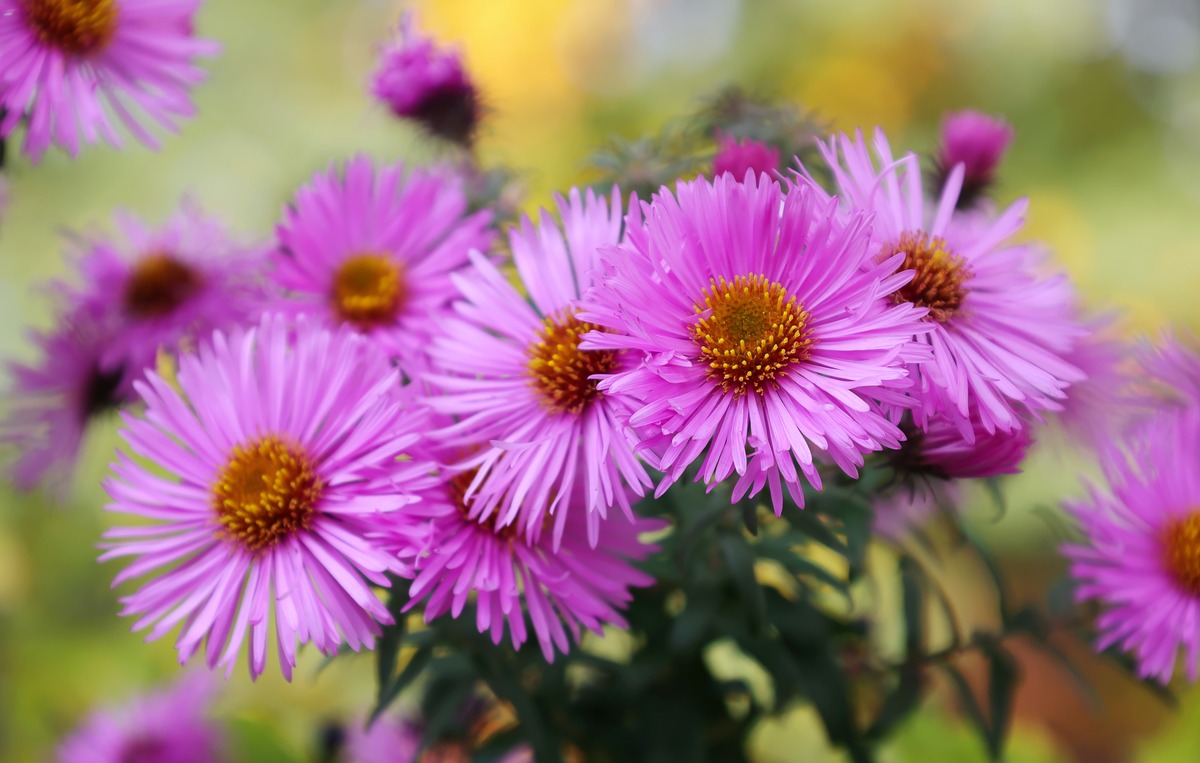
Best Time to Plant Asters
Choosing the right time to plant your asters can greatly contribute to their overall health and blooming capacity. Asters are perennial plants that thrive in cooler temperatures, so it’s essential to select the appropriate time for planting.
Generally, it is recommended to plant asters in the early spring or fall when the weather is mild and the soil is workable. In cooler climates, planting asters in the spring allows them to establish their roots before the hot summer months. However, if you live in a warmer region, opt for fall planting to give the asters a head start before the winter dormancy.
During the spring, it is crucial to wait until the last frost has passed before planting asters. This ensures that the soil has warmed up sufficiently, providing a favorable environment for the plants to establish themselves. On the other hand, fall planting should be done at least six weeks before the first expected frost date to allow the asters enough time to settle in before the winter dormancy period begins.
Keep in mind that the specific timing for planting asters may vary depending on your geographic location and climate. It is always wise to consult with your local gardening resources or extension office for guidance tailored to your specific area.
Additionally, when selecting asters for planting, consider the bloom time of the varieties you choose. Different asters have varying bloom periods, and you may want to stagger your planting to ensure continuous blooming throughout the growing season.
Overall, planting asters in the spring or fall, depending on your climate, will give them the best chance to establish themselves and provide beautiful blooms year after year. By following the appropriate planting timeline, you can set the stage for a successful and vibrant aster garden.
Choosing the Right Location for Asters
When it comes to growing healthy and thriving asters, selecting the right location is crucial. Asters are versatile plants that can adapt to various conditions, but providing them with an optimal growing environment will ensure their longevity and vibrant blooms.
Here are some key factors to consider when choosing a location for your asters:
- Sunlight: Asters require abundant sunlight to bloom their best. Choose a location that receives at least 6 hours of direct sunlight per day. However, in areas with scorching summers, some afternoon shade can help protect the plants from overheating.
- Soil Type: Asters thrive in well-draining soil that is rich in organic matter. They prefer a slightly acidic to neutral soil pH, ranging from 6.0 to 7.0. If your soil is heavy or clay-like, add compost or organic matter to improve its texture and drainage capability.
- Moisture: While asters prefer moist soil, it is crucial to avoid waterlogged conditions. Choose a location with adequate drainage to prevent excess water accumulation, which can lead to root rot and other problems. However, ensure that the soil retains moisture and doesn’t dry out completely, especially during hot summer months.
- Air Circulation: Good air circulation is essential to prevent the development of fungal diseases in asters. Avoid planting them in crowded areas or locations with dense foliage that restricts airflow. Adequate spacing between plants will allow for proper ventilation and help prevent disease issues.
- Protection from Wind: Asters can be susceptible to wind damage, especially the taller varieties. Choose a location that offers some shelter or provide support structures like stakes and trellises to protect the plants from strong winds.
By considering these factors and selecting a location that meets the requirements of sunlight, soil type, moisture, air circulation, and wind protection, you can create an ideal environment for your asters to flourish. A well-chosen location will help ensure that your asters grow vigorously and produce abundant and stunning blooms throughout the growing season.
Preparing the Soil for Asters
Proper soil preparation is essential to provide the right growing conditions for asters. By preparing the soil adequately, you can create a nutrient-rich and well-draining environment that promotes healthy root development and overall plant growth.
Here are the steps to prepare the soil for planting asters:
- Clear the area: Start by removing any weeds, rocks, or debris from the planting area. Clearing the space ensures that the asters have ample space and resources to grow without competition.
- Loosen the soil: Use a garden fork or tiller to loosen the soil to a depth of 8 to 10 inches (20-25 cm). This process helps improve soil aeration and drainage, making it easier for the asters’ roots to penetrate the soil.
- Amend the soil: Asters thrive in soil that is rich in organic matter. Incorporate well-rotted compost, aged manure, or other organic amendments into the soil. These additions enhance the soil’s fertility, improve its structure, and provide essential nutrients for the asters.
- Test the soil: Conduct a soil test to determine the pH level and nutrient content of your soil. Asters prefer a slightly acidic to neutral pH ranging from 6.0 to 7.0. If necessary, adjust the pH by adding amendments according to the recommendations of the soil test results.
- Work in organic matter: Before planting, mix the organic matter and amendments evenly into the soil. This ensures that the nutrients and organic matter are distributed throughout the planting area, providing a fertile and nutrient-rich environment for the asters.
- Smooth and level the soil: Finally, rake the soil to create a smooth and level surface. This allows for even planting and watering, ensuring that the asters have the best chance to establish themselves in the prepared soil.
By following these steps, you can ensure that the soil is properly prepared for asters. The amended and well-draining soil will provide the necessary nutrients and optimal growing conditions for the asters to thrive and produce beautiful blooms.
How to Plant Asters
Planting asters properly is key to their long-term health and vitality. By following these step-by-step instructions, you can ensure that your asters have a successful start and establish themselves well in the garden.
- Choose healthy plants: Select healthy asters from a reputable nursery or garden center. Look for plants with sturdy stems, lush foliage, and no signs of disease or pests.
- Prepare the planting holes: Dig holes that are slightly wider and deeper than the root ball of your asters. This allows enough space for the roots to spread out and establish themselves.
- Place the asters: Gently remove the asters from their containers and place them in the prepared holes. Ensure that the top of the root ball is level with or slightly above the soil surface to prevent water pooling around the stems.
- Backfill the holes: Fill the holes with the prepared soil, gently pressing it around the roots to remove any air pockets. Avoid compacting the soil too tightly, as this can hinder water penetration and root growth.
- Water thoroughly: After planting, water the asters thoroughly to settle the soil and ensure good root-to-soil contact. This encourages root establishment and helps the plants recover from transplant shock.
- Apply mulch: Spread a layer of organic mulch around the base of the asters, leaving a small gap around the stems to prevent moisture-related issues. Mulch helps conserve soil moisture, suppress weed growth, and regulate soil temperature.
- Provide support (if needed): Taller varieties of asters may require support to prevent them from flopping over. Install stakes or place a plant support cage around the asters to provide stability and prevent damage from wind or heavy rain.
- Water regularly: Asters prefer evenly moist soil. Water the plants regularly, especially during dry spells or hot weather. Aim for deep, thorough watering rather than frequent shallow watering to encourage deep root growth.
- Monitor and care for the asters: Keep an eye on the asters for any signs of pests or diseases. Remove any spent blooms to encourage continuous flowering. Provide regular fertilization, as per the specific requirements of the asters’ variety or general-purpose fertilizer.
By following these planting guidelines, you can ensure that your asters have a strong start in the garden. With proper planting and care, your asters will reward you with abundant blooms and delightful colors throughout the growing season.
Watering and Mulching Asters
Proper watering and mulching are essential for maintaining the health and well-being of your asters. These practices ensure that the plants receive adequate moisture, retain soil moisture, and suppress weed growth. By following these guidelines, you can help your asters thrive and flourish in your garden.
Watering:
Asters prefer consistently moist, but not waterlogged, soil. Here are some watering tips to keep in mind:
- Water deeply: Provide a thorough watering session to moisten the soil to the depth of the asters’ root system. This encourages deep root growth and helps the plants withstand dry periods.
- Water in the morning: Watering in the morning allows the foliage to dry out during the day, reducing the risk of fungal diseases. It also ensures that the plants have enough moisture to sustain them throughout the day.
- Avoid overhead watering: Asters are susceptible to foliar diseases. To prevent the spread of diseases, water at the base of the plants, directing the water to the soil rather than wetting the foliage.
- Monitor soil moisture: Regularly check the soil moisture levels by inserting your finger into the soil. Water when the top inch (2.5 cm) feels dry. Be mindful of overwatering, as excessively wet conditions can lead to root rot and other problems.
Mulching:
Mulching offers several benefits for asters. It helps retain soil moisture, regulate soil temperature, suppress weed growth, and improve the overall health of the plants. Follow these mulching guidelines:
- Apply organic mulch: Spread a layer of organic mulch, such as wood chips, straw, or shredded leaves, around the base of the asters. Apply the mulch in a 2 to 3-inch (5-8 cm) thick layer, extending it out to the drip line, but leaving a small gap around the stems to prevent moisture-related issues.
- Renew mulch annually: As the mulch decomposes, replenish it annually to keep a consistent layer. This ensures continued weed suppression and moisture retention benefits.
- Avoid piling mulch against stems: Piling mulch against the stems can create a moist environment that promotes rot and disease. Leave a small gap between the mulch and the stems to promote airflow and prevent moisture-related problems.
- Monitor for pests and diseases: Regularly inspect the mulched area for signs of pests or diseases, as they can hide in the mulch. Remove any affected plant material promptly to prevent further spread.
By providing consistent and appropriate watering, as well as applying a layer of organic mulch, you can help your asters maintain optimal moisture levels, regulate soil temperature, and minimize weed competition. These practices contribute to the overall health and vigor of your asters, enhancing their beauty as they bloom.
Fertilizing Asters
Fertilizing asters can provide them with the necessary nutrients to support healthy growth and abundant blooms. While asters are generally low-maintenance plants, applying the right fertilizers at the proper times can greatly enhance their overall performance. Here’s what you need to know about fertilizing asters:
Timing and Frequency:
Early spring is the ideal time to apply fertilizer to asters. Use a balanced, slow-release fertilizer formulated for flowering plants or a general-purpose granular fertilizer with a ratio such as 10-10-10. Follow the package instructions for proper application rates.
In subsequent years, you can continue fertilizing asters annually in early spring, making sure to follow the dosage recommendations for the specific fertilizer you are using. Avoid over-fertilizing, as excessive nutrients can lead to lush foliage growth but fewer blooms.
Application Techniques:
There are two primary methods for applying fertilizer to asters:
- Top-Dressing: Spread the granular fertilizer evenly around the base of the asters, taking care not to allow it to come into direct contact with the stems or foliage. Water the area thoroughly after application to help the nutrients reach the roots.
- Water-Soluble Fertilizer: Alternatively, you can use water-soluble fertilizer to feed asters. Dissolve the recommended amount of fertilizer in water and apply it to the plants according to the package instructions. Watering the asters before and after application helps prevent burn and ensures efficient nutrient uptake.
Organic Fertilizer Options:
If you prefer an organic approach, there are several options to consider:
- Compost: Apply a layer of compost around the base of the asters in early spring. This organic matter gradually releases nutrients into the soil and improves its structure.
- Manure: Well-aged manure can be used as a natural fertilizer for asters. Apply a thin layer around the plants, taking care to avoid direct contact with the stems.
- Organic Plant Food: Use organic plant fertilizers specifically formulated for flowering plants or perennials. Follow the package instructions for application rates and methods.
Cautions and Considerations:
Avoid applying fertilizer to dry soil, as it can burn the roots. Water the asters thoroughly before and after fertilization to prevent damage and help the nutrients penetrate the soil.
Always follow the recommended dosage instructions provided on the fertilizer packaging. Over-fertilizing can lead to nutrient imbalances, excessive foliage growth, and reduced flowering.
Monitor the asters closely after fertilization. If you notice any signs of leaf burn, such as browning or wilting foliage, consider diluting the concentration of water-soluble fertilizer or reducing the amount of granular fertilizer applied.
By providing the appropriate fertilization, you can support the growth and blooming potential of your asters. Whether you choose conventional or organic options, proper fertilization can help your asters thrive and produce a stunning display of colorful flowers year after year.
Pruning Asters
Pruning asters is an important aspect of their care and maintenance. Regular pruning helps promote bushier growth, control the plant’s height, and encourage abundant blooming. Here are some guidelines to follow when pruning asters:
Timing:
In the early spring, before new growth emerges, is the ideal time for pruning asters. It’s best to prune them before they start producing new shoots, ensuring that the energy goes into producing healthy foliage and flowers rather than sustaining old growth.
Deadheading:
Deadheading, or removing faded flowers, is a crucial step in asters’ maintenance. By removing spent blooms, you encourage the plant to redirect its energy towards producing new flowers rather than setting seeds. Deadheading also improves the overall appearance of the plant by removing faded or withered petals.
To deadhead asters, simply snip off the faded flowers just above a set of healthy leaves or a leaf node. This will stimulate the growth of new buds and extend the blooming period of the plant. Regular deadheading throughout the flowering season keeps the plant looking tidy and encourages continuous blossom production.
Pinching back:
To control the height and promote bushier growth, pinching back asters is beneficial. Pinching back involves removing the top portion of the stems, usually by about one-third, when the plant reaches a height of 6-8 inches (15-20 cm). This encourages the asters to develop more lateral branches, resulting in a fuller and more compact plant.
Pinching back can be done with your fingers or using clean pruning shears. Make the cuts just above a leaf node or set of leaves, which will stimulate the growth of new shoots. Repeat the pinching back process several times throughout the spring and early summer, allowing enough time for the new growth to develop before the buds form.
Division:
Over time, asters can become crowded and start to decline in vigor. Dividing the plants every few years can help rejuvenate them and promote healthy growth. Division is typically done in the early spring or late summer, before new growth starts or after blooming has finished.
To divide asters, carefully dig up the clump and separate it into smaller sections, making sure each division has a viable root system and several healthy shoots. Replant the divisions in prepared soil, spacing them apart to allow for adequate airflow and growth. Water the transplants thoroughly after replanting and keep them well-watered until they establish themselves.
Cautions and Considerations:
When pruning or dividing asters, always use clean and sharp tools to prevent the spread of diseases. Disinfect the tools between cuts, especially if you are working with multiple plants or suspect any signs of disease.
Take care not to prune too late in the growing season, as this can interfere with the formation of flower buds and reduce blooming. Late pruning may also cause the plant to become more susceptible to frost damage.
By following these pruning guidelines, you can maintain the health, shape, and vibrant blooming of your asters throughout the growing season. Regular deadheading, pinching back, and occasional division will help ensure that your asters remain vigorous and provide a stunning display of flowers year after year.
Dealing with Pests and Diseases in Asters
Asters, like any other plant, can be susceptible to a range of pests and diseases. Being aware of common issues and taking proactive measures can help keep your asters healthy and minimize damage. Here are some tips for dealing with pests and diseases in asters:
Common Pests:
– Aphids: These small, soft-bodied insects feed on the sap of the plant, causing distorted growth and yellowing leaves. Use insecticidal soap or a strong spray of water to dislodge and control aphids.
– Slugs and Snails: These slimy creatures can feed on the foliage of asters, leaving behind irregular holes. Remove them manually or use organic slug and snail baits to eliminate them.
– Spider Mites: These tiny pests can cause yellowing, speckled leaves and fine webbing on the plant. Rinse the leaves with a strong spray of water to dislodge them, and use insecticidal soaps if necessary.
Common Diseases:
– Powdery Mildew: This fungal disease appears as a white powdery coating on the leaves and can cause stunted growth and distorted foliage. Provide proper air circulation, avoid overhead watering, and apply fungicides if required.
– Gray Mold (Botrytis Blight): Gray mold affects the flowers and leaves of asters, causing brown spots and fuzzy gray growth. Remove and destroy infected plant parts and improve air circulation to prevent the spread of the disease.
– Leaf Spot Diseases: Leaf spot diseases manifest as brown or black spots on the leaves. Remove and destroy infected foliage, ensure proper watering practices, and apply fungicides if necessary.
Preventive Measures:
– Plant Resistance: Choose disease-resistant aster varieties when possible, as they are less likely to succumb to common diseases.
– Proper Spacing: Provide adequate space between asters to improve air circulation, reducing the risk of fungal diseases.
– Water Management: Avoid excessive watering and watering late in the day, as it can create a damp environment favorable for disease development.
– Sanitation: Regularly remove weeds, fallen leaves, and other plant debris from the garden to eliminate hiding spots for pests and disease pathogens.
Integrated Pest Management:
If pest or disease problems persist, consider an integrated pest management (IPM) approach. This involves combining cultural practices, such as proper sanitation and watering, with targeted treatment options like organic insecticides or fungicides, if necessary.
It’s important to identify the specific pest or disease affecting your asters accurately, as different treatments may be required for effective control. If unsure, consult with your local garden center or extension office for proper diagnosis and recommendations.
By staying vigilant, implementing preventative measures, and taking swift action when necessary, you can effectively manage pests and diseases in your asters and maintain their health and beauty throughout the growing season.
Dividing and Transplanting Asters
Dividing and transplanting asters is an essential task to maintain their health, vigor, and overall garden aesthetics. Dividing allows you to rejuvenate overcrowded plants, propagate new ones, or move existing asters to different areas of your garden. Here’s how to divide and transplant asters successfully:
Timing:
The best time to divide and transplant asters is in early spring or late summer. Dividing in early spring before new growth emerges allows the plants to establish themselves before the hot summer months. Late summer division gives asters time to establish roots before winter dormancy.
Preparing the Plant:
Begin by watering the asters a day or two before dividing. This will ensure that the plants are well-hydrated and can recover more quickly from the division process.
Dividing:
1. Carefully dig up the clump of asters, taking care to minimize root disturbance.
2. Gently separate the clump into smaller sections using your hands or a sharp garden knife. Each division should have a healthy root system and several shoots.
3. If necessary, trim the foliage of each division to reduce stress on the plant.
4. Discard any diseased or damaged sections.
5. You may choose to divide into smaller clumps or individual plants depending on your preference and the available space.
Transplanting:
1. Prepare the new planting holes in the desired location beforehand. Ensure the soil is well-draining and amended with compost or organic matter.
2. Place each division into its respective hole, making sure the crown of the plant is level with the soil surface.
3. Backfill the hole with soil, gently firming it around the roots to eliminate air pockets.
4. Water the transplants thoroughly to settle the soil and provide moisture to the newly planted asters.
5. Mulch around the transplants to help conserve moisture and suppress weed growth.
Aftercare:
1. Keep the newly transplanted asters well-watered, especially during the first few weeks, to encourage root establishment.
2. Monitor the plants for signs of stress or wilting, and provide shade or temporary protection from hot sun or strong winds if necessary.
3. Avoid fertilizing immediately after transplanting, as it can stress the plant. Wait until the new growth appears before applying fertilizer.
Cautions:
Dividing and transplanting can cause temporary stress to the asters, so it’s important to be gentle and minimize root damage as much as possible. Divisions may take some time to reestablish and produce new growth, so be patient and provide proper care during this period.
It’s also worth noting that some aster varieties may not divide as easily or require less frequent division. Always refer to specific care guidelines for the particular aster variety you are working with.
By dividing and transplanting asters, you can revitalize crowded plants, expand your garden, or share the beauty of asters with others. With the appropriate timing and proper care, your transplanted asters will quickly establish themselves and continue to thrive and bloom for seasons to come.
Overwintering Asters
Overwintering asters is crucial to ensure their survival and prepare them for robust growth and beautiful blooms in the following seasons. Asters are generally hardy plants, but taking a few extra steps to protect them during the cold winter months can greatly enhance their chances of thriving. Here’s how to effectively overwinter your asters:
Cutting Back:
In late fall, after the first frost, cut back the foliage of the asters to a height of 4 to 6 inches (10-15 cm) above the ground. This pruning helps redirect the plant’s energy towards the roots and prevents excessive moisture buildup that could lead to diseases.
Clean Up:
Clear any fallen leaves, debris, or dead plant material from around the asters. This debris can harbor pests, diseases, and fungal spores that may cause problems in the spring. Removing it helps create a clean and disease-free environment.
Mulching:
Apply a layer of mulch around the base of the asters, roughly 2 to 3 inches (5-8 cm) thick. Mulching helps insulate the soil, regulate temperature fluctuations, and protect the roots from freezing. Organic mulch, such as straw or shredded leaves, works well for this purpose.
Wind Protection:
If your area experiences strong winds or heavy snowfall, consider installing a windbreak or using protective materials like burlap to shield the asters. This helps protect the plants from desiccation, bending, or breaking under the weight of snow or ice.
Winter Watering:
During the winter, check the soil moisture periodically. If there is an extended dry period or spells without snow cover, provide water to keep the soil slightly moist. Be cautious not to overwater, as the asters are dormant and do not require as much moisture as during the active growing season.
Dividing and Transplanting:
If you need to divide or transplant asters, it’s best to do so in early spring or late summer before the ground freezes. This allows the plant enough time to establish its roots before winter or before the active growth period begins.
Pest and Disease Management:
Inspect the asters for any signs of pests or diseases before winter. Treat any issues promptly using appropriate organic or chemical methods to prevent them from spreading or worsening during the colder months.
Spring Cleanup:
In early spring, remove the mulch around the asters, gradually exposing them to the warming temperatures. Check for any signs of new growth, remove any winter-damaged stems or foliage, and begin regular maintenance as the asters come out of dormancy.
By following these overwintering practices and providing adequate protection and care, you can ensure the survival and vitality of your asters during the winter months. A well-prepared and well-maintained plant will reward you with a stunning bloom display year after year.