Best Time to Plant Annual Flowers
Annual flowers are a wonderful addition to any garden, providing vibrant colors and blooms for a single season. To ensure a successful growth and blooming period, it’s crucial to plant them at the right time. The timing of planting annual flowers varies depending on your location and the specific type of flower you want to plant. Here’s a general guide to help you determine the best time to plant annual flowers.
In most regions, it is ideal to plant annual flowers after the last frost date in spring. This ensures that the plants won’t be damaged by cold weather. However, keep in mind that different annuals have different temperature preferences. Some cool-season annuals like pansies and violas can tolerate cooler temperatures and can be planted as early as late winter or early spring. On the other hand, warm-season annuals like marigolds and zinnias prefer warm soil temperatures and should be planted after the danger of frost has passed and the soil has warmed up.
It’s important to note that annual flowers have a relatively short lifespan, usually lasting from seed germination to frost or the end of the growing season. To extend the blooming period, you can practice succession planting. This means planting several batches of annuals at different times throughout the growing season. By doing so, you’ll have a continuous display of color and blooms in your garden.
Additionally, consider the weather conditions when planting annual flowers. Avoid planting them during extreme heatwaves or prolonged periods of heavy rain. These conditions can stress the plants and hinder their establishment. Opt for planting on overcast days or in the early morning or late afternoon when the temperatures are cooler.
Lastly, make sure to provide adequate water and care for your annual flowers after planting. They typically require more frequent watering compared to perennial flowers. Monitor the moisture level in the soil and water when needed, ensuring that the plants receive sufficient hydration for healthy growth and development.
By following these guidelines, you can ensure that your annual flowers have the best chance of thriving and providing a beautiful burst of color in your garden throughout the season.
Best Time to Plant Perennial Flowers
Perennial flowers are the backbone of any garden, providing long-lasting beauty and coming back year after year. To ensure the success of your perennial flower garden, it’s important to plant them at the right time. The timing of planting perennial flowers can vary depending on the specific type of flower and your climate zone. Here’s a general guide to help you determine the best time to plant perennials.
For most regions, the best time to plant perennial flowers is in the spring or fall. Spring planting allows the plants to establish their root systems and become established before the heat of summer. Fall planting, on the other hand, takes advantage of the cooler temperatures and allows the plants to settle in and establish roots over the winter months. Both options can be successful, but it’s important to consider the specific needs of the perennial flowers you are planting.
When planting perennials in the spring, timing is crucial. It’s generally recommended to wait until the ground has thawed and is workable. This will vary depending on your location, but a good rule of thumb is to wait until the soil temperature reaches around 55°F (13°C). Planting too early can damage the plants, while planting too late in the season may not give them enough time to establish before the hot summer months.
Fall planting of perennials is also a popular choice, especially for gardeners in colder regions. The cooler temperatures and increased rainfall in the fall season help the plants establish their root systems before going dormant for the winter. Aim to plant perennials at least 6 weeks before the first frost date in your area, allowing them enough time to settle in before the arrival of freezing temperatures.
It’s important to note that some perennials are best divided and transplanted in the early spring or late fall when they are dormant. Dividing larger clumps of perennials helps rejuvenate the plants and encourage better growth and flowering. Consider researching the specific needs of the perennial plants you have to determine the best time for dividing and transplanting.
After planting perennial flowers, provide them with adequate water and care to help them establish and thrive. Water the plants deeply immediately after planting and continue to monitor their moisture needs. Mulching around the base of the plants can help retain moisture and suppress weeds. Regular maintenance, including deadheading spent blooms and removing any diseased or damaged foliage, will keep your perennial flower garden looking its best.
By carefully considering the best time to plant perennials and providing them with the proper care, you’ll enjoy a beautiful and long-lasting flower garden that brings joy for years to come.
Best Time to Plant Bulbs
Bulb flowers, such as tulips, daffodils, and lilies, are a delightful addition to any garden, adding pops of color and elegance. To ensure successful growth and stunning blooms, it’s important to plant bulbs at the right time. The timing of bulb planting varies depending on the specific type of flower and your climate zone. Here’s a general guide to help you determine the best time to plant bulbs.
In general, the best time to plant bulbs is in the fall, typically between September and November. Planting bulbs in the fall gives them ample time to establish their root systems before the winter frost sets in. The cool temperatures and moist soil conditions allow the bulbs to settle in and prepare for the spring bloom. Be sure to check the specific planting recommendations for the bulbs you have, as some may have particular requirements.
When planting bulbs, it’s important to select a location with well-draining soil. Bulbs don’t like excessive moisture, and soggy soil can lead to rot. Good drainage ensures that water flows away from the bulbs, preventing waterlogging. If your soil tends to be heavy or clay-like, consider amending it with organic matter, such as compost or peat moss, to improve drainage.
The planting depth for bulbs varies depending on their size. As a general rule, plant bulbs at a depth that is about two to three times their height. This allows them to establish firmly in the soil without being too shallow or too deeply buried. Additionally, spacing bulbs adequately is important to prevent overcrowding and allow for proper growth and airflow.
If you live in a region with mild winters, where the ground doesn’t freeze, you can also plant bulbs in early spring. However, keep in mind that planting bulbs in the spring may result in delayed or shorter blooms as the bulbs haven’t had enough time to establish their root systems.
After planting bulbs, water them thoroughly to settle the soil and promote root development. In most cases, bulbs do not require additional watering until they start actively growing. Be mindful of rainfall and monitor soil moisture levels to ensure they don’t become too dry or too wet.
Remember, after the spring bloom, bulb flowers may need some care to help them rejuvenate for the following year. Allow the foliage to die back naturally before removing it, as the leaves play a vital role in storing energy for the bulbs. You can cut back the foliage once it has turned yellow and withered.
By planting bulbs at the appropriate time and providing proper care, you’ll be rewarded with a stunning display of colorful blooms that will brighten your garden and bring joy year after year.
Best Time to Plant Wildflower Seeds
Planting wildflower seeds is a wonderful way to create a vibrant and natural-looking garden filled with a variety of colorful blooms. To ensure successful germination and growth, it’s important to sow wildflower seeds at the right time. The timing of planting wildflower seeds depends on the specific region and the type of wildflowers you wish to grow. Here’s a general guide to help you determine the best time to plant wildflower seeds.
In most regions, the ideal time to plant wildflower seeds is in the spring or fall. Spring planting allows the seeds to take advantage of the warming temperatures and longer daylight hours, while fall planting takes advantage of the cooler weather and increased rainfall. Both seasons offer favorable conditions for seed germination and establishment.
Spring planting is typically done after the danger of frost has passed, and the soil temperature has warmed up. This allows the seeds to germinate and establish before the heat of summer. When sowing wildflower seeds in the spring, it’s important to prepare the ground properly. Ensure that the soil is well-drained and free from debris or vegetation that can compete with the germinating seeds. It’s recommended to lightly rake the soil and create a fine, loose surface before sowing the seeds.
Fall planting of wildflower seeds is an excellent option, especially for areas with harsh winters. The seeds will lie dormant during the winter months and then germinate when the weather warms up in the spring. Fall planting allows the seeds to establish their root systems before the cold temperatures set in, giving them a head start for the following growing season. It’s important to plant the seeds at least several weeks before the ground freezes to ensure adequate time for germination.
When sowing wildflower seeds, it’s crucial to follow the instructions provided on the seed packet. Different wildflowers have varying requirements regarding soil conditions, depth of planting, and sunlight exposure. Some seeds may need scarification or stratification to break dormancy and promote germination. Researching the specific needs of the wildflowers you are planting will help you achieve the best results.
Once the wildflower seeds are sown, water them gently to settle them into the soil. Avoid watering too heavily, as it can displace the seeds or cause them to rot. Keep the soil moist until germination occurs, which can take anywhere from a few days to several weeks, depending on the type of wildflower seeds. After germination, gradually reduce watering, allowing the plants to establish a deeper root system.
Remember that wildflowers thrive in natural conditions, so avoid using chemical fertilizers or pesticides that can harm the delicate ecosystem. Instead, focus on maintaining healthy soil and providing adequate sunlight and water. Regular weeding may be necessary to prevent invasive plants from overshadowing the wildflowers as they grow.
By planting wildflower seeds at the appropriate time and providing the necessary care, you’ll be rewarded with a beautiful and vibrant display of native flowers that attract pollinators and enhance the natural beauty of your garden.
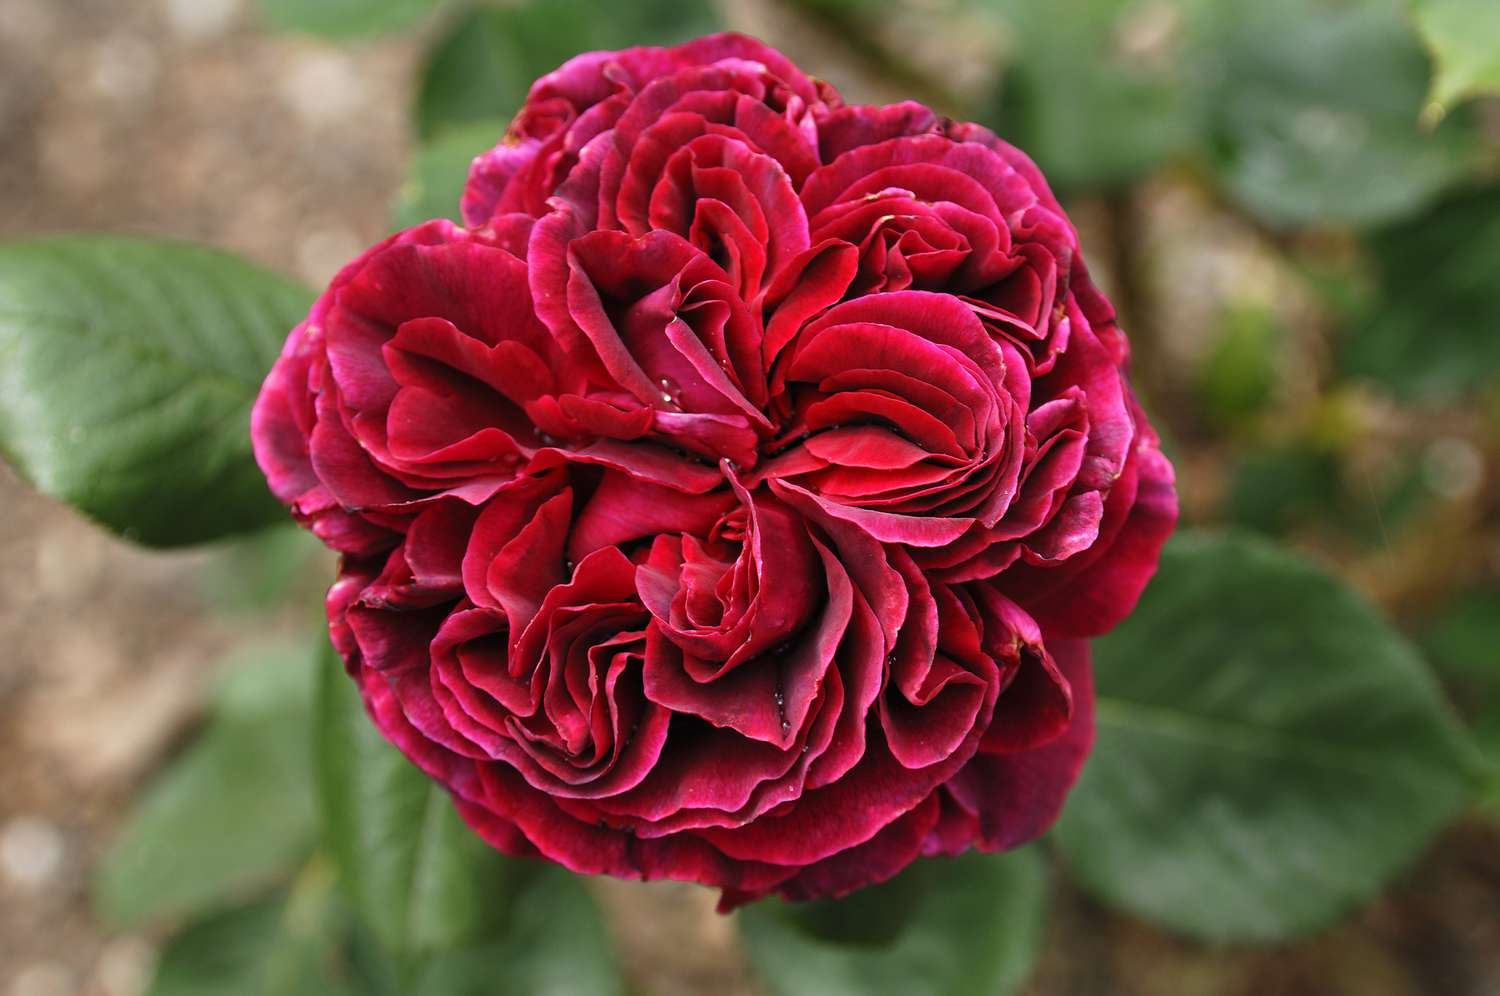
Best Time to Plant Roses
Roses are classic and timeless flowers that add beauty and elegance to any garden. To ensure the successful establishment and growth of roses, it’s important to plant them at the right time. The timing of planting roses may vary depending on your location and the specific type of roses you wish to grow. Here’s a general guide to help you determine the best time to plant roses.
For most regions, the best time to plant roses is in early spring or fall. Spring planting allows the roses to establish their root systems before the hot summer months, while fall planting takes advantage of the cooler temperatures and increased rainfall, allowing the plants to settle in and establish roots over the winter months.
When planting roses in the spring, it’s essential to wait until the soil has thawed and dried out slightly. Extremely wet or muddy soil can lead to poor drainage and root rot. Aim to plant roses when the soil can be easily worked and is not overly compacted. It’s important to prepare the planting site properly by loosening the soil and incorporating organic matter such as compost to improve drainage and provide essential nutrients for the roses.
In regions with mild winters, fall planting is another option for roses. The cooler temperatures and abundant rainfall during the fall season create favorable conditions for root establishment. Typically, roses should be planted at least six weeks before the first frost date in your area. This allows the plants enough time to establish their root systems before the onset of winter.
When planting roses, choose a location that receives at least six hours of direct sunlight. Roses thrive in full sun and may not produce abundant blooms in shady areas. Make sure the site has well-draining soil to prevent waterlogged conditions that can harm the root system. If needed, incorporate organic matter or amend the soil to improve drainage.
Once planted, water the roses thoroughly and provide them with regular watering throughout the growing season. Roses require consistent moisture but should not be overwatered, as this can lead to root rot. It’s important to monitor the soil moisture levels and adjust the watering accordingly.
Proper care and maintenance are crucial for the success of roses. Prune the roses in early spring to remove dead or damaged canes and shape the plant. This promotes healthy growth and encourages abundant flowering. Apply a layer of mulch around the base of the rose plants to help conserve moisture, suppress weeds, and protect the roots from extreme temperatures.
Incorporate regular fertilization according to the specific needs of your roses. Use a balanced rose fertilizer or organic alternatives to provide essential nutrients. Additionally, be on the lookout for common rose pests and diseases, and take appropriate measures to control and prevent infestations.
By planting roses at the appropriate time and providing proper care, you’ll be rewarded with a stunning display of fragrant blooms that will bring beauty and joy to your garden for years to come.
Best Time to Plant Fall Flowers
Fall flowers are a wonderful way to add color and beauty to your garden as the weather starts to cool down. To ensure a successful fall bloom, it’s important to plant your fall flowers at the right time. The timing of planting fall flowers can vary depending on your location and the specific type of flowers you want to plant. Here’s a general guide to help you determine the best time to plant fall flowers.
In most regions, the best time to plant fall flowers is during the late summer or early fall, typically around August or September. The goal is to provide enough time for the flowers to establish their root systems before the first frost arrives. By planting early enough, the flowers will have ample time to grow and bloom before the colder temperatures set in.
When selecting fall flowers, consider cool-season annuals such as pansies, violas, mums, asters, and ornamental kale. These flowers are specifically bred to thrive in cooler temperatures and can tolerate light frosts. By choosing varieties that are suited for your climate, you can ensure that they will withstand the changing weather conditions of the fall season.
Before planting your fall flowers, prepare the soil by removing any weeds or debris and loosening it with a garden fork or tiller. Incorporate organic matter such as compost or aged manure to improve the soil’s fertility, drainage, and water-holding capacity. This will provide a nutrient-rich environment for the roots to establish and promote healthy growth.
When it comes to planting fall flowers, follow the recommended spacing guidelines provided on the seed packet or plant label. This ensures that the plants have enough room to grow and prevents overcrowding, which can lead to disease and stunted growth. Plant the flowers at a depth similar to their original containers or slightly deeper, making sure to water them thoroughly after planting.
Watering is essential for the establishment of fall flowers, especially during the initial weeks after planting. Keep the soil consistently moist but not waterlogged, as excessive moisture can cause root rot. Monitor the soil’s moisture levels and adjust the watering accordingly, taking into consideration rainfall and the specific needs of the plants.
Although fall flowers are generally more tolerant of cold temperatures, it’s a good idea to provide them with some protection against harsh weather conditions. Applying a layer of mulch around the base of the plants helps to insulate the roots, conserve moisture, and prevent soil erosion. If frost is a concern in your area, cover the plants with a light cloth or blanket overnight to protect them from freezing temperatures.
Continued care and maintenance are crucial for the longevity of your fall flowers. Regularly deadhead spent blooms to promote continuous flowering and prevent the plants from going to seed prematurely. Remove any diseased or damaged foliage to prevent the spread of diseases and maintain the overall health and appearance of the plants.
By planting fall flowers at the appropriate time and providing proper care, you’ll create a vibrant and stunning display that will bring warmth and beauty to your garden as the temperatures cool down.
Best Time to Plant Spring Flowers
Spring flowers are a delightful way to welcome the arrival of warmer weather and add color to your garden after a long winter. To ensure a successful spring bloom, it’s important to plant your spring flowers at the right time. The timing of planting spring flowers can vary depending on your location and the specific type of flowers you want to plant. Here’s a general guide to help you determine the best time to plant spring flowers.
In most regions, the best time to plant spring flowers is in the early spring, once the soil has thawed and is workable. Planting too early when the ground is still frozen or too wet can lead to poor germination and the potential for root rot. As temperatures begin to warm up, usually in March or April, it’s a good time to start planting your spring flowers.
When selecting spring flowers, consider both bulbs and annuals. Bulbs like tulips, daffodils, and hyacinths should be planted in the fall, but potted bulbs can be purchased in early spring and planted to provide colorful blooms. Annuals like pansies, violas, and primroses are popular choices for early spring planting and can tolerate cooler temperatures.
Before planting your spring flowers, prepare the soil by removing any weeds or debris and loosening it with a garden fork or tiller. Incorporate organic matter, such as compost or aged manure, to improve soil fertility, drainage, and moisture retention. This will create an ideal environment for the roots to establish and promote healthy growth.
When planting, follow the instructions provided on the seed packet or plant label for the correct planting depth and spacing. It’s generally recommended to plant flowers at a depth similar to their original containers or slightly deeper. Water the plants thoroughly after planting to settle the soil and ensure good root-to-soil contact.
Spring flowers benefit from regular watering, especially during dry spells or when temperatures start to rise. Keep the soil consistently moist but not overly saturated to prevent waterlogging. Monitor the soil moisture levels and water as needed, adjusting the frequency based on weather conditions and the specific needs of the flowers.
Fertilizing is another important aspect of caring for spring flowers. Incorporate a balanced fertilizer or slow-release granules into the soil during planting to provide essential nutrients. Additional fertilizer applications may be needed throughout the growing season, following the recommended dosage on the fertilizer packaging.
As your spring flowers start to bloom, removing faded flowers, a practice known as deadheading, promotes continuous flowering and prevents energy from being wasted on seed production. This encourages the plants to divert their energy into producing more blooms, prolonging the overall blooming period.
Lastly, be mindful of any potential pests or diseases that may affect your spring flowers. Monitor the plants regularly and take appropriate measures to control and manage any issues that arise. Removing any dead or diseased foliage can help prevent the spread of diseases and maintain the health of the plants.
By planting spring flowers at the appropriate time and providing proper care, you’ll create a beautiful and vibrant display that announces the arrival of the new season and fills your garden with joy and color.
Best Time to Plant Summer Flowers
Summer flowers are the epitome of beauty and vibrancy, adding a burst of color to your garden during the warmest months of the year. To ensure a successful summer bloom, it’s important to plant your summer flowers at the right time. The timing of planting summer flowers can vary depending on your location and the specific type of flowers you want to grow. Here’s a general guide to help you determine the best time to plant summer flowers.
In most regions, the best time to plant summer flowers is in the late spring or early summer when the danger of frost has passed, and the soil has warmed up. Planting too early can expose the tender plants to cold temperatures, while waiting too late might limit their ability to establish before the intense heat of summer. Aim to plant your summer flowers when the soil temperature reaches around 60°F (15.5°C) or higher.
When selecting summer flowers, consider both annuals and perennials that thrive in warmer temperatures. Popular choices for summer annual flowers include geraniums, petunias, marigolds, zinnias, and sunflowers. Perennial flowers like daylilies, coneflowers, black-eyed Susans, and salvias can also provide long-lasting beauty throughout the summer months.
Before planting your summer flowers, prepare the soil by removing any weeds or debris and loosening it with a garden fork or tiller. Incorporate organic matter, such as compost or well-rotted manure, to improve soil structure, fertility, and moisture retention. This will create a nutrient-rich environment that supports healthy plant growth and development.
When planting, make sure to follow the specific instructions provided on the seed packets or plant labels for accurate planting depth and spacing. Planting too shallow may lead to weak root systems, while planting too deep can hinder the emergence of seedlings. Water the plants thoroughly after planting to settle the soil and promote good root-to-soil contact.
During the hot summer months, watering is crucial to keep your summer flowers hydrated and thriving. Water deeply and ensure that the soil remains evenly moist, but avoid overwatering, as it can lead to root rot. It’s beneficial to water your flowers early in the morning or late in the evening to minimize evaporation and allow the plants to dry before nighttime, reducing the risk of diseases.
Fertilization is also important for the health and vigor of your summer flowers. Apply a balanced, slow-release fertilizer or use organic alternatives according to the package instructions. Regular feeding throughout the growing season helps provide the necessary nutrients for robust growth and abundant blooms.
As your summer flowers continue to grow, it’s essential to monitor for pests and diseases. Keep an eye out for common garden pests like aphids, snails, and caterpillars, and take appropriate measures to control them. Regularly inspect the plants for any signs of disease, such as fungal infections or wilting, and promptly address the issues to prevent further spread.
Lastly, don’t forget to deadhead faded flowers to encourage continuous blooming and prevent the plants from going to seed prematurely. Removing spent blooms redirects the plant’s energy towards new growth and flowering, ensuring a more prolonged and vibrant display throughout the summer.
By planting your summer flowers at the appropriate time and providing proper care, you’ll create a stunning oasis of color that thrives in the warmth of the summer season, transforming your garden into a joyful and inviting space.
Best Time to Plant Indoor Flowers
Indoor flowers are a wonderful way to bring the beauty and freshness of nature into your home. Unlike outdoor plants, indoor flowers aren’t bound by the seasons, allowing you to enjoy their beauty year-round. However, there are still optimal times for planting indoor flowers to ensure their successful growth and overall health. Here’s a general guide to help you determine the best time to plant indoor flowers.
When it comes to indoor flowers, the best time to plant them can largely depend on the specific type of flower and its growth habits. Many indoor flowers can be planted anytime throughout the year, as long as certain environmental conditions are met. These conditions include access to appropriate lighting, temperature, and humidity levels.
For most houseplants and tropical flowers, the ideal time to plant them is in the spring or summer, as this is when they experience the most active growth. This is especially true if you plan on repotting or propagating new plants from existing ones. Spring and summer provide a period of renewed energy for indoor flowers, allowing them to establish themselves more readily.
When planting indoor flowers, choose a pot or container that has drainage holes to prevent waterlogging. Use a well-draining potting mix that is specifically formulated for indoor plants. This type of soil retains adequate moisture while allowing excess water to drain away, preventing the risk of root rot.
Lighting is crucial for the success of indoor flowers. Most indoor flowers require bright, indirect light to thrive. Be sure to place your plants near a window that receives a good amount of natural light throughout the day. If natural light is limited, consider supplementing with artificial grow lights to provide the necessary light energy for plant growth.
Temperature and humidity levels also play a significant role in the growth and health of indoor flowers. Most indoor flowers prefer temperatures between 60-75°F (15-24°C), but they can tolerate slightly cooler or warmer conditions. Additionally, indoor flowers generally thrive in moderate to high humidity environments. To increase humidity levels, you can place a tray of water near the plants or use a humidifier.
When planting indoor flowers, proper watering is crucial. Overwatering can lead to root rot, while underwatering can cause the plants to wilt and decline. It’s important to water your indoor flowers when the top inch of soil feels dry to the touch. Water thoroughly until the excess exits through the drainage holes, and then allow the soil to dry out partially before watering again.
Fertilizing indoor flowers is also important for their overall health and vitality. Use a balanced liquid fertilizer formulated for indoor plants and follow the recommended dosage instructions. Fertilize during the active growing season, typically from spring to early fall, and reduce or cease fertilization during the winter months when growth slows down.
Regular grooming and maintenance are vital for indoor flowers to look their best. Remove any yellowing or dead leaves and periodically clean the leaves with a soft, damp cloth to remove dust, allowing the plants to breathe and absorb light more effectively.
By considering the specific requirements of your indoor flowers and providing them with the optimal conditions, you’ll ensure their growth and enjoy the beauty of lush, vibrant blooms inside your home throughout the year.
Best Time to Plant Flowering Shrubs
Flowering shrubs are an excellent addition to any garden, providing year-round interest with their stunning blooms and foliage. To ensure successful growth and abundant flowering, it’s important to plant flowering shrubs at the right time. The ideal planting time for flowering shrubs may vary depending on the specific variety and your climate zone. Here’s a general guide to help you determine the best time to plant flowering shrubs.
In most regions, the best time to plant flowering shrubs is during the early spring or fall. Spring planting allows the shrubs to take advantage of the cool, moist conditions and gives them ample time to establish their root systems before the heat of summer. Fall planting, on the other hand, allows the shrubs to settle in and establish roots before they go dormant for the winter.
When selecting flowering shrubs, it’s important to consider their specific blooming patterns. Some shrubs bloom on new wood, meaning they produce flowers on new growth that emerges in the current season. For these types of shrubs, spring planting is ideal, as it allows them to establish new growth and set buds for the following year’s bloom.
Other shrubs bloom on old wood, meaning they produce flowers on growth that emerged in the previous season. For these shrubs, fall planting may be a better option, as it allows them to establish their root systems during the cooler months and be ready to produce blooms in the following spring.
Regardless of the blooming pattern, proper preparation of the planting site is crucial for the success of flowering shrubs. Prepare the soil by removing any weeds or debris and loosening it to a depth of about 12 inches. Incorporate organic matter, such as compost or well-rotted manure, to improve soil fertility, drainage, and moisture retention.
When planting flowering shrubs, dig a hole that is wider and slightly shallower than the root ball. Gently remove the shrub from its container, ensuring that the roots are intact. Place the shrub in the hole, making sure that it is level with or slightly above the surrounding soil. Backfill the hole with soil, firming it gently around the roots. Water the shrub thoroughly after planting to promote root establishment.
After planting, it’s important to provide proper care for flowering shrubs to help them thrive. Water the shrubs deeply and regularly, especially during dry spells or the first growing season after planting. Mulching around the base of the shrubs helps conserve moisture and suppress weeds.
Pruning flowering shrubs may be necessary to maintain their shape, promote healthy growth, and encourage abundant flowering. The proper time and method of pruning will depend on the specific shrub variety. For shrubs that bloom on old wood, it’s generally recommended to prune them immediately after they finish flowering. For shrubs that bloom on new wood, prune them in late winter or early spring before new growth appears.
Fertilizing should be done at the appropriate time and with the right type of fertilizer for flowering shrubs. A slow-release, balanced fertilizer formulated for shrubs can be applied in the early spring or as directed by the specific product’s instructions. Avoid over-fertilizing, as it can lead to excessive foliage growth at the expense of flowering.
By planting flowering shrubs at the appropriate time and providing proper care, you’ll enjoy their beautiful blooms and enhance the overall aesthetics of your garden year after year.
Best Time to Plant Climbing Flowers
Climbing flowers are a stunning addition to any garden, adding vertical interest and a touch of elegance to walls, trellises, and fences. To ensure successful growth and abundant blooms, it’s important to plant climbing flowers at the right time. The ideal planting time for climbing flowers may vary depending on the specific variety and your climate zone. Here’s a general guide to help you determine the best time to plant climbing flowers.
For most regions, the best time to plant climbing flowers is during the early spring or fall. Planting in the spring allows the flowers to take advantage of the growing season and gives them ample time to establish their roots and climb during the summer months. Fall planting, on the other hand, allows the flowers to establish their roots before going dormant in winter and encourages early growth and blooming in the following spring.
When selecting climbing flowers, consider the specific frost tolerance and temperature preferences of the varieties you choose. Some climbing flowers, like clematis and trumpet vine, are more cold-hardy and can be planted in early spring to take advantage of the mild temperatures. Others, such as passionflower and bougainvillea, are more sensitive to frost and should be planted in late spring or early summer when the risk of frost has passed.
Proper preparation of the planting site is crucial for the success of climbing flowers. Before planting, ensure that you have a sturdy trellis, arbor, or other support structure in place to accommodate the eventual growth and climbing habit of the flowers. Prepare the soil by removing any weeds or debris and enriching it with organic matter, such as compost or well-rotted manure, to provide the necessary nutrients for healthy growth.
When planting climbing flowers, dig a hole that is wide and deep enough to accommodate the root ball. Gently remove the flower from its container, being careful not to damage or disturb the roots. Place the flower in the hole, ensuring that it is level with or slightly above the surrounding soil. Backfill the hole with soil, firming it gently around the roots. Water the flower thoroughly after planting to settle the soil and promote root establishment.
After planting, it’s important to provide proper care for climbing flowers to help them thrive. Water the flowers deeply and regularly, especially during dry spells or the first growing season after planting. Mulching around the base of the flowers helps conserve moisture and suppress weeds.
Pruning climbing flowers is essential for maintaining their shape, controlling their growth, and encouraging abundant blooms. The specific timing and method of pruning will depend on the particular climbing flower variety. Some climbing flowers, such as wisteria and roses, benefit from pruning in late winter or early spring before new growth begins. Others, like clematis, may require pruning after their first flush of blooms to encourage a second flush later in the season.
Fertilizing climbing flowers should be done at the appropriate time and with the right type of fertilizer. A balanced, slow-release fertilizer formulated for flowering plants can be applied in the spring or as directed by the specific product’s instructions. Avoid over-fertilizing, as it can lead to excessive foliage growth at the expense of flowering.
By planting climbing flowers at the appropriate time and providing proper care, you’ll create a breathtaking display of vertical beauty in your garden, transforming walls, trellises, and fences into magnificent showcases of color and fragrance.
Best Time to Plant Flowering Vines
Flowering vines can add a touch of beauty and elegance to any garden or outdoor space, providing vertical interest and vibrant blooms. To ensure successful growth and abundant flowering, it’s important to plant flowering vines at the right time. The optimal planting time for flowering vines can vary depending on the specific variety and your climate zone. Here’s a general guide to help you determine the best time to plant flowering vines.
For most regions, the best time to plant flowering vines is during the early spring or fall. Planting in the spring allows the vines to establish their root systems and take advantage of the growing season for vigorous growth and blooming. Fall planting, on the other hand, allows the vines to settle in and establish roots before going dormant in the winter, ensuring a strong start for the following spring.
When selecting flowering vines, consider their frost tolerance and temperature preferences. Some vines, like clematis and honeysuckle, are more cold-hardy and can be planted in early spring to take advantage of the milder temperatures. Other vines, such as bougainvillea and mandevilla, are more sensitive to frost and should be planted in late spring or early summer when the risk of frost has passed.
Proper preparation of the planting site is essential for the success of flowering vines. Before planting, consider the type of support structure the vine will need, such as a trellis, arbor, or fence. Ensure that the structure is secure and can accommodate the vine’s growth habit. Prepare the soil by removing any weeds or debris and incorporating organic matter, such as compost or well-rotted manure, to provide the necessary nutrients for healthy growth.
When planting flowering vines, dig a hole that is wide and deep enough to accommodate the root ball. Gently remove the vine from its container, being careful not to damage the roots. Place the vine in the hole, ensuring that it is level with or slightly above the surrounding soil. Backfill the hole with soil, firming it gently around the roots. Water the vine thoroughly after planting to settle the soil and promote root establishment.
After planting, it’s important to provide proper care for flowering vines to help them thrive. Water the vines deeply and regularly, especially during dry spells or the first growing season after planting. Mulching around the base of the vine helps conserve moisture, suppress weeds, and regulate soil temperature.
Pruning flowering vines is important for maintaining their shape, controlling their growth, and encouraging abundant blooms. The specific timing and method of pruning will depend on the particular vine variety. Some vines, such as wisteria and roses, benefit from pruning in late winter or early spring before new growth begins. Others, like clematis, may require pruning after their first flush of blooms to encourage a second flush later in the season.
Fertilizing flowering vines should be done at the appropriate time and with the right type of fertilizer. A balanced, slow-release fertilizer formulated for flowering plants can be applied in the spring or as directed by the specific product’s instructions. Avoid over-fertilizing, as it can lead to excessive foliage growth at the expense of flowering.
By planting flowering vines at the appropriate time and providing proper care, you’ll create a stunning vertical display of color and fragrance in your garden or outdoor space, transforming structures and creating a beautiful and inviting atmosphere.
Best Time to Plant Cut Flowers
Planting cut flowers allows you to create stunning fresh arrangements and bring the beauty of your garden indoors. To ensure successful growth and an abundant supply of cut flowers, it’s important to plant them at the right time. The timing of planting cut flowers can vary depending on the specific variety and your climate zone. Here’s a general guide to help you determine the best time to plant cut flowers.
For most regions, the best time to plant cut flowers is in the spring when the soil has thawed and is workable. This allows the flowers to establish their root systems and take advantage of the longer days and warmer temperatures. However, it’s crucial to consider the specific needs of each flower variety.
Some popular cut flowers, such as zinnias, sunflowers, and cosmos, can be directly sown into the ground after the last frost date. These flowers prefer warmer soil temperatures and can be planted once all danger of frost has passed. Make sure to check the specific planting guidelines for each flower, as they may have different preferences.
Other cut flowers, particularly those with more delicate blooms, benefit from an early start indoors. This involves starting the seeds indoors 6 to 8 weeks before the last frost date. Flowers like snapdragons, lisianthus, and dahlias can be sown indoors in trays or pots, and then transplanted into the garden once the soil has warmed up.
When planting cut flowers, prepare the soil in the planting area by removing any weeds, rocks, or debris and incorporating organic matter like compost or well-rotted manure. This will improve soil fertility, drainage, and moisture retention, which are crucial for the health and growth of cut flowers.
Ensure that the planting area receives ample sunlight, as most cut flowers require full sun to thrive and produce abundant blooms. Adequate spacing between plants is also important to allow air circulation and prevent overcrowding, which can lead to disease and poor growth.
Watering is essential for the establishment and growth of cut flowers. After planting, water the flowers thoroughly to settle the soil and promote root establishment. Once established, provide regular watering, aiming for consistent moisture levels, and adjust according to weather conditions. It’s crucial to strike a balance between keeping the soil moist and avoiding overwatering, which can cause root rot.
Depending on the specific flower variety, fertilizing cut flowers may be necessary to provide additional nutrients for healthy growth and abundant blooms. Use a balanced, slow-release fertilizer or a water-soluble fertilizer specifically formulated for flowering plants. Follow the package instructions for dosage and timing, as excessive fertilization can result in excessive foliage at the expense of flowers.
Regular deadheading, the removal of spent flowers, is crucial for cut flowers. This encourages continuous blooming and prevents the plant from putting energy into seed production. Remove faded or wilting flowers promptly to redirect resources to new growth and encourage the development of more buds.
By planting cut flowers at the appropriate time, providing proper care, and practicing regular maintenance, you’ll be rewarded with an abundant supply of beautiful blooms that can be enjoyed both in your garden and as stunning floral arrangements.
Best Time to Plant Flowers in Containers
Planting flowers in containers is a versatile and convenient way to add beauty and color to your outdoor space, whether you have a small balcony, patio, or limited gardening space. To ensure successful growth and stunning displays, it’s important to plant flowers in containers at the right time. The timing of planting flowers in containers can vary depending on the specific variety and your climate zone. Here’s a general guide to help you determine the best time to plant flowers in containers.
For most regions, the best time to plant flowers in containers is in the early spring when the risk of frost has passed, and temperatures are consistently mild. This ensures that the flowers can establish themselves and grow without the risk of cold damage. However, it’s important to consider the specific requirements of each flower variety.
Some flowers, such as pansies, violas, and snapdragons, are considered cool-season annuals and can tolerate cooler temperatures. They can be planted earlier in the year when soil temperatures are still relatively cool. These flowers provide early-season color and can withstand light frosts.
Warm-season flowers, such as petunias, geraniums, and marigolds, prefer warmer soil temperatures. It’s best to wait until the danger of frost has completely passed and the soil has warmed up before planting these flowers in containers. This is usually in late spring or early summer.
When selecting containers for planting, make sure they have proper drainage holes to prevent waterlogging the soil. Choose containers of appropriate size for the specific flower variety, ensuring enough room for the roots to grow. The material of the container can also affect the soil temperature, with lighter materials like plastic and fiberglass staying cooler than darker materials like metal or terracotta.
Use a high-quality potting mix specifically formulated for container gardening. These mixes provide a well-draining environment and contain the necessary nutrients for healthy plant growth. Avoid using garden soil or heavy compost, as they can lead to poor drainage and hinder root development.
When planting flowers in containers, ensure that the soil is adequately moist before planting. Gently remove the flowers from their nursery pots and arrange them in the container, considering their spacing requirements. Add additional potting mix around the roots and firm it gently to provide stability. Water the container thoroughly after planting to settle the soil and promote root establishment.
Proper care is crucial for the success of flowers in containers. Regular watering is essential, as containers tend to dry out more quickly than garden beds. Check the moisture level of the soil regularly and water as needed to keep it consistently moist, but not waterlogged. During hot summer months, you may need to water daily or even twice a day, depending on the size of the container and the specific flower variety.
Fertilize the flowers in containers regularly to provide them with the necessary nutrients for healthy growth and abundant blooms. Use a balanced, water-soluble fertilizer or slow-release granules according to the package instructions. Avoid over-fertilization, as it can lead to excessive foliage growth at the expense of flowers.
Regular deadheading, removing faded or spent flowers, encourages continuous blooming and keeps the container looking fresh and vibrant. Prune back any leggy or overgrown stems to maintain a compact and attractive appearance. Trim back any diseased or damaged foliage promptly to prevent the spread of diseases.
By planting flowers in containers at the appropriate time and providing proper care, you can enjoy a dazzling display of color and fragrance right at your doorstep or outdoor living space throughout the growing season.
Best Time to Plant Flowers to Attract Pollinators
Planting flowers that attract pollinators is not only beneficial for the ecosystem but also adds beauty and vibrancy to your garden. To ensure successful attraction of pollinators, it’s important to plant these flowers at the right time. The timing of planting flowers to attract pollinators can vary depending on the specific variety and your climate zone. Here’s a general guide to help you determine the best time to plant flowers for pollinators.
For most regions, the best time to plant flowers to attract pollinators is in the early spring when the weather begins to warm up and the pollinators start to become active. It’s important to have flowers blooming early in the season to provide a consistent food source for pollinators as they emerge from hibernation.
When selecting flowers that attract pollinators, opt for native varieties that are adapted to your local climate and have co-evolved with the local pollinator population. Native flowers are more likely to attract and support a wide range of pollinators, including bees, butterflies, hummingbirds, and other beneficial insects.
Consider the bloom times of the flowers when planning your garden. Choose a combination of early, mid, and late-blooming flowers to provide a continuous source of nectar and pollen throughout the growing season. This ensures that pollinators have access to food from early spring through late fall.
Proper preparation of the planting site is important for the success of flowers that attract pollinators. Ensure that the soil is well-drained and enriched with organic matter to provide the necessary nutrients. Create diverse planting beds with a mix of different flower species and heights to attract a variety of pollinators.
When planting, consider the preferences of different pollinators. For example, planting flowers that have flat, open blooms can attract a variety of bees, while tubular flowers are often preferred by hummingbirds. Additionally, planting a range of flower colors can attract different pollinators, as they have varying preferences for specific colors.
Water the newly planted flowers thoroughly to settle the soil and promote root establishment. Once established, water as needed to keep the soil moist but not waterlogged, as excessive moisture can lead to root rot and other plant health issues.
Maintain your flower garden by regularly deadheading spent blooms to promote continuous flowering. Remove any damaged or diseased foliage promptly to prevent the spread of diseases. Periodically check the garden for pests and take appropriate measures to control them using organic and pollinator-friendly methods.
By planting flowers that attract pollinators at the appropriate time and providing proper care, you’ll create a haven for pollinators in your garden, supporting their essential role in pollinating plants and ensuring the health and productivity of your ecosystem.