
Best Time to Plant Watermelons
Choosing the right time to plant watermelons is crucial for a successful harvest. Watermelons thrive in warm weather, so it’s important to wait until all chances of frost have passed before planting them outdoors. The best time to plant watermelons depends on your location and local climate, but there are general guidelines to follow.
In most regions, it’s best to plant watermelon seeds or seedlings after the last frost date in spring. This ensures that the soil and air temperatures are warm enough for optimal growth. If you’re uncertain about the average last frost date in your area, you can check with your local agricultural extension office or consult a gardening guide specific to your region.
Typically, the soil temperature should be around 70 to 80 degrees Fahrenheit (21 to 27 degrees Celsius) for watermelon seeds to germinate. To achieve this, you may need to warm up the soil by covering it with black plastic mulch a few weeks before planting. The plastic absorbs heat from the sun, raising the soil temperature to an ideal range for watermelon germination and growth.
It’s important to note that watermelons require a long growing season, typically around 70 to 90 days from planting to harvest. Therefore, it’s recommended to plant watermelons when the average daily temperature reaches at least 70 degrees Fahrenheit (21 degrees Celsius). This ensures that the fruits have enough time to mature before colder weather arrives.
If you live in a region with a short growing season, you can consider starting watermelon seeds indoors several weeks before the last frost date. This allows you to give your plants a head start and extend the growing season.
Overall, the best time to plant watermelons is when the soil and air temperatures are consistently warm, and all risks of frost have passed. By following these guidelines and considering the specific requirements of your local climate, you can maximize the chances of a bountiful watermelon harvest.
Factors to Consider before Planting Watermelons
Before jumping into planting watermelons, there are several important factors to consider that can greatly affect the success of your crop. These factors include soil conditions, available space, pollination requirements, and pest control measures.
Firstly, it is essential to evaluate the soil conditions in your garden. Watermelons prefer well-draining soil with a pH level between 6.0 and 7.0. Conduct a soil test to determine the pH level and make any necessary amendments to optimize the soil for watermelon growth. Additionally, ensure that the soil is rich in organic matter and adequately nourished with essential nutrients.
Secondly, consider the available space in your garden. Watermelons require ample room to spread out and sprawl, as the vines can grow up to 10-20 feet long. Choose a location that receives full sun throughout the day and has enough space for the vines to grow and the watermelon fruits to develop properly.
Another crucial factor to consider is pollination. Watermelon plants have separate male and female flowers, and successful pollination is necessary for fruit set and development. Bees and other pollinators play a vital role in this process. To attract pollinators, you can plant flowers, such as marigolds or asters, nearby or even consider keeping honeybee colonies if allowed in your area.
Pest control is also important before planting watermelons. Common pests that can affect watermelon plants include aphids, cucumber beetles, and squash bugs. Implementing organic pest control methods, such as companion planting, using row covers, or applying natural insect repellents, can help protect your watermelon crop from damage.
Additionally, consider the timing of planting watermelons. As mentioned earlier, watermelons require warm temperatures to thrive. Ensure that the weather is consistently warm, and the soil temperature is optimal for seed germination and plant growth. Planting too early when the soil is still cool can lead to poor germination and stunted growth.
Climate Requirements for Watermelons
Watermelons are warm-season plants that thrive in specific climatic conditions. Understanding the climate requirements for watermelons is essential to ensure successful growth and a bountiful harvest.
Temperature is a crucial factor for watermelon cultivation. The ideal temperature range for watermelon plants is between 70 and 90 degrees Fahrenheit (21 to 32 degrees Celsius). They require warm temperatures to germinate, establish, and produce sweet and juicy fruits. If the temperature drops below 50 degrees Fahrenheit (10 degrees Celsius), the growth of watermelon plants can be severely affected or even halted.
In addition to temperature, watermelons also require plenty of sunlight to develop properly. They need a minimum of 6 to 8 hours of direct sunlight each day. Adequate sunlight ensures that the plants can photosynthesize efficiently, leading to healthier vines and better fruit production.
Watermelons also have specific moisture requirements. While they need consistent moisture throughout the growing season, they are susceptible to waterlogged soil, which can lead to root rot. Therefore, it is essential to provide well-draining soil that retains enough moisture without becoming saturated. Regular watering, especially during dry spells or when the fruits are developing, is crucial for proper growth and fruit quality.
Another important aspect of the climate is the absence of frost. Watermelons are sensitive to cold temperatures and can be damaged or killed by frost. It is crucial to wait until all chances of frost have passed before planting watermelons outdoors. In regions with shorter growing seasons, starting watermelon seeds indoors several weeks before the last frost date can provide an early start and increase the chances of a successful harvest.
Understanding the climate requirements for watermelons allows you to select the ideal planting time and create favorable growing conditions. By providing adequate warmth, sunlight, moisture, and frost protection, you can ensure healthy watermelon plants and enjoy the sweet rewards of a successful harvest.
Choosing the Right Watermelon Variety
When it comes to choosing the right watermelon variety, there are several factors to consider, including size, flavor, texture, seed type, and disease resistance. Selecting the appropriate variety ensures that you can grow watermelons that meet your preferences and thrive in your specific growing conditions.
One of the first considerations is the size of the watermelon you desire. The available options range from small, personal-sized watermelons to large, juicy ones perfect for picnics and gatherings. Consider your needs and the available space in your garden when selecting a size.
The flavor and texture of watermelons can vary greatly between varieties. Some have a sweeter taste with crisp, juicy flesh, while others may be milder or have a firmer texture. Research different varieties and read reviews to find ones that align with your desired flavor profile.
Another consideration is the seed type. Watermelon varieties can have either seeds or be seedless. Seedless varieties are popular as they eliminate the need to deal with seeds while consuming the fruit. However, keep in mind that seedless varieties generally require a pollinator nearby to produce fruits properly.
Disease resistance is an important factor, especially if you live in an area prone to specific watermelon diseases. Look for varieties that are resistant to common issues such as powdery mildew, fusarium wilt, or anthracnose. Disease-resistant varieties can save you time and effort in managing and preventing potential problems.
Lastly, consider the length of the growing season for different watermelon varieties. Some varieties have a shorter maturity period, which is ideal for areas with a shorter growing season or for gardeners who prefer quicker harvests. Others may take longer to reach maturity but produce larger fruits.
Explore catalogs, visit local nurseries, or consult with experts to learn about the different watermelon varieties available for your region and gardening preferences. By considering factors such as size, flavor, seed type, disease resistance, and growing season length, you can choose the perfect watermelon variety that will thrive and provide you with delicious fruits to savor.
Preparing the Soil for Watermelons
Preparing the soil properly is crucial for the successful growth of watermelon plants. By following a few essential steps, you can create optimal growing conditions for your watermelon crop.
First, start by clearing the planting area of any weeds, rocks, or debris. Watermelon plants thrive in well-maintained soil, free from competition with other plants or obstructions.
Next, loosen the soil to improve its drainage and aeration. Use a garden fork or a tiller to gently break up the soil, ensuring that it is not overly compacted. Avoid excessively tilling the soil, as this can disturb its structure and negatively affect drainage.
Once the soil is loosened, it’s time to amend it with organic matter. Incorporating compost or well-rotted manure into the soil adds vital nutrients and improves its overall fertility. Spread a layer of organic matter over the planting area and work it into the soil to a depth of about 6 to 8 inches (15 to 20 cm).
Watermelon plants prefer slightly acidic to neutral soil, with a pH level between 6.0 and 7.0. Test the soil pH using a soil testing kit and adjust it if necessary. If the pH is too low (acidic), add lime to raise it. If it is too high (alkaline), amend the soil with sulfur or peat moss to lower the pH.
In addition to organic matter and pH adjustment, it’s beneficial to incorporate a balanced fertilizer into the soil. Choose a slow-release organic fertilizer that provides essential nutrients for plant growth, such as nitrogen, phosphorus, and potassium. Follow the recommended application rates on the fertilizer packaging to ensure proper nutrient balance.
Before planting, ensure that the soil is evenly moist but not overly wet. Watermelons require consistent moisture, so it’s important to establish proper irrigation practices early on. Consider installing a drip irrigation system or using soaker hoses to provide consistent, targeted watering to the plants’ root zones.
How to Start Watermelon Seeds Indoors
Starting watermelon seeds indoors is a great way to get a head start on the growing season and ensure healthy seedlings for transplanting outdoors. Follow these steps to successfully start watermelon seeds indoors:
1. Select the right time: Start watermelon seeds indoors approximately 4 to 6 weeks before the last anticipated frost date in your area. This will give the seedlings enough time to develop before they are ready for transplanting.
2. Choose the right containers: Use biodegradable peat pots or seed-starting trays with drainage holes to plant watermelon seeds. These containers allow for easy transplanting without disturbing the delicate roots.
3. Prepare the seed-starting mix: Use a sterile seed-starting mix composed of peat moss, vermiculite, and perlite. This type of mix provides good drainage and aeration for the seedlings.
4. Sow the seeds: Place 2 to 3 watermelon seeds about 1 inch deep into each pot or cell, and cover them with a thin layer of the seed-starting mix. Water lightly to moisten the soil.
5. Provide optimal conditions: Place the seed trays or pots in a warm location with temperatures around 75 to 85 degrees Fahrenheit (24 to 29 degrees Celsius). Use a heating mat or grow lights if necessary to maintain warmth.
6. Ensure proper lighting: Watermelon seeds require plenty of light to germinate and grow properly. Place the seed trays under grow lights or in a well-lit location where they will receive at least 12 to 16 hours of bright light per day.
7. Water appropriately: Keep the soil evenly moist but not soaked. Water thoroughly whenever the top inch of soil feels dry, using a watering can or spray bottle to prevent disturbing the seeds.
8. Thin out seedlings: Once the seedlings have developed their first set of true leaves, thin them out by removing the weakest seedlings from each pot or cell. This allows the remaining seedlings more space and resources to grow.
9. Harden off the seedlings: About a week before transplanting, gradually expose the seedlings to outdoor conditions. Start by placing them in a sheltered location for a few hours each day, gradually increasing the time and exposure to direct sunlight. This helps the seedlings adjust to outdoor temperatures and reduces transplant shock.
By following these steps, you can successfully start watermelon seeds indoors and enjoy healthy and robust seedlings ready for transplanting into your garden once the danger of frost has passed.
Direct Sowing Watermelon Seeds
Direct sowing watermelon seeds is a simple and effective method of planting watermelon directly in the garden. Follow these steps to successfully sow watermelon seeds directly into the soil:
1. Choose the right time: Wait until all chances of frost have passed and the soil has warmed up to at least 70 degrees Fahrenheit (21 degrees Celsius) before sowing watermelon seeds directly in the garden. This ensures optimal germination and growth.
2. Select the planting site: Choose a sunny location with well-draining soil for planting watermelon seeds. Watermelons require at least 6 to 8 hours of direct sunlight each day for optimal growth and fruit development.
3. Prepare the soil: Clear the planting area of weeds, rocks, and debris. Loosen the soil using a garden fork or tiller to a depth of about 8 to 12 inches (20 to 30 cm). Incorporate organic matter, such as compost or well-rotted manure, into the soil to improve fertility and drainage.
4. Create mounds or rows: Create mounds or rows in the prepared soil to plant watermelon seeds. Mounds should be about 3 to 4 feet (0.9 to 1.2 meters) apart, while rows should be about 6 to 8 feet (1.8 to 2.4 meters) apart to allow vines to spread comfortably.
5. Sow the seeds: Plant watermelon seeds about 1 inch (2.5 cm) deep, spaced about 2 to 3 feet (0.6 to 0.9 meters) apart within the mounds or rows. Place a couple of seeds in each hole, and cover them with soil. Water gently to settle the soil around the seeds.
6. Provide regular water: Water the newly sown seeds immediately after planting and continue to provide consistent moisture. Keep the soil evenly moist, but avoid overwatering, as waterlogged soil can lead to root rot and other problems.
7. Thin out seedlings: Once the seedlings have grown their first true leaves, thin them out by removing the weaker seedlings, allowing the remaining ones enough space to grow and develop properly. Aim for a final spacing of about 1 plant per 2 to 3 feet (0.6 to 0.9 meters).
8. Mulch and protect: Apply a layer of organic mulch, such as straw or wood chips, around the seedlings to conserve moisture, suppress weed growth, and maintain consistent soil temperature. Additionally, use row covers or netting to protect the young plants from pests and harsh weather conditions.
By following these steps and providing proper care and maintenance, you can successfully sow watermelon seeds directly in the garden and enjoy a bountiful harvest of delicious and juicy watermelons.
Transplanting Watermelon Seedlings
Transplanting watermelon seedlings is a critical step in the growth journey of these plants. When the seedlings have matured indoors or in a greenhouse, they are ready to be transplanted into the garden for optimal growth and fruit production. Follow these steps to successfully transplant watermelon seedlings:
1. Timing is key: Wait until all chances of frost have passed and the soil has warmed up to at least 70 degrees Fahrenheit (21 degrees Celsius) before transplanting watermelon seedlings. This ensures that the plants can thrive in the optimal growing conditions.
2. Prepare the planting site: Choose a sunny location in the garden with fertile, well-draining soil. Amend the soil with compost or well-rotted manure to improve its fertility and drainage. Create hills or mounds spaced 3 to 4 feet (0.9 to 1.2 meters) apart to provide enough room for the watermelon vines to spread.
3. Harden off the seedlings: About a week before transplanting, gradually expose the seedlings to outdoor conditions. Start by placing them in a sheltered location for a few hours each day, gradually increasing the time and exposure to direct sunlight. This helps the seedlings adjust to outdoor temperatures and reduces transplant shock.
4. Dig the planting holes: Dig holes in the prepared planting site that are large enough to accommodate the root ball of each seedling. Space the holes according to the desired spacing for the watermelon variety, usually 2 to 3 feet (0.6 to 0.9 meters) apart.
5. Transplant the seedlings: Gently remove the watermelon seedlings from their containers, being careful not to disturb the roots too much. Place each seedling into a hole, ensuring that the top of the root ball is level with the soil surface. Backfill the holes with soil, gently firming it around the base of the plant.
6. Water thoroughly: After transplanting, water the seedlings deeply to settle the soil and provide them with essential moisture. Ensure that the soil remains consistently moist but not waterlogged throughout the growing season.
7. Provide support: Depending on the watermelon variety, you may need to provide support for the vines as they grow. Erect trellises or install stakes near the plants to support the vines and prevent them from sprawling on the ground.
8. Mulch the soil: Apply a layer of organic mulch, such as straw or wood chips, around the base of the watermelon plants. The mulch helps retain moisture, suppress weed growth, and maintain a more consistent soil temperature.
By following these steps and providing proper care and maintenance, you can successfully transplant watermelon seedlings into your garden and ensure healthy growth, leading to a fruitful harvest of delicious watermelons.
Caring for Watermelon Plants
Proper care and attention are key to ensuring the healthy growth and maximum yield of watermelon plants. By following these essential care practices, you can support the development of strong vines and sweet, juicy watermelons:
1. Watering: Watermelon plants have high water requirements, especially during hot and dry periods. Provide consistent moisture by watering deeply at the base of the plants. Aim to keep the soil evenly moist, but not waterlogged, to prevent root rot and other diseases.
2. Mulching: Apply a layer of organic mulch, such as straw or wood chips, around the base of the watermelon plants. Mulch helps retain soil moisture, suppress weed growth, and maintain a more consistent soil temperature.
3. Fertilizing: Watermelons are heavy feeders and require regular fertilization. Apply a balanced, slow-release organic fertilizer according to the package instructions. Alternatively, use organic compost or well-rotted manure to provide necessary nutrients to the plants.
4. Trellising: Consider trellising or providing support for the watermelon vines, especially if you have limited garden space. This practice can help save space, improve air circulation, and enhance fruit quality by keeping the fruits off the ground.
5. Pruning: Watermelon plants generally do not require extensive pruning. However, it is beneficial to remove any suckers or lateral shoots that divert energy from the main vines. Pruning also helps improve airflow and reduce the risk of diseases.
6. Pest and Disease Management: Monitor your watermelon plants regularly for pests such as aphids, cucumber beetles, and squash bugs. Use organic pest control methods, including hand removal, insecticidal soaps, and neem oil, to manage pest infestations. Additionally, watch for common watermelon diseases like powdery mildew and treat them early with organic fungicides or preventative measures like proper spacing and good air circulation.
7. Pollination: Ensure proper pollination by providing an environment conducive to attracting pollinators. Planting flowers nearby or keeping beehives can help improve pollination rates and increase fruit set.
8. Fruit Support: As the watermelon fruits grow, supporting them can prevent the risk of fruit rot. Use slings made of fabric or pantyhose to cradle the developing fruits and reduce stress on the vine.
By implementing these caring practices, you can promote healthy growth, prevent common problems, and enjoy a successful harvest of sweet and refreshing watermelons.
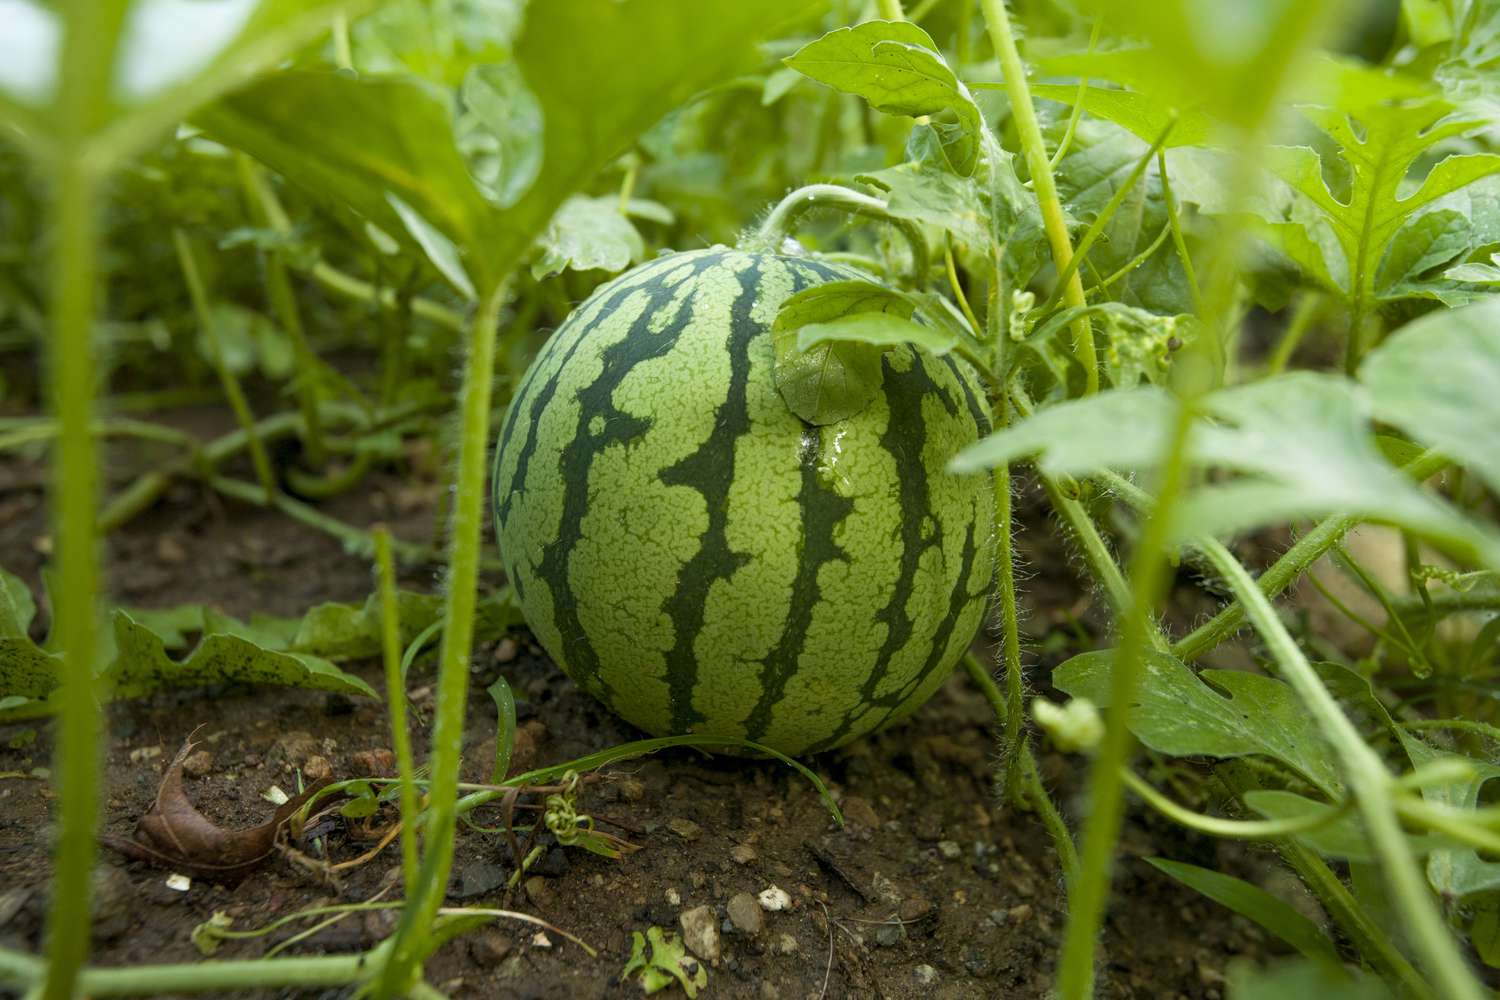
Harvesting Watermelons
Harvesting watermelons at the right time ensures maximum flavor and sweetness. Here are some key tips to help you determine when and how to harvest your watermelons:
1. Observe the signs of maturity: Pay attention to the signs that indicate the watermelons are ready to be harvested. Look for a dull skin surface, a yellow or cream-colored underside (where the watermelon is in contact with the ground), and a dry and curled stem. These are indicators of ripeness.
2. Check the tendril: Another method to assess ripeness is by observing the tendril closest to where the watermelon stem connects to the plant. When the tendril changes from green to brown and dries out, it is a good indication that the watermelon is ripe and ready for harvest.
3. Perform the thump test: Gently tap the watermelon with your knuckles and listen for a dull, hollow sound. A ripe watermelon will produce a deep sound, indicating that the flesh is firm and juicy. However, this method requires some experience to accurately determine ripeness based on the sound.
4. Lift and weigh: As watermelons mature, they become heavier. Lift the watermelon and assess its weight. Ripe watermelons will feel heavier than they initially did when they were smaller and not fully developed.
5. Timing is crucial: Harvest watermelons at the right time to prevent them from becoming overripe or losing their flavor. Remember that different watermelon varieties have varying maturity periods, ranging from 70 to 90 days. Check the seed packet or consult the variety information to estimate the expected harvest time.
6. Use sharp tools: When it’s time to harvest, use a sharp knife or pruning shears to cut the watermelon off the vine. Leave a short stem attached to the fruit, about 1 to 2 inches (2.5 to 5 cm) long, as this can prolong the storage life of the watermelon.
7. Store appropriately: After harvesting, handle the watermelons with care to avoid bruising or damage. Store them in a cool, dry place, such as a cellar or refrigerator, away from other fruits and vegetables. Ideally, watermelons should be consumed within a week of harvest for the best flavor and quality.
By using these techniques and paying attention to the signs of ripeness, you can ensure that your watermelons are harvested at their peak, delivering sweet, juicy, and refreshing fruits for your enjoyment.
Common Watermelon Problems and Solutions
While watermelons are generally easy to grow, they can be susceptible to various problems. Understanding common issues that may arise and knowing how to address them can help ensure a successful watermelon harvest. Here are some common watermelon problems and possible solutions:
1. Powdery Mildew: This fungal disease appears as a white powdery coating on the leaves and can inhibit plant growth and fruit development. To prevent powdery mildew, provide proper air circulation, avoid overhead watering, and apply organic fungicides as a preventive measure.
2. Blossom End Rot: Blossom end rot is characterized by dark, sunken spots at the blossom end of the fruit. It is caused by calcium deficiency or uneven moisture levels. Maintain consistent soil moisture by watering regularly and providing mulch. Additionally, ensure the soil has adequate calcium levels through proper fertilization.
3. Fusarium Wilt: Fusarium wilt is a soil-borne disease that causes wilting, yellowing leaves, and eventual death of the plant. To prevent infection, choose disease-resistant watermelon varieties and practice crop rotation to avoid planting watermelons in the same area for consecutive years.
4. Cucumber Beetles: These small yellow and black pests can damage seedlings and transmit bacterial wilt. Use row covers to protect young plants, apply organic insecticides, or introduce beneficial insects like ladybugs or parasitic wasps.
5. Squash Bugs: Squash bugs can cause wilting, yellowing, and stunting of watermelon plants. Handpick and destroy the bugs or use organic insecticides. Regularly remove debris and plant residues where these pests may shelter.
6. Anthracnose: Anthracnose is a fungal disease that causes dark, sunken lesions on leaves, stems, and fruits. To prevent anthracnose, provide adequate plant spacing to improve air circulation, practice crop rotation, and apply organic fungicides as needed.
7. Poor Fruit Set: Inadequate pollination can result in poor fruit set. Encourage pollinators by planting flowers nearby or using handheld pollination techniques such as gently brushing male flowers against female flowers to transfer pollen.
8. Overwatering: Overwatering can lead to root rot and other issues. Watermelon plants require regular moisture but should not be waterlogged. Maintain proper soil moisture levels by watering deeply and allowing the soil to dry out slightly before watering again.
By being vigilant, practicing good cultural practices, and promptly addressing any problems that arise, you can overcome common watermelon issues and enjoy a healthy and productive watermelon crop.