
Choosing the Right Location
When it comes to washing an area rug outside, the first step is choosing the right location. This is crucial to ensure that the cleaning process is efficient and successful. Here are some factors to consider when selecting the location:
- Outdoor Space: Find a suitable area in your outdoor space that is large enough to accommodate the size of your rug. Make sure there is enough room for you to move around and clean the rug effectively.
- Flat Surface: Look for a flat surface such as a patio, deck, or driveway to lay the rug. This will provide stability for the rug and make the cleaning process easier.
- Shaded Area: Opt for a location that offers some shade to prevent the rug from getting too hot or drying too quickly. Excessive heat can cause the rug’s fibers to shrink or become damaged.
- Proximity to Water Source: It is essential to have access to a water source, such as a hose or outdoor faucet, to rinse the rug thoroughly. This will help remove any leftover cleaning solution and dirt effectively.
- Drainage: Ensure that the chosen location has proper drainage to allow the water to flow away easily. This will prevent the rug from sitting in a puddle of water, which can lead to mold or mildew formation.
By considering these factors, you can choose the ideal location to clean your area rug outside. This will help ensure a successful cleaning process and maintain the beauty and longevity of your rug.
Preparing the Area Rug
Before you begin the process of washing your area rug outside, it is essential to prepare the rug properly. Proper preparation ensures that the cleaning process is effective and minimizes the risk of damage. Here are the steps to prepare your area rug:
- Remove Loose Items: Start by removing any loose items from the rug, such as small objects or debris. This can be done by gently shaking or brushing the rug to dislodge any dirt or crumbs.
- Brush or Vacuum: Use a soft-bristle brush or a vacuum with a brush attachment to thoroughly remove any loose dirt or debris from the rug’s surface. This step helps to make the cleaning process more effective and prevents dirt from getting embedded in the fibers during the washing process.
- Check for Stains: Inspect the rug for any stains or spots. If there are any visible stains, treat them with a suitable stain remover or a mixture of mild detergent and water before washing the entire rug.
- Spot Test: Before proceeding with washing the entire rug, it is advisable to spot test a small, inconspicuous area to ensure that the cleaning solution does not cause any discoloration or damage. Apply a small amount of the cleaning solution to the test area and blot with a clean cloth or sponge. If there is no color transfer or damage, you can proceed with washing the entire rug.
- Roll or Fold: If your rug is particularly large or heavy, consider rolling or folding it before carrying it outside. This will make it more manageable to transport to the chosen cleaning location.
By following these preparatory steps, you can ensure that your area rug is ready for the cleaning process. This will help achieve the best results and maintain the rug’s appearance and quality.
Removing Loose Dirt and Debris
Before washing your area rug outside, it is important to remove loose dirt and debris from the surface. This step will help prevent the dirt from becoming embedded in the fibers during the cleaning process. Here are some effective methods for removing loose dirt and debris:
- Shake Vigorously: Take the rug outside and shake it vigorously. This will help loosen and dislodge dirt, dust, and other particles trapped in the fibers. Hold onto the corners or edges of the rug and shake it in an up and down motion.
- Use a Broom or Brush: If the rug is too large to shake, you can use a broom or brush to remove loose dirt. Gently sweep the bristles across the surface of the rug in the direction of the pile. This will effectively loosen and lift dirt and debris from the rug.
- Vacuum with a Brush Attachment: If the rug is not too delicate, you can also use a vacuum cleaner with a brush attachment to remove loose dirt and debris. Set the vacuum to a suitable setting for delicate rugs or use a brush attachment that is gentle on the rug’s fibers.
- Beat the Rug: For smaller area rugs, you can hang them on a clothesline or fence and beat them gently with a rug beater or a clean broom. This method helps dislodge dirt and dust from the fibers and is particularly effective for rugs with thick pile.
- Spot Clean with a Cotton Cloth: If you notice specific areas with stains or spills, you can spot clean them before washing the entire rug. Dampen a clean cotton cloth with water and gently blot the affected area. Avoid rubbing, as it can spread the stain. For stubborn stains, you can use a mild detergent diluted with water.
By removing loose dirt and debris from your area rug, you ensure that the cleaning process is more effective and maintain the rug’s overall cleanliness and appearance. This step sets the foundation for a successful outdoor rug washing experience.
Creating a Cleaning Solution
Creating a suitable cleaning solution is essential for washing your area rug outside. The right combination of ingredients will effectively remove stains, dirt, and odors while being gentle on the rug’s fibers. Here are a few options for creating a cleaning solution:
- Mild Detergent Solution: Mix a small amount of mild liquid detergent, such as dish soap or laundry detergent, with warm water. Stir the solution gently until the detergent is well-dissolved. Avoid using harsh detergents or bleach, as they can damage the rug’s fibers.
- Vinegar Solution: Combine equal parts white vinegar and water to create a natural cleaning solution. Vinegar helps to eliminate odors and can be effective in lifting stains and dirt. This solution is particularly suitable for synthetic rugs.
- Baking Soda Paste: For stubborn stains or odors, you can create a paste by mixing baking soda with water. Apply the paste directly to the stained areas and gently rub it in. Let it sit for a few minutes before rinsing it off.
- Commercial Rug Cleaner: If you prefer, you can also use a commercially available rug cleaner. Follow the instructions on the packaging and dilute the cleaner with water as directed. Be sure to choose a cleaner that is suitable for your rug’s material.
- Natural Solutions: Some natural solutions, such as a mixture of lemon juice, salt, and water or a solution of borax and water, can also be effective for cleaning rugs. However, it is important to test these solutions on a small, inconspicuous area to ensure they do not cause any discoloration or damage.
Remember, regardless of the cleaning solution you choose, always use warm water rather than hot water. Hot water can shrink or damage certain rug fibers. Additionally, avoid oversaturating the rug with the cleaning solution, as excessive moisture can lead to mold or mildew growth.
By carefully selecting or creating a suitable cleaning solution, you can ensure that your area rug is effectively cleaned while maintaining its quality and appearance.
Testing for Colorfastness
Before proceeding with washing your area rug outside, it is important to test for colorfastness. This step ensures that the cleaning solution you plan to use will not cause any color bleeding or fading. Here’s how to test for colorfastness:
- Choose an Inconspicuous Area: Select a small, hidden area on the rug, such as a corner or the underside, to perform the colorfastness test. This will minimize any visible effects in case the solution causes color damage.
- Dampen a White Cloth: Moisten a clean, white cloth or sponge with the cleaning solution you intend to use. It is important to use a white cloth to avoid any color transfer from colored cloths.
- Blot the Test Area: Gently blot the dampened cloth onto the test area, making sure to apply enough pressure to transfer a small amount of the cleaning solution onto the rug. Avoid rubbing the cloth, as it can cause friction and potential color damage.
- Observe for Color Transfer: After a few seconds, blot the test area with a dry white cloth to check for any color transfer. Look for signs of bleeding or fading on both the test area and the cloth. If there is no color transfer or damage, it is safe to proceed with washing the entire rug. However, if you notice any color bleeding or fading, do not proceed with the cleaning solution on the rug.
It is crucial to perform a colorfastness test, even if you have used the cleaning solution before on the same type of rug. Different rugs can react differently to cleaning solutions, and it is always better to be cautious to prevent any unwanted color damage.
If the colorfastness test yields positive results, you can proceed with confidence, knowing that the cleaning solution will not affect the rug’s colors. However, if there is any color transfer or fading, it is recommended to consult a professional rug cleaner for the appropriate cleaning method or consider alternative cleaning solutions.
Applying the Cleaning Solution
Once you have prepared the area rug and tested for colorfastness, it’s time to apply the cleaning solution to effectively remove stains, dirt, and odors. Follow these steps to apply the cleaning solution to your area rug:
- Dilute the Cleaning Solution: If you are using a concentrated commercial cleaner, dilute it with water according to the instructions on the packaging. For homemade solutions, mix the ingredients based on the recommended ratios.
- Pour the Solution: Pour the cleaning solution into a spray bottle or a bucket, depending on your preference and the size of the rug. A spray bottle allows for easy and controlled application, while a bucket can hold a larger amount of solution for extensive cleaning.
- Apply the Solution: Start by applying the cleaning solution to a small section of the rug, using a sponge, soft brush, or a clean cloth. Work in a gentle, circular motion to ensure that the solution reaches the fibers evenly. Gradually move to other areas of the rug until the entire surface is covered.
- Focus on Stains and High-Traffic Areas: Pay extra attention to areas with stains or high foot traffic. Apply a bit more solution and gently scrub those areas with a brush or sponge to ensure thorough cleaning.
- Avoid Over-Saturation: While it is important to apply enough solution to effectively clean the rug, be mindful not to oversaturate it. Excessive moisture can lead to long drying times and potential mold or mildew growth. If you notice excessive pooling of the solution on the rug, use a clean cloth or sponge to blot away the excess.
Allow the cleaning solution to sit on the rug for the recommended time, as per the instructions provided with the cleaning solution. This allows the solution to penetrate and break down stains and dirt effectively.
By properly applying the cleaning solution to your area rug, you can ensure that it is thoroughly cleaned and restored to its original beauty. Remember to follow the instructions for the specific cleaning solution you are using and take caution to avoid over-saturation.
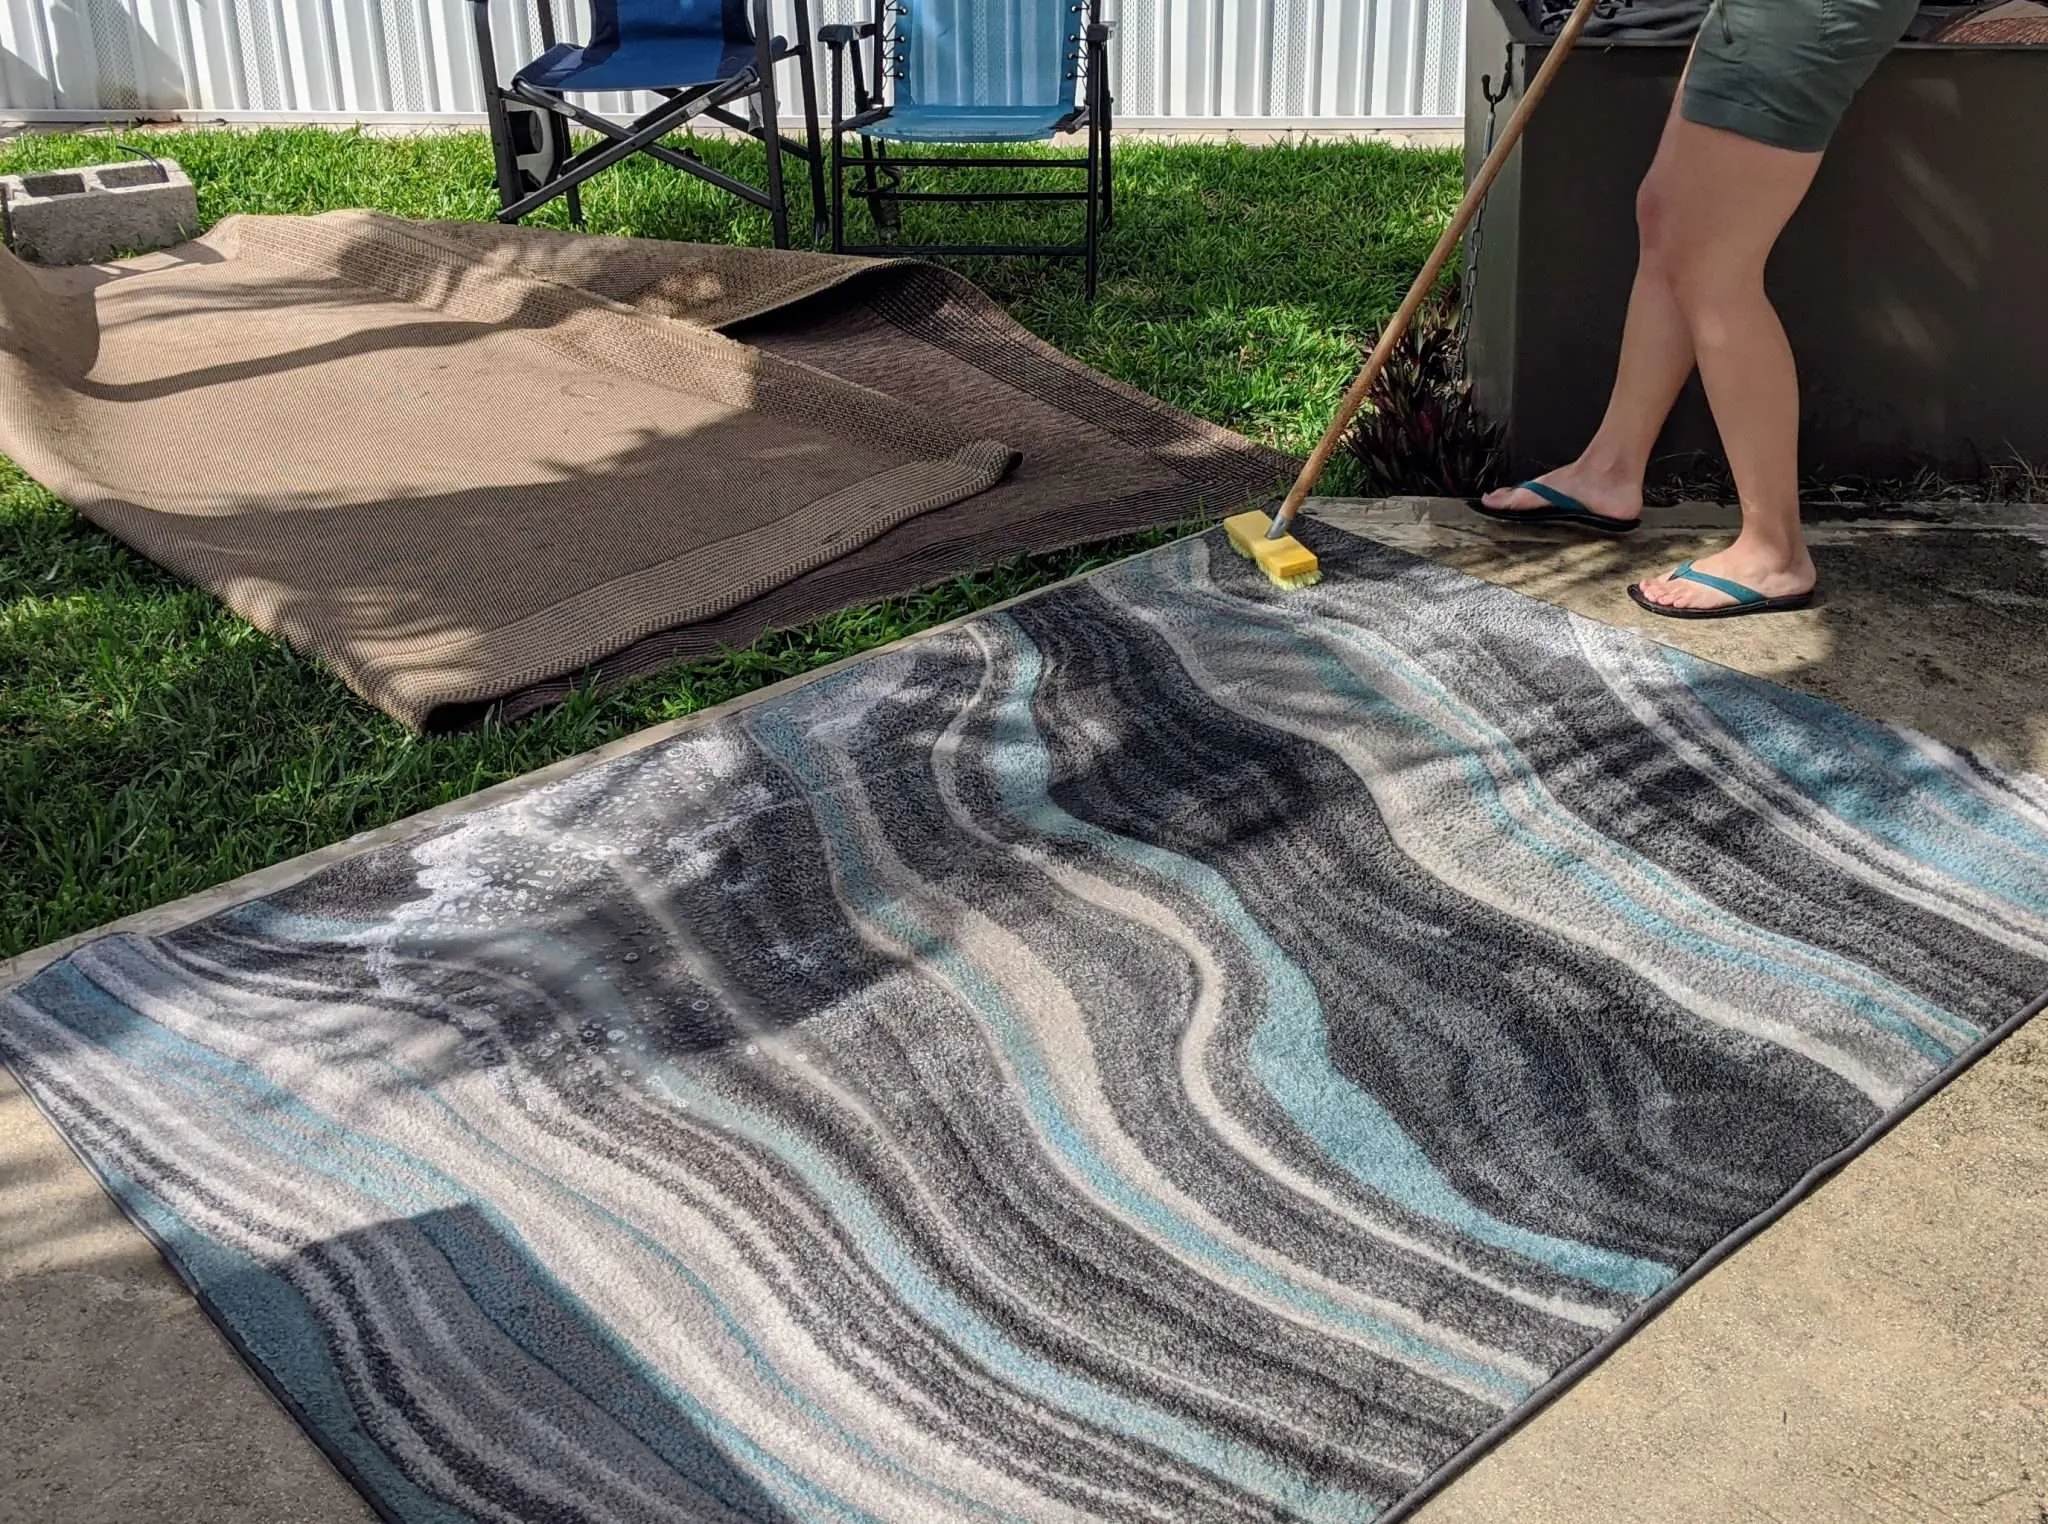
Scrubbing the Rug
After applying the cleaning solution to your area rug, it’s time to scrub the rug to further loosen dirt, lift stains, and ensure a thorough cleaning. Follow these steps to effectively scrub your rug:
- Select the Right Tool: Choose a soft-bristle brush, a sponge, or a clean cloth for scrubbing the rug. Avoid using stiff brushes or abrasive materials, as they can damage the rug’s fibers.
- Work in Sections: Divide the rug into smaller sections for easier handling. This will also allow you to give more attention to heavily soiled areas or stains.
- Gently Scrub: Dip your selected scrubbing tool into the cleaning solution and, using moderate pressure, scrub the rug in circular or back-and-forth motions. Concentrate on areas with stains or dirt buildup. Be careful not to scrub too aggressively, as this can damage the rug’s fibers.
- Pay Attention to Pile Direction: If your rug has a distinct pile direction, scrub in the same direction to avoid disrupting the fibers. This promotes a more even and effective cleaning process.
- Work from the Edges Inward: Start scrubbing from the outer edges of each section and gradually work your way inward. This helps prevent pushing dirt and debris into already cleaned areas.
- Periodically Rinse the Cleaning Tool: As you scrub, periodically rinse the cleaning tool in clean water to remove any dirt or debris that may have accumulated. This will ensure that you are working with a clean tool at all times.
- Apply Extra Solution as Needed: If you encounter stubborn stains or heavily soiled areas, apply a bit more cleaning solution and focus your scrubbing efforts in those spots. Allow the solution to sit for a few minutes before continuing to scrub.
Take your time and work methodically, ensuring that you scrub the entire area rug thoroughly. Be patient and persistent, as removing dirt and stains may require multiple passes.
By effectively scrubbing your area rug, you can loosen dirt, remove stains, and revitalize its appearance. Remember to be gentle and attentive to maintain the integrity of the rug’s fibers throughout the process.
Rinsing Away the Cleaning Solution
After scrubbing your area rug with the cleaning solution, it is crucial to rinse away the solution thoroughly. This step ensures that no cleaning residue or dirt is left behind, leaving your rug clean and fresh. Follow these steps to effectively rinse away the cleaning solution:
- Prepare the Water Source: Set up a hose or fill a clean bucket with fresh, clean water. Ensure that the water is at a suitable temperature, preferably lukewarm, to avoid damaging the rug’s fibers.
- Rinse in Sections: Just as you worked in sections for scrubbing, rinse the rug in sections as well. This will help maintain control and ensure that each part of the rug receives adequate rinsing.
- Use a Gentle Water Stream: If using a hose, attach a nozzle with a gentler water stream setting. Avoid using high-pressure sprays that can damage the rug or push dirt deeper into the fibers.
- Start at the Edges: Begin rinsing from the outer edges of each section and work your way inward. This ensures that dirt and cleaning solution residue are rinsed away effectively.
- Thoroughly Rinse: Direct the water stream across the rug’s surface, moving back and forth, to ensure thorough rinsing. Pay extra attention to areas that were heavily soiled or had stubborn stains.
- Continue Rinsing until Clear: Keep rinsing until the water runs clear and free of any soap suds or cleaning solution residue. This indicates that the rug is thoroughly rinsed.
- Blot or Squeeze Excess Water: Once the rug is adequately rinsed, gently blot or squeeze out the excess water. Avoid wringing or twisting the rug, as this can damage the fibers.
It is important to note that for larger area rugs, you might need to repeat the rinsing process multiple times to ensure complete removal of the cleaning solution.
By properly rinsing away the cleaning solution, you eliminate any residue that can attract dirt and leave your rug looking dull. This step is crucial in achieving a fresh and clean result.
Drying the Area Rug
After rinsing your area rug, it’s time to dry it thoroughly to prevent mold, mildew, and odors from developing. Proper drying is crucial to maintain the rug’s shape, texture, and overall condition. Follow these steps to effectively dry your area rug:
- Remove Excess Water: Gently squeeze or blot the rug with clean towels or absorbent cloths to remove excess water. Be careful not to rub or wring the rug, as this can damage the fibers.
- Hang or Lay Flat: Determine the best drying method based on the size of your rug and the available space. For smaller rugs, you can hang them on a clothesline or over a railing. Larger rugs can be laid flat on a clean and dry surface, such as a patio or driveway.
- Air Circulation: Ensure that there is adequate air circulation around the rug to facilitate drying. Open windows, doors, or use fans to encourage airflow. This will help speed up the drying process.
- Flip and Rotate: If possible, periodically flip and rotate the rug during the drying process. This promotes even drying and prevents the rug from developing any sagging or uneven areas.
- Avoid Direct Sunlight: While it may be tempting to dry your rug in direct sunlight for faster drying, it is best to avoid prolonged exposure to direct sunlight. Excessive sunlight can fade colors and weaken the rug’s fibers over time.
- Patience: Allow sufficient time for the rug to dry completely. Depending on the size and thickness of the rug, this process can take anywhere from a few hours to a couple of days. Avoid placing the rug back inside until it is entirely dry.
It’s important to note that drying times may vary based on the environmental conditions, such as humidity and temperature. Be patient and ensure that the rug is thoroughly dry before bringing it back indoors.
By effectively drying your area rug, you prevent the growth of mold, mildew, and unpleasant odors, helping to maintain its cleanliness and extend its lifespan.
Performing Final Touches
Once your area rug is dry, there are a few final touches you can perform to enhance its appearance and ensure it is in good condition before placing it back in its intended space. Follow these steps to complete the cleaning process:
- Inspect for Remaining Stains: Take a close look at the rug and check for any remaining stains or spots. If you notice any, treat them with a suitable stain remover or a mixture of mild detergent and water. Gently blot the area until the stain is lifted.
- Gently Comb or Brush: Use a soft-bristle brush or a large-toothed comb to gently comb or brush the dried rug. This helps fluff up the fibers, restore the rug’s texture, and remove any residual dirt or debris.
- Trim Loose Fibers: If you notice any loose or frayed fibers, carefully trim them with a pair of scissors. Be cautious not to cut any essential parts of the rug while doing so.
- Apply Rug Protector: Consider applying a rug protector spray to further safeguard your rug against future stains and spills. This protective barrier forms a shield around the fibers, making it easier to clean up any messes that may occur.
- Return Rug to its Intended Space: Once the final touches are complete, carefully move the rug back to its intended space. Use a rug pad underneath to prevent slipping and increase cushioning if desired.
- Maintain Regular Cleaning: To keep your area rug looking its best, maintain regular cleaning practices. Vacuum the rug regularly to remove everyday dirt and debris. For more thorough cleanings, follow the steps discussed in this article to wash the rug outside.
Performing these final touches ensures that your area rug is clean, fresh, and ready to be enjoyed once again. By implementing regular maintenance and promptly treating stains or spills, you can extend the lifespan of your rug and keep it looking its best for years to come.