
Choosing the Right Round Brush
When it comes to creating beautiful curls with a round brush, selecting the right brush is crucial. The size and material of the brush will greatly affect the outcome of your curls. Here are some factors to consider when choosing a round brush:
1. Size: The size of the round brush determines the tightness of the curls. For loose, natural-looking curls, opt for a larger-sized brush. If you prefer tight, defined curls, go for a smaller-sized brush.
2. Bristles: Round brushes come in different types of bristles, including natural bristles, synthetic bristles, or a combination of both. Natural bristles are gentle on the hair and provide excellent grip, making them ideal for fine or delicate hair. Synthetic bristles are more heat-resistant and suitable for thick or coarse hair. Consider your hair type and desired outcome when choosing the type of bristle.
3. Material: Round brushes can be made from various materials, such as ceramic, metal, or tourmaline. Ceramic brushes distribute heat evenly, resulting in faster and more consistent curling. Metal brushes heat up quickly, making them suitable for styling with a blow dryer. Tourmaline brushes emit negative ions that reduce frizz and create smoother, shinier curls.
4. Handle: The handle of the round brush should be comfortable to hold and allow for easy maneuverability. Look for brushes with ergonomic handles and a non-slip grip to prevent any accidental slips during styling.
5. Budget: Consider your budget when selecting a round brush. While high-quality brushes tend to be more expensive, they often offer better performance and durability. However, there are also affordable options available that can still achieve great results.
Remember, finding the right round brush may require some experimentation. Don’t be afraid to try different sizes, materials, and bristle types until you find the brush that works best for your hair. With the right round brush in hand, you’ll be well-equipped to create stunning curls.
Prepping Your Hair
Before you start curling your hair with a round brush, it’s essential to properly prep your hair to ensure the best results. Here are some steps to follow to get your hair ready for styling:
1. Cleanse and condition: Start by washing your hair with a shampoo and conditioner suitable for your hair type. Choose products that help enhance the texture and condition of your hair, as this will make it easier to create curls that last.
2. Apply a heat protectant: Heat styling can be damaging to your hair, so it’s crucial to protect it beforehand. Apply a heat protectant spray or serum to your damp hair, focusing on the ends and lengths. This will create a barrier between your hair and the heat, minimizing potential damage.
3. Detangle your hair: Use a wide-toothed comb or a detangling brush to gently remove any knots or tangles from your hair. Starting from the ends and working your way up to the roots, carefully comb through your hair to ensure it’s smooth and knot-free.
4. Use a volumizing product: If you have fine or flat hair, applying a volumizing product, such as mousse or root-lifting spray, can help add body and lift to your hair. Apply the product to your roots and distribute it evenly throughout your hair using your fingers or a comb.
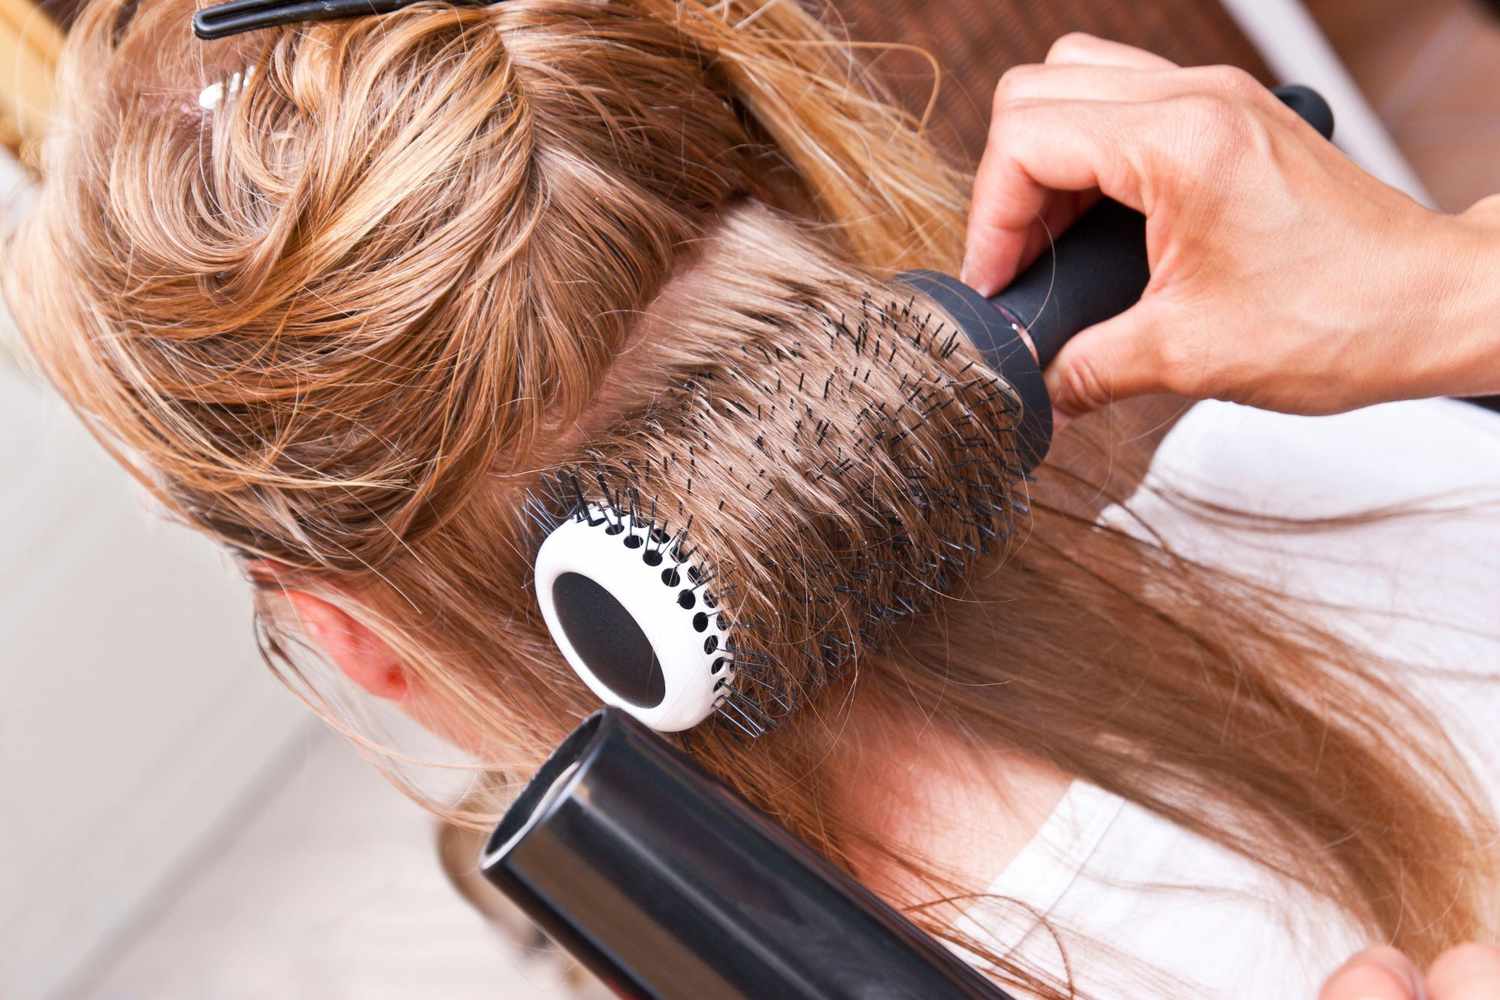
5. Blow dry your hair: Before you start curling, ensure that your hair is completely dry. Use a blow dryer and a round brush to lift the roots and create volume. Start by drying the roots, then work your way down towards the ends, using the round brush to guide the hair and add tension for a smoother finish.
6. Apply a styling product: Depending on your hair type and the desired outcome, you can apply a styling product, such as a curl-enhancing cream or a texturizing spray. These products can help hold the curls and add definition to your hair.
Once you’ve prepped your hair following these steps, it’s time to move on to the next stage: sectioning your hair. Properly preparing your hair will ensure that the curls hold better and last longer, giving you the desired curly hairstyle you’ve been longing for.
Sectioning Your Hair
Properly sectioning your hair before curling is important to ensure that you have control over each strand and achieve a uniform curl pattern. Here’s how to section your hair effectively:
1. Divide your hair into sections: Start by dividing your hair into manageable sections. The number of sections will depend on the thickness and length of your hair. If you have thick hair, you may need more sections, while those with fine hair can work with fewer sections.
2. Use clips or hair ties: Once you’ve determined how many sections you need, secure the rest of your hair with clips or hair ties to keep them out of the way. This will make it easier to focus on one section at a time without getting tangled or overwhelmed.
3. Begin at the back: Start with the lower sections at the back of your head. Take a small section of hair, about 1-2 inches wide, and leave the rest of the hair securely clipped away. This will allow you to work more efficiently and ensure that you don’t miss any strands.
4. Work your way up: Once you’ve completed one section, release another section of hair and continue curling. Repeat this process until you’ve curled all the sections. Starting from the back ensures that the front layers are the freshest and most visible.
5. Take time with each section: When curling each section, take your time to ensure that the hair is properly wrapped around the round brush and heated evenly. This will result in more defined curls and prevent any sections from being missed.
By sectioning your hair before curling, you’ll have better control over your styling process. It allows you to work systematically and ensures that each section receives the attention and heat it needs for beautiful, long-lasting curls.
How to Hold the Round Brush
The way you hold the round brush while curling your hair can greatly affect the outcome of your curls. Here are some tips on how to hold the round brush effectively:
1. Grip the brush handle: Hold the round brush by the handle, ensuring that it feels comfortable and secure in your hand. Your grip should be firm but not too tight, allowing for smooth movements as you curl your hair.
2. Position your hand: Place your hand closer to the brush bristles, near the point where the handle meets the barrel. This will give you better control over the brush and allow you to guide your hair as you curl.
3. Angle the brush: Hold the round brush at a slight angle, with the barrel facing downward. This helps create tension and provides a better grip on the hair, allowing for more effective curling.
4. Use your non-dominant hand: If you’re right-handed, hold the brush with your right hand and use your left hand to hold the section of hair you’re curling. Vice versa if you’re left-handed. This allows for better coordination and control over the brush and the hair.
5. Twist and roll: As you position the brush in your hair, twist it away from your face while rolling it towards the roots. This twisting motion creates tension on the hair and helps create a more defined curl. Keep rolling until you reach the roots, then hold for a few seconds to allow the heat to set the curl.
Remember to work with smaller sections of hair for tighter curls and larger sections for looser curls. Experiment with different techniques and brush angles to find what works best for your hair type and desired curl style.
By mastering the proper way to hold the round brush, you’ll have greater control over the curling process, resulting in beautifully styled hair that will turn heads wherever you go.
Curling Techniques for Different Hair Types
Not every hair type responds the same way to the curling process. Therefore, it’s important to understand how to adjust your curling techniques to suit your specific hair type. Here are some curling techniques for different hair types:
1. Fine or Straight Hair: If you have fine or straight hair, you may need to add extra volume and hold to your curls. Start by using a volumizing mousse or spray on damp hair and blow-dry with a round brush to create lift at the roots. Use a smaller-sized round brush to curl small sections of hair, starting from the roots and wrapping them tightly around the brush. Hold the hair in place for a few seconds, then gently release the curl. Finish with a light-hold hairspray to help the curls stay in place.
2. Thick or Coarse Hair: Thick or coarse hair often requires more heat and time to hold a curl. Begin by applying a heat protectant and using a larger-sized round brush. Take thicker sections of hair and wrap them around the brush, holding for a bit longer than with fine hair. Additionally, you can try using a higher heat setting on your curling tool or holding the curl in place for a few extra seconds to ensure the curl sets. Finish with a strong-hold hairspray to help your curls last longer.
3. Curly or Wavy Hair: If you already have natural curls or waves, you can use a round brush to refine and enhance them. Start with clean, fully dry hair, and use a medium-sized round brush to smooth out and shape your curls. Wrap small sections of hair around the brush, focusing on any areas that may need more definition. Hold the curl for a few seconds, then gently release. Finish with a lightweight hairspray to maintain the shape without weighing down your natural curls.
4. Short Hair: Curling short hair with a round brush may require some creativity. Use a small-sized round brush to add volume and lift at the roots. Take small sections of hair and twist them around the brush, rolling towards the scalp. Hold for a few seconds to set the curl, then release. You can also use a flat iron or a curling wand to create bouncy curls or soft waves in short hair.
Remember, practice makes perfect when it comes to curling techniques. Experiment with different methods and find what works best for your hair type and desired style. Don’t be afraid to try new techniques or seek inspiration from tutorials and hairstyling tips specifically tailored to your hair type.
Creating Loose Curls
Loose curls give a relaxed and effortless look that is perfect for various occasions. Here’s how you can create loose curls using a round brush:
1. Prep your hair: Start by prepping your hair with a heat protectant spray or serum to shield your strands from heat damage. It’s also helpful to apply a curl-enhancing mousse or foam for extra hold and definition.
2. Section your hair: Divide your hair into smaller sections, securing them with clips or hair ties. This will make it easier to work through your hair systematically.
3. Choose the right brush size: Select a larger-sized round brush, as this will create looser, more relaxed curls. Opt for one with natural bristles for better grip and control.
4. Grab a section of hair: Take a small section of hair, about 1-2 inches wide, to work with. Leave the rest of your hair clipped away.
5. Use the round brush: Holding the round brush vertically, position it at the roots of the sectioned hair. Begin to wrap the hair around the brush, away from your face, towards the ends. Roll the brush down the hair shaft, maintaining medium tension.
6. Apply heat: Use a blow dryer on medium heat to gently warm the wrapped hair. Keep the airflow consistent as you move the brush and dryer down the section towards the ends. The heat will help set the curls.
7. Release the curl: Hold the brush in place for a few seconds to let the hair cool down and set. Then, carefully unravel the hair from the brush, allowing it to naturally fall into a loose curl.
8. Repeat the process: Move on to the next section, working your way around your head until all the sections are curled. Make sure to wrap the hair in the same direction consistently to achieve uniform curls.
9. Finishing touches: Once all sections are curled and cooled, use your fingers or a wide-toothed comb to gently separate and loosen the curls for a softer, more natural look. Set the style with a light-hold hairspray to help the curls hold throughout the day.
Creating loose curls with a round brush may take a bit of practice, but with time, you’ll be able to achieve effortless, beachy curls that exude style and grace.
Creating Tight Curls
Tight curls can add a touch of glamour and sophistication to any hairstyle. If you’re looking to create tight curls using a round brush, follow these steps:
1. Prepare your hair: Start by applying a heat protectant spray or serum to shield your hair from the heat. This will help minimize damage and keep your curls looking their best.
2. Section your hair: Divide your hair into smaller sections, securing them with clips or hair ties. This will make it easier to work through your hair methodically.
3. Choose the right brush size: To create tight curls, opt for a smaller-sized round brush. This will allow you to wrap smaller sections of hair tightly around the brush.
4. Take a section of hair: Begin by selecting a small section of hair, approximately 1-2 inches wide. Leave the rest of your hair clipped away while you work on one section at a time.
5. Use the round brush: Hold the round brush horizontally, near the ends of the sectioned hair. Start to wrap the hair around the brush, rolling it towards the roots. Keep the tension firm while rolling the brush down the hair shaft.
6. Apply heat: Use a blow dryer on medium to high heat, directing the airflow onto the wrapped hair. Ensure that the heat is evenly distributed along the section as you move the brush and dryer towards the roots. The heat will help set the tight curls.
7. Hold and cool: Allow the wrapped hair to cool down and set by keeping the brush in place for a few seconds. This will help the curl hold its shape once you release it from the brush.
8. Release the curl: Gently unravel the hair from the brush, allowing it to carefully slide off without disturbing the curl formation. The result should be a tight and defined curl.
9. Repeat and continue: Move on to the next section, following the same steps to curl all the hair. Ensure that you wrap the hair in the same direction consistently to achieve uniform and cohesive curls.
10. Finishing touches: Once all sections are curled and cooled, use your fingers or a wide-toothed comb to separate and loosen the curls slightly, if desired. Apply a light-hold hairspray to set the curls and keep them in place throughout the day.
Creating tight curls with a round brush may require some practice, but with patience and attention to detail, you’ll achieve stunning curls that make a statement.
Curling Tips and Tricks
To achieve the best results when curling your hair with a round brush, consider these helpful tips and tricks:
1. Start with partially dry hair: It’s easier to work with hair that is slightly damp than completely wet. Towel-dry your hair or let it air-dry until it is about 80% dry before starting the curling process.
2. Use a heat protection product: Before applying heat to your hair, always use a heat protectant spray or serum. This will help prevent damage and keep your hair healthy and shiny.
3. Don’t overload the brush: When wrapping your hair around the round brush, make sure you don’t overstuff it. This can prevent the heat from evenly reaching the hair and result in uneven curls. Work with smaller sections for better control.
4. Allow the curls to cool: After releasing the curled section from the round brush, hold the curl in your hand for a few seconds to allow it to cool and set. This will help the curl hold its shape for longer.
5. Vary the direction of the curls: To achieve a more natural and voluminous look, alternate the direction of your curls. Curl some sections toward your face and others away. This will add dimension and prevent the curls from clumping together.
6. Adjust the temperature: If you have fine or delicate hair, use a lower heat setting to prevent excessive heat damage. For thicker or coarser hair, higher heat may be needed to achieve and maintain the desired curl.
7. Don’t rush: Take your time when curling each section of hair. Rushing can lead to under- or over-processed curls. Ensure that the hair is wrapped tightly around the brush and heated evenly for consistent and long-lasting results.
8. Experiment with different techniques: Don’t be afraid to try different curling techniques, such as twisting the hair before wrapping it around the brush or using different brush sizes for varying curl patterns. Find what works best for your hair type and desired style.
9. Practice makes perfect: Curling your hair with a round brush can take some practice to master. Be patient and give yourself time to refine your technique. With persistence, you’ll become more comfortable and confident in creating beautiful curls.
10. Finish with a holding product: To ensure your curls last all day, finish off with a lightweight hairspray or styling product to help hold the curls in place while maintaining a natural look and feel.
By incorporating these tips and tricks into your curling routine, you’ll elevate your styling skills and achieve stunning, long-lasting curls with your round brush.
How to Finish and Maintain Your Curls
After curling your hair with a round brush, it’s important to properly finish and maintain your curls to keep them looking their best. Here are some tips on how to do so:
1. Allow the curls to cool completely: Before touching or styling your curls further, give them some time to cool down and set. This will help the curls to hold their shape better and last longer throughout the day.
2. Gently separate the curls: Once the curls have cooled, use your fingers or a wide-toothed comb to gently separate and loosen the curls for a more natural and voluminous look. Avoid using a brush, as this can cause the curls to frizz or lose their definition.
3. Apply a texturizing or styling product: To enhance the texture and hold of your curls, apply a small amount of texturizing spray, curl cream, or mousse to your hair. This will add definition and help to maintain the shape of your curls throughout the day.
4. Limit touching and excessive brushing: Avoid constantly touching or running your fingers through your curls. This can cause frizz and disrupt the curl pattern. If you need to style or adjust your hair, use your fingers or a wide-toothed comb to avoid disrupting the curls too much.
5. Avoid excessive heat styling: Minimize the use of hot styling tools, such as straighteners and curling irons, between washes. Excessive heat can damage the hair and cause the curls to lose their shape. Embrace your natural curls and use heat styling sparingly.
6. Sleep with care: To preserve your curls overnight, loosely tie your hair in a pineapple or use a satin or silk pillowcase to reduce friction and help maintain the curls’ shape. In the morning, you can freshen up your curls by lightly misting them with water and applying a bit of styling product if needed.
7. Protect from humidity: Humidity can cause curls to frizz and lose their definition. Use a lightweight anti-frizz serum or hairspray with humidity protection to shield your curls from moisture in the air.
8. Regularly trim your hair: Trimming your hair regularly helps to prevent split ends and maintain the overall health of your curls. This allows your curls to look more defined and bouncy.
Remember, every person’s curls are unique, so it may take some experimentation to find the right techniques and products that work best for your hair. With proper finishing and maintenance, you can keep your curls looking gorgeous and full of life until your next wash day.