
Choosing the Right Drying Rack
When it comes to drying your clothes, using a drying rack can be an efficient and eco-friendly option. However, with so many different types of drying racks available on the market, it can be overwhelming to choose the right one for your needs. Here are some factors to consider when selecting a drying rack:
- Size and Capacity: Evaluate the available space in your home and the amount of laundry you typically do. Consider whether you need a smaller rack for occasional use or a larger one for a family’s worth of laundry.
- Design and Construction: Look for a drying rack made from sturdy materials such as stainless steel or high-quality plastic. It should have a stable base and sturdy crossbars to hold the weight of your wet clothes without sagging or tipping over.
- Type of Rack: There are various types of drying racks to choose from, such as freestanding racks, wall-mounted racks, or retractable racks. Consider your storage space and convenience when deciding which type will work best for you.
- Additional Features: Some drying racks come with additional features like wheels for easy mobility, adjustable height for versatile drying options, or clips for hanging delicate items. Assess your specific needs and choose a rack that offers the features that are important to you.
- Price: Determine your budget and compare prices of different drying racks. While it’s important to find one that fits within your budget, remember that investing in a high-quality drying rack can ensure its durability and longevity.
By considering these factors, you can find the perfect drying rack that suits your needs and preferences. Whether you live in a small apartment or have a large family, a well-chosen drying rack will make the task of drying clothes more efficient and hassle-free.
Setting Up the Drying Rack
Once you have chosen the right drying rack for your needs, it’s time to set it up. Here are some steps to help you effectively set up your drying rack:
- Choose the location: Select a suitable spot in your home to set up the drying rack. Ideally, it should be in a well-ventilated area with enough space for the clothes to hang without touching each other.
- Prepare the area: Before placing the drying rack, ensure that the floor or surface is clean and dry. This will prevent any dirt or moisture from transferring onto your freshly washed clothes.
- Unfold or assemble the rack: If you have a collapsible drying rack, unfold it and lock it into position. In the case of an assembled rack, make sure all the parts are securely connected.
- Stabilize the rack: If your drying rack has adjustable legs or supports, make sure they are properly extended to provide stability. This will prevent any wobbling or tipping over when clothes are hung.
- Ensure proper spacing: Maintain an adequate distance between each clothing item on the rack. This will allow air to circulate efficiently around the garments, ensuring even drying.
- Use the pegs and hooks: Utilize the pegs or hooks provided with your rack to hang smaller items such as socks, undergarments, or delicate fabrics. This will free up space on the drying rods for larger items.
- Organize clothes by weight: Place heavier items on the bottom or center of the rack to distribute weight evenly. This will prevent the rack from tipping over and ensure proper drying of all garments.
- Leave room for air circulation: Avoid overcrowding the drying rack as this can hinder airflow and extend drying time. Allow enough space between clothes to ensure they dry thoroughly and efficiently.
Follow these steps when setting up your drying rack to maximize its efficiency and ensure your clothes dry properly. A well-organized and properly positioned drying rack will make the drying process smoother and help your clothes maintain their quality for longer periods of time.
Sorting Clothes for Drying
Properly sorting your clothes before hanging them on the drying rack can help ensure efficient drying and prevent any potential damage. Here are some tips to help you sort your clothes effectively:
- Separate by fabric type: Sort your clothes into different piles based on their fabric type. This will prevent color bleeding and minimize the risk of damage to delicate fabrics.
- Group by weight: Separate heavier garments, such as jeans and towels, from lighter ones like t-shirts and underwear. Hanging lighter items on top of heavier ones can cause the heavier items to take longer to dry.
- Consider care instructions: Check the care labels on your clothing to identify any specific drying instructions. Some garments may need to be air-dried completely, while others may be suitable for partial drying before finishing off on a rack.
- Handle delicate fabrics with care: Delicate fabrics like silk or lace should be given special attention. Consider placing them on a mesh garment bag or using clothespins to secure them to the rack gently. This will minimize stretching or misshaping.
- Treat stains or spots: If you have any clothing items with stains or spots, it’s best to spot treat them before hanging them on the drying rack. This will prevent the stain from setting and make it easier to remove later.
- Turn clothes inside out: For garments that are prone to fading or have intricate designs, turn them inside out before hanging them. This will help preserve the color and prevent damage to any delicate embellishments.
- Separate lint-producing items: To prevent lint from transferring onto other clothes, separate items like towels, bathrobes, or fuzzy sweaters. Hanging them separately will minimize any potential lint transfer.
- Organize clothes by size: If you are drying clothes of different sizes, consider hanging similar-sized garments together. This will make it easier to retrieve and fold them once they are dry.
By following these sorting tips, you can ensure that your clothes dry efficiently, maintain their quality, and are ready for use in no time. Taking the extra time to sort your clothes before hanging them on the drying rack will help extend their lifespan and keep them looking their best.
Hanging Clothes on the Drying Rack
Once you have sorted your clothes, it’s time to hang them on the drying rack properly. Here are some guidelines to follow when hanging clothes on a drying rack:
- Start with larger items: Begin by hanging larger items such as bedsheets or tablecloths. These items require more space and are easier to handle when there is still ample room on the drying rack.
- Hang shirts and tops: Hang shirts and tops by draping them over the horizontal rods or using clothespins. Smooth out any wrinkles and ensure the garments are spread evenly to facilitate proper air circulation.
- Use hangers for dresses and skirts: If you have dresses or skirts that may be prone to stretching or wrinkling, consider using hangers to hang them on the drying rack. This will help maintain their shape and minimize creases.
- Secure small items with clothespins: Use clothespins to hang small items like socks, underwear, or baby clothes. Attach them to the horizontal rods or the rack’s designated hooks to prevent them from falling or getting separated.
- Avoid overcrowding: Ensure that there is enough space between each garment on the drying rack. Overcrowding can lead to longer drying times and may result in clothes not drying properly.
- Hang pants and bottoms: Hang pants or bottoms over the horizontal rods. Fold them carefully to avoid unnecessary creasing and make sure they are evenly distributed across the drying rack.
- Open up sweater sleeves: If you are drying sweaters on the rack, open up the sleeves to allow air to circulate inside. This will help speed up the drying process and prevent any potential damp spots.
- Attach delicates with care: For delicates such as lingerie or fine knits, use clothespins or hangers to securely attach them to the drying rack. Be gentle to avoid stretching or damaging the delicate fabric.
- Separate items by color: If you have clothes in different colors, consider hanging them separately on the drying rack to prevent any potential color transfer.
- Check for even weight distribution: Periodically check the drying rack to ensure that the weight of the clothes is evenly distributed. Adjust the placement of heavier items if necessary to maintain balance and stability.
By following these tips, you can ensure that your clothes are hung properly on the drying rack for optimal drying results. Taking the time to hang garments carefully will help preserve their shape, reduce wrinkles, and ensure they dry efficiently and quickly.
Maximizing Space on the Drying Rack
When it comes to drying clothes on a rack, maximizing the available space is essential, especially if you have limited room. Here are some tips to help you make the most of the space on your drying rack:
- Use vertical space: Consider utilizing the vertical space on your drying rack by hanging clothes on multiple levels. Many drying racks have adjustable rods or additional hooks to accommodate more garments.
- Hang items close together: Hang clothes closely together, but with enough space for air to circulate. By doing this, you can fit more items on the rack without sacrificing drying efficiency.
- Invest in accessories: Look for accessories such as clothes hangers, clips, or lingerie bags to help maximize space. These items can hold smaller garments or delicate items and allow you to hang more clothes on the rack.
- Utilize the ends of the rack: Make use of the ends of the drying rack by hanging items that are longer or bulkier, such as bath towels or long pants. This will prevent these items from interfering with other clothes on the rack.
- Hang clothes from the sides: If your drying rack has side hooks or bars, take advantage of them by hanging additional clothes. This can be useful for lightweight or smaller items that do not require as much space.
- Consider folding techniques: Opt for space-saving folding techniques when hanging clothes on the drying rack. For example, fold t-shirts in a compact manner or roll socks to maximize the available space.
- Alternate directions: Hang clothes in alternating directions to create more space. For example, hang some items horizontally and others vertically. This allows for better airflow and increases the overall capacity of the drying rack.
- Hang clothes outside the rack: If your drying rack has side supports or hooks, consider hanging clothes directly on them. This can create extra hanging space on the rack itself for more items.
- Remove unnecessary items: Remove any items that are already dry or close to being dry from the drying rack. This will free up space for wet clothes that still need to dry.
- Use additional drying racks: If you have a significant amount of laundry to dry, consider investing in an additional drying rack. Having multiple racks will provide more space to hang clothes and speed up the drying process.
By implementing these space-maximizing strategies, you can make the most of your drying rack’s capacity and efficiently dry a larger quantity of clothes. This will help you save space, time, and ensure that all your laundry dries thoroughly and quickly.
Drying Delicate Items
When it comes to drying delicate items, such as lingerie, silk garments, or delicate knits, it’s important to take extra care to prevent any damage or stretching. Here are some tips to help you properly dry delicate items:
- Read the care labels: Always check the care labels on delicate garments for specific drying instructions. Some items may require air-drying or low-heat settings.
- Air-dry fragile fabrics: For delicate fabrics that are prone to stretching or damage, consider air-drying them. Lay them flat on a clean, dry towel or a mesh drying rack to maintain their shape and prevent stretching.
- Use a mesh garment bag: Place delicate items like lingerie or fine knits inside a mesh garment bag before hanging them on the drying rack. This will protect them from snagging on other clothes or getting stretched out.
- Reduce drying time: Delicate items often dry quickly, so check them frequently to avoid over-drying. Remove them from the drying rack as soon as they are dry to prevent wrinkles or damage caused by prolonged drying.
- Pin or clip delicate fabrics: Use clothespins or clips with rubber grips to secure delicate items to the drying rack. This prevents them from slipping or getting misshapen during the drying process.
- Avoid direct sunlight: Keep delicate items away from direct sunlight, as it can cause fading or discoloration. Find a shaded area or an indoor spot with good air circulation to hang them on the drying rack.
- Separate delicate colors: If you have delicate items in different colors, it’s advisable to hang them separately on the drying rack to prevent any potential color transfer or bleeding.
- Handle with care: When removing delicate items from the drying rack, handle them gently to avoid snagging or stretching. Fold and store them carefully to maintain their quality until they are ready to be worn again.
- Consider flat drying: Some delicate items, such as intricate lace or sequined garments, may require flat drying rather than hanging. Lay them flat on a clean, dry surface or use a mesh drying rack to preserve their shape and prevent any damage.
- Steam or iron carefully: If necessary, use a handheld steamer or a low-heat iron to remove any wrinkles from the delicate items after they are dry. Be cautious and use gentle heat to avoid causing any damage.
By following these tips, you can ensure that your delicate items are dried safely and maintain their quality for a longer period of time. Properly caring for delicate fabrics during the drying process will help them look their best and extend their lifespan.
Drying Time and Care Instructions
Understanding the appropriate drying time and following care instructions for your clothes is essential to ensure they dry thoroughly and retain their quality. Here are some tips to help you determine drying time and follow care instructions effectively:
- Refer to care labels: Always check the care labels attached to your garments for specific drying instructions. They often provide important information regarding heat settings, tumble drying, or air-drying recommendations.
- Consider fabric type: Different fabrics have varying drying times. Natural fibers like cotton or linen usually take longer to dry compared to synthetic fabrics like polyester or nylon. Take the fabric type into account when estimating drying time.
- Check garment thickness: Thicker garments, such as chunky sweaters or bath towels, will require more time to dry compared to thinner items. Ensure that you give them adequate drying time to prevent dampness or moisture retention.
- Avoid overloading: Overloading the drying rack can result in longer drying times and inefficient air circulation. It is recommended to dry clothes in smaller batches to allow proper airflow and reduce drying time.
- Factor in humidity: Humidity levels in your home can affect drying time. If the air is humid, clothes may take longer to dry. Consider using a dehumidifier or positioning the drying rack in a well-ventilated area to speed up drying.
- Be mindful of temperature: Higher temperatures generally lead to faster drying times. However, some fabrics may be sensitive to heat and require low-heat settings or air-drying. It’s crucial to follow the temperature recommendations provided on the care labels.
- Check for moisture: Before removing clothes from the drying rack, ensure they are completely dry. Feel the garments to detect any lingering dampness, particularly in thicker or more absorbent fabrics, to avoid potential mildew or musty odors.
- Follow special instructions: Certain garments, such as those with embellishments, waterproof coatings, or delicate trims, may require special care instructions. Be sure to follow these instructions diligently to preserve the quality and appearance of the item.
- Make adjustments as needed: There may be instances where the recommended drying time or care instructions need to be adjusted based on your specific circumstances. Use your judgment or seek professional advice to ensure the best care for your clothes.
- Stay vigilant with delicate items: Delicate fabrics, such as silk or lace, may require extra attention. Always handle them with care and consider lower heat settings or air-drying to prevent damage or shrinkage.
By considering drying time and following the care instructions provided, you can ensure that your clothes dry effectively and maintain their quality. Proper care during the drying process will help prolong the lifespan of your garments, keeping them in excellent condition for years to come.
Dealing with Wrinkles
Wrinkles can be a common issue when drying clothes on a rack. However, there are several effective ways to deal with wrinkles and ensure your garments come out looking smooth and wrinkle-free. Here are some tips to help you handle wrinkles:
- Smooth clothes before hanging: Take a moment to smooth out any wrinkles in your clothes before hanging them on the drying rack. Gently pull the fabric and flatten out any creases with your hands.
- Shake out garments: Give your clothes a good shake before hanging them. This will help loosen any wrinkles and distribute the fabric, making it easier for them to dry without excessive creasing.
- Hang clothes with care: Ensure that you hang clothes evenly and with enough space between them on the drying rack. This will help minimize fabric-to-fabric contact, reducing the likelihood of wrinkles forming during the drying process.
- Use gravity to your advantage: Let gravity do some of the work for you by hanging clothes strategically. Hang shirts or tops upside down to help gravity pull out any creases, especially around the shoulders.
- Consider garment weights: Heavier items like jeans or towels are less likely to wrinkle. Hang lighter garments over heavier ones, allowing the weight of the heavier items to help smooth out wrinkles in the lighter fabric.
- Reposition clothes during drying: Periodically rearrange clothes on the drying rack to expose different areas to the airflow. This can help minimize wrinkles by ensuring even drying throughout the garment.
- Use a fabric steamer: If wrinkles still persist after clothes are dry, use a fabric steamer to gently remove wrinkles. Hold the steamer a few inches away from the fabric and move it in a sweeping motion to release the wrinkles.
- Try a wrinkle-releasing spray: Use a wrinkle-releasing spray on clothes before hanging them on the drying rack. Follow the instructions on the product to mist the garment and let it air dry, which can help reduce wrinkles.
- Dry clothes in a steamy bathroom: Hang clothes on the drying rack inside a steamy bathroom. The steam will help relax the fabric fibers and release wrinkles naturally, leaving your clothes looking smoother.
- Iron as a last resort: If all else fails, use a low-heat iron or a garment steamer to iron out persistent wrinkles. Follow the garment’s care instructions and use a pressing cloth to protect the fabric if necessary.
By implementing these strategies, you can effectively deal with wrinkles and ensure that your clothes come out of the drying process looking neat and presentable. With a little extra care and attention, you can minimize wrinkles and have clothes that are ready to wear without the need for extensive ironing.
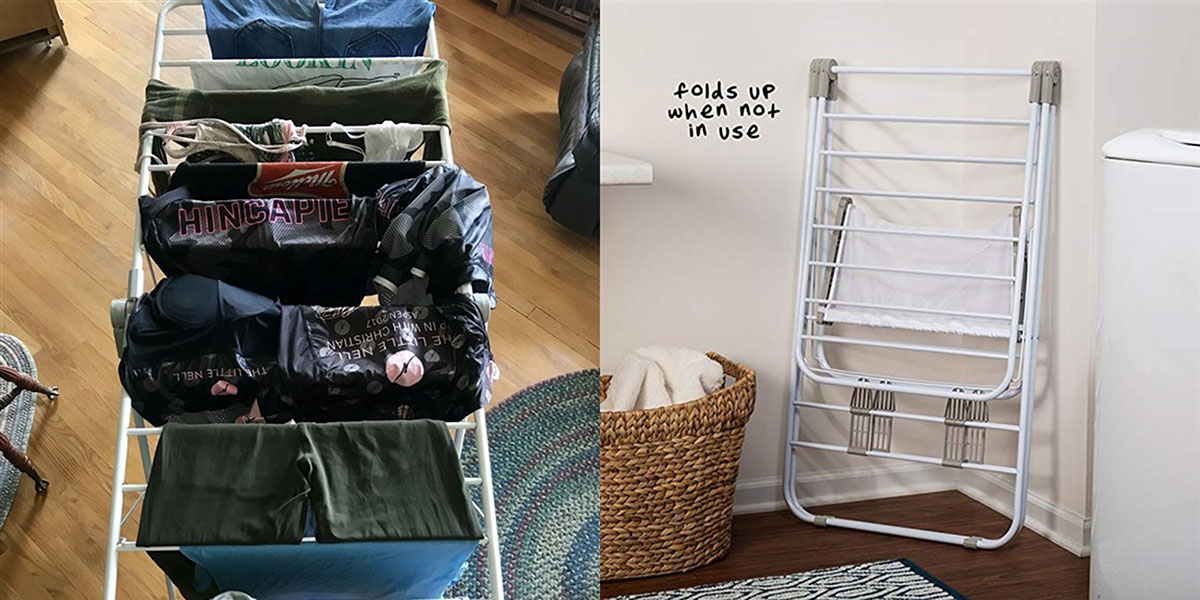
Storing the Drying Rack
Properly storing your drying rack when it’s not in use is essential to keep it in good condition and maximize its lifespan. Follow these tips to ensure your drying rack is stored efficiently:
- Clean and dry the rack: Before storing the drying rack, make sure it is clean and completely dry. Wipe it down with a damp cloth to remove any dust or debris, and allow it to air dry thoroughly.
- Disassemble if necessary: If your drying rack is collapsible or comes apart, disassemble it as per the manufacturer’s instructions. This will make it easier to store and save space in your storage area.
- Choose an appropriate storage location: Find a suitable storage area for your drying rack. Ideally, select a spot that is dry, well-ventilated, and protected from extreme temperatures or humidity to prevent any damage to the rack.
- Consider hanging storage: If space allows, consider hanging the drying rack on a wall or the back of a door. This frees up precious floor or shelf space and keeps the rack easily accessible for future use.
- Use a storage bag or cover: If your drying rack came with a storage bag or cover, utilize it to protect the rack from dust or potential damage while in storage. This will help maintain its cleanliness and extend its lifespan.
- Store smaller components together: If your drying rack has detachable parts such as pegs or hooks, store them together in a separate bag or container. This way, you can keep all the components organized and easily accessible when needed.
- Label or categorize: If you have multiple drying racks or storage items, consider labeling or categorizing them. This will make it easier to locate the drying rack when you need it and streamline the storage process.
- Keep it away from children or pets: Store the drying rack in a secure location, away from children or pets who may accidentally knock it over or get tangled in the rack’s components.
- Check for any damage: Before storing the rack, inspect it for any signs of damage. Repair or replace any broken or malfunctioning parts to ensure the rack is safe and functional for future use.
- Regularly maintain and clean: Periodically check and clean your drying rack even during storage to prevent any build-up of dust or debris. This will ensure that the rack remains in good condition and ready for use whenever needed.
By following these storage tips, you can ensure that your drying rack is kept in good condition and readily available for future use. Proper storage will help preserve the rack’s quality and functionality, allowing you to continue to efficiently air-dry your clothes for years to come.
Cleaning and Maintenance Tips
Maintaining a clean and well-maintained drying rack is crucial to ensure its longevity and efficient performance. Follow these cleaning and maintenance tips to keep your drying rack in excellent condition:
- Regularly remove lint and debris: Remove any accumulated lint or debris from the drying rack after each use. Use a lint roller, brush, or a damp cloth to wipe down the rack and remove any loose fibers or dirt.
- Inspect for wear and tear: Periodically inspect the drying rack for any signs of wear and tear. Check the structure, hinges, and connectors for stability, and repair or replace any damaged parts promptly to prevent further damage.
- Clean with mild detergent: If your drying rack requires a deeper clean, use a mild detergent and warm water solution. Gently scrub the rack with a soft brush or cloth, paying attention to any dirt or stains. Rinse thoroughly and allow the rack to dry completely before use.
- Avoid abrasive cleaners: Refrain from using harsh or abrasive cleaners, as they can damage the finish or material of the drying rack. Stick to gentle cleaning solutions to maintain the integrity of the rack’s components.
- Prevent rust on metal racks: If you have a metal drying rack, keep it dry to prevent rust formation. Wipe down the metal parts with a dry cloth after use to remove any moisture and store the rack in a dry location.
- Check and tighten connections: Regularly check the connections and joints of the drying rack to ensure they are secure. Tighten any loose screws or fittings to maintain the stability and functionality of the rack.
- Avoid overloading: Be mindful of weight limits and avoid overloading the drying rack. Excessive weight can strain the structure and cause damage. Follow the manufacturer’s recommendations for maximum load capacity.
- Store in a dry environment: When the drying rack is not in use, store it in a dry environment to prevent moisture damage or mold growth. Avoid areas with high humidity, and ensure the rack is completely dry before storing to prevent musty odors.
- Keep away from direct sunlight: Prolonged exposure to direct sunlight can fade or weaken the materials of the drying rack. Store it in a shaded area or use a cover to protect it from harmful UV rays.
- Follow manufacturer’s instructions: Always refer to the manufacturer’s instructions and guidelines for cleaning and maintenance. They will provide specific recommendations for your specific drying rack model to ensure proper care.
By following these cleaning and maintenance tips, you can keep your drying rack in optimal condition and extend its lifespan. A well-maintained drying rack will continue to serve you efficiently, allowing you to easily air-dry your clothes for years to come.