
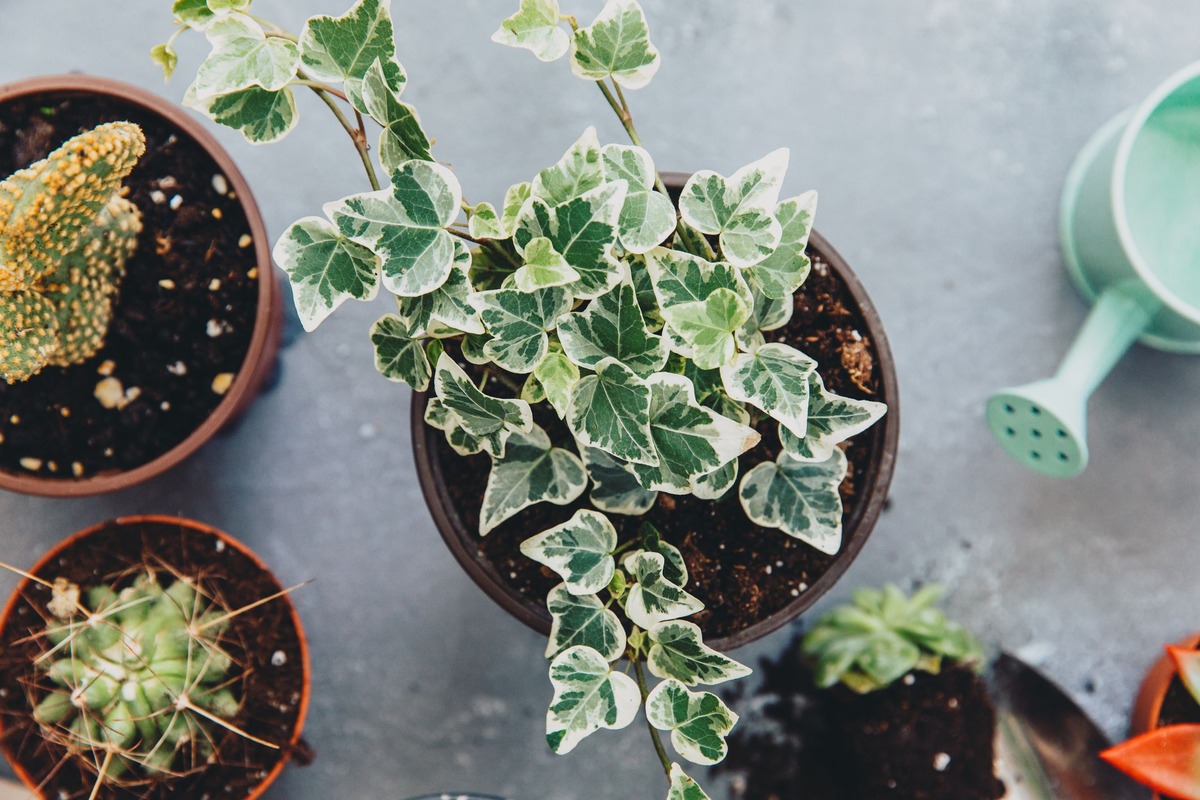
Choosing the Right Location
When it comes to caring for an ivy plant, one of the most crucial factors is choosing the right location. The ideal location will provide the plant with the right conditions to thrive and grow. Here are some important considerations to keep in mind:
- Light Requirements: Ivy plants are versatile and can tolerate different light conditions. However, they generally prefer bright, indirect light. Place your ivy plant in a spot where it can receive a few hours of morning or evening sunlight, but avoid exposing it to direct, harsh sunlight.
- Temperature: Ivy plants prefer moderate temperatures between 50 and 70°F (10-21°C). Avoid placing the plant in a location with extreme temperature fluctuations or near drafty areas, such as near vents or doors.
- Adequate Space: Ivy plants are vigorous growers and require ample space to spread their leaves. Make sure to choose a location where the plant has enough room for growth without being crowded.
- Avoid Cold Drafts: Ivy plants are sensitive to cold drafts, so it’s important to place them away from doors and windows during the winter months.
By considering these factors, you can provide your ivy plant with an ideal location that promotes healthy growth and development. Remember to regularly monitor the conditions in the chosen location and make any necessary adjustments to ensure optimal care for your ivy plant.
Providing the Right Light
Proper lighting is essential for the health and growth of an ivy plant. While ivy plants can tolerate different light conditions, providing the right amount and quality of light is key. Here are some tips for ensuring your ivy plant gets the light it needs:
- Indirect Light: Ivy plants thrive in bright, indirect light. Place your plant near a window where it can receive moderate light without being exposed to direct sunlight. Direct sunlight can scorch the leaves and cause damage.
- Rotate the Plant: To ensure even growth, rotate your ivy plant every few weeks. This will prevent the plant from leaning or growing unevenly towards the light source. By rotating the plant, all sides will receive equal exposure to light, resulting in a balanced and healthy appearance.
- Monitor Light Intensity: Different ivy varieties have varying light requirements. Some may prefer lower light conditions, while others may tolerate higher levels of light. Monitor the intensity of light your particular ivy plant is receiving, and adjust accordingly to prevent issues like leaf burning or yellowing.
- Supplement with Artificial Light: If you’re unable to provide sufficient natural light, you can supplement with artificial light sources. Use fluorescent grow lights or LED lights designed for plants. Place the lights a few feet above the plant and leave them on for 12-14 hours a day, mimicking the natural light cycle.
Remember to observe your ivy plant closely and make adjustments as needed. If the leaves start to turn pale or yellowish, it may be a sign of too much light. On the other hand, if the plant is growing leggy and thin, it may indicate insufficient light. Finding the right balance will ensure healthy growth and vibrant foliage for your ivy plant.
Proper Watering Techniques
Watering is a crucial aspect of caring for an ivy plant. Proper watering techniques will ensure that the plant stays adequately hydrated without being overwatered. Here are some tips to help you master the art of watering your ivy plant:
- Check Moisture Levels: Before watering, always check the moisture levels of the soil. Insert your finger about an inch into the soil. If it feels dry, it’s time to water the plant. If it’s still moist, hold off on watering for a few more days.
- Watering Frequency: The frequency of watering will depend on various factors such as the size of the plant, the type of pot, and the environmental conditions. In general, aim for a thorough watering when the top inch of soil feels dry. Avoid overwatering, as it can lead to root rot and other issues.
- Watering Method: When watering your ivy plant, use a watering can or a slow, steady stream of water. Avoid splashing water directly onto the leaves as it can cause fungal diseases. Instead, water at the base of the plant and let the soil absorb the moisture.
- Drainage: Ensure that the pot or container has proper drainage holes to allow excess water to escape. Standing water can lead to root rot and other diseases. If your pot doesn’t have drainage holes, consider repotting the ivy into a container that does.
- Consistency: Maintain a consistent watering schedule for your ivy plant. Fluctuating between dry and wet conditions can stress the plant and affect its overall health. Aim for regular, moderate moisture levels to keep the plant happy.
Remember that while ivy plants like moisture, they do not tolerate soggy conditions. It’s better to slightly underwater than to overwater. By following these watering techniques, you can ensure that your ivy plant receives the right amount of water for optimal growth and vitality.
Maintaining the Right Temperature and Humidity
Temperature and humidity play crucial roles in the overall health and well-being of an ivy plant. Creating and maintaining the ideal environment will help your ivy thrive. Here are some tips to ensure that you provide the right temperature and humidity:
- Temperature Range: Ivy plants prefer moderate temperatures between 50°F and 70°F (10°C and 21°C). Avoid exposing your ivy plant to extreme temperature fluctuations, such as drafts from doors or windows, as well as air conditioning or heating vents. Sudden temperature changes can stress the plant.
- Avoid Cold Drafts: Ivy plants are sensitive to cold drafts, so it’s important to keep them away from doors and windows during the winter months. Cold drafts can cause leaf discoloration and slow down growth. Consider moving the plant to a warmer location or providing additional insulation.
- Consistent Humidity: Ivy plants prefer moderate to high humidity levels. To increase humidity, you can mist the leaves occasionally. Another option is to place the ivy pot on a tray filled with water and pebbles. As the water evaporates, it will create a humid microclimate around the plant.
- Avoid Dry Air: Dry air can be detrimental to ivy plants, especially in heated indoor environments during winter. Consider using a humidifier to increase moisture levels in the air or place a shallow dish of water near the plant to help combat dryness.
- Monitor Humidity Levels: Use a hygrometer to monitor the humidity levels in the room where your ivy plant is located. The ideal humidity range for ivy plants is around 40-60%. If the humidity levels are consistently below this range, consider adopting measures to increase moisture in the air.
Providing the right temperature and humidity conditions for your ivy plant will promote healthy growth and lush foliage. By paying attention to these factors, you can create an optimal environment that mimics the plant’s natural habitat, ensuring its overall well-being and longevity.
Fertilizing the Ivy PlantFertilizing is an important aspect of caring for an ivy plant as it provides essential nutrients for growth and promotes overall vigor. Although ivy plants are generally low-maintenance, they can benefit from occasional fertilization. Here are some tips to help you fertilize your ivy plant effectively:
- Choose the Right Fertilizer: Look for a balanced, water-soluble fertilizer with a ratio of 10-10-10 or a similar formulation. This means the fertilizer contains equal amounts of nitrogen (N), phosphorus (P), and potassium (K). Alternatively, you can use a specialized houseplant fertilizer that includes micronutrients.
- Fertilize During the Growing Season: Feed your ivy plant with fertilizer during the active growing season, which is typically spring and summer. Ivy plants go through a period of dormancy in winter, and fertilizing during this time is generally unnecessary. Read the instructions on the fertilizer packaging for specific guidelines on frequency and application amounts.
- Dilute the Fertilizer: It’s essential to dilute the fertilizer to avoid overwhelming the plant with concentrated nutrients. Follow the package instructions for the correct dilution ratio. Mixing the fertilizer with water will ensure even distribution and prevent chemical burns to the roots.
- Apply Fertilizer with Care: Slowly pour the diluted fertilizer around the base of the ivy plant, taking care not to splash it on the leaves. Avoid over-fertilizing, as excessive amounts of nutrients can harm the plant’s roots and lead to salt buildup in the soil.
- Monitor the Plant’s Response: Watch for signs of overfertilization or nutrient deficiencies in your ivy plant. If the leaves turn brown or black and the plant shows signs of stress, flush the soil with water to leach out excess salts. If the leaves appear pale or yellowish, it may indicate a lack of nutrients, in which case you can adjust the fertilization schedule.
Proper fertilization will provide the necessary nutrients for your ivy plant’s healthy growth and vibrancy. Remember to follow the instructions on the fertilizer packaging, adopt a balanced approach, and monitor your plant’s response to ensure optimal care.
Pruning and Shaping the Ivy Plant
Pruning is an essential part of maintaining the health and appearance of an ivy plant. Regular pruning not only helps control the plant’s size but also encourages bushier growth and removes any dead or damaged foliage. Here are some tips to guide you in pruning and shaping your ivy plant:
- Timing: The best time to prune ivy plants is during the spring or early summer when they are actively growing. Avoid pruning during the winter or when the plant is in a dormant state.
- Tools: Use clean and sharp pruning shears or scissors to make clean cuts. Sterilize the tools with rubbing alcohol before and after pruning to prevent the spread of diseases.
- Remove Dead or Dying Foliage: Start by inspecting the plant and identifying any dead or yellowed leaves. Using your pruners, carefully remove these leaves at the base of the stem. This will enhance the plant’s aesthetics and promote new growth.
- Trimming Overgrown Vines: If your ivy plant has long, straggly vines, you can trim them back to encourage bushier growth. Identify the desired length and cut the vines just above a leaf node or joint. This will stimulate new growth and create a fuller appearance.
- Shaping and Training: Ivy plants can be trained to climb walls, trellises, or other support structures. As the plants grow, gently guide the vines in the desired direction and secure them with plant ties or twist ties. Regularly prune any excessive growth to maintain the desired shape and prevent the plant from becoming too unruly.
- Step Back and Assess: Don’t be afraid to step back and assess your work as you prune and shape your ivy plant. Take breaks and observe the overall appearance from different angles to ensure a balanced and aesthetically pleasing result.
Remember that pruning is a gradual process, and it’s best to prune lightly rather than removing too much foliage at once. Regularly inspect your ivy plant and repeat the pruning process as needed to maintain its health, shape, and overall attractiveness.
Preventing Pests and Diseases
Pests and diseases can pose a threat to the health and vitality of your ivy plant. Taking preventive measures is key to keeping your plant pest-free and minimizing the risk of diseases. Here are some tips to help you prevent pests and diseases from affecting your ivy plant:
- Inspect Regularly: Regularly inspect your ivy plant for any signs of pests or diseases. Look for pests like aphids, mealybugs, spider mites, or scale insects, as well as any unusual spots, discoloration, or wilting of leaves. Early detection is crucial for effective prevention and control.
- Isolate New Plants: When bringing in new plants or cuttings, isolate them from your existing plants for a few weeks. This will help prevent the spread of any potential pests or diseases to your ivy plant. Monitor the new plants closely during this isolation period before integrating them into your established plant collection.
- Good Air Circulation: Ensure proper air circulation around your ivy plant. Good airflow helps prevent the buildup of moisture, reducing the risk of fungal diseases. Avoid placing the plant in crowded areas or near obstructions that can hinder air movement.
- Avoid Overwatering: Overwatering not only affects the health of your ivy plant but can also create a favorable environment for pests and diseases. Be mindful of watering practices and avoid keeping the soil constantly damp. Allow the top inch of soil to dry out between waterings.
- Cleanliness: Maintain a clean environment around your ivy plant. Remove any fallen leaves or debris promptly, as they can attract pests or harbor disease-causing pathogens. Regularly wipe down the leaves to remove dust and discourage pests from settling on the foliage.
- Natural Remedies: Consider using natural pest control methods like neem oil, insecticidal soap, or a homemade solution of water and mild dish soap to treat common pests. However, always test these remedies on a small area of the plant first to ensure that they do not cause any adverse reactions.
By following these preventive measures, you can significantly reduce the risk of pests and diseases affecting your ivy plant. Regular monitoring and maintaining a healthy growing environment will help keep your ivy plant thriving and pest-free.
Repotting the Ivy Plant
Repotting is an important part of caring for an ivy plant and ensuring its ongoing growth and health. Repotting allows for necessary root maintenance, provides fresh soil, and gives the plant more room to grow. Here are some key steps to follow when repotting your ivy plant:
- Timing: Repot your ivy plant every 1-2 years or when you notice it becoming root-bound. Spring or early summer is generally the best time for repotting, as it aligns with the plant’s active growth period.
- Choose the Right Pot: Select a pot that is slightly larger than the current one, allowing enough room for the roots to grow. Ensure that the new pot has drainage holes to prevent water from pooling at the bottom, which can lead to root rot.
- Prepare the New Pot: Place a layer of fresh, well-draining potting mix at the bottom of the new pot. This will provide a healthy start for the newly repotted ivy plant.
- Remove the Plant from the Old Pot: Gently tap the old pot or squeeze it to loosen the root ball. Carefully lift the ivy plant out of the old pot, supporting the base of the stem to avoid any damage to the plant or its roots.
- Inspect and Prune: Examine the root system for any signs of rot, damage, or overgrowth. Trim any unhealthy or excessively long roots using clean and sharp scissors or pruning shears. This will encourage healthy new growth.
- Repot and Fill: Place the ivy plant in the center of the new pot and fill the sides with fresh potting mix, gently pressing it down to ensure secure placement. Leave a gap of about an inch from the top of the pot to allow for watering.
- Water and Care: After repotting, give the ivy plant a thorough watering to help settle the soil and promote root establishment. Continue regular care and monitoring to ensure that the newly repotted plant adjusts well to its new environment.
Repotting your ivy plant provides it with fresh nutrients and the necessary space for healthy growth. Follow these steps carefully to give your ivy plant the best start in its new pot, ensuring its continued vitality and beauty.
Propagating Ivy Plants
Propagating ivy plants is a great way to expand your plant collection or share the beauty of these versatile plants with others. Ivy plants can be propagated through various methods, including stem cuttings and division. Here are some steps to successfully propagate ivy plants:
- Stem Cuttings: Select a healthy stem from your ivy plant that has several nodes. Using clean and sharp pruning shears, make a clean cut just below a node. Remove the lower leaves from the stem, leaving only a few at the top.
- Rooting Hormone: Dip the cut end of the stem in a rooting hormone powder or gel. This will encourage the development of roots on the cutting. Shake off any excess hormone so that it doesn’t overwhelm the cutting.
- Planting the Cutting: Fill a small pot with a well-draining potting mix. Make a hole in the soil and insert the cutting, burying the node and a portion of the stem. Gently press the soil around the cutting to provide stability.
- Provide the Right Environment: Place the potted cutting in a warm and bright location, but away from direct sunlight. Maintain a consistent level of moisture, ensuring the soil doesn’t dry out completely. Covering the cutting with a clear plastic bag or using a propagation tray can help create a humid environment.
- Monitor and Wait: Check the cutting regularly for any signs of growth. It may take a few weeks to several months for roots to develop. Once roots are established, the cutting can be cared for like a mature ivy plant.
- Division: Another method of propagating ivy is through division. Carefully remove the ivy plant from its pot and gently separate the root system into smaller sections. Each section should have its own set of roots and stems. Repot each divided section into individual pots with fresh potting mix.
- Water and Care: Water the newly propagated ivy plants moderately, keeping the soil consistently moist but not overly saturated. Place them in an area with bright indirect light and provide regular care, including fertilization, pruning, and appropriate watering.
Propagating ivy plants can be a rewarding experience that allows you to create new plants and expand your garden. Whether you choose stem cuttings or division, with patience and proper care, you can successfully propagate ivy plants and enjoy their beauty in multiple areas of your home or garden.