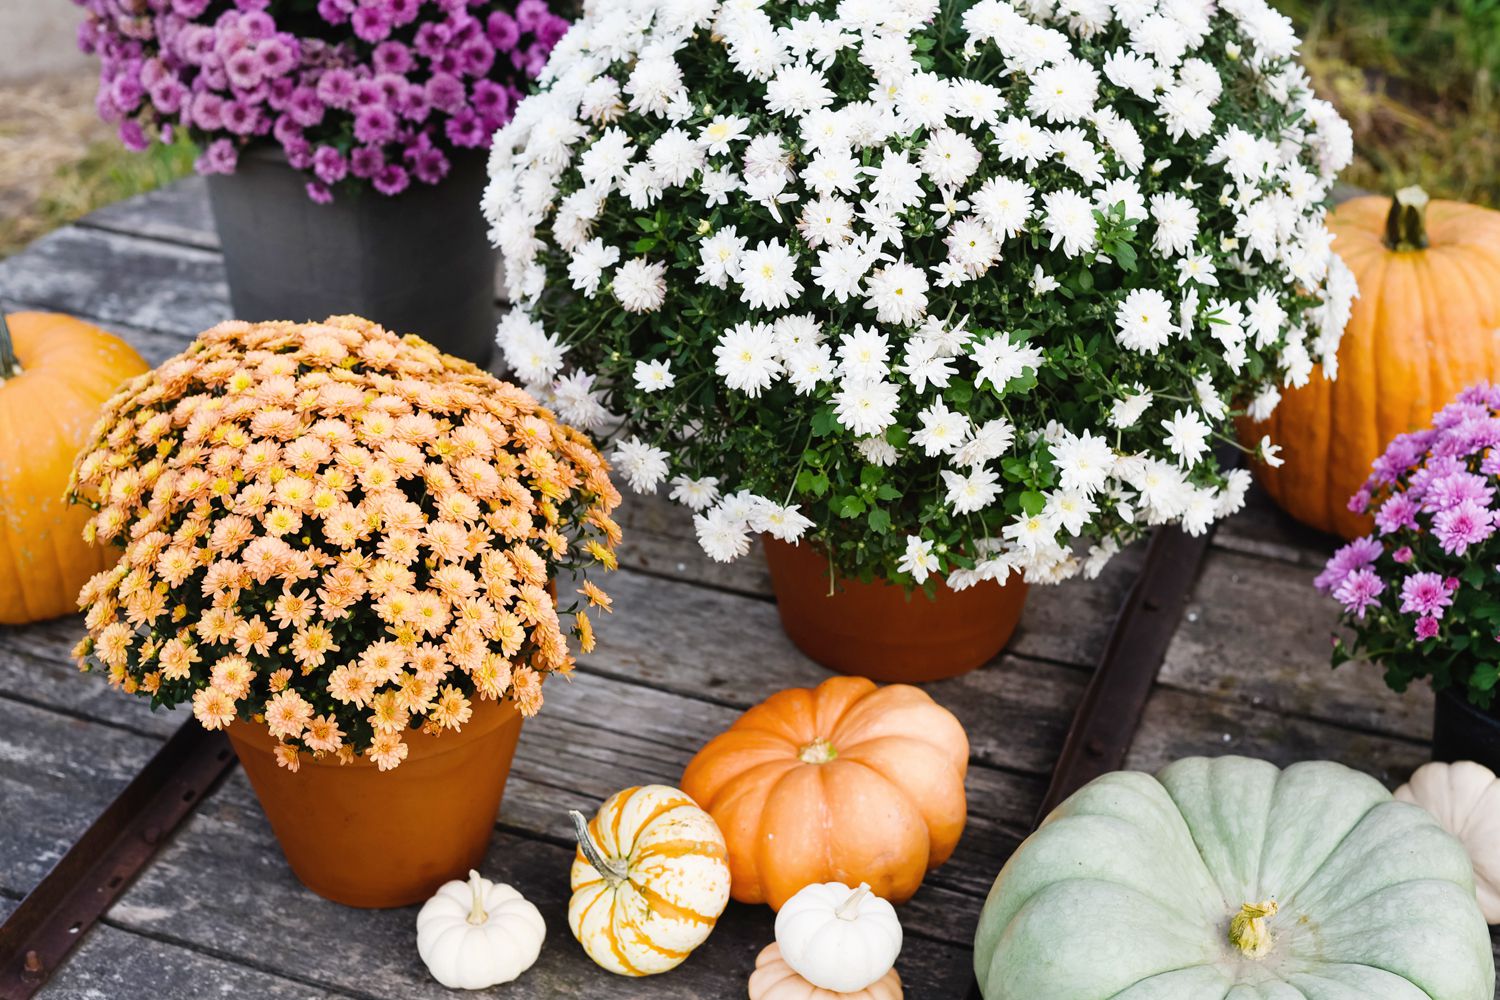
Choosing the Right Mum Plant
When it comes to selecting a mum plant for your garden, there are a few factors to consider. Mum plants come in a variety of colors, sizes, and bloom times, so it’s important to choose the right ones that will thrive in your specific growing conditions.
First and foremost, take into account your climate. Mum plants are available in different hardiness zones, so make sure to choose varieties that are suitable for your region. This will ensure that your plants can withstand the temperature fluctuations and weather conditions in your area.
Next, consider the size of the mum plant. Mums can range from small, compact varieties to large, bushy plants. Think about the available space in your garden and choose plants that will fit well into the landscape without overcrowding other plants.
Another important factor is the bloom time of the mum plant. Mums can bloom in either early, mid, or late season, so select a combination of varieties that will provide continuous color throughout the fall. This way, you’ll have a vibrant and blossoming garden for a longer period of time.
Additionally, take note of the flower color and shape. Mum plants offer a wide array of color options, including shades of white, yellow, pink, and purple. Decide on the color scheme that suits your preferences and complements the other flowers in your garden. Also, consider the shape of the mum flowers – some are daisy-like with a single row of petals, while others have pompom-like or spider-like shapes.
Finally, consider the overall health and condition of the mum plants you’re considering. Inspect the leaves for signs of damage or discoloration and ensure that the stems and roots are sturdy and healthy. Choosing healthy plants will give them a better chance of thriving in your garden.
By considering these factors – climate suitability, size, bloom time, color and shape, and plant health – you can choose the right mum plants for your garden. This will ensure that your mum plants not only survive, but thrive and bring beauty to your outdoor space.
Providing Adequate Sunlight
Sunlight is essential for the growth and blooming of mum plants. These plants thrive in full sun, which is defined as at least six hours of direct sunlight per day. Providing adequate sunlight will promote healthy foliage growth and vibrant blooms.
When choosing a location for your mum plants, look for an area in your garden that receives ample sunlight throughout the day. Avoid placing them in shaded or heavily shaded spots, as this can hinder their growth and reduce flower production.
If you live in a region with intense sunlight or high temperatures, it’s also important to protect your mum plants from scorching. You can do this by providing some afternoon shade, especially during the hottest months of the year. This can be achieved by planting them near taller plants or by using shade cloth to partially cover them.
On the other hand, if you’re in a region with cooler temperatures, you’ll want to maximize the amount of sunlight your mum plants receive. Choose a location that is not obstructed by trees, buildings, or other structures that may create shade.
It’s important to note that while mum plants require sufficient sunlight, they can still tolerate some light shade. If you have limited options for a sunny location, you can try placing them in an area that receives morning sun and afternoon shade, or vice versa. This will still provide them with enough sunlight to thrive.
Regularly monitor the sunlight conditions in your garden throughout the growing season. If you notice that your mum plants are not receiving enough sun, you may need to consider transplanting them to a sunnier spot. Remember to do this during the dormant season or when the plants are not actively growing, to minimize stress.
In addition to providing adequate sunlight, it’s equally important to ensure proper soil drainage and moisture levels. Well-draining soil will prevent excess water from pooling around the roots, which can lead to root rot and other issues. Regularly check the moisture levels and adjust your watering schedule accordingly to maintain a healthy balance.
By providing your mum plants with the right amount of sunlight, you’ll create the ideal conditions for their growth and blooming. This will result in beautiful and healthy plants that enhance the overall beauty of your garden.
Watering the Mum Plant
Proper watering is crucial for the health and vitality of mum plants. These plants have specific water requirements that need to be met in order for them to thrive and produce abundant blooms.
When it comes to watering mum plants, the key is to maintain a consistent level of moisture in the soil. Avoid overwatering, as this can lead to root rot and other fungal diseases. On the other hand, underwatering can cause stress and result in wilting and stunted growth.
One method to determine when to water your mum plants is to check the moisture level in the soil. Insert your finger about an inch deep into the soil – if it feels dry, it’s time to water. However, if the soil feels moist, wait a couple more days before watering. This way, you can prevent overwatering and allow the plant to access the right amount of moisture.
Another important consideration is the time of day to water your mum plants. It’s best to water them early in the morning, as this allows the foliage to dry quickly in the sunlight. Avoid watering them in the evening, as the prolonged moisture on the leaves can promote the growth of fungal diseases.
When watering, provide a deep, thorough soak to ensure that the moisture reaches the roots. You can use a hose or a watering can with a gentle spray attachment to water the plants at the base. Avoid wetting the foliage, as this can also lead to disease and sunburn.
The frequency of watering will depend on the weather conditions and the moisture retention capabilities of your soil. In general, mum plants typically require watering once or twice a week. However, during hot and dry spells, you may need to increase the frequency to keep the soil consistently moist.
It’s important to note that individual mum plants may have different water requirements, especially if they are in containers or have specific soil conditions. Monitor each plant closely and adjust your watering schedule accordingly to meet their specific needs.
Fertilizing the Mum Plant
Fertilizing mum plants is a key aspect of their care regimen. Providing proper nutrients will help promote healthy growth, vibrant foliage, and abundant blooms. However, it’s important to use the right type and amount of fertilizer to avoid overfeeding or damaging the plants.
Before applying fertilizer, it’s crucial to test your soil to determine its nutrient levels. This will help you understand what specific nutrients your mum plants may need. You can conduct a soil test by using a home testing kit or by sending a soil sample to a local agricultural extension service.
Based on the results of the soil test, you can choose a balanced, slow-release fertilizer specifically formulated for flowering plants. These fertilizers typically have a ratio such as 10-10-10 or 12-12-12, which indicates the percentage of nitrogen (N), phosphorus (P), and potassium (K) in the product.
When it comes to fertilizing mum plants, timing is crucial. It’s best to apply fertilizer in the spring, just as the new growth emerges from the ground. This will provide the plants with the necessary nutrients to support their growth and prepare them for the upcoming blooming season.
When applying the fertilizer, follow the instructions on the packaging for the proper amount to use. Typically, you’ll want to scatter the granules evenly around the base of the plants, avoiding direct contact with the foliage. After application, lightly water the area to help the fertilizer dissolve and penetrate the soil.
Throughout the growing season, you may also consider side-dressing your mum plants with a small amount of fertilizer during the midsummer months. This additional feeding can help boost their energy and encourage a more vibrant and prolonged bloom period.
While fertilizing is important, it’s equally essential to avoid overfertilization. Too much fertilizer can lead to excessive foliage growth at the expense of flower production. It can also cause nutrient burn and damage the roots. Always follow the recommended dosage and avoid applying fertilizer when the plants are experiencing stress, such as during a drought or heatwave.
Regularly monitor your mum plants after fertilization. Look for signs of nutritional deficiencies, such as yellowing or stunted growth, and adjust your fertilization routine accordingly. Remember that each mum plant is unique, so it’s important to observe their individual needs.
By providing the proper fertilization, you’ll ensure that your mum plants have the nutrients they need for healthy growth and abundant blooms. This will result in stunning, vibrant flowers that enhance the beauty of your garden.
Pruning and Pinching
Pruning and pinching are essential practices for maintaining the health and shape of mum plants. These techniques help promote bushier growth, increase flower production, and prevent the plants from becoming leggy or floppy.
The first step in pruning mum plants is to remove any dead or damaged stems and foliage. This will improve the overall appearance of the plants and prevent the spread of diseases. Use sharp, clean pruning shears to make clean cuts just above the nearest healthy leaf node or set of leaves.
Pinching is a technique used to encourage more compact and bushy growth in mum plants. It involves removing the growing tips or the top few inches of the stems, typically done when the plants are around 6 inches tall. Pinching can be done by using your fingers or shears to snip off the topmost part of the stem. This encourages branching and stimulates the growth of new lateral shoots.
As the mum plants continue to grow, frequent pinching can be beneficial. Every few weeks, pinch back the top few inches of the stems to promote dense growth and prevent legginess. Be sure to pinch above a set of leaves or leaf nodes to encourage branching from that point.
When pinching, it’s important to note that the timing can vary depending on the desired bloom time. If you want your mum plants to bloom earlier in the season, start pinching in the spring or early summer. For later blooming varieties, pinch them in mid to late summer. Adjust your pinching routine accordingly to achieve the desired flowering timeline.
In addition to pinching, it’s beneficial to remove spent or faded flowers, a process known as deadheading. This prevents the plants from expending energy on seed production and redirects their resources towards new growth and future blooms. Simply snip off the faded flowers at the base of the stem using pruning shears or your fingers.
Regular pruning and pinching not only help maintain the shape and size of mum plants, but they also promote better airflow and reduce the risk of diseases. By removing dead or crowded foliage, you help prevent the buildup of moisture, which can lead to fungal infections.
Remember to clean your pruning tools with rubbing alcohol or a solution of bleach and water after each use. This helps prevent the spread of pests and diseases from one plant to another.
By incorporating regular pruning, pinching, and deadheading into your mum plant care routine, you’ll encourage healthy growth, bushier plants, and abundant blooms. These practices will ensure that your mum plants are in optimal condition and provide a stunning display in your garden.
Dealing with Pests and Diseases
Just like any other plant, mum plants are susceptible to pests and diseases. However, with proper care and vigilance, you can prevent and manage infestations to keep your plants healthy and thriving. Here are some common pests and diseases that may affect mum plants and how to deal with them.
Pests:
Aphids: These tiny, soft-bodied insects feed on the sap of mum plants, causing stunted growth and distorted leaves. To control aphids, you can use insecticidal soap or a strong spray of water to dislodge them from the plants.
Spider Mites: These tiny pests are known for causing yellow stippling on the leaves and fine webbing on the plants. Regularly misting or using a soapy water solution helps to control spider mites. Alternatively, predatory mites can also be introduced to help manage their population.
Slugs and Snails: These slimy creatures can munch on mum foliage, leaving behind irregular holes. Using organic slug and snail baits or creating physical barriers, such as copper tape or diatomaceous earth, can help protect your mums from these pests.
Diseases:
Powdery Mildew: This fungal disease appears as a white powdery coating on the leaves, causing them to curl and distort. To combat powdery mildew, ensure proper air circulation around the plants and remove affected leaves. Applying a fungicide approved for powdery mildew can help prevent its spread.
Gray Mold: This fungal disease causes grayish-brown patches on the leaves and stems. Infected plant parts should be promptly removed, and the surrounding area should be kept clean and dry to prevent the spread of mold. Proper spacing between plants and good air circulation also help to decrease the chances of gray mold.
Rust: Rust appears as rusty-orange spots on the leaves and stems. Infected plant parts should be pruned and destroyed to prevent the spread of rust. Applying a fungicide labeled for rust can help control the disease.
Regular inspection of your mum plants is crucial to catch any pest or disease issues early on. Monitor the leaves, stems, and flowers for any signs of damage or abnormalities. By doing so, you can address any problems promptly and prevent them from taking a toll on your plants.
It’s also important to maintain good plant hygiene practices, such as cleaning garden tools, removing debris from the garden, and avoiding overcrowding of plants. These practices help reduce the risk of pest and disease infestations.
If the pest or disease problem becomes severe and your efforts to control them are not sufficient, seeking advice from a local garden center or consulting with a professional horticulturist can provide further guidance and support.
By being proactive in dealing with pests and diseases, you can ensure the health and vitality of your mum plants. This will result in beautiful, pest-free flowers that add charm and color to your garden.
Transplanting Mums
Transplanting mum plants can be done for several reasons, such as improving their location, dividing an overcrowded clump, or preparing them for winter protection. When done properly, transplanting can help ensure the continued health and longevity of your mum plants.
Timing:
The best time to transplant mum plants is in early spring or late summer, during their dormant periods. This allows the plants to establish their roots before the active growth periods. Avoid transplanting mums during hot summer months or when they are actively blooming, as this can cause stress and reduce their chances of success.
Preparing the New Location:
Choose a new location for your mum plants that provides full sun exposure and well-draining soil. Prepare the planting area by removing weeds, loosening the soil, and incorporating organic matter like compost or aged manure to improve its fertility and drainage.
Transplanting Process:
Start by watering the mum plant thoroughly a day or two before transplanting. This will ensure that the roots are well-hydrated and reduce transplant shock.
Next, dig a hole in the new location that is slightly larger than the root ball of the mum plant. Gently loosen the soil around the plant, being careful not to damage the roots. Carefully lift the plant out of the ground, keeping as much of the root system intact as possible.
Place the mum plant into the prepared hole, making sure that it sits at the same depth as it was previously. Backfill the hole with soil, firming it gently around the roots to eliminate air pockets. Water the transplanted mum thoroughly to settle the soil and ensure good root-to-soil contact.
Aftercare:
After transplanting, provide proper care to help the mum plants recover and establish themselves in their new location. Water the plants regularly, keeping the soil consistently moist but not soggy. Mulching around the base of the plants can help retain moisture and suppress weed growth.
Consider providing some temporary shade or protection from harsh sunlight during the initial days after transplanting. This can help reduce stress on the plants and increase their chances of survival.
Dividing Overcrowded Clumps:
If your mum plants have become overcrowded, it may be necessary to divide them during the transplanting process. Carefully lift the clump from the ground and gently separate the individual plants, making sure to keep their roots intact. Replant the divided plants following the same process as mentioned above.
Transplanting Potted Mums:
If you have mum plants in containers, the transplanting process is similar. Choose a new container that provides adequate drainage and is slightly larger than the current pot. Gently remove the plant from its current pot, loosen the roots if they are tightly bound, and place it in the new container. Fill the container with fresh potting soil and water thoroughly.
By following these transplanting guidelines, you can successfully move your mum plants to a new location or divide overcrowded clumps. This will promote their continued growth and ensure their longevity in your garden.
Overwintering Mums
Mum plants are perennials that can survive the winter in many regions. However, proper preparation and care are essential to help them withstand the cold temperatures and ensure their survival for the next growing season.
Timing:
Before the first frost arrives, it’s important to start preparing your mum plants for winter. Ideally, this should be done when the plants have finished blooming and are starting to enter their dormant phase. In most regions, this occurs in late fall.
Cutting Back:
One essential step in overwintering mum plants is cutting back the foliage. Trim the stems down to about 2-3 inches above the ground. This helps prevent excessive transpiration and reduces the risk of disease and pest infestations during winter.
Protective Mulch:
After cutting back the foliage, apply a layer of protective mulch around the base of the mum plants. This mulch acts as an insulating layer, helping to regulate soil temperature and protect the roots. Use straw, leaves, or other organic materials to create a thick layer, around 4-6 inches deep.
Winter Protection:
In regions with harsh winters, additional protection may be necessary. If your mum plants are in containers, consider moving them to a sheltered location such as a garage or basement. This provides extra insulation and protects them from freezing temperatures and drying winds.
If your mum plants are in the ground, you can create a protective cover using materials such as burlap or frost blankets. Wrap the material around the plants, securing it with stakes or twine. This helps trap heat and create a microclimate, shielding the plants from harsh winter conditions.
Monitoring Moisture:
During winter, it’s important to monitor moisture levels in the soil. While mum plants require less water during their dormant period, it’s important to keep the soil slightly moist, but not excessively wet. Check the soil periodically and water if necessary, particularly during dry spells or when the temperature fluctuates significantly.
Spring Uncovering:
In the spring, as temperatures start to rise and the last frost has passed, it’s time to uncover and revive your mum plants. Remove the protective coverings and excess mulch, gradually exposing the plants to sunlight and outdoor conditions. Resume regular watering and provide the necessary care for the plants to start their new growth cycle.
Remember that overwintering mums requires different strategies depending on your climate and the specific variety of mum plant. Some mum plants may be more hardy and require minimal protection, while others may need extra care to survive the winter months.
By taking the necessary steps to overwinter your mum plants, you’ll ensure their survival and be rewarded with beautiful blooms in the following growing season.
Propagating Mums
One of the rewarding aspects of gardening is being able to propagate and create new plants from existing ones. Propagating mum plants is no exception, and it can be an enjoyable and cost-effective way to expand your garden. There are several methods you can use to propagate mum plants, including division, stem cuttings, and seed propagation.
Division:
Division is the most common and straightforward method of propagating mum plants. This method is typically done in early spring or late summer when the plants are not actively blooming. Dig up the clump of mum plants and carefully separate them into smaller sections, making sure each division has its own set of healthy roots. Replant the divisions in well-prepared soil, water them thoroughly, and provide the necessary care for them to establish and grow.
Stem Cuttings:
Taking stem cuttings is another effective way to propagate mum plants. Select a healthy, non-flowering stem and make a clean cut just below a set of leaves. Remove the lower leaves, leaving only a few at the top. Dip the cut end in a rooting hormone powder or liquid to encourage root development and reduce the risk of disease. Plant the cutting in a well-draining rooting medium, such as a mixture of perlite and peat moss, and keep it consistently moist. Place the cutting in a warm, bright location but away from direct sunlight. In a few weeks, roots should develop, and you can transplant the rooted cutting into a pot or the garden.
Seed Propagation:
Propagating mum plants from seeds is a longer and more unpredictable process compared to division or stem cuttings. Collect the seeds from mature mum flowers, making sure they are fully developed and dry. Sow the seeds in a seed-starting mix or a well-draining potting soil. Keep the soil consistently moist, but not waterlogged. Place the seed tray or pots in a warm location with indirect sunlight. The seeds will germinate in a few weeks to several months, depending on the variety and conditions. Once the seedlings have developed a few sets of leaves, you can transplant them into individual pots or the garden.
Regardless of the propagation method you choose, it’s important to provide proper care and attention to the newly propagated plants. Keep them in a suitable growing environment, provide adequate water and nutrition, and protect them from extreme temperatures and pests.
Remember that not all mum varieties may be suitable for propagation from seeds, as some may be hybrids that do not produce true-to-type offspring. Division and stem cuttings are the more reliable methods for preserving the characteristics of the parent plant.
Through the rewarding process of propagating mum plants, you can expand your garden, share plants with others, and continue to enjoy the beauty and diversity that mum plants have to offer.
Enjoying the Bloom of Mum Plants
After patiently caring for your mum plants, it’s time to enjoy the beautiful and vibrant blooms that they offer. The arrival of the colorful flowers signals the culmination of your efforts and adds a delightful touch to your garden or outdoor space. Here are some tips for fully enjoying the bloom of your mum plants:
Regular Maintenance:
Continue providing regular care for your mum plants during their blooming period. This includes maintaining proper watering, fertilizing as needed, and inspecting for pests or diseases. Regular deadheading of spent flowers will also encourage continuous blooms and keep the plants looking tidy.
A Feast for the Senses:
Take the time to fully immerse yourself in the beauty of the mum blooms. Observe their varying colors, shapes, and sizes. Gently touch the petals to appreciate their softness and texture. Close your eyes and inhale the scent of the flowers, savoring their unique fragrance. Make the most of this sensory experience to truly appreciate the beauty of your mum plants.
Create Floral Displays:
Your mum flowers can serve as fantastic elements for creating stunning floral displays. Cut some of the blooms and arrange them in vases or containers to bring the beauty indoors. Combine them with other seasonal flowers or foliage for a complementary and colorful arrangement. Adorn your living space with these floral displays to elevate the ambiance and enjoy the mum blooms up close.
Photograph the Splendor:
Capture the beauty of your mum plants through photographs to preserve the memories and share them with others. Experiment with different angles, lighting, and backgrounds to showcase the unique features of the flowers. Photograph them in their natural garden setting or create artistic compositions. These photographs will allow you to revisit and cherish the blooming moments for years to come.
Share the Beauty:
Spread the joy of mum blooms by sharing cuttings or divisions with friends, family, or neighbors. You can propagate new mum plants from your existing ones and gift them to fellow gardening enthusiasts. This not only spreads the beauty of the flowers but also fosters a sense of community and connection through gardening.
Take Time to Reflect:
Sit back and simply enjoy the serenity that your mum plants bring to your garden. Find a comfortable spot nearby and take moments to observe the vibrant blooms dancing in the breeze. Reflect on the effort and care that went into nurturing these beautiful flowers. Let their presence evoke feelings of tranquility and gratitude.
Countless hours of care and attention go into cultivating mum plants to achieve their stunning blooms. By actively engaging with and appreciating the beauty they offer, you can fully enjoy the rewards of your labor, creating lasting memories and finding solace in the presence of these magnificent flowers.