
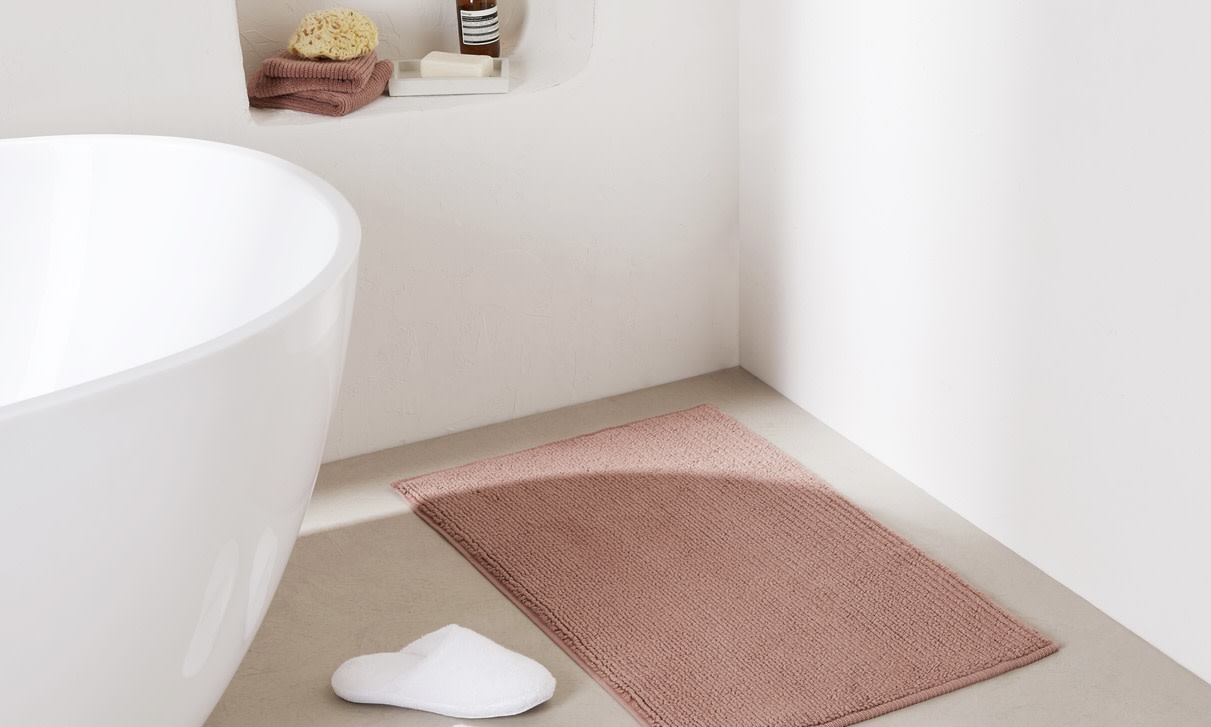
Why soak a rug in the bath?
Soaking a rug in the bath can be an effective way to deep clean and refresh it. While regular vacuuming and spot cleaning can help maintain the rug’s cleanliness, there are times when a more thorough cleaning is necessary. Soaking a rug in the bath allows for a deeper clean that can remove ingrained dirt, odors, and stains that regular surface cleaning may not be able to tackle.
One of the main benefits of using a bath to soak a rug is the ability to submerge it completely. This immersion method ensures that the cleaning solution reaches every fiber of the rug, providing a more thorough clean. Additionally, soaking the rug in the bath allows for the loosening of dirt and debris through gentle agitation. This can be particularly useful for rugs that have a high pile or delicate fibers.
Another advantage of using the bath for soaking a rug is the convenience and control it offers. The bath provides a contained space where you can clean the rug without worrying about water seeping onto the floor. It also allows you to have greater control over the cleaning process, as you can easily adjust the water temperature and manually agitate the rug to target specific areas that need extra attention.
Soaking a rug in the bath can also be a cost-effective cleaning option. Professional rug cleaning services can be expensive, and using a bath allows you to achieve similar results at a fraction of the cost. It is a DIY cleaning method that can be done using readily available cleaning solutions and basic household items.
In addition to the practical benefits, soaking a rug in the bath can also be a satisfying and therapeutic activity. Taking the time to care for your rug and witness the transformation as the dirt and grime are washed away can be incredibly rewarding. It can also be an opportunity to take a break from the digital world and engage in a hands-on task that connects you with your home and surroundings.
Overall, soaking a rug in the bath is a practical, cost-effective, and rewarding method of deep cleaning. It provides a thorough clean, allows for greater control, and can be a rejuvenating activity. Whether you have a small area rug or a large carpet, using the bath can help restore its freshness and extend its lifespan.
Choosing the right rug for soaking
When it comes to soaking a rug in the bath, not all rugs are created equal. Certain factors should be considered to ensure that the rug is compatible with the soaking process and can withstand the cleaning. Here are some guidelines to help you choose the right rug for soaking:
1. Material: Opt for rugs made of natural fibers like wool or cotton, as they tend to hold up well during the soaking process. These materials are more resistant to damage and have better water absorbency compared to synthetic fibers. Avoid soaking rugs made of delicate or sensitive materials that may shrink or lose their shape when exposed to water.
2. Size: Consider the size of the rug in relation to the size of your bath. Ensure that the rug can comfortably fit in the tub without being crumpled or folded, as this can hinder the cleaning process. If the rug is too large for your bath, you may have to consider other cleaning methods or seek professional assistance.
3. Construction: Assess the construction of the rug before soaking it. Rugs with loose weaves or delicate bindings may not be suitable for submersion in water. The soaking process can cause these types of rugs to unravel or become misshapen. Look for rugs with robust construction and tightly secured edges that can withstand immersion.
4. Colorfastness: Check the colorfastness of the rug before soaking it. Perform a small colorfastness test in an inconspicuous area using a mild detergent or cleaning solution. If the colors bleed or fade significantly, it may not be suitable for soaking. Rugs with vibrant or unstable dyes may require alternative cleaning methods to prevent color damage.
5. Stains and damage: Evaluate the condition of the rug and the nature of any stains or damage present. Soaking can be effective for general cleaning and removing some stains, but it may not be suitable for severe stains or structural damage. It’s important to address specific issues like pet stains, mold, or mildew before attempting to soak the rug.
By considering these factors, you can select a rug that is well-suited for soaking. Choosing the right rug will ensure that the cleaning process is effective and doesn’t cause any unnecessary damage or color fading. Keep in mind that if you have any doubts about the compatibility of a rug with the soaking method, it is always best to consult a professional for guidance.
Preparing the bath
Before you begin the process of soaking a rug in the bath, it’s important to properly prepare the bath area to ensure the best cleaning results. Here are the steps to take when preparing the bath for rug soaking:
1. Clean the tub: Start by thoroughly cleaning the bath to remove any dirt, soap scum or residue. Use a mild cleaner or white vinegar to ensure a clean and hygienic environment for soaking the rug. Rinse the tub thoroughly with water to remove any cleaning products.
2. Remove bath accessories: Take out any bath accessories like mats, shower curtains, or bath toys that may obstruct the soaking process. A clear and empty tub will provide ample space for the rug to soak and allow for proper circulation.
3. Plug the drain: Ensure the drain is securely plugged to prevent water from escaping during the soaking process. This will allow the rug to fully immerse in the water and ensure an effective clean. You can use a rubber stopper or a drain cover specifically designed for soaking tasks.
4. Protect the tub: To protect the surface of the tub from any potential damage or scratches caused by the rug, consider laying a towel or a non-slip mat at the bottom of the tub. This will provide an extra layer of cushioning and prevent any abrasive contact between the rug and the tub.
5. Gather cleaning supplies: Before filling the bath with water, ensure you have all the necessary cleaning supplies within reach. This may include a mild detergent, carpet cleaner, soft brush or sponge, and any specific stain-removal products suitable for your rug’s material. Having everything prepared will streamline the cleaning process.
6. Set the water temperature: Adjust the water temperature to a lukewarm or cool setting. Avoid using hot water as it can potentially damage the rug’s fibers or cause the colors to bleed. Lukewarm water is generally safe for most rug materials and will help to loosen dirt and stains effectively.
By following these steps to prepare the bath, you can create an optimal environment for soaking the rug. A clean and well-prepared bath will ensure that the rug is fully immersed, provide a safe and hygienic area for cleaning, and help you achieve the best possible results when it comes to refreshing your rug’s appearance and condition.
Removing loose dirt
Before soaking a rug in the bath, it’s important to remove any loose dirt and debris. This initial step will help prevent the dirt from settling into the rug’s fibers during the soaking process. Here’s how you can effectively remove loose dirt from your rug:
1. Vacuum the rug: Begin by vacuuming the rug thoroughly on both sides. Use a vacuum cleaner with a brush attachment or a handheld vacuum for delicate rugs. This will help remove loose dirt, dust, pet hair, and any small particles that may have accumulated on the surface of the rug.
2. Shake or beat the rug: If the rug is small enough and weather permits, take it outside and give it a firm shake to loosen and dislodge any remaining dirt. Alternatively, you can hang the rug on a clothesline or a sturdy fence and use a clean broom or a rug beater to gently beat the rug. This process will help dislodge embedded dirt and debris that may not have been picked up by vacuuming.
3. Brush the rug: For rugs with high pile or longer fibers, use a soft-bristle brush to gently brush the rug in the direction of the nap. This will further loosen any dirt or debris that may be trapped within the fibers. Be sure to brush both sides of the rug thoroughly to ensure a more effective cleaning process.
4. Use a clothing roller or tape: If you spot any stubborn pet hair or lint on the rug, you can use a clothing roller or adhesive tape to pick up these particles. Simply roll the clothing roller over the surface of the rug or press the adhesive tape onto the affected areas and lift away the hair or lint.
By taking the time to remove loose dirt from the rug before soaking it in the bath, you can prevent further contamination of the water and ensure a more effective and thorough cleaning process. Removing loose dirt also helps to maintain the quality and longevity of the rug by preventing additional wear and tear caused by abrasive particles.
Testing colorfastness
Before proceeding with soaking your rug in the bath, it’s crucial to test its colorfastness. This step ensures that the colors of your rug won’t bleed or fade when exposed to water and cleaning solutions. Here’s how you can perform a colorfastness test:
1. Choose an inconspicuous spot: Select a small, discreet area on the rug, such as a corner or the underside, to perform the colorfastness test. This ensures that any potential color changes or damage caused by the test won’t be noticeable in the rug’s prominent areas.
2. Prepare the cleaning solution: Dilute a small amount of the cleaning solution you plan to use in the bath according to the manufacturer’s instructions. It’s essential to use the same cleaning solution that you’ll use to soak the entire rug, as different solutions can yield different color reactions.
3. Apply the cleaning solution: Lightly dampen a clean cloth or sponge with the diluted cleaning solution. Gently dab or rub the damp cloth onto the selected area of the rug. Ensure that the cloth is damp and not soaking wet to avoid excessive saturation.
4. Check for color transfer: After applying the cleaning solution, inspect the cloth for any color transfer. If you notice significant color bleeding or the colors on the cloth appear faded or distorted, it indicates that the rug is not colorfast. In this case, it’s best to avoid soaking the rug in the bath and explore alternative cleaning methods.
5. Blot and dry: Once you’ve completed the colorfastness test, use a clean, dry cloth to blot away any excess moisture from the tested area. Allow the spot to air dry completely. Observe the dried area to ensure that there are no noticeable color changes or damage to the rug’s fibers.
If the colorfastness test shows no signs of color bleeding or fading, you can proceed with confidence to soak the rug in the bath. However, if the rug fails the colorfastness test, it’s advisable to consult a professional cleaner or explore alternative cleaning methods to avoid causing irreversible damage or color distortion to the rug.
Performing a colorfastness test is a crucial step to ensure the integrity of your rug’s colors during the soaking process. Taking this precautionary measure helps protect the rug from potential color damage and allows you to make informed decisions regarding the cleaning methods and solutions you use.
Treating stains and spots
Before soaking a rug in the bath, it’s important to address any stains or spots present on the rug. Treating these stains prior to the soaking process can help ensure a more effective and thorough cleaning. Here are the steps to follow when treating stains and spots on your rug:
1. Identify the type of stain: Determine the nature of the stain on your rug. Is it a food stain, pet stain, grease stain, or a different type? Different stains may require different treatment methods to effectively remove them.
2. Blot the stain: For fresh or wet stains, use a clean cloth or paper towel to gently blot the area. Avoid rubbing or scrubbing, as this can spread the stain and embed it further into the rug fibers. Blotting helps to remove excess moisture and prevents the stain from setting.
3. Use a stain remover: Depending on the type of stain, apply an appropriate stain remover to the affected area. There are various commercial stain removers available for different types of stains, or you can create your own homemade stain-removing solution using household ingredients such as baking soda or vinegar.
4. Follow product instructions: Read and follow the instructions on the stain remover product carefully. Apply the stain remover to the stain according to the recommended amount and method. Allow the product to penetrate the stain and work its magic for the designated amount of time.
5. Gently agitate the area: After applying the stain remover, gently agitate the area with a soft brush or a clean cloth. This helps to loosen the stain from the fibers and facilitate the stain removal process. Be cautious not to be too forceful, as aggressive scrubbing may damage the rug.
6. Rinse or blot the area: Depending on the product instructions, rinse the area with clean water or blot it with a damp cloth to remove the stain remover residue. Ensure that all residue is thoroughly removed to prevent any potential discoloration or damage to the rug.
7. Repeat if necessary: For stubborn or set-in stains, multiple treatments may be required. Follow the same steps and repeat the stain treatment process, allowing each application to penetrate and work on the stain before rinsing or blotting.
By treating stains and spots before soaking the rug, you can target specific areas of concern and improve the overall cleanliness and appearance of the rug. Treating stains in advance also enables the soaking process to focus more on deep cleaning and refreshing the entire rug rather than solely addressing individual stains.
Pre-treating for odors
Before soaking a rug in the bath, it’s essential to address any unpleasant odors that may be present. Pre-treating for odors not only improves the overall freshness of the rug but also enhances the results of the soaking process. Here are some effective methods for pre-treating odors on your rug:
1. Baking soda: Baking soda is a natural odor absorber that can help eliminate unwanted smells from your rug. Sprinkle a generous amount of baking soda over the entire surface of the rug and let it sit for at least 30 minutes to an hour. The baking soda will absorb odors from the fibers. Vacuum the rug thoroughly to remove the baking soda residue.
2. Vinegar solution: Vinegar is known for its ability to neutralize odors. Create a solution of equal parts white vinegar and water. Use a spray bottle to lightly mist the rug with the vinegar solution. Allow it to air dry. As the vinegar evaporates, it will help neutralize odors. Keep in mind that the smell of vinegar may linger temporarily, but it will dissipate as the rug dries completely.
3. Odor-neutralizing sprays: There are commercially available odor-neutralizing sprays specifically designed for rugs and carpets. These sprays contain enzymes or chemicals that break down odor-causing molecules. Follow the instructions on the product label and spray it evenly over the surface of the rug. Allow the spray to dry completely before proceeding with the soaking process.
4. Sun-drying: Sunlight is a natural deodorizer and can help eliminate odors from rugs. If feasible, hang the rug outdoors in direct sunlight for a few hours. The UV rays will help kill bacteria and freshen the rug. However, be cautious not to leave the rug exposed to direct sunlight for an extended period, as this can cause color fading or damage to certain rug materials.
5. Fresh air exposure: If you’re unable to sun-dry the rug, you can still benefit from fresh air exposure. Hang the rug in a well-ventilated area such as a balcony or near an open window. The circulation of fresh air will help dissipate odors and freshen the rug over time.
It’s important to note that these pre-treatment methods are most effective for mild to moderate odors. For persistent or strong odors, it may be necessary to seek professional odor removal services or consult a carpet cleaning specialist.
By pre-treating your rug for odors before soaking it in the bath, you can ensure a more pleasant cleaning experience and eliminate any lingering smells. The combination of odor pre-treatment and the soaking process will leave your rug refreshed, clean, and free from unwanted odors.
Filling the bath
Once you have prepared the rug and addressed any stains or odors, it’s time to fill the bath with water for the soaking process. Filling the bath correctly is crucial to ensure the rug is fully submerged and that the cleaning solution can effectively penetrate the fibers. Here are the steps to follow when filling the bath:
1. Check the water level: Before filling the bath, double-check the water level to ensure it is sufficient to fully immerse the rug. The water should be deep enough to cover the entire rug without the risk of overflowing or causing water damage to the surrounding area.
2. Adjust the water temperature: Set the water temperature to a lukewarm or cool setting. Avoid using hot water, as it can potentially damage delicate rug fibers or cause colors to bleed. Lukewarm water is generally safe for most rug materials and allows for effective cleaning without compromising the rug’s quality.
3. Add a gentle cleaning solution: Depending on the type of rug and its cleaning needs, add a gentle cleaning solution to the bath. It’s important to select a cleaning solution that is suitable for your rug’s material. Alternatively, you can use a mild detergent or a carpet cleaner specifically designed for rugs. Follow the product instructions for the appropriate amount to add.
4. Mix the solution: Use your hand or a long-handled spoon to mix the cleaning solution thoroughly with the water in the bath. This will ensure that the solution is evenly distributed, allowing for consistent cleaning throughout the entire rug.
5. Test the water pH: If you are using a homemade cleaning solution, it’s recommended to test the pH level of the water. The pH level should be neutral or slightly alkaline to prevent any potential damage to the rug. You can use pH testing strips or pH testing kits available at hardware or pool supply stores to check the pH level.
6. Avoid excessive agitation: While filling the bath, avoid creating excessive turbulence or agitation in the water. Vigorous splashing or stirring can cause unnecessary damage to the rug or lead to excessive foam formation. Gently filling the bath and mixing the cleaning solution should be sufficient.
By following these steps, you can ensure that the bath is properly filled, allowing for the optimal soaking and cleaning of your rug. Filling the bath correctly sets the foundation for an effective cleaning process and helps maintain the rug’s integrity and longevity.
Adding cleaning solution
Once the bath is filled with water, the next step in the rug soaking process is to add the appropriate cleaning solution. The cleaning solution plays a crucial role in breaking down dirt, stains, and odors, and ensuring a thorough cleaning of the rug. Follow these steps to add the cleaning solution effectively:
1. Use a suitable cleaning solution: Select a cleaning solution that is specifically formulated for rugs and compatible with your rug’s material. It’s crucial to choose a gentle and non-abrasive cleaning solution to avoid damaging the fibers or causing color fading. Refer to the product label for guidelines on compatibility and usage.
2. Measure the recommended amount: Refer to the product instructions or guidelines provided by the manufacturer to determine the appropriate amount of cleaning solution to use. Proper measurement ensures that you use the right concentration of cleaning agents for an effective clean, without overusing or wasting the product.
3. Add the cleaning solution to the bath: Slowly pour the measured amount of cleaning solution into the water-filled bath. Pour it evenly across the surface of the water to ensure proper distribution. Avoid pouring the cleaning solution directly onto the rug, as it may create concentrated spots or uneven cleaning.
4. Mix the solution gently: Use your hand or a long-handled spoon to gently stir the water in the bath, allowing the cleaning solution to mix thoroughly. Be cautious not to create excessive turbulence or splashing, as this can result in unnecessary foam formation or potential damage to the rug.
5. Ensure even distribution: After mixing, verify that the cleaning solution is evenly distributed throughout the bath. Check for any concentrated areas of cleaning solution and dissolve them by gently stirring the water again. Even distribution will ensure that every part of the rug receives consistent cleaning.
6. Avoid overuse: It’s important not to overuse the cleaning solution, as excessive amounts can lead to residue buildup on the rug. This can be difficult to rinse out completely and may leave a soapy or sticky residue on the rug’s fibers.
By adding the appropriate cleaning solution to the bath, you can ensure an effective and thorough cleaning of your rug. Choosing a suitable cleaning solution and following the recommended instructions will help to break down dirt, stains, and odors, resulting in a refreshed and revitalized rug.
Placing the rug in the bath
After preparing the bath and adding the cleaning solution, it’s time to carefully place the rug in the water. This step ensures that the rug gets fully immersed and allows for optimal cleaning of all its fibers. Follow these steps to correctly place your rug in the bath:
1. Clear the path: Clear the area around the bath to create a clear and easy path for placing the rug. Remove any obstacles or items that may obstruct the rug’s entry into the water. Having a clear path will prevent any accidents or damage to the rug or the surrounding area.
2. Lift the rug carefully: Lift the rug gently using both hands or with the help of another person if it’s a larger or heavier rug. Support the rug evenly to avoid putting excessive strain on a specific area or causing it to fold or crumple. Lift the rug slowly to prevent any splashing or water spills.
3. Lower the rug into the water: Lower the rug into the bath, ensuring that it is fully submerged. Slowly release the rug into the water, allowing it to settle naturally. Be cautious not to drop or forcefully place the rug, as this can cause unnecessary damage or distortion to its shape.
4. Smooth out any air pockets: Once the rug is in the water, gently smooth out any air pockets that may have formed under the rug. Air pockets can prevent proper cleaning and may cause certain areas of the rug to remain untouched by the cleaning solution. Smooth the rug out evenly to ensure optimal contact between the rug and the cleaning solution.
5. No overloading: Avoid overloading the bath with too many rugs. Overcrowding can hinder the proper cleaning process and prevent thorough saturation of each rug. If you have multiple rugs to clean, it’s advisable to clean them individually or in smaller batches to ensure the best cleaning results.
6. Submerge any floating edges: If you notice any edges of the rug floating above water, gently press them down to ensure they are fully immersed. Floating edges may not receive sufficient cleaning and can lead to uneven results. By ensuring the entire rug is submerged, you guarantee consistent cleaning throughout.
By following these steps and placing the rug in the bath carefully, you can ensure that the rug is fully immersed and ready for a thorough and effective cleaning. Proper placement allows the cleaning solution to reach all parts of the rug, resulting in a clean, fresh, and revitalized final outcome.
Soaking the rug
The soaking process is a crucial step in deep cleaning and refreshing a rug. Immersing the rug in the bath allows the cleaning solution to penetrate the fibers, loosening dirt, stains, and odors. Here are the steps to follow when soaking your rug:
1. Ensure complete submersion: Once the rug is placed in the bath, ensure that it’s fully submerged in the water and the cleaning solution. Gently press down on the rug to ensure it’s fully immersed. This ensures that every part of the rug receives equal cleaning and helps the cleaning solution reach the deepest layers of the fibers.
2. Allow sufficient soaking time: The length of the soaking time will depend on the rug’s condition and the cleaning solution used. Follow the instructions on the cleaning solution’s label or go by general guidelines. Soaking for 15-30 minutes is usually sufficient for most rugs, but heavily soiled or stained rugs may require a longer soaking time.
3. Periodically agitate the rug: While the rug is soaking, periodically agitate it to help further loosen dirt and debris. Gently swish the rug back and forth or use a soft brush to agitate the fibers. This motion helps to dislodge dirt and ensures thorough cleaning. Be gentle to avoid causing any damage to the rug.
4. Maintain the water temperature: Throughout the soaking process, monitor and maintain the water temperature in the bath. Lukewarm to cool water is generally suitable for most rugs. If the water cools down significantly during the soaking time, you can add warm water in small increments to maintain an optimal temperature.
5. Be patient: Allow the rug to soak for the recommended time without rushing the process. This gives the cleaning solution enough time to penetrate and break down dirt, stains, and odors. Patience ensures a more effective cleaning result.
6. Monitor colorfastness: While the rug is soaking, periodically check for any signs of color bleeding or fading. If you notice any significant color transfer or changes, it’s crucial to act promptly and remove the rug from the bath. Extended soaking can lead to color damage, especially in rugs with unstable or vibrant dyes.
By properly soaking the rug, you allow the cleaning solution to work its magic and thoroughly clean the fibers. The soaking process helps to lift away dirt, stains, and odors, resulting in a revitalized and refreshed rug.
Agitating the rug
Agitating the rug during the soaking process is a critical step in achieving a thorough and effective cleaning. Agitation helps to further loosen dirt, break down stains, and dislodge debris from the rug’s fibers. Here’s how you can properly agitate the rug:
1. Choose a gentle method: Select a gentle method of agitation that is appropriate for your rug’s material and condition. Avoid using aggressive or harsh techniques that may cause damage or unravel the rug’s fibers. The goal is to loosen dirt and stains without compromising the integrity of the rug.
2. Swishing motion: One effective method of agitation is to create a gentle swishing motion with the rug in the bath. Use your hands or a soft brush to move the rug back and forth in the water. This motion helps to dislodge dirt and debris from the fibers and allows the cleaning solution to penetrate more effectively.
3. Soft brush or sponge: If your rug can withstand light brushing, use a soft-bristle brush or a sponge to gently scrub the surface of the rug. Work in small, circular motions or follow the direction of the rug’s nap. This technique helps to lift dirt and stains from the fibers and ensures even cleaning throughout the rug.
4. Avoid excessive force: Be cautious not to apply excessive force or harsh scrubbing, as this can damage the rug’s fibers or cause them to become misshapen. Gentle agitation is key to achieving effective cleaning without compromising the rug’s integrity.
5. Pay attention to problem areas: Give extra attention to areas with stubborn stains or heavily soiled patches. Use a soft brush or sponge to gently agitate these spots, making sure the cleaning solution reaches and works on the concentrated areas of dirt or stains.
6. Periodic agitation: Agitate the rug periodically throughout the soaking process. This helps to ensure that all parts of the rug receive equal cleaning and prevents dirt from resettling onto already cleaned areas. Remember to be gentle yet thorough in your agitation.
By agitating the rug during the soaking process, you enhance the effectiveness of the cleaning solution and help dislodge dirt and stains from the rug’s fibers. Gentle and consistent agitation ensures a deeper clean and promotes a refreshed and revitalized appearance for your rug.
Draining the bath
After the rug has soaked and been properly agitated, it’s time to drain the bath. Draining the bath is an important step in the rug cleaning process as it removes the dirty water and prepares the rug for rinsing. Follow these steps to effectively drain the bath:
1. Turn off the water supply: Before draining the bath, make sure to turn off the water supply if it’s still running. This prevents any excess water from entering the bath and ensures a controlled draining process.
2. Check for any floating debris: As the bath drains, keep an eye out for any floating debris or loose particles on the surface of the water. If you notice any, use a sieve or a mesh strainer to collect and remove these debris. This prevents them from clogging or damaging the drain as the water drains.
3. Open the drain stopper: Depending on the type of bath drain you have, open the drain stopper to allow the water to flow out. It may be a lever or a twist mechanism. Ensure the drain is fully open to facilitate proper and efficient drainage.
4. Monitor the draining process: Keep an eye on the draining process to ensure the water is flowing smoothly and without any blockages. If you notice any signs of slow draining or water pooling, it may indicate a clogged drain that needs to be addressed before proceeding.
5. Assist with water removal: To aid in the draining process, you can gently press down on the rug with a soft squeegee or use your hands to squeeze out excess water. This helps remove trapped water from the rug’s fibers, allowing for faster and more efficient drying.
6. Remove the rug from the bath: As the water drains, carefully lift the rug out of the bath. Use both hands to support the weight of the rug and avoid any unnecessary strain or damage. Gently squeeze out any remaining water from the rug without wringing or twisting it too forcefully.
By efficiently draining the bath, you remove the soiled water and prepare the rug for the rinsing process. Proper drainage ensures a clean and clear bath, allowing for effective rinsing and the removal of any remaining cleaning solution and contaminants from the rug’s fibers.
Rinsing the rug
After draining the bath, the next important step in the rug cleaning process is to thoroughly rinse the rug. Rinsing removes any remaining cleaning solution, dirt, and debris, leaving the rug cleaner and free from residue. Follow these steps to effectively rinse your rug:
1. Set up a clean water source: Prepare a clean water source, such as a hose or a large container filled with clean water. It’s essential to have access to a sufficient amount of water to ensure a thorough rinse of the rug.
2. Gently spray or pour water over the rug: Using a gentle spray nozzle or by pouring water from a container, start rinsing the rug by evenly distributing water over its surface. Ensure that the water reaches all parts of the rug, specifically targeting areas that may have been heavily soiled or treated with cleaning solution.
3. Pay attention to color bleeding: As you rinse the rug, monitor the water to check for any signs of color bleeding. If you notice significant color transfer, stop rinsing immediately and address the issue appropriately to prevent further color damage.
4. Rinse until water runs clear: Continue rinsing the rug until the water running off the rug appears clear and free from any visible dirt or soapy residue. This ensures that all traces of the cleaning solution are removed, leaving the rug clean and ready for the drying process.
5. Test for soap residue: To ensure that there is no soap residue left behind, perform a touch test on a small area of the rug. Lightly touch the wet rug’s surface and see if any soap residue feels sticky or remains on your fingers. If there is any residue present, continue rinsing until the water feels clean to the touch.
6. Squeeze out excess water: Once the rug has been thoroughly rinsed, gently squeeze out excess water without wringing or twisting the rug too forcefully. Start at one end and work your way to the other, applying even pressure to remove as much water as possible.
By effectively rinsing the rug, you remove any remaining cleaning solution and ensure that the rug is free from dirt and residue. Thorough rinsing is critical to achieving a clean and refreshed rug ready for the drying process.
Removing excess water
After rinsing the rug, it’s important to remove excess water to facilitate the drying process. Removing excess water helps to prevent mold, mildew, and potential damage to the rug’s fibers. Here are the steps to effectively remove excess water from your rug:
1. Use a clean, absorbent towel: Lay a clean, absorbent towel on a flat surface, such as a clean floor or countertop. Carefully place the rinsed rug on top of the towel, gently pressing down to absorb the excess water. This method helps to wick away moisture from the rug.
2. Roll up the rug in the towel: Starting from one end of the rug, roll it up tightly with the towel inside. Apply gentle pressure as you roll, allowing the towel to absorb as much water as possible from the rug’s fibers. Continue rolling until you reach the other end of the rug.
3. Step on the rolled-up rug: Once the rug is rolled up with the towel inside, step or walk on the rolled portion. This aids in further extracting water from the rug’s fibers. Apply gentle pressure to help squeeze out the excess water, being careful not to exert too much force that could damage the rug.
4. Repeat with a second towel if needed: If the first towel becomes saturated, unroll the rug and replace it with a second dry towel. Repeat the process of rolling, pressing, and stepping on the rug to remove additional water. Continue this step until the towel no longer absorbs significant amounts of water.
5. Squeeze or blot with additional towels: Dampen clean towels and use them to squeeze or blot the rug’s surface to remove any remaining moisture. Work in sections, applying gentle pressure to absorb the water. Repeat the process with fresh towels until the rug feels significantly drier.
6. Hang or lay flat to air dry: Once most of the excess water has been removed, it’s time to let the rug air dry. Hang the rug over a sturdy clothesline or lay it flat on a clean surface in a well-ventilated area. Ensure that the rug is evenly spread out to facilitate drying and prevent any potential misshaping.
By effectively removing excess water from the rug, you accelerate the drying process and minimize the risk of moisture-related issues. Properly drying the rug is essential for maintaining its shape, preventing mold or mildew growth, and ensuring a clean and fresh final result.
Drying the rug
After removing excess water, it’s crucial to properly dry the rug to prevent moisture-related issues and ensure its longevity. Proper drying helps maintain the rug’s shape, texture, and overall condition. Follow these steps to effectively dry your rug:
1. Choose a well-ventilated area: Select a well-ventilated area where air can circulate freely. It’s important to choose a space that is away from direct sunlight, as exposure to intense sunlight can lead to color fading or damage certain rug materials. An indoor space with good airflow is ideal.
2. Lay the rug flat or hang it: Depending on the size and type of rug, you can either lay it flat or hang it for drying. For smaller rugs, lay them flat on a clean, dry surface. Larger rugs can be hung over a sturdy clothesline or railing. Ensure that the rug is evenly stretched and supported to maintain its shape.
3. Flip the rug periodically: During the drying process, periodically flip the rug to ensure both sides receive adequate airflow. This promotes even drying and prevents one side from remaining damp for an extended period, reducing the risk of mold or mildew formation.
4. Utilize fans or dehumidifiers: If possible, place fans or dehumidifiers near the drying area to promote air circulation and speed up the drying process. This is especially beneficial in humid environments or when drying larger rugs. Ensure that the airflow is gentle to avoid causing the rug to shift or bunch up.
5. Be patient: Drying a rug thoroughly can take time, especially for thicker or larger rugs. It’s essential to exercise patience and allow the rug to dry completely before using or storing it. Avoid rushing the process by using heat sources like heaters, as excessive heat can cause damage or shrinkage to the rug.
6. Check for moisture: To ensure the rug is completely dry, check for any remaining moisture. Press a clean, dry cloth onto the rug’s surface and leave it for a few minutes. If the cloth remains dry, it indicates that the rug is fully dried. If it feels damp, continue the drying process until all moisture is gone.
By allowing the rug to dry properly, you prevent the growth of mold and mildew, maintain its shape and integrity, and ensure a fresh and clean final result. Take the time to facilitate thorough drying to protect your rug investment and prolong its lifespan.