
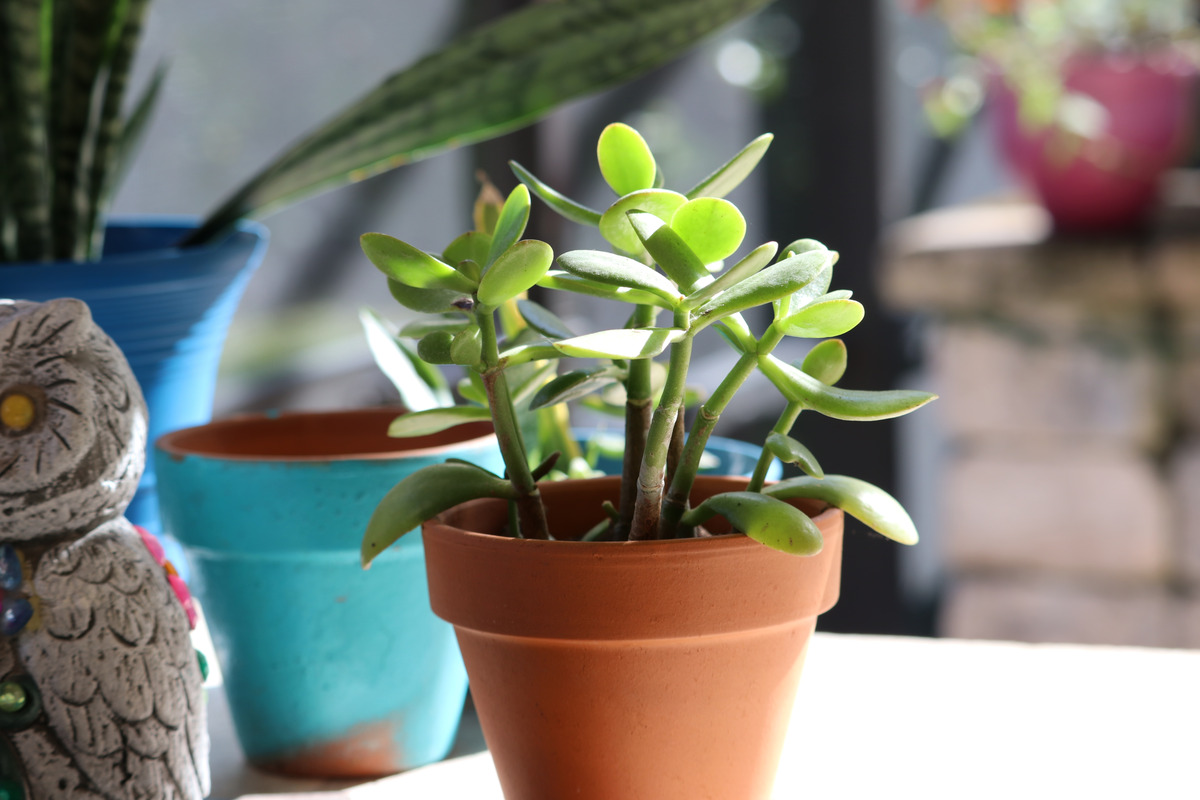
Selecting the Right Container
The first step in repotting a jade plant is to select the right container. Choosing the proper container is essential for the plant’s health and overall growth. Here are some factors to consider:
Size: The new container should be slightly larger than the current pot, allowing the jade plant’s roots to have enough room to grow. However, avoid selecting a container that is too big, as excessive space can retain too much moisture, leading to root rot.
Material: Opt for a container made of breathable material, such as terracotta or clay. These materials allow for proper drainage and prevent soil from becoming overly saturated. Avoid containers made of non-porous materials like plastic or glass, as they can cause moisture buildup.
Drainage: Ensure that the container has drainage holes at the bottom. Adequate drainage is crucial to prevent waterlogged soil, which can harm the jade plant’s roots. If you find a container you love that lacks drainage holes, you can create them yourself using a drill.
Aesthetics: While functionality is key, considering the aesthetics of the container is also important. Select a container that complements your home decor and enhances the beauty of the jade plant.
Stability: Choose a container that provides stability and prevents toppling over as the jade plant grows. The weight of the pot, especially when the plant becomes top-heavy, should be sufficient enough to keep it balanced.
By considering these factors, you can select the perfect container that promotes healthy growth for your jade plant. Remember, providing the right environment for your plant is crucial for its overall well-being.
Preparing the New Container
Once you have selected the right container for repotting your jade plant, it’s important to prepare it properly to ensure a smooth transition for the plant. Here’s how to prepare the new container:
Cleaning: Before adding fresh soil and transferring the jade plant, clean the new container thoroughly. Wash it with mild soap and warm water to remove any dirt or debris. This will help maintain a healthy environment for the plant.
Soaking: If you are using a terracotta or clay pot, it’s beneficial to soak the container in water for a few hours or overnight before repotting. Soaking allows the porous material to absorb some moisture, preventing it from leaching water away from the plant’s roots after repotting.
Protecting the Drainage Holes: Place a piece of broken pottery or mesh over the drainage holes in the new container. This prevents soil from escaping while still allowing excess water to drain freely.
Adding a Layer of Fresh Potting Mix: Before transferring the jade plant, add a layer of fresh potting mix to the new container. This helps provide a nutrient-rich base for the roots to establish in the new pot.
Positioning: Ensure the new container is positioned in a suitable location in your home. Place it in an area where the jade plant can receive the ideal amount of sunlight and temperature conditions for healthy growth.
Labeling: If you have multiple jade plants or other houseplants, consider labeling the new container to avoid confusion. This way, you can keep track of plant varieties, care requirements, and repotting schedules more easily.
By properly preparing the new container, you are creating the perfect environment for your jade plant’s successful repotting. This careful preparation sets the stage for the next steps of the repotting process, ensuring that your plant thrives in its new home.
Prepping the Jade Plant for Repotting
Before you can transfer your jade plant to its new container, it’s important to prepare the plant itself. Prepping the jade plant for repotting helps minimize stress and ensures a smooth transition. Here’s how to do it:
Watering: A day or two before repotting, water the jade plant thoroughly. This helps hydrate the roots and loosen the soil, making it easier to remove the plant from its current pot.
Inspecting: Take this opportunity to inspect the plant for any signs of pests or diseases. If you notice any issues, treat them before proceeding with the repotting process to avoid spreading the problem to the new container.
Pruning: Check the jade plant for any overgrown or damaged branches. If needed, gently prune them using clean and sharp pruning shears. This encourages healthier growth and helps maintain the desired shape of the plant.
Gently Loosening the Soil: Carefully tilt the jade plant and tap the sides of the current pot to loosen the soil around the roots. This will help ease the plant’s removal without causing unnecessary damage to the root system.
Removing the Plant: Once the soil is loosened, gently lift the jade plant out of its current container. Hold the base of the plant and avoid pulling it by the stems or leaves, as this can cause breakage.
Shake Off Excess Soil: Gently shake the roots to remove any excess soil clinging to them. Be gentle to avoid damaging the delicate root system.
Inspecting the Roots: Take a close look at the roots and remove any dark or mushy roots, as these can indicate root rot. Healthy roots will generally appear firm and light-colored.
Trimming the Roots (if necessary): If the jade plant’s roots are excessively long or tangled, you can trim them slightly. Use clean and sharp scissors or pruning shears to make clean cuts. However, avoid pruning more than one-third of the root mass, as this can stress the plant.
By prepping the jade plant for repotting, you are ensuring that it remains healthy and ready to thrive in its new container. This careful preparation allows for a successful repotting process and promotes continued growth and vitality in your jade plant.
Removing the Jade Plant from its Current Pot
Once you have prepped the jade plant and inspected its roots, it’s time to carefully remove the plant from its current pot. This step requires gentle handling to avoid causing damage to the plant or its root system. Follow these steps to remove the jade plant:
Tap and Loosen: Gently tap the sides of the current pot to loosen the soil from the edges. This will help prevent the root ball from sticking to the pot, making it easier to remove the plant.
Slightly Squeeze the Pot: Gently squeeze the sides of the pot to further loosen the soil. Be careful not to apply too much pressure and risk cracking or breaking the pot.
Avoid Pulling by Stems or Leaves: It’s important to lift the jade plant from the base or near the soil level, avoiding pulling or tugging on the stems or leaves, as this can cause them to break or snap off.
Use Hand Pressure: Place one hand on top of the soil surface, with your fingers spread apart. Use the other hand to support the pot as you turn it upside down. Gently tap and wiggle the container if needed to help release the plant.
Support the Plant: As the jade plant becomes loose from the pot, support the base of the plant with your hand to prevent it from falling or collapsing.
Patience is Key: If the plant is stubborn and doesn’t immediately come out of the pot, don’t force it. Take your time and gently work the root ball loose by tapping and wiggling the pot.
By following these steps, you can safely remove the jade plant from its current pot without causing harm to the plant or its roots. Proper handling during this process helps ensure a successful transfer to its new container and encourages the ongoing health and growth of your jade plant.
Inspecting and Trimming the Roots
After removing the jade plant from its current pot, it’s important to take the time to inspect and trim the roots. This step allows you to ensure the health and vitality of the plant’s root system before transferring it to the new container. Follow these guidelines for inspecting and trimming the roots:
Root Inspection: Carefully examine the roots of the jade plant for any signs of damage, discoloration, or excessive tangling. Healthy roots should appear firm, light-colored, and free from any mushy or decaying sections.
Removing Overcrowded Roots: If the roots appear crowded or densely packed, gently loosen them using your fingers. This will help promote better airflow and prevent the roots from becoming too tightly intertwined. Be careful not to damage or break the healthy roots in the process.
Trimming Unhealthy Roots: If you notice any roots that are dark, mushy, or severely damaged, you will need to trim them. Use clean and sharp scissors or pruning shears to remove these unhealthy sections. Make clean cuts to minimize the risk of infection or further damage.
Avoid Over-Trimming: It’s important to exercise caution when trimming roots. Avoid removing more than one-third of the root mass, as excessive trimming can cause stress and hinder the plant’s ability to properly absorb water and nutrients.
Encouraging New Growth: While trimming, look for any areas where new roots are starting to emerge. These are a sign of healthy growth. Ensure that you do not accidentally remove these new roots while trimming the older ones.
Root Stimulants (Optional): If desired, you can dip the trimmed root ends in a rooting hormone to stimulate root growth. However, this step is optional and not necessary for all jade plants.
By inspecting and trimming the roots of your jade plant, you are promoting healthy root development and ensuring the overall vitality of the plant. This step, coupled with proper care during the repotting process, sets the stage for continued growth and success in the new container.
Placing the Jade Plant in the New Container
With the roots inspected and trimmed, it’s time to carefully place the jade plant in its new container. Proper placement ensures that the plant has room to grow and establishes a strong foundation for continued growth. Follow these steps to place the jade plant in the new container:
Positioning: Select the desired position in the new container where you want the jade plant to be placed. Ensure that it is centered and positioned at the appropriate depth, allowing for enough space for watering and future growth.
Adding Fresh Potting Mix: Fill the new container about one-third to halfway with fresh, well-draining potting mix. Gently pat the soil down to create a firm base for the plant.
Centering the Plant: Carefully place the jade plant in the center of the new container, ensuring that the base of the plant is resting on the soil. Avoid burying the stem or leaves in the potting mix, as this can cause them to rot.
Adjusting the Position: Once the plant is centered, gently adjust its position, ensuring that it is upright and balanced in the container. Take your time to find the best placement before proceeding.
Adding more Potting Mix: Slowly add more potting mix around the plant, gently filling the container while ensuring that the roots are covered. Use your fingers to gently press the soil around the roots to eliminate any air pockets.
Avoid Overpacking: Be careful not to overpack the potting mix, as this can lead to poor drainage and compacted soil. Allow a bit of space at the top of the container for easy watering.
Firming the Soil: Once the plant is securely placed and surrounded by potting mix, gently press down the soil to ensure firmness around the plant’s base. This helps provide stability and prevents the plant from becoming top-heavy.
By carefully placing the jade plant in the new container, you are setting the stage for healthy growth and development. Following these steps ensures that the plant is positioned correctly and has adequate support to establish roots in its new home.
Adding Fresh Soil
After placing the jade plant in its new container, the next step is to add fresh soil. The right type and quality of soil are crucial for the plant’s growth and overall health. Follow these guidelines for adding fresh soil to your jade plant:
Choosing the Right Soil: Select a well-draining soil mix specifically formulated for succulent plants. These mixes are typically composed of a combination of organic matter, such as peat moss or coconut coir, and inorganic materials like perlite or pumice. This type of soil allows excess water to drain away from the roots, preventing root rot.
Layering the Soil: Start by adding a layer of the fresh soil mix to the new container. Gently spread it evenly on top of the existing potting mix, covering the roots of the jade plant. Ensure that the soil is distributed evenly around the plant.
Filling Gaps: As you add the soil, pay attention to any gaps or spaces between the roots. Use your fingers or a small spoon to carefully fill these gaps with additional soil. Be gentle to avoid damaging the roots.
Avoid Burying the Stem: When adding fresh soil, take care not to bury the stem or base of the plant. Ensure that the soil level remains below the base of the plant to prevent rotting or suffocation of the stem.
Leave Some Room: As you fill the container with fresh soil, leave a small space at the top to allow for watering. This space will prevent water from overflowing when you water the plant.
Gently Press the Soil: Once the fresh soil is added, use your fingers to lightly press the soil around the plant’s base. This helps to secure the plant and eliminate any air pockets that may have formed during the soil-filling process.
Revisit Soil Level: After settling the soil, check the level to ensure that it is slightly below the rim of the container. This will prevent water from spilling over the edge when you water the jade plant.
By adding fresh soil to the jade plant’s new container, you are providing it with the proper medium to support growth and development. The right soil composition and proper technique ensure optimal water drainage and encourage the plant to thrive in its new home.
Watering and Settling the Plant
Once the jade plant is in its new container and fresh soil has been added, it’s time to water the plant and help it settle into its new environment. Proper watering techniques promote root establishment and ensure the plant’s hydration needs are met. Follow these steps for watering and settling the jade plant:
Initial Watering: Give the jade plant a thorough watering immediately after repotting. This helps to settle the soil and eliminates any air pockets that may have formed during the repotting process. Water until you see water draining out from the bottom of the new container.
Observing Drainage: Pay attention to the drainage of the new container. If water fails to drain properly, adjust the soil around the roots to provide better drainage. Excess moisture can lead to root rot, so it’s important to ensure proper drainage.
Monitoring Moisture Levels: Allow the soil to dry out slightly before the next watering. Jade plants prefer drier conditions, and overwatering can be detrimental to their health. Insert a finger into the soil to assess moisture levels, and water only when the top inch of soil is dry.
Watering Technique: When watering, aim to thoroughly moisten the soil, allowing water to reach the root zone. Avoid splashing water directly onto the leaves, as this can lead to rot or fungal issues. Water at the base of the plant, allowing it to soak in gradually.
Consistency in Watering: Develop a consistent watering schedule based on the plant’s needs and environmental conditions. Remember that jade plants prefer drier conditions, so err on the side of underwatering rather than overwatering. Adjust the frequency of watering based on the moisture needs of your specific jade plant.
Observe and Adjust: Monitor the jade plant for any signs of underwatering or overwatering, such as wilted leaves or yellowing. Adjust your watering practices accordingly to ensure the plant’s health and well-being.
Settling Period: After watering, allow the jade plant some time to settle into its new container and adjust to the new environment. Avoid moving or disturbing the plant excessively during this settling period, as it can cause stress and hinder root establishment.
By watering the jade plant appropriately and allowing it to settle into its new container, you are providing the necessary hydration and stability for the plant to thrive. Consistent and mindful watering practices contribute to the long-term health and growth of your jade plant.
Post-Repotting Care and Maintenance
After repotting your jade plant, it’s important to provide proper care and maintenance to ensure its continued health and growth. Follow these guidelines for post-repotting care:
Light Requirements: Place the jade plant in an area with bright, indirect sunlight. Jade plants thrive in bright light conditions but can be sensitive to direct sunlight, which can lead to leaf burn.
Watering Schedule: Establish a watering schedule based on the plant’s needs and environmental conditions. Allow the soil to dry out slightly between waterings to prevent overwatering, as jade plants are susceptible to root rot. Adjust the frequency of watering depending on the humidity levels in your home and the plant’s moisture needs.
Fertilization: Feed the jade plant with a balanced, water-soluble fertilizer formulated for succulent plants. Follow the instructions on the fertilizer packaging and apply it at half-strength during the plant’s active growing season, typically spring and summer. Avoid fertilizing during the winter months when the plant is in a state of dormancy.
Temperature and Humidity: Jade plants prefer average room temperatures between 65-75°F (18-24°C). They can tolerate slightly lower temperatures during the winter months. Maintain a relative humidity level of around 40-50%. Avoid placing the plant near drafty windows or overly dry environments, as this can cause stress and leaf drop.
Pruning and Maintenance: Regularly inspect the plant for any dead or yellowing leaves and remove them using clean and sharp pruning shears. Pruning helps maintain the plant’s shape and promotes healthy growth. Keep an eye out for any signs of pests, such as mealybugs or spider mites, and take appropriate measures to treat them if necessary.
Repotting Frequency: Jade plants generally require repotting every 2-3 years, or when they have outgrown their current container. Monitor the plant’s growth and root system carefully, and repot as needed to provide enough space for healthy root development.
Patience and Observation: Allow the jade plant time to adjust to its new environment and monitor its condition regularly. Pay attention to any changes in growth, leaf color, or overall health. Adjust your care routine accordingly to ensure the plant’s well-being.
By providing proper care and maintenance after repotting, you are ensuring the continued health and growth of your jade plant. Consistency in watering, light, and environmental conditions, coupled with regular maintenance, will help your jade plant thrive for years to come.