
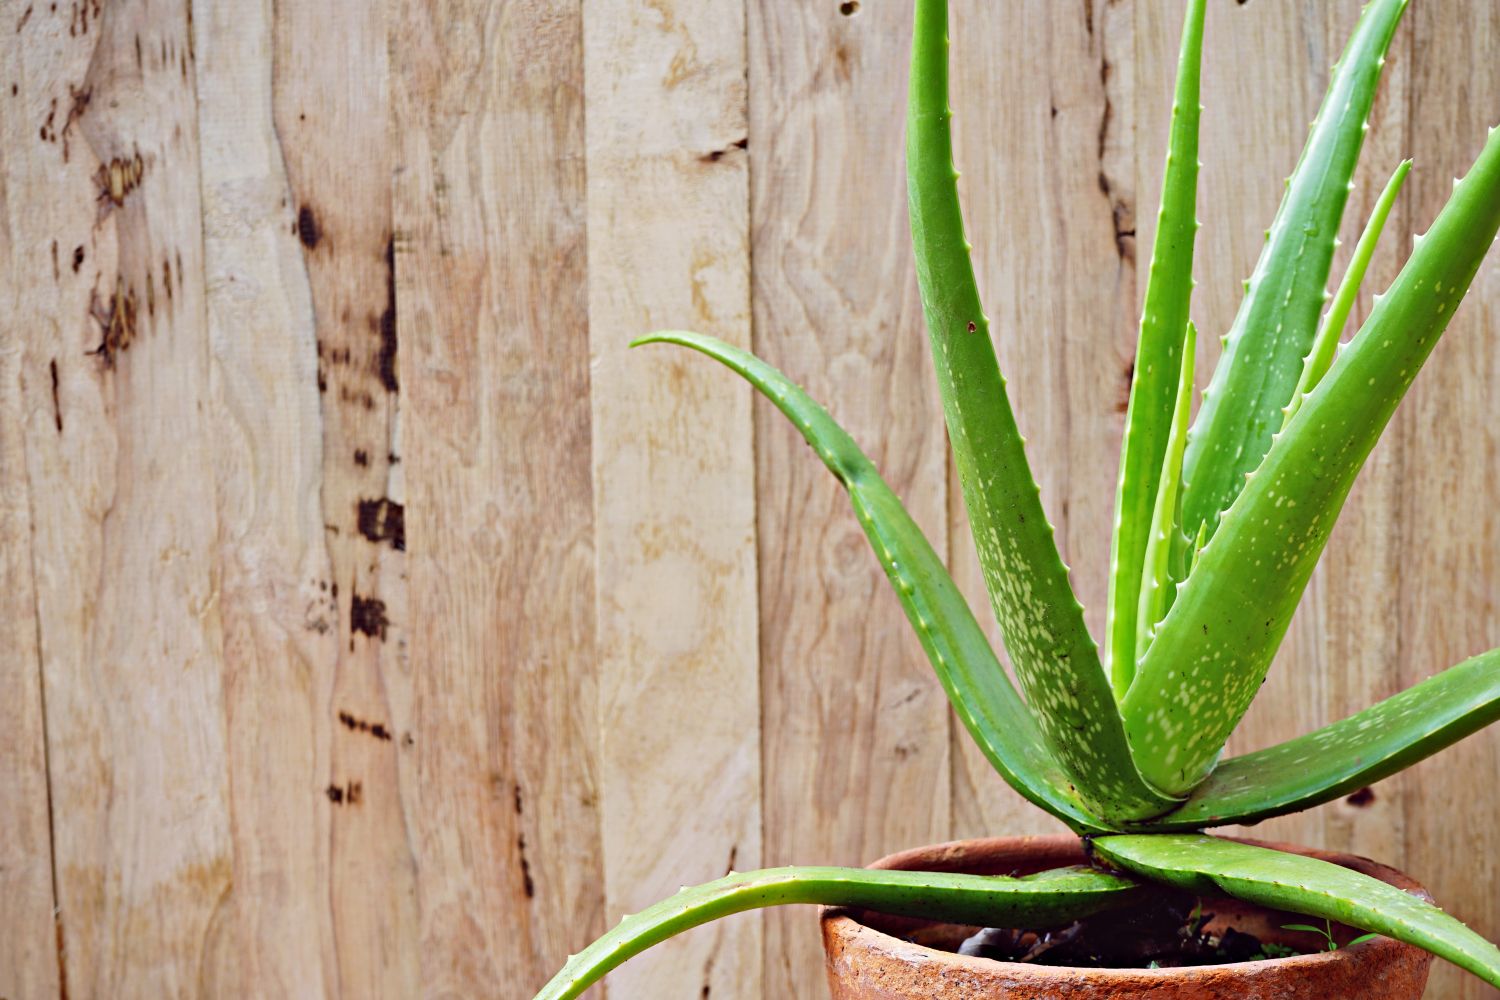
Choosing the Right Pot and Soil
When it comes to repotting an aloe plant, choosing the right pot and soil is crucial for its overall health and well-being. The pot must provide adequate drainage to prevent waterlogged roots, while the soil should offer the right balance of moisture retention and aeration.
First, let’s talk about the pot. Look for a pot that is slightly larger than the current one, allowing room for the aloe plant’s root system to grow. Opt for a pot made of terracotta or a porous material that allows excess water to evaporate. Avoid pots with no drainage holes, as this can lead to water accumulation and root rot.
Next, consider the soil. A well-draining soil mix is essential for aloe plants. Look for a cactus or succulent mix, which typically consists of a blend of potting soil, sand, and perlite. This mixture ensures proper drainage while retaining enough moisture for the plant’s roots. Avoid using garden soil or heavy clay-based soils, as they retain too much water and can suffocate the roots.
Additionally, you may want to consider adding a layer of rocks or pebbles at the bottom of the pot before adding the soil. This helps with drainage and prevents the roots from sitting in standing water.
Lastly, ensure that the pot and soil are clean and free from any pests or diseases. Rinse the pot and wash away any debris before using it. If reusing a pot, sterilize it by soaking it in a solution of one part bleach and nine parts water for 10 minutes, then rinse thoroughly.
Overall, selecting the right pot and soil will lay the foundation for a successful repotting process. This will create a healthy and thriving environment for your aloe plant, allowing it to continue to grow and flourish.
Preparing the Aloe Plant for Repotting
Before diving into the process of repotting your aloe plant, it’s essential to take the necessary steps to prepare the plant for this transition. By preparing the aloe plant properly, you’ll ensure minimal stress and maximize the chances of a successful repotting.
1. Water the Plant: About a week prior to repotting, give your aloe plant a thorough watering. Adequate hydration will make it easier to remove the plant from its current pot without damaging the roots.
2. Choose the Right Time: It’s best to repot your aloe plant during its active growing season, which is typically in spring or early summer. This allows the plant to recover quickly and establish itself in the new pot.
3. Trim Excess Growth: If your aloe plant has grown leggy or has offshoots, now is a good time to trim and remove any excess growth. Use a clean pair of shears or scissors to carefully cut away any long or unruly stems, ensuring you leave a clean cut.
4. Inspect for Pests or Diseases: Before repotting, inspect your aloe plant for any signs of pests or diseases. Look for pests such as mealybugs or root rot. If you notice any issues, treat them accordingly before moving on to repotting.
5. Loosen the Soil: Gently loosen the soil around the base of the plant using a small gardening fork or your fingers. Be careful not to damage the roots in the process.
6. Remove the Plant from the Pot: Turn the plant sideways and tap the bottom of the pot gently to loosen the root ball. Carefully slide the aloe plant out of the pot, supporting the base of the plant to prevent any breakage.
By following these steps, you’ll ensure that your aloe plant is well-prepared for the repotting process. This will minimize stress and potential damage to the plant, setting the stage for a successful transition into its new home.
Removing the Aloe Plant from Its Current Pot
Once you have properly prepared the aloe plant for repotting, the next crucial step is removing it from its current pot. This process requires care and attention to prevent damage to the plant’s delicate roots.
1. Tap and Loosen: Gently tap the sides and bottom of the pot to loosen the aloe plant’s root system. This will help loosen the soil and make it easier to slide the plant out of the pot.
2. Support the Base: Place one hand firmly on the base of the plant while tilting the pot to the side. This will provide stability and prevent the plant from falling out abruptly.
3. Slide it Out: With the other hand, gently and slowly slide the aloe plant out of the pot. If it’s stubborn, use a trowel or your fingers to carefully loosen the soil around the edges to ease the removal.
4. Handle with Care: Be cautious as you take the plant out to avoid damaging the leaves or roots. Hold the plant from the base and avoid squeezing or pulling on the leaves, as they can easily break or bruise.
5. Inspect the Roots: Once the aloe plant is out of the pot, take some time to inspect the roots. Look for any signs of root rot, which may appear as black or mushy roots. If you spot any damaged or unhealthy roots, gently prune them with clean shears.
6. Remove Excess Soil: Gently shake off any excess soil clinging to the roots. This allows you to have a better view of the root system and ensures a clean start in the new pot.
By following these steps, you’ll be able to safely and effectively remove the aloe plant from its current pot. This opens the way for further inspection and preparation before transferring it to its new home.
Inspecting the Roots for Any Issues
After removing the aloe plant from its current pot, it’s important to carefully inspect the roots for any potential issues. This step is crucial in identifying and addressing any root-related problems before transferring the plant to its new pot.
1. Remove Excess Soil: Gently shake off any remaining soil from the roots to get a clear view of their condition. Use your fingers or a soft brush to remove any stubborn bits of soil, being careful not to damage the roots.
2. Check for Root Rot: Look for any signs of root rot, which can occur due to overwatering or improper drainage. Healthy roots are firm, white, and plump. If you notice any roots that are mushy, slimy, or discolored, it’s a sign of root rot. Remove the affected roots using clean shears, cutting them back to healthy tissue.
3. Assess the Root System: Evaluate the overall root system of the aloe plant. Ideally, the roots should be evenly distributed and fill the pot without being overcrowded. If you notice that the roots are tightly wound or forming a dense ball, it may indicate that the plant has outgrown its current pot and needs to be repotted.
4. Look for Pests: Take a close look at the roots for any signs of pests such as mealybugs or aphids. These pests can cause damage to the roots and affect the overall health of the plant. If you spot any pests, consider treating them with appropriate organic pest control methods before proceeding with repotting.
5. Prune Overgrown Roots: If you notice long, straggly roots that extend beyond the root ball, consider pruning them slightly. Trimming the longer roots encourages the plant to develop a more compact and healthy root system once it’s placed in the new pot.
By carefully inspecting the roots of your aloe plant, you can identify any potential issues and take the necessary steps to address them. This ensures that your plant has the best chance of thriving in its new pot and promotes overall root health and vitality.
Trimming and Removing Dead or Damaged Leaves
As part of the aloe plant repotting process, it’s essential to assess and trim any dead or damaged leaves. This not only enhances the plant’s appearance but also promotes new growth and ensures the health and vitality of the aloe plant.
1. Identify Dead or Damaged Leaves: Take a close look at the leaves of your aloe plant and identify any that are brown, shriveled, or wilted. These are typically the dead or damaged leaves that need to be removed. Additionally, look for leaves with signs of insect infestations or disease.
2. Prepare Your Tools: Use a clean, sharp pair of pruning shears or scissors for the trimming process. It’s important to use sterile tools to prevent the spread of potential diseases or pests to the healthy parts of the plant.
3. Trim at the Base: When removing dead or damaged leaves, make clean cuts as close to the base as possible. This helps maintain the overall aesthetics of the plant and prevents any jagged edges that could lead to further damage or infection. Avoid pulling or tearing the leaves, as this can harm the healthy parts of the plant.
4. Inspect the Base of Leaves: Occasionally, dead or damaged leaves may have healthy sections near the base. In such cases, carefully trim away the affected portions, leaving the healthy parts intact. This allows the plant to focus its energy on new growth rather than trying to revive dying leaves.
5. Dispose of Removed Leaves: Collect the trimmed leaves in a compost bin or discard them in the appropriate manner. Do not leave them near the aloe plant or in the pot, as they can attract pests or cause rotting.
6. Observe for Resilience: As you trim the dead or damaged leaves, take note of the overall resilience of the remaining foliage. A healthy aloe plant will have firm leaves with a vibrant green color. If you notice any signs of weakness or discoloration in the healthy leaves, it may indicate an underlying issue that requires attention.
By trimming and removing dead or damaged leaves, you not only improve the appearance of your aloe plant but also promote its overall health and encourage new growth. This step, combined with proper care and maintenance, ensures that your aloe plant thrives after repotting.
Selecting the New Pot Size for the Aloe Plant
Choosing the right pot size is crucial for the successful repotting of your aloe plant. The new pot should provide enough space for the plant’s root system to grow while ensuring proper drainage and stability. Here’s what you need to consider when selecting the new pot size:
1. Assess the Current Pot: Take a look at the aloe plant’s current pot. If the roots are visibly overcrowded or growing out of drainage holes, it’s a clear indication that your plant needs a larger pot.
2. Allow Room for Growth: Select a new pot that is approximately 2-3 inches larger in diameter than the current one. This allows ample space for the roots to expand and encourages healthy growth.
3. Consider the Vertical Space: In addition to considering the pot’s width, think about the height as well. Aloe plants typically have shallow root systems, so a deeper pot is generally unnecessary. However, choose a pot that is tall enough to accommodate the substantial base and rosette of the plant.
4. Optimize Drainage: Ensure that the new pot has drainage holes at the bottom. These holes allow excess water to escape, preventing root rot. Avoid pots without drainage holes, as they can trap water and lead to unhealthy conditions for the plant.
5. Durable and Stable Material: Select a pot made of sturdy material such as terracotta, ceramic, or plastic. These materials provide stability and durability while allowing for proper airflow to the roots.
6. Consider Aesthetics: While functionality is essential, you can also consider the pot’s aesthetic appeal. Choose a pot that complements your personal style and blends well with your home’s décor.
Remember, it’s important to select a pot that meets the specific needs of your aloe plant. By choosing the right size, providing adequate drainage, and ensuring stability, you create an ideal environment for your aloe plant to thrive and continue its growth journey.
Preparing the New Pot with Fresh Soil
Before transferring your aloe plant to its new pot, it’s essential to prepare the pot with fresh soil. This ensures optimal growing conditions and provides the plant with a healthy start in its new home. Follow these steps to prepare the new pot with fresh soil:
1. Clean the Pot: If you are using a new pot, give it a thorough rinse to remove any dust or debris. If you are reusing a pot, wash it with warm soapy water and rinse well to remove any traces of old soil or potential pests.
2. Add Drainage Material: Place a layer of small rocks or pebbles at the bottom of the pot. This helps improve drainage and prevents the plant’s roots from sitting in water. It’s important not to block the drainage holes with the rocks, as this could hinder water flow.
3. Fill the Pot with Soil Mix: Use a well-draining soil mix specifically formulated for cacti or succulents. Alternatively, you can create your own mix by combining potting soil, coarse sand, and perlite. Fill the pot with enough soil so that the base of the aloe plant is slightly elevated above the rim of the pot.
4. Create a Soil Mound: Gently create a small mound in the center of the pot to support the aloe plant when it’s placed in the pot. This helps keep the plant stable and prevents it from sinking too deeply into the soil.
5. Lightly Moisten the Soil: Before transferring the aloe plant, lightly moisten the soil in the new pot. This provides a welcome environment for the roots and aids in the initial establishment of the plant in its new home.
6. Be Mindful of Soil Level: Ensure that the soil level in the new pot is adjusted so that the base of the aloe plant sits slightly higher than the surrounding soil. This prevents water from pooling around the stem, which can lead to rot.
Properly preparing the new pot with fresh soil provides your aloe plant with a nourishing foundation for growth. It supports healthy root development, adequate drainage, and stability, which are all essential factors in maintaining the overall health and vigor of your plant.
Placing the Aloe Plant in the New Pot
With the new pot prepared and the fresh soil in place, it’s time to carefully transfer your aloe plant to its new home. Following these steps will ensure a smooth and successful transition.
1. Position the Plant: Create a small hole or indentation in the center of the soil mound to accommodate the base of the aloe plant. Ideally, the base should be slightly elevated above the rim of the pot to prevent water accumulation around the stem.
2. Center the Plant: Hold the aloe plant by the base, ensuring that it is centered in the hole or indentation. Gently lower the plant into the pot, taking care not to disturb or damage the roots.
3. Check Plant Stability: Once the aloe plant is positioned in the new pot, check its stability. Ensure that the plant stands upright and doesn’t wobble. Adjust the soil if needed to provide additional support and stability.
4. Fill in Gaps with Soil: Use your fingers or a small trowel to gently fill in the gaps around the roots with the prepared soil. Be careful not to pack the soil too tightly, as this can restrict airflow and water drainage.
5. Avoid Covering the Leaves: As you fill in the soil, be mindful not to cover the base or bottom leaves of the aloe plant. Allow a small space between the soil surface and the base of the leaves to prevent moisture-related issues.
6. Tap the Pot: Lightly tap the pot on a flat surface to help settle the soil and eliminate any air pockets. This ensures good soil-to-root contact and promotes root development.
By following these steps, you can ensure that your aloe plant is placed securely and comfortably in its new pot. It will have the stability and support needed to thrive and grow in its fresh environment.
Gently Filling the Soil around the Roots
Once you have positioned your aloe plant in the new pot, the next step is to fill the soil around the roots. This process requires care and attention to avoid damaging the roots and to provide a stable environment for the plant to grow.
1. Gradual Backfilling: Start by gently filling the soil around the roots with your fingers or a small trowel. Take your time and add soil in small increments to distribute it evenly around the roots. Avoid adding too much soil at once, as this can create excessive pressure on the roots.
2. Lightly Tamp the Soil: As you fill in the soil, lightly tamp it down using your fingers or the back of a spoon. This helps to eliminate any air pockets and provides better soil-to-root contact.
3. Maintain Plant Stability: Throughout the backfilling process, ensure that the aloe plant remains stable and upright. Hold the base of the plant if necessary to prevent it from tipping over or becoming unbalanced.
4. Leave Adequate Space: Be mindful not to overfill the pot, leaving a small gap between the top of the soil and the rim of the pot. This space allows for easier watering and prevents water from spilling over the edges during irrigation.
5. Firm but Gentle: While it’s important to lightly tamp the soil, be gentle to avoid compacting it too tightly. A loose soil structure promotes good aeration and proper water drainage, which are crucial for the health of the aloe plant.
6. Do Not Bury the Base: As you fill the soil, ensure that the base of the aloe plant remains exposed and slightly elevated above the soil surface. This helps to prevent rotting or damage to the plant’s stem.
By gently filling the soil around the roots of your aloe plant, you provide it with a stable and supportive environment for growth. This careful process allows the plant’s roots to establish themselves in the new pot and ensures their access to essential nutrients and water.
Watering the Newly Replanted Aloe Plant
Proper watering is crucial after replanting your aloe plant as it helps settle the soil and promotes root establishment. However, it’s essential to strike the right balance and avoid overwatering, which can lead to root rot. Follow these steps to effectively water your newly replanted aloe plant:
1. Settle the Soil: After replanting, gently water the soil around the aloe plant to help settle it and remove any remaining air pockets. Use a watering can or a gentle stream of water to wet the soil evenly.
2. Be Moderate: Instead of drenching the soil, aim for a moderate amount of water. Overwatering can suffocate the roots and lead to rotting. Allow the water to soak into the soil and ensure proper absorption.
3. Water at the Base: Direct the water at the base of the plant, avoiding the leaves and rosette. Wet leaves can create a favorable environment for fungal infections and other issues. Watering at the base promotes healthy root development.
4. Observe for Drainage: After watering, check if the excess water drains out from the pot’s drainage holes. If there is excessive water pooling at the bottom, you may have overwatered, and it’s important to adjust your watering habits in the future.
5. Establish a Watering Schedule: Aloe plants prefer to be on the drier side, so allow the soil to dry out partially between waterings. The frequency of watering will depend on various factors such as the environment, pot size, and plant size. As a general rule, water your aloe plant when the top inch of soil feels dry to the touch.
6. Pay Attention to Signs of Thirst: Watch for signs of dehydration in your aloe plant, such as wilting leaves, curling, or a shriveled appearance. These indicate that the plant requires water. Adjust your watering schedule accordingly, but be cautious not to overcompensate with excessive watering.
By watering your newly replanted aloe plant with care and observing its moisture needs, you provide the right amount of hydration for healthy root development. This promotes the overall well-being of the plant and sets the stage for its continued growth and vitality.
Providing Proper Care and Maintenance after Repotting
After repotting your aloe plant, it’s important to provide the necessary care and maintenance to help your plant thrive in its new environment. By following these guidelines, you’ll ensure the continued health and growth of your aloe plant:
1. Sunlight Requirements: Aloe plants thrive in bright, indirect sunlight. Place your repotted aloe plant near a window where it can receive 6 to 8 hours of sunlight per day. Avoid placing it in direct sunlight, as this can lead to sunburn and leaf damage.
2. Watering Guidelines: Aloe plants are succulents and have low water needs. Allow the soil to dry out partially between waterings. Stick your finger about an inch into the soil; if it feels dry, it’s time to water. Ensure proper drainage by using well-draining soil and allowing excess water to flow out of the pot’s drainage holes.
3. Avoid Overwatering: Overwatering is a common mistake that can lead to root rot. Only water when the soil is dry, and be sure to adjust your watering schedule based on factors such as environmental conditions, pot size, and plant size.
4. Temperature and Humidity: Aloe plants prefer temperatures between 60°F (15°C) and 80°F (26°C). They can tolerate slightly cooler temperatures but are sensitive to frost. Maintain average indoor humidity levels, as excessive moisture can encourage fungal growth.
5. Fertilizer Application: During the active growing season, you can fertilize your aloe plant with a balanced, water-soluble fertilizer specifically formulated for succulents. Follow the instructions on the fertilizer package and apply at a diluted strength every 3 to 4 months. Avoid fertilizing in winter when the plant is in dormancy.
6. Pruning and Maintenance: Remove any dead or yellowing leaves promptly to maintain the plant’s appearance and health. Trim off any offshoots or pups that form around the base of the plant if you want to control its size or propagate new plants.
7. Monitor for Pests and Diseases: Keep a close eye on your aloe plant for signs of pests such as mealybugs or scale insects. If detected, treat the infestation promptly with organic solutions or insecticidal soap. Also, watch for signs of common diseases like root rot or fungal infections, and take appropriate measures to address them.
By providing proper care and maintenance to your freshly repotted aloe plant, you’ll create an optimal environment for its growth and well-being. With the right balance of sunlight, water, and attention, your aloe plant will thrive and continue to beautify your living space.