
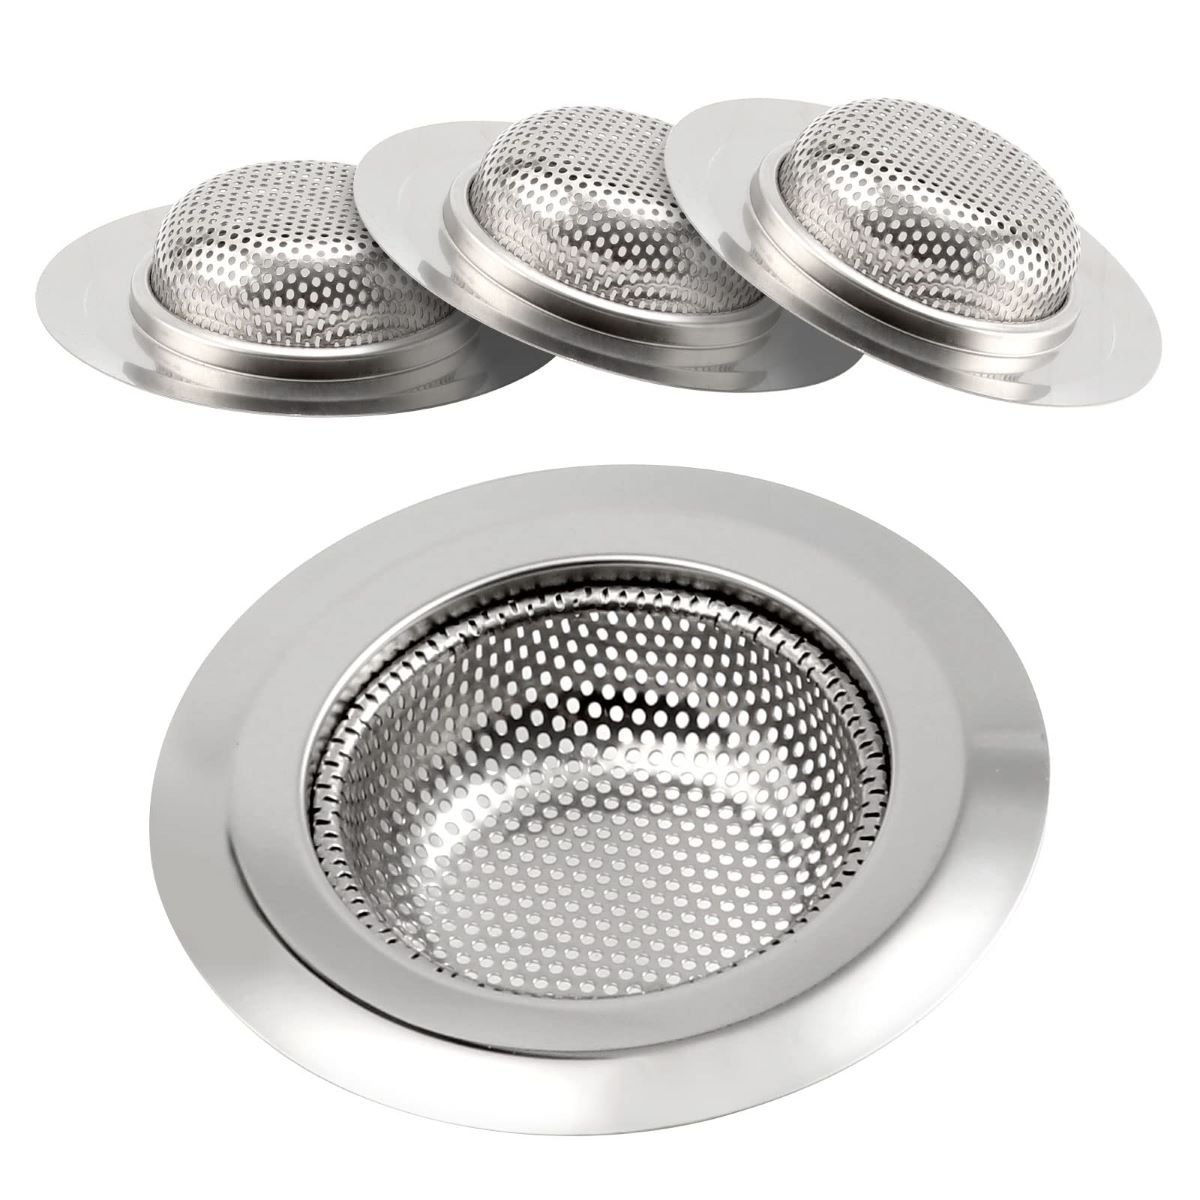
What is a Sink Strainer?
A sink strainer is a small device that is installed in the drain of a sink to prevent debris from entering the plumbing system. It is typically made of metal or plastic and consists of a perforated or mesh basket that catches solid particles, while allowing water to flow through. Sink strainers are commonly used in kitchen and bathroom sinks to prevent food scraps, hair, and other objects from clogging the drain pipes.
The main purpose of a sink strainer is to trap larger items that can cause blockages in the plumbing system. It acts as a filter, allowing water to pass through while trapping solid waste. This helps to prevent costly plumbing repairs and ensures that the sink drains properly.
Sink strainers are particularly important in kitchen sinks, where food scraps and grease can easily accumulate. By using a sink strainer, you can easily collect and dispose of food debris, preventing it from entering your pipes and causing blockages. In bathrooms, sink strainers can catch hair, soap residue, and other small objects that can accumulate over time and lead to clogged drains.
Not only do sink strainers prevent clogs, but they also help to keep the drains clean and hygienic. Without a strainer, food particles, hair, and other waste can build up inside the pipes, creating a breeding ground for bacteria and unpleasant odors. By using a sink strainer, you can keep your drains clear and minimize the risk of foul smells in your kitchen or bathroom.
Tools and Materials You’ll Need
Before you can start replacing a sink strainer, it is important to gather all the necessary tools and materials. Here is a list of what you’ll need:
- Adjustable wrench or pliers
- Screwdriver (flathead or Phillips, depending on your sink)
- Plumber’s putty or silicone sealant
- New sink strainer kit
- Bucket or container
- Clean cloth
- Teflon tape
The adjustable wrench or pliers will be used to loosen and tighten the lock nut that holds the sink strainer in place. The screwdriver is needed to remove any screws or clips that may be securing the strainer to the sink.
Plumber’s putty or silicone sealant is necessary to create a watertight seal between the sink and the new strainer. This will prevent any water from leaking out underneath the sink.
A new sink strainer kit can be purchased from any home improvement store or plumbing supply store. It typically includes the strainer basket, lock nut, rubber gasket, and any additional components that may be required for installation.
A bucket or container will come in handy to catch any water that may spill out during the replacement process. It is important to have a clean cloth on hand to wipe away any excess water or debris from the sink.
Teflon tape is optional but recommended to create a tight seal when reconnecting the pipes. It can help prevent any leaks from occurring.
By gathering these tools and materials before starting the sink strainer replacement, you will ensure a smooth and efficient process.
Step 1: Prepare Your Workspace
Before you begin replacing a sink strainer, it is important to prepare your workspace to ensure a smooth and efficient process. Follow these steps to get started:
- Clear the area around the sink: Remove any items, such as dishes or utensils, from the sink and surrounding countertop. This will give you ample space to work and prevent any items from falling into the sink during the replacement process.
- Turn off the water supply: Locate the shut-off valves underneath the sink and turn them clockwise to shut off the water supply. This will prevent any water from flowing while you are working.
- Place a bucket or container underneath the sink: Position a bucket or container underneath the sink to catch any water that may spill out during the removal of the old sink strainer.
- Remove any excess water: If there is any water remaining in the sink, use a clean cloth or sponge to soak it up and wring it out into the bucket or container. Ensuring that the sink is dry will make it easier to work with when removing the old strainer.
- Gather your tools and materials: Make sure you have all the necessary tools and materials within reach, including the adjustable wrench or pliers, screwdriver, plumber’s putty or silicone sealant, new sink strainer kit, bucket, clean cloth, and Teflon tape.
By following these steps, you will create a clean and organized workspace, making it easier to replace the sink strainer efficiently and effectively.
Step 2: Turn Off the Water Supply
Before you begin replacing the sink strainer, it is crucial to turn off the water supply to avoid any leaks or water damage. Follow these steps to turn off the water supply:
- Locate the shut-off valves: Look under the sink for the shut-off valves. These valves are usually located near the pipes that connect to the faucet. There will be separate valves for the hot and cold water supply.
- Turn off the water valves: Using either your hand or a wrench, turn the shut-off valves clockwise until they are fully closed. This will shut off the flow of water to the sink.
- Check for water flow: Once you have closed the shut-off valves, turn on the faucet to check if any water is still flowing. If water continues to flow, you may have to shut off the main water valve for your entire house until the water stops completely.
- Test the water supply: To ensure that the water supply is completely turned off, turn on a nearby faucet to see if any water is still flowing. If the water stops running, it means that the shut-off valves have successfully cut off the water supply to the sink and you are ready to proceed with the replacement.
Turning off the water supply is an important step to prevent any potential water damage or leaks during the sink strainer replacement. It ensures a safe working environment and allows you to proceed with the installation with peace of mind.
Step 3: Remove the Existing Sink Strainer
Now that you have turned off the water supply, it’s time to remove the existing sink strainer. Follow these steps to complete this process:
- Access the sink strainer: Look underneath the sink and locate the lock nut that secures the sink strainer in place. This nut is usually located directly under the drain opening.
- Loosen the lock nut: Using an adjustable wrench or pliers, grip the lock nut and turn it counterclockwise to loosen it. Apply steady pressure until the lock nut starts to move. If the nut is difficult to turn, you can use penetrating oil to help loosen it.
- Remove the lock nut: Once the lock nut is loose, continue unscrewing it until it comes off completely. Be careful not to drop the lock nut into the drain as it can be difficult to retrieve. Place the lock nut in a safe spot where it will not get lost or fall into the drain.
- Detach the sink strainer: With the lock nut removed, you can now detach the sink strainer from the sink. Gently wiggle and pull the strainer upward to free it from the opening. If the strainer is stuck, you can use a screwdriver to loosen it by wedging it between the strainer and the sink and twisting it slowly.
- Clean the drain opening: After you have removed the old sink strainer, use a clean cloth or sponge to wipe away any debris or residue from the drain opening. It’s important to ensure that the opening is clean and free from any obstruction before installing the new sink strainer.
By following these steps, you will successfully remove the existing sink strainer, making way for the installation of a new one. Take your time during this process to avoid any damage to the sink or surrounding areas.
Step 4: Clean the Sink Drain
Once you have removed the existing sink strainer, it’s essential to clean the sink drain before installing the new strainer. Follow these steps to ensure a clean and obstruction-free drain:
- Inspect the drain: Take a close look at the drain opening and check for any debris or residue that may have accumulated. This can include food scraps, soap scum, and other particles that can hinder proper drainage.
- Remove visible debris: Use a pair of gloves and a paper towel or a small brush to remove any visible debris. Wipe around the perimeter of the drain opening to clear away any dirt or grime that may be present on the surface.
- Flush the drain: Run hot water through the drain for a few minutes to help flush out any remaining particles or buildup. This will help ensure that the drain is as clean as possible before installing the new sink strainer.
- Use a drain cleaner (optional): If you notice any stubborn residue or clogs in the drain, you can use a mild drain cleaner to help dissolve and remove them. Follow the instructions on the cleaner carefully and use it only as needed.
- Dry the area: After cleaning the drain, use a clean cloth or paper towel to dry the area around the drain opening. This will remove any excess water and provide a clean surface for installing the new sink strainer.
By taking the time to clean the sink drain, you ensure optimal performance of the new sink strainer. A clean and unclogged drain will allow water to flow freely, preventing future blockages and maintaining the efficiency of your sink.
Step 5: Prepare the New Sink Strainer
With the sink drain cleaned, it’s time to prepare the new sink strainer for installation. Follow these steps to ensure proper preparation:
- Inspect the new sink strainer: Before proceeding, carefully examine the components of the new sink strainer kit. Make sure all necessary parts are included, such as the strainer basket, lock nut, rubber gasket, and any additional components.
- Apply plumber’s putty or silicone sealant: Take a small amount of plumber’s putty or silicone sealant and roll it between your hands to form a thin, even rope. Apply the putty or sealant around the underside of the lip of the new sink strainer.
- Position the rubber gasket: Take the rubber gasket included in the sink strainer kit and place it on top of the putty or sealant, ensuring it sits flat and evenly around the strainer opening.
- Apply Teflon tape (if necessary): If the sink strainer kit includes a threaded tailpiece or any other threaded connections, wrap Teflon tape clockwise around the threads to create a tight seal when connecting the parts.
- Check the alignment: Before proceeding to installation, hold the new sink strainer assembly up to the drain opening and check that it lines up properly. Adjust the position if necessary to ensure a snug fit and proper alignment.
By properly preparing the new sink strainer, you will ensure a secure and watertight installation. Taking the time to apply plumber’s putty or silicone sealant and position the rubber gasket correctly will help prevent any leaks or water damage in the future.
Step 6: Install the New Sink Strainer
Now that you have prepared the new sink strainer, it’s time to install it in your sink. Follow these steps to successfully install the new sink strainer:
- Lower the sink strainer into the drain opening: Carefully lower the new sink strainer assembly into the drain opening, aligning it properly with the sink.
- Press down firmly: Apply gentle pressure and push the sink strainer downward to compress the plumber’s putty or silicone sealant and create a watertight seal with the sink surface.
- Position the rubber gasket: Ensure that the rubber gasket is properly positioned and secured between the sink strainer assembly and the sink surface.
- Hand-tighten the lock nut: Take the lock nut that came with the sink strainer kit and hand-tighten it onto the threaded tailpiece or connection underneath the sink. This will help hold the sink strainer assembly in place.
- Use an adjustable wrench or pliers: Use an adjustable wrench or pliers to further tighten the lock nut. Grip the lock nut and turn it clockwise until it is securely tightened. Be careful not to over-tighten, as this can cause damage to the sink or the sink strainer assembly.
- Wipe away excess putty or sealant: Once the lock nut is tightened, use a clean cloth or paper towel to wipe away any excess plumber’s putty or silicone sealant that may have been squeezed out during installation.
By following these steps, you will successfully install the new sink strainer in your sink. Ensure that the sink strainer fits snugly and securely to prevent any leaks or water damage.
Step 7: Tighten the Lock Nut
After installing the new sink strainer, the next step is to tighten the lock nut to ensure a secure and watertight connection. Follow these steps to properly tighten the lock nut:
- Locate the lock nut: The lock nut is the large nut underneath the sink that holds the sink strainer assembly in place.
- Get a good grip: Using an adjustable wrench or pliers, grip the lock nut firmly but gently. Make sure you have a good grip to prevent slipping or damage to the lock nut.
- Turn the lock nut clockwise: Begin turning the lock nut clockwise to tighten it onto the threaded tailpiece or connection underneath the sink. Use steady pressure and turn the nut until it is snug and secure.
- Avoid over-tightening: Be cautious not to over-tighten the lock nut, as this can cause damage to the sink or the sink strainer assembly. Tighten it until it is securely in place, but do not force it beyond that point.
- Check for leaks: Once you have tightened the lock nut, it’s important to check for any leaks. Turn on the water supply and let the water flow into the sink. Inspect the area around the sink strainer for any signs of water leakage, such as dripping or pooling water.
- Adjust if necessary: If you notice any leaks, you may need to further tighten the lock nut. Use the adjustable wrench or pliers to make slight adjustments until the leaks stop.
By properly tightening the lock nut, you ensure a secure and leak-free connection between the sink strainer assembly and the sink. Remember to check for leaks and make any necessary adjustments to achieve a watertight seal.
Step 8: Reconnect the Pipes
Now that the new sink strainer is securely in place, it’s time to reconnect the pipes. Follow these steps to properly reconnect the pipes:
- Inspect the pipes: Take a close look at the pipes underneath the sink, including the tailpiece and the trap. Ensure that the pipes are clean and free from any debris or damage.
- Apply Teflon tape (if necessary): If any threaded connections are present, such as those on the tailpiece or the trap, wrap Teflon tape clockwise around the threads. This will create a tight seal and help prevent leaks.
- Reconnect the tailpiece: Align the threaded end of the tailpiece with the threaded connection on the sink strainer assembly. Hand-tighten the connection, and then use an adjustable wrench or pliers to securely tighten it. Avoid over-tightening to prevent damage.
- Reattach the trap: Position the trap under the tailpiece and line up its openings with the corresponding connections. Hand-tighten the connections, and then use the adjustable wrench or pliers to tighten them further. Again, be careful not to over-tighten.
- Check for leaks: Once all the connections are tightened, turn on the water supply and check for any leaks. Inspect the connections and the pipes for any signs of leaking water. If you notice leaks, you may need to further tighten the connections or apply additional Teflon tape as needed.
- Ensure proper alignment: Make sure that the pipes are properly aligned and are not under unnecessary strain. Adjust them if necessary to ensure smooth water flow and prevent any potential leaks.
By reconnecting the pipes correctly, you ensure proper water drainage and prevent leaks. Take your time to align the pipes properly, tighten the connections securely, and check for any leaks to ensure a successful reconnection.
Step 9: Turn On the Water Supply
After completing the installation and reconnecting the pipes, it’s time to turn on the water supply and test your work. Follow these steps to safely turn on the water supply:
- Locate the shut-off valves: Look under the sink for the shut-off valves that you previously turned off in Step 2. These valves control the flow of water to the sink.
- Turn on the hot water valve: Carefully turn the hot water shut-off valve counterclockwise to open it. This will restore the water flow to the hot water supply line.
- Turn on the cold water valve: Similarly, turn the cold water shut-off valve counterclockwise to open it and restore the water flow to the cold water supply line.
- Check for leaks: As the water supply is turned back on, closely monitor the connections around the sink strainer and the pipes for any signs of leakage. Look for dripping water or water pooling around the connections.
- Verify proper drainage: To ensure proper drainage, turn on the faucet and let the water flow into the sink. Pay attention to how the water drains and ensure there are no clogs or slow draining issues.
- Inspect for any further leaks: Allow the water to run for a few minutes and continue inspecting all connections for any additional signs of leakage. If you notice any leaks, tighten the connections as necessary or seek professional assistance if needed.
By safely turning on the water supply and checking for leaks, you can ensure that the sink strainer replacement was successful and that the plumbing system is functioning properly. Address any leaks immediately to prevent water damage and maintain the integrity of your sink and plumbing system.
Step 10: Test for Leaks
After completing the installation and turning on the water supply, it’s crucial to test for any potential leaks. Follow these steps to thoroughly test for leaks:
- Inspect all connections: Carefully examine all connections, including the sink strainer, pipes, and any other areas where components meet. Look for signs of water dripping, pooling, or any moisture around the connections.
- Check the drain: With the water running, observe how well the sink drains. Make sure there are no slow drain issues or water backing up. If you notice any problems, it could indicate a clog or an improper installation.
- Examine the pipes: Inspect the pipes under the sink for any signs of condensation, corrosion, or water droplets. These can be indications of a leak and should be addressed immediately.
- Listen for unusual sounds: While the water is running, listen carefully for any unusual sounds, such as hissing or gurgling noises. These sounds can also be signs of a leak or an issue with the plumbing system.
- Feel for moisture: Run your fingers along the connections and pipes to check for any moisture. Even a small amount of moisture can indicate a potential leak that needs to be resolved.
- Address any leakage: If you discover any leaks during the testing process, take immediate action to address them. Tighten the connections, apply additional sealant or Teflon tape if necessary, or seek professional help if the issue persists.
- Recheck after adjustments: After making adjustments to address any leaks, retest the area to ensure that the adjustments were effective and no further leaks are present.
Thoroughly testing for leaks is a crucial step in the sink strainer replacement process. Identifying and resolving leaks promptly will help prevent water damage, keep your plumbing system in good condition, and ensure the proper functioning of your sink.