
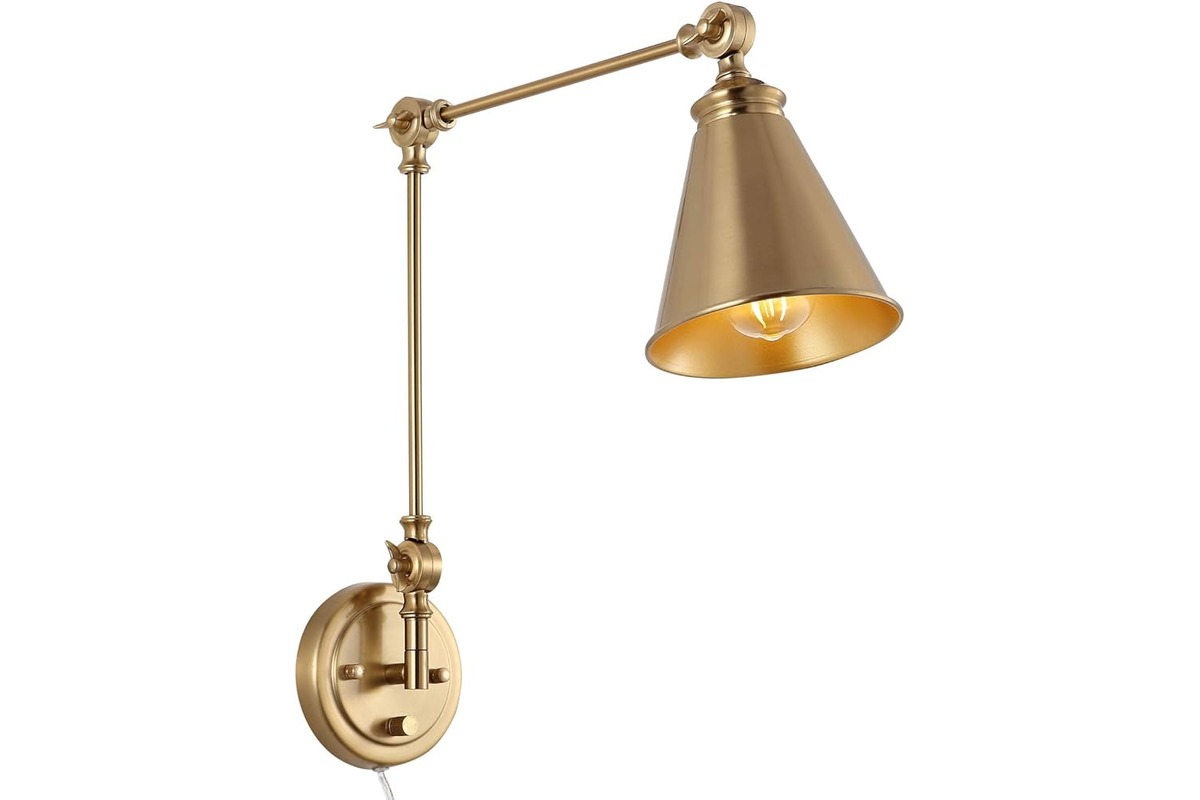
Tools and Materials Needed
To successfully repair a swing arm lamp, you will need a few key tools and materials. Having them on hand will ensure a smooth and efficient repair process. Here is a list of what you will need:
- Phillips screwdriver
- Wire cutters
- Wire strippers
- Electrical tape
- Replacement wiring
- Replacement switch
- Replacement socket
- Replacement shade (if necessary)
- Replacement bulb (if necessary)
- Repair manual or online resources (optional, but highly recommended)
The Phillips screwdriver is essential for disassembling the lamp and accessing the internal components. Wire cutters and wire strippers will be required to remove and replace damaged wiring. Electrical tape is necessary for securing wires and providing insulation.
You will also need replacement wiring to replace any damaged sections. Similarly, a replacement switch and socket may be required if either component is faulty. If the shade or bulb is damaged, it may be necessary to replace them as well.
Having a repair manual or accessing online resources can provide valuable guidance and step-by-step instructions specific to your lamp model. While not mandatory, it can greatly assist you in understanding the repair process and ensure that you complete the repair correctly.
By gathering all the necessary tools and materials beforehand, you will be well-prepared to tackle the repair process with confidence and efficiency.
Step 1: Assess the Damage
The first step in repairing a swing arm lamp is to carefully assess the damage. This involves a thorough examination of the lamp to identify any visible issues or malfunctions. Here’s how to proceed:
- Start by visually inspecting the lamp for any obvious signs of damage. Look for frayed wires, loose connections, or any physical damage to the lamp’s components.
- Next, plug in the lamp and test it to see if it turns on. If the lamp does not illuminate, try replacing the bulb to ensure that the issue is not simply a burnt-out bulb.
- If the lamp still does not work after replacing the bulb, move on to examining the wiring. Carefully examine the length of the cord for any cuts, exposed wires, or signs of wear and tear. Additionally, check for any loose or disconnected wires inside the lamp housing.
- Take note of any other issues you may observe during the assessment. This could include a faulty switch, a damaged socket, or a worn-out shade. These issues will be addressed in later steps of the repair process.
Assessing the damage is crucial as it helps you understand the extent of the repair required. It allows you to identify specific components that need to be repaired or replaced, ensuring that you have the necessary tools and materials ready to proceed to the next steps.
Take your time during this step and make note of any observations or potential issues. This information will guide you in subsequent steps and ensure that you address all the necessary repairs to restore your swing arm lamp to working condition.
Step 2: Disconnect the Lamp
Before you can begin repairing your swing arm lamp, it is essential to disconnect it from the power source. This step ensures your safety and prevents any potential accidents. Follow these steps to properly disconnect the lamp:
- Turn off and unplug the lamp from the wall outlet. This ensures that no electrical current is flowing through the lamp while you work on it.
- If the lamp has a switch, turn it to the “off” position. This further ensures that the lamp is completely powered off.
- If the lamp is connected to an extension cord or power strip, unplug it from there as well.
By unplugging the lamp and turning off any switches, you eliminate the risk of electrical shock while repairing the lamp. This is especially crucial when working with electrical components and wiring.
Remember, safety should always be your top priority. Take precautions to ensure that the lamp is completely disconnected from the power source before moving on to the next steps.
Once you have disconnected the lamp, you can proceed with the repair process with peace of mind, knowing that you are working on it in a safe and secure manner.
Step 3: Remove the Shade and Bulb
Before delving into the internal components of a swing arm lamp, it is necessary to remove the shade and bulb. This step allows for better access to the lamp’s wiring and other elements that may need repair. Follow these simple steps to remove the shade and bulb:
- Ensure that the lamp is completely turned off and disconnected from the power source. This ensures your safety throughout the process.
- If your lamp has a fabric or glass shade, carefully remove it by unscrewing or unclipping it from the lamp socket. Place the shade in a safe location to avoid damage during the repair process.
- If your lamp has a traditional light bulb, unscrew it counterclockwise to remove it from the socket. Handle the bulb carefully to avoid breakage, and set it aside for inspection or replacement if necessary.
Removing the shade and bulb allows you to have a clear view of the lamp’s interior and facilitates easier access to the wiring and other components that may need attention. It also creates a safer environment for working on the repair.
Remember to handle the shade and bulb with care to prevent any accidental damage. Set them aside in a secure place until you are ready to reinstall them later in the repair process, if applicable.
With the shade and bulb removed, you are now ready to proceed to the next steps of assessing and repairing the internal components of your swing arm lamp.
Step 4: Inspect the Wiring
Once you have removed the shade and bulb, it is time to closely inspect the wiring of your swing arm lamp. This step is crucial in identifying any damaged or faulty wiring that may be causing issues with the lamp’s functionality. Follow these steps to inspect the wiring:
- Take a close look at the entire length of the lamp’s cord. Look for any cuts, frayed sections, or exposed wires. These can indicate damage that needs to be addressed.
- If you notice any loose or disconnected wires inside the lamp housing, carefully examine them to determine the extent of the problem. Gently wiggle the wires to check for secure connections.
- Inspect the plug for any visible signs of damage. Look for bent or broken prongs, as these may affect the lamp’s ability to receive power. Additionally, make sure the plug is clean and free of dirt or debris.
During the inspection, it is important to approach the wiring with caution. Avoid handling live wires and ensure that the lamp is disconnected from the power source before examining the wiring.
If you identify any damaged or faulty wiring, it will need to be replaced or repaired. You can use wire cutters and wire strippers to remove the damaged section and replace it with new wiring. Secure the wires in place using electrical tape, ensuring a firm and safe connection.
By thoroughly inspecting the wiring, you can pinpoint any issues that may be affecting the lamp’s functionality. This step sets the foundation for successful repair and ensures that the wiring is in proper working condition before moving on to the next steps.
Step 5: Replace or Repair the Wiring
If you have identified damaged or faulty wiring during the inspection, it is essential to replace or repair it to restore proper functionality to your swing arm lamp. Follow these steps to replace or repair the wiring:
- Ensure that the lamp is fully disconnected from the power source to avoid any risk of electrical shock.
- Using wire cutters, carefully remove the damaged section of wire. Make clean, straight cuts to ensure a precise removal.
- Strip the ends of the new replacement wire using wire strippers. Ensure that you expose enough wire to create a secure connection.
- If necessary, thread the new wire through the lamp housing, following the same path as the previous wire.
- Connect the new wire to the appropriate terminals inside the lamp housing. Use electrical tape to securely fasten the wires in place, ensuring a proper and safe connection.
- If you need to repair a loose or disconnected wire, use wire strippers to expose a small amount of wire on both ends. Twist the ends together and secure them with electrical tape.
It is crucial to handle the wiring with care and attention to detail during this step. Ensure that the connections are tight and secure, as loose wires can lead to further issues and potential hazards.
If you are uncertain about replacing or repairing the wiring on your own, it is recommended to seek assistance from a professional electrician to ensure a safe and effective repair.
By replacing or repairing the wiring, you address one of the most common issues that can affect the functionality of a swing arm lamp. This step paves the way for a successful repair and ensures that the lamp’s electrical components are in optimal working condition.
Step 6: Replace or Repair the Switch
If your swing arm lamp is experiencing issues with turning on or off, it may be necessary to replace or repair the switch. Follow these steps to replace or repair the switch:
- Ensure that the lamp is completely disconnected from the power source before working on the switch. This prevents any electrical mishaps or shocks.
- Locate the switch on the lamp. It is usually located near the base or along the power cord.
- If the switch is damaged, carefully remove it from the lamp housing. This may involve unscrewing or unclipping the switch.
- Examine the switch for any visible damage, such as loose connections or worn-out components. If the switch is repairable, you may be able to tighten connections or replace small parts.
- If the switch is beyond repair, or if you prefer to replace it, obtain a suitable replacement switch that matches the specifications of your lamp. You can find these switches at hardware stores or online.
- Install the new switch by following the manufacturer’s instructions or by referring to the wiring diagram specific to your lamp model. Take note of the connection points and ensure that the wiring is secure.
- Once the new switch is in place, carefully reassemble the lamp housing or base, ensuring a snug fit. Double-check that all screws or clips are tightened to secure the components.
Replacing or repairing the switch is crucial for proper operation and control of your swing arm lamp. A faulty switch can render the lamp unusable or pose safety risks.
If you are unsure about replacing or repairing the switch on your own, consult a professional electrician to ensure a safe and effective repair.
By addressing the switch-related issues, you will restore the convenient functionality of your swing arm lamp and continue to enjoy its versatile lighting.
Step 7: Replace or Repair the Socket
If you are experiencing issues with the socket of your swing arm lamp, such as a loose connection or a malfunctioning socket, it may be necessary to replace or repair it. Follow these steps to replace or repair the socket:
- Make sure that the lamp is completely disconnected from the power source to ensure your safety while working on the socket.
- Locate the socket on the lamp. It is usually located at the end of the lamp arm or inside the lamp housing.
- If the socket is damaged or faulty, carefully remove it from the lamp. This may involve unscrewing or unclipping the socket from its fixture.
- Examine the socket for any visible damage or loose connections. Ensure that the contacts are secure and free of any obstructions or debris.
- If the socket is repairable, you may be able to tighten loose connections or replace damaged parts. Refer to the manufacturer’s instructions or consult a professional for guidance on the specific repair process.
- If the socket is beyond repair or if you prefer to replace it, obtain a matching replacement socket that fits your lamp. You can find socket replacements at hardware stores or online.
- Install the new socket according to the manufacturer’s instructions or by referring to the wiring diagram for your lamp model. Make sure all connections are secure and tight.
- Once the new socket is in place, carefully reassemble the lamp housing or base, ensuring a proper fit. Tighten any screws or clips to secure the components.
Replacing or repairing the socket is crucial in restoring proper functionality and safety to your swing arm lamp. The socket ensures a secure connection for the bulb and controls the lamp’s on/off operation.
If you are uncertain about replacing or repairing the socket on your own, it is recommended to seek assistance from a professional electrician to ensure a safe and effective repair.
By addressing any socket-related issues, you can ensure that your swing arm lamp continues to provide reliable and convenient lighting for your space.
Step 8: Reassemble the Lamp
After completing the necessary repairs and replacements, it is time to reassemble your swing arm lamp. Follow these steps to ensure a proper reassembly:
- Begin by gathering all the components that were removed during the repair process, such as the shade, bulb, and any other detached parts.
- If you had removed the lamp shade, position it back onto the lamp socket and secure it by screwing or clipping it into place. Ensure that it is evenly attached and straight.
- If you had removed the bulb, insert a fully functional bulb into the socket and carefully screw it in clockwise until it is secure. Make sure that the bulb is compatible with the lamp’s wattage requirements.
- If any other components were detached, align them properly and reattach them to the lamp base or housing. Use the necessary screws or clips to secure these components in place.
- Ensure that all connections, such as the wiring and socket, are properly positioned inside the lamp housing and are not pinched or twisted.
- Double-check that all screws or clips on the lamp’s housing or base are tightened to ensure a stable and safe fit.
- Inspect the lamp visually to ensure that it appears correctly reassembled and that all components are in their proper positions.
Reassembling the lamp is important to ensure that all the repairs and replacements are properly integrated and that the lamp is in a functional state. Taking the time to carefully reassemble each component ensures that the lamp will operate safely and effectively.
When reassembling the lamp, pay attention to any specific instructions provided by the manufacturer. If you encounter any difficulties or uncertainties, consult the lamp’s manual or seek assistance from a professional.
By completing this step, you are one step closer to enjoying the full functionality of your swing arm lamp once again.
Step 9: Test the Lamp
After completing all the necessary repairs and reassembling the lamp, it is crucial to test its functionality to ensure that the issues have been resolved. Follow these steps to properly test your swing arm lamp:
- Ensure that the lamp is securely plugged into a working power outlet.
- Turn on the lamp using the switch or control mechanism. If the lamp has a dimmer, test all the different brightness levels.
- Observe the lamp’s performance and functionality. Check if it turns on and off smoothly, if the brightness adjusts correctly (if applicable), and if any other features are working as intended.
- If the lamp fails to turn on or exhibits any issues, double-check the connections, wiring, and components. Ensure that everything is properly secured and in the correct position.
- If the lamp still does not function properly after troubleshooting, you may need to revisit the previous steps or consider seeking professional assistance.
Testing the lamp is the final step in the repair process. It allows you to confirm that the repairs and replacements have been successful and that the lamp is in good working order once again.
During the testing process, be mindful of any unusual smells, sounds, or overheating, as these can indicate further issues. If you notice anything concerning, immediately turn off and unplug the lamp and seek professional help.
By thoroughly testing the lamp, you can ensure that it is safe to use and that it provides reliable lighting in your space.