
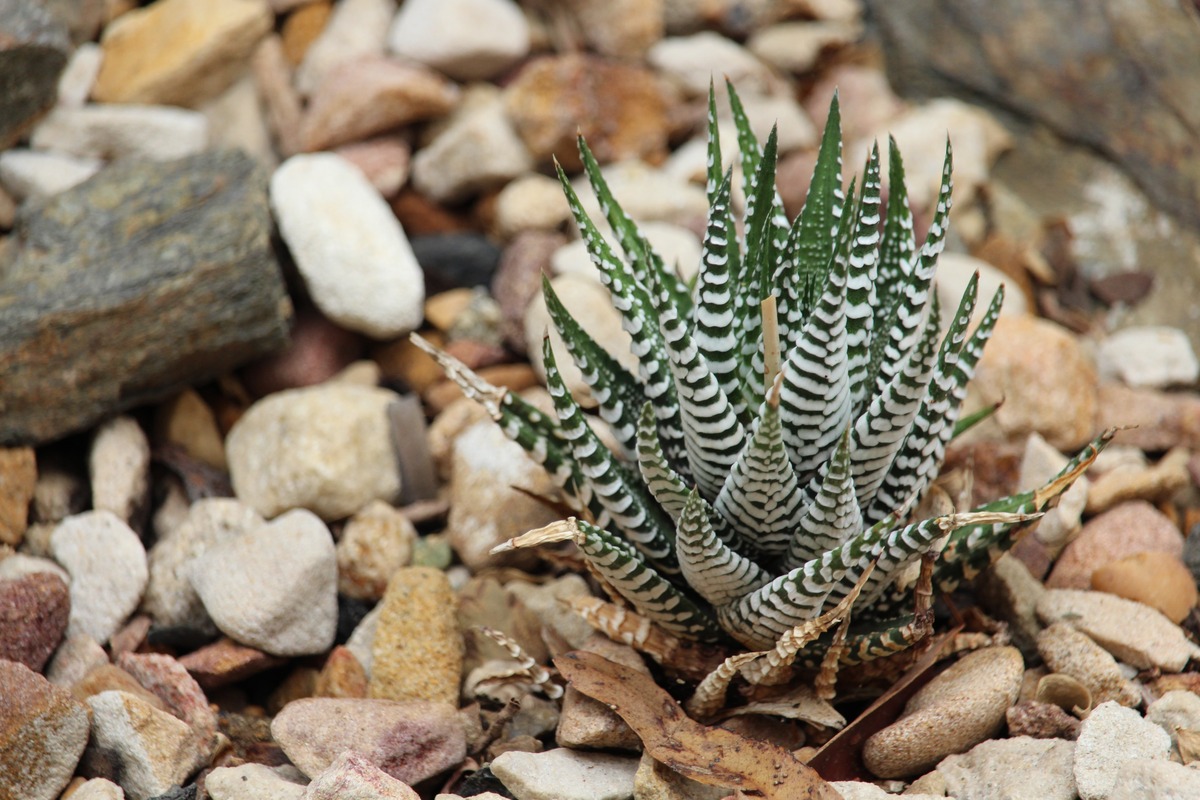
Choosing a Healthy Zebra Plant
When it comes to propagating a zebra plant, selecting a healthy parent plant is crucial for successful propagation. Whether you are purchasing a zebra plant from a nursery or selecting one from your own collection, there are a few key factors to consider.
The first thing to look for is a plant with vibrant green leaves. Avoid plants with yellow or brown leaves, as this could indicate poor health or stress. Additionally, check the leaves for any signs of pests or diseases, such as discoloration, spots, or webs.
Another important aspect to consider is the overall condition of the plant. Look for a well-established zebra plant with a sturdy stem and healthy roots. Avoid thin or weak stems, as they may not have enough energy to support new growth.
Inspect the soil to ensure it is not excessively dry or waterlogged. The ideal soil moisture for a zebra plant is slightly damp but not soggy. In addition, check the drainage of the pot. If it does not have proper drainage holes, it could lead to root rot.
Lastly, assess the size of the plant. Choose a younger zebra plant that is not too large, as it can be more challenging to propagate larger plants. Younger plants are generally more adaptable and have a higher success rate when it comes to rooting and establishing new growth.
By selecting a healthy zebra plant, you set the foundation for successful propagation. Remember to inspect the leaves, stem, roots, soil, and size of the plant before proceeding with the propagation process. This will give you the best chances of producing healthy and thriving offspring.
Propagation by Stem Cuttings
Propagating a zebra plant through stem cuttings is one of the most common and effective methods. This technique involves taking a stem cutting from a healthy parent plant and encouraging it to develop roots to form a new plant.
To begin, gather a pair of clean, sharp pruning shears or scissors. Select a healthy stem from the parent plant that is around 4-6 inches long. Make a clean cut just below a leaf node, ensuring that there are at least two or three sets of leaves on the cutting.
Once you have your cutting, remove the lower leaves near the bottom of the stem. This will create a clean area for rooting. You can either pinch the leaves off or gently cut them with a clean blade.
Next, prepare a small container or glass of water. Place the stem cutting into the water, making sure that the bottom end is submerged. Keep the container in a warm and bright location, but away from direct sunlight.
Over time, the cutting will develop roots. It is important to regularly check the water level and change it as needed to prevent stagnation and the growth of harmful bacteria. After a few weeks, you should start to see root growth from the bottom of the stem.
Alternatively, you can root the stem cutting directly in soil. Simply prepare a small pot with well-draining soil and make a hole using a pencil or your finger. Insert the stem cutting into the hole, burying it deep enough to cover the nodes where the leaves were removed. Gently press the soil around the cutting to ensure good contact.
Place the potted cutting in a warm and brightly lit area, but avoid direct sunlight at this stage. It is important to maintain consistent moisture in the soil without overwatering. Over time, the cutting will develop roots and should be ready for transplantation.
Propagation by stem cuttings offers a high success rate, allowing you to create multiple zebra plants from a single parent plant. Whether you choose to root the cutting in water or soil, proper care, patience, and monitoring are key to successful propagation.
Preparing the Cuttings
Before you begin propagating your zebra plant through stem cuttings, it is important to properly prepare the cuttings to ensure their success in developing into new plants. This involves taking the necessary steps to promote healthy growth and root development.
First, gather all the materials you will need, including clean pruning shears or scissors, a clean container with water or well-draining soil, and a suitable rooting hormone (optional but can enhance rooting success).
When selecting which stem to take cuttings from, look for a healthy and strong stem from the parent plant. It should have several sets of leaves and be around 4-6 inches long. Make sure to use a sharp and clean cutting tool to make a clean cut just below a leaf node.
Next, remove any leaves that will be below the soil or water line. This step helps prevent the leaves from decaying and keeps the focus on root development. Gently pinch or cut off the lower leaves, leaving the upper sets of leaves intact on the stem.
If you choose to use a rooting hormone, lightly dip the bottom of the cutting into the hormone powder or gel. This step can encourage faster and more robust root growth. However, if you prefer not to use a rooting hormone, the cuttings can still be successful without it.
After preparing the cuttings, it’s important to have your chosen rooting medium ready. For water propagation, fill a clean container with water, ensuring that only the bottom of the stem is submerged. For soil propagation, prepare a small pot with well-draining soil.
Whether you opt for water or soil propagation, place the prepared cuttings into their respective medium. Make sure the cuttings are secure and stable and that the nodes are in contact with the water or buried in the soil. This will encourage the development of roots.
Keep the cuttings in a warm and brightly lit area, but away from direct sunlight. Maintain a consistent moisture level in the water or soil, ensuring it does not become overly saturated or dry out. Regularly monitor the progress of the cuttings, looking for signs of root growth.
By properly preparing the cuttings, you set them up for success in their journey towards becoming new zebra plants. With the right tools and techniques, you can increase the likelihood of healthy root development and successful propagation.
Rooting the Cuttings in Water
Rooting zebra plant cuttings in water can be a simple and effective method to propagate new plants. This method allows you to observe the development of roots and ensure that the cuttings are receiving adequate moisture and nutrients for growth.
To begin, take your prepared stem cuttings and place them in a clean container filled with water. Ensure that only the bottom end of the cutting is submerged in the water, while the upper leaves remain above the water line.
Choose a spot for the container that receives bright, indirect light. Avoid placing it in direct sunlight, as this can heat up the water and potentially harm the cuttings. Maintain a warm and consistent temperature to provide an ideal environment for root development.
Throughout the rooting process, it’s important to monitor the water level and change it regularly. Stagnant water can lead to the growth of harmful bacteria, which can harm the developing roots. Refresh the water every few days or whenever you notice it becoming murky.
Over time, you should start to see root growth emerging from the bottom of the stem cuttings. This is an exciting milestone that indicates the success of the propagation process. Be patient, as it typically takes a few weeks for roots to become well-established.
Once the roots have grown to a sufficient length, it’s time to consider transferring the rooted cuttings to soil. Gently remove the cuttings from the water, taking care not to damage the delicate new roots. Prepare a small pot with well-draining soil and plant the cuttings, burying them deep enough to cover the nodes where the leaves were removed.
Transplanting the rooted cuttings to soil allows them to further establish themselves and continue growing as independent plants. Provide the newly potted cuttings with the same care and conditions as a mature zebra plant, including regular watering and adequate light.
Rooting zebra plant cuttings in water is a rewarding and relatively easy method of propagation. It allows you to witness the growth of roots firsthand and gives you control over the nutrients and moisture the cuttings receive. With proper care and patience, you can successfully root cuttings in water and watch them grow into thriving zebra plants.
Rooting the Cuttings in Soil
Another effective method of propagating zebra plants is by rooting the cuttings directly in soil. This method provides a more traditional approach to propagation, allowing the cuttings to establish roots in their final growing medium from the beginning.
Once you have prepared your stem cuttings by removing the lower leaves and ensuring there are at least two or three sets of leaves remaining, it’s time to move on to rooting them in soil.
Start by selecting a small pot with well-draining soil. It’s essential to choose a soil mix that allows good airflow and prevents waterlogging, as excessive moisture can lead to root rot. Prepare the pot by filling it with the soil mix and creating a hole in the center using your finger or a pencil.
Gently place the bottom end of the stem cutting into the hole, burying it deep enough to cover the nodes where the leaves were removed. Ensure that the cutting is securely in place and that the soil is in contact with the stem. Lightly press the soil around the stem to provide stability.
Place the potted cutting in a warm and brightly lit area, but avoid direct sunlight at this stage. It’s important to maintain consistent moisture in the soil without overwatering. Aim for slightly damp soil, ensuring it doesn’t become overly saturated or dry out completely.
As the days and weeks go by, monitor the cutting closely for signs of root growth. Initially, the cutting may focus its energy on establishing roots rather than producing new foliage. Be patient and resist the urge to disturb the cutting, as this can disrupt the rooting process.
Over time, you should observe new growth emerging from the top of the stem and signs of root development below the soil surface. This indicates that the cutting has successfully rooted and is on its way to becoming an independent plant.
Once the roots have developed, you can continue caring for the rooted cutting as you would for a mature zebra plant. Provide it with appropriate lighting, regular watering, and occasional feeding with a balanced fertilizer to support healthy growth.
Rooting zebra plant cuttings directly in soil offers a more natural and straightforward approach to propagation. With proper care, you can ensure a high success rate and watch as the cuttings develop into strong and thriving zebra plants.
Care Tips During the Rooting Phase
When propagating zebra plant cuttings, proper care during the rooting phase is crucial to increase the chances of success and ensure the healthy development of new roots. By following these care tips, you can create optimal conditions for rooting and promote strong growth in your cuttings.
1. Maintain consistent moisture: It’s important to keep the rooting medium, whether it’s water or soil, consistently moist. Avoid overwatering, as excessive moisture can lead to rotting of the cutting, while allowing the medium to dry out completely can impede root development. Regularly check the moisture level and adjust as needed.
2. Provide warmth: Zebra plants prefer warm temperatures, especially during the rooting phase. Keep the cuttings in a warm environment, ideally between 70-80°F (21-27°C). This temperature range promotes optimal root growth and increases the chances of successful propagation.
3. Ensure adequate light: While it’s crucial to avoid direct sunlight during the rooting phase, zebra plants still require bright, indirect light for healthy growth. Place the cuttings in a well-lit area, such as near a window with filtered sunlight. This allows the plants to receive the light energy needed for photosynthesis without risking excessive heat or sunburn.
4. Prevent overcrowding: If you are rooting multiple zebra plant cuttings in the same container, make sure to space them out adequately. Overcrowding can lead to poor air circulation and increased chances of fungal diseases. Allow enough space for each cutting to grow and develop roots without interference from neighboring plants.
5. Avoid frequent disturbance: Once you have placed the cuttings in the rooting medium, it’s best to avoid unnecessary disturbances. Excessive handling or movement can disrupt the delicate roots that are just beginning to develop. Minimize touching or moving the cuttings unless absolutely necessary.
6. Monitor for signs of rooting: Regularly check the cuttings for signs of root growth. Look for tiny white or light-colored roots emerging from the base of the cuttings in water or visible growth below the soil surface for cuttings rooted in soil. This indicates that the cuttings have successfully rooted and are ready for the next phase of growth.
By implementing these care tips during the rooting phase, you can provide your zebra plant cuttings with the optimal conditions for successful propagation. Remember to maintain moisture, warmth, appropriate light, and avoid overcrowding and disturbance. With proper care, you’ll soon see healthy roots developing, paving the way for the growth of thriving new zebra plants.
Transferring Rooted Cuttings to Pots
Once the zebra plant cuttings have developed a healthy root system, it’s time to transfer them to individual pots. This step is crucial in providing the rooted cuttings with the space, nutrients, and stability they need to continue growing into mature plants. Follow these steps to ensure a successful transfer.
1. Select suitable pots: Choose pots that are slightly larger than the root ball of the cutting. Opt for pots with drainage holes to allow excess water to escape. Avoid pots that are too oversized, as it can lead to waterlogged soil that can harm the roots. Ceramic or plastic pots are both good options.
2. Prepare the potting mix: Use a well-draining potting mix suitable for tropical plants. A mix consisting of peat moss, perlite, and vermiculite is effective in providing good aeration and moisture retention. Avoid using heavy, compacted, or clay-heavy soils that can hinder root development.
3. Gently remove the cutting: Carefully remove the rooted cutting from its water or soil medium. Be gentle to avoid damaging the tender roots. Handle the cutting by the stem or leaves rather than pulling on the roots.
4. Place the cutting in the new pot: Create a hole in the center of the potting mix using your finger or a small tool. Insert the root ball of the cutting into the hole, ensuring that it sits at the same depth as it was in the previous medium. Fill the remaining space with the potting mix, gently pressing it around the stem to provide stability.
5. Water the newly potted cutting: Give the potted cutting a thorough watering, ensuring that the soil is evenly moist. This helps to settle the potting mix and provides initial hydration to the roots. Allow any excess water to drain out through the drainage holes.
6. Provide appropriate growing conditions: Place the newly potted cutting in a location with bright, indirect light. Avoid exposing it to direct sunlight, as it can cause leaf burn. Maintain a warm temperature between 65-75°F (18-24°C) to promote healthy growth.
7. Regularly water and monitor: Keep a close eye on the moisture level of the soil and water the plant when the top inch of soil feels dry. Avoid overwatering, as zebra plants are susceptible to root rot. As the plant establishes itself, adjust your watering routine accordingly.
During the initial weeks after transferring the rooted cuttings to pots, monitor their progress closely. Look for signs of new growth and ensure that the plants are adapting well to their new environment. With proper care and attention, the rooted cuttings will flourish and grow into mature zebra plants.
Caring for the New Plants
Once the zebra plant cuttings have been successfully transferred to individual pots, it is crucial to provide proper care to ensure healthy growth and thriving new plants. Consistent attention to watering, light, temperature, and overall maintenance will help the newly potted zebra plants establish themselves and flourish.
1. Watering: Maintain a regular watering routine, ensuring that the soil remains slightly moist but not saturated. Zebra plants prefer to dry out slightly between waterings, so avoid overwatering, as it can lead to root rot. Adjust the frequency of watering based on the specific needs of each plant and the environmental conditions.
2. Light: Zebra plants thrive in bright, indirect light. Place the pots near a window where the plants can receive sufficient light without being exposed to direct sunlight. Inadequate light can result in leggy growth, while excessive light can scorch the leaves. Regularly rotate the pots to ensure even light exposure on all sides.
3. Temperature and Humidity: Zebra plants prefer temperatures between 65-75°F (18-24°C). Avoid placing them near drafts or in excessively hot or cold areas. These tropical plants also appreciate moderate humidity, so consider using a humidifier or placing a tray of water near the plants to increase humidity levels.
4. Fertilization: Feed the zebra plants with a balanced liquid fertilizer once a month during the growing season (spring and summer). Dilute the fertilizer to half the recommended strength to avoid over-fertilization, which can lead to fertilizer burn. Be sure to follow the manufacturer’s instructions for application and dosage.
5. Pruning: Regularly inspect the plants for any yellowing or damaged leaves. Prune these leaves using clean and sharp pruning shears to maintain the plant’s appearance and overall health. Remove any pests, such as mealybugs or spider mites, that may appear on the leaves or stems.
6. Propagation: Once your zebra plants have matured, you can continue the propagation process by taking stem cuttings from healthy parent plants. This allows you to expand your collection or share new plants with others. Follow the same propagation techniques mentioned earlier to ensure successful rooting of the cuttings.
7. General Maintenance: Regularly check the pots for proper drainage and drainage holes to prevent water accumulation and potential root rot. Dust the leaves periodically to keep them clean and free from any dust buildup that may hinder photosynthesis. Keep an eye out for any signs of pests or diseases, and address them promptly to maintain the health of your plants.
By providing regular care and attention to your newly potted zebra plants, you can create an environment conducive to their growth and well-being. Through proper watering, light, temperature, and maintenance, you can enjoy beautiful and thriving zebra plants in your home or garden.
Troubleshooting Common Problems
While zebra plants are generally hardy and relatively low-maintenance, they can still encounter some common problems. Being aware of these issues and knowing how to troubleshoot them will help ensure the continued health and vitality of your zebra plants.
1. Overwatering: One of the most common issues is overwatering, which can lead to root rot and other fungal diseases. To prevent overwatering, allow the soil to dry out slightly between waterings, and ensure that the pots have proper drainage. Adjust your watering frequency based on the specific needs of each plant.
2. Underwatering: On the flip side, underwatering can cause the leaves to wilt and dry out. Ensure that your zebra plants receive adequate moisture by checking the soil regularly. If the top inch of soil feels dry, it’s time to water the plant. Consider placing the pots on a humidity tray to help maintain an appropriate level of moisture.
3. Insufficient light: Zebra plants thrive in bright, indirect light. If the leaves appear pale or the plant is experiencing slow growth, it may not be receiving enough light. Move the plant to a brighter location, avoiding direct sunlight, which can scorch the leaves. Rotating the pot periodically will ensure even light distribution.
4. Improper temperature: Zebra plants prefer temperatures between 65-75°F (18-24°C). Exposure to extreme cold or hot temperatures can stress the plant and lead to leaf discoloration. Avoid placing the plants near drafts or heating vents, and maintain a consistent temperature to promote healthy growth.
5. Pest infestations: Common pests that may affect zebra plants include mealybugs, spider mites, and aphids. Keep a close eye on the leaves and stems, checking for any signs of pests, such as webbing, tiny moving specks, or sticky residue. If detected, treat the affected plants with a suitable insecticidal soap or horticultural oil to control the infestation.
6. Nutrient deficiencies: If your zebra plant exhibits yellowing leaves or stunted growth, it may indicate a nutrient deficiency. Feed the plant with a balanced liquid fertilizer, diluted to half the recommended strength, once a month during the growing season. This will provide the necessary nutrients for healthy foliage and growth.
7. Leaf browning and crispy edges: Browning or crispy edges on the leaves can be a sign of low humidity or inadequate watering. Increase the humidity around the plants by using a humidifier or placing a tray of water nearby. Adjust your watering routine to ensure the soil remains slightly moist, but not waterlogged.
By being vigilant and addressing these common problems promptly, you can prevent further damage to your zebra plants and promote their overall health. Regularly observe your plants, provide appropriate care, and make adjustments based on their specific needs to ensure they thrive in their environment.