
Choosing a Suitable Location
When it comes to planting a staghorn fern, choosing the right location is crucial for its long-term health and growth. Staghorn ferns are epiphytic plants that naturally grow on trees, rocks, or other plant surfaces in their native habitats. To successfully establish your staghorn fern, consider the following factors when choosing a suitable location:
- Indirect sunlight: Staghorn ferns thrive in bright, indirect sunlight. Avoid direct sunlight as it can scorch the delicate fronds. Choose a location that receives filtered or dappled sunlight throughout the day, such as under a tree canopy or near a north-facing window.
- Temperature: Staghorn ferns prefer moderate temperatures, between 60°F (15°C) and 75°F (24°C). Avoid exposing the fern to extreme temperature changes or drafts, as it can stress the plant and hinder its growth.
- Humidity: Staghorn ferns require a high level of humidity to mimic their natural rainforest environments. Look for a location that offers adequate humidity, such as a bathroom or a kitchen with regular steam. Alternatively, you can create a humid microclimate by grouping plants together or using a humidifier.
- Protection from elements: Select a location that provides some protection from harsh elements such as strong winds or heavy rainfall. Staghorn fern fronds can be sensitive, and excessive exposure to these elements can lead to damage and rot.
- Stable support: Since staghorn ferns are epiphytes, they need a stable support structure to grow on. Choose a location with a wall, tree trunk, or mounting board where the fern can be securely attached.
By considering these factors, you can create an optimal environment for your staghorn fern and ensure its successful growth. Keep in mind that with the right location, your staghorn fern will not only thrive but also become an eye-catching display in your home or garden.
Preparing the Mounting Board
When it comes to planting a staghorn fern, preparing a suitable mounting board is essential for providing a stable and secure base for the roots and fronds. Follow these steps to prepare the mounting board:
- Choose the right board: Select a sturdy piece of wood or a wooden board that is large enough to accommodate the size of your staghorn fern. Avoid using treated or chemically-treated wood as it can harm the fern.
- Soak the board: Before attaching the staghorn fern, you’ll need to soak the mounting board to make it more receptive to the fern’s attachment. Submerge the board in water, ensuring it is completely soaked. You can soak the board in a sink, bucket, or even a bathtub.
- Prepare the mounting mix: While the board is soaking, prepare a suitable mounting mix for your staghorn fern. This mix will provide nutrients and support for the fern’s roots to grow. A common mix consists of sphagnum moss, coconut coir, and well-draining potting soil.
- Attach the mounting mix: Once the board is soaked and the mounting mix is prepared, spread a layer of the mix onto the board. Make sure to cover the entire surface area where the staghorn fern will be attached. Press down lightly to secure the mix.
- Position the fern: Take your soaked staghorn fern and position it on the prepared mounting board. Arrange the roots over the mounting mix, ensuring they are evenly spread out. Gently press the roots into the mix to secure them in place.
- Secure the fern: Finally, use wire or twine to secure the staghorn fern onto the mounting board. Avoid placing the wire or twine too tightly to allow room for growth. Attach the wire or twine around the bottom and middle fronds, ensuring they are firmly anchored.
By following these steps, you can prepare a sturdy and suitable mounting board for your staghorn fern. This will not only ensure the fern’s stability but also provide an aesthetically pleasing display. Remember to regularly check the mounting board’s moisture level and make adjustments as needed to maintain a healthy growing environment for your staghorn fern.
Soaking the Staghorn Fern
Soaking the staghorn fern is an important step in its care, as it helps to replicate the natural rainforest conditions that these plants thrive in. By ensuring your staghorn fern receives adequate moisture, you can promote healthy growth and maintain its overall well-being. Here’s how to properly soak your staghorn fern:
- Select the right container: Choose a container that is large enough to accommodate the size of your staghorn fern. It should be deep enough to fully submerge the root ball and fronds without causing any damage.
- Fill the container with water: Fill the container with room temperature water until it is deep enough to cover the root ball of the staghorn fern. Avoid using chlorinated or tap water, as the chemicals can be harmful to the fern. If possible, use rainwater or filtered water.
- Submerge the staghorn fern: Gently lower the staghorn fern into the water, ensuring that the root ball and fronds are fully submerged. Allow the fern to soak for about 15 to 30 minutes. This allows the fern to take up water and rehydrate, mimicking its natural habitat.
- Check for air bubbles: During the soaking process, it’s important to check for any air bubbles that may be trapped in the root ball. Carefully agitate the fern in the water to release any air bubbles, ensuring that the roots are fully saturated.
- Remove the fern from the water: After the soaking period is complete, gently lift the staghorn fern out of the water, allowing excess water to drain off. Avoid shaking or forcefully removing water from the fronds, as this can cause damage.
- Allow the fern to drip dry: Set the staghorn fern aside in a well-ventilated area to let it drip dry. Avoid placing it in direct sunlight or areas with excessive heat, as this can lead to sunburn or wilting.
By following these steps, you can ensure that your staghorn fern receives the proper moisture it needs to thrive. Remember to schedule regular soakings to keep the fern hydrated and monitor the moisture level of the mounting material and fronds. With proper care, your staghorn fern will flourish and become a stunning addition to your home or garden.
Preparing the Potting Mix
Creating the right potting mix is crucial for the successful growth and health of your staghorn fern. The potting mix serves as the foundation for the fern’s root system, providing essential nutrients, moisture retention, and proper drainage. Follow these steps to prepare the ideal potting mix for your staghorn fern:
- Gather the ingredients: The primary components of a staghorn fern potting mix are sphagnum moss, coconut coir, and well-draining potting soil. You can find these ingredients at your local garden center or online.
- Mix the components: In a large container or bucket, combine equal parts sphagnum moss, coconut coir, and well-draining potting soil. Use a garden trowel or your hands to mix the components thoroughly until they are well blended.
- Adjust the moisture level: The potting mix should have a moist consistency, similar to a damp sponge. Gradually add water to the mix while stirring, until it reaches the desired moisture level. Avoid making it too wet or soggy, as this can lead to waterlogged roots.
- Check the pH level: Staghorn ferns prefer a slightly acidic to neutral pH level. Use a pH testing kit to ensure that the potting mix falls within the ideal range of 5.5 to 7.0. Adjust the pH level if necessary by adding acidic additives such as pine bark or sphagnum peat moss.
- Test the drainage: Take a handful of the prepared potting mix and gently squeeze it. It should hold its shape briefly but crumble easily when touched. If the mix feels too compact or retains water excessively, you may need to add more well-draining materials such as perlite or orchid bark to improve drainage.
With a well-prepared potting mix, your staghorn fern will have the necessary nutrients and a suitable environment for root growth. Remember to periodically check the moisture level of the mix and make adjustments if needed. By providing the right potting mix, you can promote healthy growth and ensure the long-term vitality of your staghorn fern.
Positioning the Staghorn Fern on the Mounting Board
Positioning the staghorn fern correctly on the mounting board is essential for its growth and overall appearance. By carefully placing the fern and ensuring proper attachment, you can create a visually appealing display. Follow these steps to position your staghorn fern on the mounting board:
- Assess the fern: Begin by examining your staghorn fern and identifying the most aesthetically pleasing side. This will be the side facing forward when mounted on the board.
- Place the fern: Gently position your staghorn fern on the moistened mounting mix, ensuring that the roots make contact with the mix. Arrange the fronds in a visually pleasing manner, spreading them out evenly.
- Align the fern: Take a step back and assess the positioning of the fern. Make any necessary adjustments to ensure that the fern is centered on the mounting board and aligned with your desired orientation.
- Secure the fern: Once you are satisfied with the placement, use wire or twine to secure the staghorn fern to the mounting board. Begin by loosely wrapping the wire or twine around the bottom fronds, securing them in place without causing any damage.
- Continue securing: Working your way up, add additional loops of wire or twine around the middle fronds, gently cinching them towards the board. Be careful not to apply excessive pressure, ensuring that the fronds have enough room to grow and expand.
- Double-check stability: Once the fern is secured, gently wiggle the board to ensure that the fern is stable and firmly attached. Make any necessary adjustments to the wire or twine to ensure the fern is held securely.
By following these steps, you can position your staghorn fern on the mounting board in a way that enhances its overall appearance and stability. Remember to regularly check the attachment to ensure that the fern remains secure as it grows. With a well-positioned staghorn fern, you can enjoy a stunning living artwork in your home or garden.
Securing the Staghorn Fern with Wire or Twine
Securing the staghorn fern onto the mounting board is a crucial step in ensuring its long-term stability and growth. By properly securing the fern with wire or twine, you can prevent it from shifting or falling off the board. Follow these steps to securely attach your staghorn fern:
- Choose the right materials: Opt for a malleable and non-abrasive wire or twine that is gentle on the fern’s fronds. Avoid using materials that can cut into the fronds or restrict their growth.
- Begin at the bottom: Start by wrapping the wire or twine around the bottom fronds of the staghorn fern. Make several loops around the fronds, ensuring that they are firmly held in place but not tightly constricted.
- Work your way up: As you move upward, continue wrapping the wire or twine around the middle fronds of the fern. Gently tighten the loops, holding the fronds securely against the mounting board without causing damage.
- Secure the top: Once you have reached the top fronds of the staghorn fern, wrap the wire or twine around them, completing the anchoring process. Again, ensure that they are securely fastened but able to grow and expand without restrictions.
- Make additional adjustments: Double-check the security of the wire or twine, making any necessary adjustments to ensure that the staghorn fern is firmly attached. Ensure that the fern is stable on the mounting board, with no risk of falling or shifting.
- Consider aesthetic appeal: While securing the staghorn fern, take into account the overall visual appeal. Arrange the wire or twine in a neat and visually pleasing manner, avoiding any tangled or messy appearance.
By securely attaching your staghorn fern with wire or twine, you can ensure its stability on the mounting board. Regularly inspect the attachments to make any necessary adjustments as the fern grows. With proper securing, you can enjoy a healthy and thriving staghorn fern that adds beauty to your home or garden.
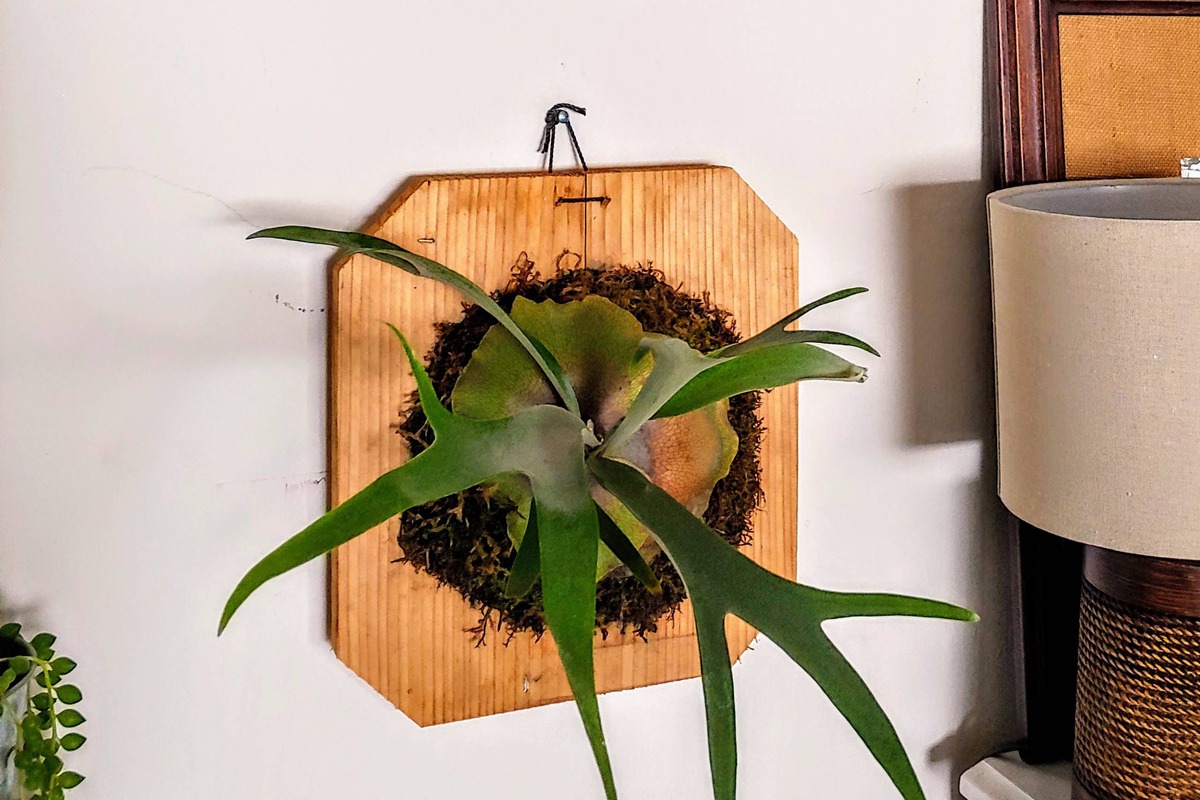
Mounting the Staghorn Fern on a Wall or Tree
Mounting a staghorn fern on a wall or tree is a fantastic way to showcase its unique growth habit and create a stunning vertical display. By properly mounting the fern, you can ensure its stability and create an eye-catching focal point in your indoor or outdoor space. Follow these steps to mount your staghorn fern:
- Choose a suitable location: Select a wall or tree with a sturdy surface that can support the weight of the staghorn fern. Ensure that the location provides adequate light and meets the plant’s environmental requirements.
- Prepare the mounting surface: If mounting on a wall, attach a sturdy mounting board to the surface using screws or nails. Make sure the board is securely fixed and can withstand the weight of the fern. If mounting on a tree, find a stable branch or trunk that aligns with the fern’s natural growth habit.
- Position the mounting board: Place the mounting board against the chosen surface and mark the desired placement. Take into consideration the size and visibility of the fern to achieve an aesthetically pleasing arrangement.
- Attach the mounting board: Secure the mounting board to the wall or tree using appropriate hardware. Ensure that it is firmly attached and able to support the weight of the staghorn fern.
- Prepare the fern: Soak the staghorn fern to hydrate it and prepare it for mounting. Gently remove any excess moisture by gently shaking the fern, ensuring that the fronds are not overly saturated.
- Position the fern: Carefully position the staghorn fern on the mounting board, arranging the fronds in an aesthetically pleasing manner. Ensure that the fern is centered and balanced on the board or tree branch.
- Secure the fern: Use wire or twine to anchor the staghorn fern to the mounting board or tree branch. Start at the bottom fronds and wrap the wire or twine around the base of the fern, gradually working your way up to the top fronds. Adjust the tightness to allow for growth and prevent damage.
- Double-check stability: Gently shake or wiggle the fern to ensure that it is securely mounted. Make any necessary adjustments to the wire or twine to ensure the fern’s stability and prevent it from shifting.
By following these steps, you can successfully mount your staghorn fern on a wall or tree, creating a visually striking display. Regularly inspect the mounting to ensure the fern’s stability and make any necessary adjustments as it continues to grow. With proper mounting, your staghorn fern will become a captivating focal point in your living space.
Caring for the Staghorn Fern
Proper care is essential for the health and vitality of your staghorn fern. By following a few key guidelines, you can ensure that your fern thrives and remains an attractive addition to your home or garden. Here are some important care tips for your staghorn fern:
- Watering the Staghorn Fern: Staghorn ferns prefer to be kept consistently moist but not waterlogged. Water your fern regularly, ensuring that the mounting material remains damp. Avoid letting the fern completely dry out between waterings, as this can lead to dehydration.
- Fertilizing the Staghorn Fern: Staghorn ferns benefit from regular fertilization to promote healthy growth. Apply a balanced liquid fertilizer diluted to half strength every four to six weeks during the growing season (spring and summer). Avoid over-fertilizing, as it can burn the fern’s roots.
- Pruning the Staghorn Fern: Remove any dead or discolored fronds to maintain the fern’s appearance and vigor. Use clean and sharp pruning shears to avoid damaging the healthy parts of the plant. You can also trim back fronds that have become too long or are obstructing the overall arrangement.
- Providing Adequate Light: Staghorn ferns thrive in bright, indirect light. Place the fern in a location that receives filtered or dappled sunlight, such as near a north-facing window or under a tree canopy. Avoid exposing the fern to direct sunlight, as it can scorch the delicate fronds.
- Maintaining Humidity: Staghorn ferns appreciate a high level of humidity. Increase humidity by misting the fronds regularly or placing a tray of water near the plant. Grouping the fern with other plants can create a microclimate that helps maintain humidity.
- Protecting from Extreme Temperatures: Staghorn ferns prefer moderate temperatures between 60°F (15°C) and 75°F (24°C). Avoid exposing the fern to extreme temperature fluctuations, drafts, or frost, as these can cause stress and damage to the plant.
- Monitoring for Pests and Diseases: Regularly inspect your staghorn fern for signs of pests such as mealybugs or scale. If infested, gently remove pests by hand or use a diluted insecticidal soap solution. Additionally, watch out for diseases like root rot, and ensure proper drainage to prevent waterlogging.
By providing the right care and environment, your staghorn fern will thrive and bring a touch of nature and beauty to your surroundings. Keep a close eye on its needs and make adjustments as necessary to ensure its continued health and stunning appearance.
Watering the Staghorn Fern
Proper watering is crucial for the health and well-being of your staghorn fern. Finding the right balance of moisture will ensure that the fern receives adequate hydration without becoming waterlogged. Follow these guidelines to effectively water your staghorn fern:
- Monitor the moisture level: Regularly check the moisture level in the mounting material of your staghorn fern. Stick your finger about an inch into the mix to gauge its dampness. Ideally, it should feel evenly moist, similar to a well-wrung sponge.
- Watering frequency: Water your staghorn fern when the mounting material begins to feel slightly dry to the touch. The frequency of watering will depend on factors such as environmental conditions, season, and the size of your fern. On average, most staghorn ferns require watering every 7-10 days.
- Soaking vs. misting: While regular watering is important, staghorn ferns benefit from occasional thorough soakings. Every few weeks, give your fern a soak by submerging the entire root ball in a container of room-temperature water. Allow it to soak for 15-30 minutes to ensure maximum hydration.
- Drainage is key: Provide proper drainage for the staghorn fern by ensuring that excess water can flow freely from the mounting material. Avoid overwatering or allowing water to pool in the base of the fern, as this can lead to root rot and other issues. Be mindful of the potting mix’s moisture level and adjust as needed to maintain good drainage.
- Water quality: Use clean, preferably filtered water when watering your staghorn fern. Avoid chlorinated or fluoridated tap water as these chemicals can be harmful to the fern. If possible, collect and use rainwater, as natural rainwater closely replicates the fern’s natural habitat.
- Consider humidity: Staghorn ferns appreciate high humidity levels. Increase the humidity around your fern by misting the fronds daily or placing the plant near a humidifier. Grouping the fern with other moisture-loving plants can also help create a microclimate with increased humidity.
- Observe your fern’s response: As you establish a watering routine, observe how your staghorn fern responds. Signs of overwatering include yellowing fronds, mushy or slimy roots, or a foul odor. Adjust your watering frequency accordingly to establish a balance that works for your specific fern and its environment.
By providing the right amount of water and maintaining proper drainage, you can ensure the health and vitality of your staghorn fern. Regularly assess its moisture needs, create a suitable watering schedule, and adjust as necessary to keep your fern thriving.
Fertilizing the Staghorn Fern
Fertilizing your staghorn fern is essential to provide the necessary nutrients for healthy growth and vibrant fronds. By applying the right fertilizers at the appropriate times, you can support the fern’s overall well-being. Consider the following guidelines when fertilizing your staghorn fern:
- Choose the right fertilizer: Select a well-balanced, water-soluble fertilizer specifically formulated for epiphytic plants or ferns. Look for a fertilizer with a higher nitrogen (N) content to promote lush green fronds and healthy growth.
- Timing is key: Begin fertilizing your staghorn fern in the early spring, when it starts its active growth phase. Apply the first round of fertilizer as new fronds emerge, and continue fertilizing every four to six weeks throughout the growing season.
- Dilute the fertilizer: Follow the instructions on the fertilizer packaging to determine the correct dilution rate. It’s generally recommended to use half the recommended strength to avoid over-fertilization, which can damage the fern’s roots.
- Apply evenly: Distribute the diluted fertilizer evenly over the surface of the mounting material and around the base of the staghorn fern. Avoid directly applying the fertilizer onto the fronds, as this can cause burning. Water the fern lightly after fertilizing to help the nutrients reach the roots.
- Monitor for signs of over-fertilization: Keep an eye out for signs of fertilizer burn, such as brown or burnt tips on the fronds. If this occurs, flush the fern with water to dilute and rinse away excess fertilizer. Adjust your fertilization routine to prevent further damage.
- Pause during dormancy: Staghorn ferns typically have a period of dormancy during the winter months. Reduce or stop fertilizing during this time, as the fern’s growth slows down, and its nutrient requirements decrease.
- Organic alternatives: If preferred, you can opt for organic fertilizers such as compost or worm castings. These natural alternatives provide slow-release nutrients and are gentle on the staghorn fern’s delicate root system.
By following these guidelines and providing your staghorn fern with the appropriate fertilizers, you can support its growth and keep its fronds vibrant and healthy. Regularly monitor the fern’s response to fertilization, adjusting the frequency and strength as needed to ensure optimal nutrient uptake and overall plant health.
Pruning the Staghorn Fern
Regular pruning is an important aspect of staghorn fern care to maintain its appearance and promote healthy growth. By properly pruning your fern, you can remove dead or damaged fronds, maintain its overall shape, and encourage the development of new fronds. Here are some guidelines for pruning your staghorn fern:
- Identify dead or damaged fronds: Regularly inspect your staghorn fern for any fronds that have turned brown, yellow or completely dried out. These fronds are no longer viable and should be removed to maintain the plant’s visual beauty.
- Use clean and sharp tools: Prune your staghorn fern using clean and sharp pruning shears or scissors. This helps prevent the introduction of bacteria or pathogens that can harm the plant. Sterilize the tools before use to minimize the risk of infection.
- Start from the base: Begin pruning by removing any dead or damaged fronds at the base of the fern. Make a clean cut as close to the base as possible without injuring nearby healthy fronds. This encourages new growth and prevents the spread of diseases.
- Thin out overgrown fronds: Over time, your staghorn fern may develop crowded fronds that can obscure its overall appearance. Thin out these overgrown fronds by selectively removing some of them, allowing space for newer fronds to emerge.
- Trim excessively long fronds: If your staghorn fern’s fronds become too long and begin to droop or obstruct the plant’s aesthetics, consider trimming them back. Make cuts just above a node or junction point to encourage new growth.
- Prune with aesthetic balance in mind: When pruning, aim for a balanced and visually pleasing arrangement of fronds. Step back occasionally to assess the overall shape and symmetry of the plant, making adjustments as necessary.
- Dispose of pruned fronds: Once you have finished pruning, dispose of the pruned fronds properly. Compost them if suitable, or discard in a green waste bin. Avoid leaving them in the vicinity of the fern, as decaying fronds can attract pests or diseases.
By regularly pruning your staghorn fern, you can maintain its attractiveness and overall health. Keep in mind that each fern is unique, and you may need to adapt your pruning routine to suit the specific growth patterns of your plant. With proper care and maintenance, your staghorn fern will continue to thrive and add a touch of natural beauty to your indoor or outdoor space.
Dealing with Common Pests and Diseases
While staghorn ferns are generally resilient plants, they can still be susceptible to certain pests and diseases. Being vigilant and proactive in identifying and addressing these issues is crucial to maintaining the health and beauty of your fern. Here are some common pests and diseases to watch out for, along with ways to deal with them:
- Mealybugs: Mealybugs are tiny, soft-bodied insects that appear as white, cottony clusters on the fronds of the staghorn fern. To control them, manually remove the visible bugs with a cotton swab dipped in rubbing alcohol. Regularly inspect the fern for any signs of recurrence and take immediate action.
- Scale insects: Scale insects are small, immobile pests that attach themselves to the fronds, sucking out sap and causing yellowing or wilting. Remove them carefully with a soft brush or cotton swab dipped in rubbing alcohol, ensuring to reach all infested areas.
- Spider mites: Spider mites are tiny pests that can spin fine webs on the fronds, causing discoloration and damage. Rinse the infested fronds with a strong jet of water to dislodge the mites. Repeat this process regularly to keep the population under control.
- Root rot: Root rot can occur when the staghorn fern’s roots are consistently exposed to excessive moisture or poor drainage. To prevent root rot, ensure proper drainage by using well-draining potting mix and watering the fern only when the mounting material begins to dry out.
- Bacterial or fungal infections: Stagnant water, high humidity, or wounds on the fern can provide an entry point for bacterial or fungal infections. Promptly remove any infected fronds or areas and adjust the environment to minimize excess moisture. Apply an appropriate fungicide or bactericide if necessary.
- Leaf spot: Leaf spot appears as small, dark spots on the fronds and can be caused by various fungi or bacteria. Prune affected fronds and maintain good air circulation to prevent the spread of the disease. Ensure that water doesn’t splash onto the fronds, as this can contribute to leaf spot development.
- Monitor overall plant health: Regularly inspect your staghorn fern for any signs of pests or diseases, such as discoloration, wilting, or unusual growth patterns. Promptly address any issues you notice to prevent further spread and maintain the overall health of the plant.
- Natural remedies and prevention: As a preventive measure, regularly clean and groom your staghorn fern to minimize the risk of pests and diseases. You can also use natural remedies like neem oil or insecticidal soap to control pests, following the instructions and precautions provided with the product.
By being attentive to your staghorn fern and taking prompt action, you can effectively deal with common pests and diseases. Regular monitoring and maintaining a favorable environment for your fern will go a long way in keeping it healthy and thriving.
Propagating the Staghorn Fern
Propagating your staghorn fern is an exciting way to expand your collection or share the beauty of this unique plant with others. There are a few methods you can utilize to propagate your staghorn fern successfully:
- Division: Dividing the staghorn fern is a popular method of propagation. Locate offsets or pups that have developed at the base of the parent plant. Gently separate the pup from the parent by carefully cutting through the connecting root mass. Plant the pup in a separate pot or mounting board, providing it with appropriate care and conditions.
- Spores: Staghorn ferns produce spores on the undersides of mature fronds, which can be collected and used for propagation. Allow the spores to fully develop and become black in color. Collect the spores by gently rubbing the mature fronds onto a piece of paper or container. Then, spread the spores onto a suitable growing medium, such as a mix of sphagnum moss and perlite. Maintain high humidity and provide indirect light to encourage spore germination and the growth of new ferns.
- Offsets: Staghorn ferns occasionally produce offsets or baby plants that grow adjacent to the main plant. These offsets can be separated from the parent once they have developed their own root system. Carefully remove the offset, ensuring that it has roots attached. Plant it in a separate pot or mounting board, providing it with the necessary care to establish and grow.
- Pups: Mature staghorn ferns can produce new pups or plantlets at the base or around the fronds. These pups can be carefully removed once they have sufficient root growth. Plant them in separate containers or mount them onto their own mounting boards, ensuring they receive proper care and growing conditions.
Regardless of the propagation method you choose, it is important to provide the newly propagated staghorn fern with appropriate care. Ensure that the medium or mounting material remains consistently moist but not waterlogged. Place the new plant in a location with bright, indirect light and maintain a suitable level of humidity.
Propagation can be a patient and rewarding process. While staghorn ferns may take some time to establish and grow, with proper care and attention, you can enjoy the satisfaction of successfully propagating and cultivating new generations of these fascinating plants.
Reviving a Dying Staghorn Fern
Finding your beloved staghorn fern in a struggling or dying state can be disheartening, but there is hope for reviving it with the right care and attention. Here are some steps you can take to revive a dying staghorn fern:
- Assess the situation: Begin by closely examining your fern to identify the underlying issues causing its decline. Look for signs of dehydration, root rot, pests, or diseases that may be affecting its health.
- Adjust watering: Inadequate or excessive watering is a common cause of staghorn fern decline. Adjust the watering regimen to provide consistent moisture, allowing the mounting material to dry slightly between waterings.
- Improve drainage: If your staghorn fern is suffering from root rot, it may be due to poor drainage. Ensure the mounting material has good drainage and consider repotting it using a well-draining potting mix.
- Trim away dead or damaged fronds: Prune any fronds that have completely dried out or turned brown. Removing these fronds will redirect energy toward healthier parts of the plant.
- Inspect for pests and diseases: Look for signs of pests such as mealybugs, scale insects, or spider mites. If pests are present, treat the fern with an appropriate insecticide or natural remedy according to the instructions.
- Check light conditions: Ensure your staghorn fern is receiving appropriate light. It thrives in bright, indirect light, so make sure it is not exposed to harsh direct sunlight or kept in overly dark conditions.
- Adjust humidity: Staghorn ferns prefer high humidity levels. Increase humidity around the plant by misting it regularly or placing a tray of water nearby. Grouping it with other plants can also help create a more humid microclimate.
- Provide proper nutrition: Feed your staghorn fern with a balanced, water-soluble fertilizer diluted to half strength. This will supply necessary nutrients to support its recovery. Follow the fertilizer’s recommended dosage and frequency.
- Be patient: Reviving a dying staghorn fern takes time and patience. Monitor its progress, making adjustments to the care routine as needed. Remember that recovery can be a gradual process, and not all fronds may fully recover.
By addressing the underlying issues, providing appropriate care, and allowing time for recovery, there is a good chance of reviving a dying staghorn fern. Implement these steps diligently and stay observant to ensure that your fern returns to its healthy and thriving state.