
Choosing the Right Sod Grass for Your Lawn
When it comes to planting sod grass, one of the first and most crucial steps is choosing the right type of grass for your lawn. The selection process should be based on various factors, including climate, soil type, sun exposure, and intended use of the lawn. Here are some key considerations to keep in mind:
1. Climate: Different types of sod grass thrive in different climates. Some grasses, such as Bermuda grass, are well-suited for warm, sunny climates, while others, like fine fescue, are more adaptable to cooler regions.
2. Soil Type: Take into account the soil composition in your area. Some grasses, like Zoysia grass, prefer sandy soils, while others, like Kentucky bluegrass, can tolerate a wider range of soil types.
3. Sun Exposure: Consider the amount of sunlight your lawn receives. If you have a shady area, opt for shade-tolerant grasses such as St. Augustine grass or fine fescue. For areas with full sun exposure, Bermuda grass or Buffalo grass may be a better choice.
4. Intended Use: Determine how you plan to use your lawn. If you have kids or pets who will be running and playing on the grass, opt for a durable, wear-resistant variety like Tall Fescue or Bermuda grass. For a more ornamental lawn, you might consider Kentucky bluegrass or Zoysia grass.
Once you have identified the grass type that best suits your needs, research reputable sod providers in your area to ensure you are getting healthy, high-quality sod grass. Consult with local experts or landscaping professionals to get recommendations based on your specific requirements. Remember, selecting the right sod grass is essential for achieving a lush, thriving lawn that will be the envy of your neighborhood.
Testing the Soil
Before planting sod grass, it’s important to test the soil in your lawn. Soil testing helps to determine the pH level, nutrient content, and overall health of the soil, which are crucial factors for the successful growth of sod grass. Here’s why soil testing is essential and how to go about it:
Why test the soil?
Soil testing provides valuable insights into the condition of your soil, allowing you to make informed decisions about fertilizer application and soil amendments. It helps identify any deficiencies or excesses in nutrients, such as nitrogen, phosphorus, and potassium, which are vital for the growth of sod grass. Additionally, soil testing reveals the pH level, which affects nutrient availability and nutrient uptake by the grass roots. By understanding the soil composition, you can modify it to create optimal conditions for your sod grass to thrive.
How to test the soil:
There are several ways to test your soil. The most accurate method is to send a soil sample to a professional laboratory for analysis. Contact your local agricultural extension office or a reputable soil testing laboratory for guidance on collecting and submitting soil samples. They will provide a detailed report outlining the nutrient levels and pH of your soil.
If you prefer a do-it-yourself approach, you can use a soil testing kit available at garden centers or online. These kits typically provide simple instructions on how to collect soil samples and conduct basic tests for pH and nutrient levels.
Interpreting soil test results:
Once you receive the soil test results, review them carefully. Pay attention to the pH level and any nutrient deficiencies or imbalances identified. The soil test report usually comes with recommendations for soil amendments and fertilizers to improve the soil quality.
Based on the test results and recommendations, you can adjust the pH level by adding lime to raise it or sulfur to lower it. Additionally, you may need to apply specific fertilizers to address nutrient deficiencies or imbalances.
Regular soil testing:
Soil conditions can change over time, so it’s beneficial to retest the soil periodically. This ensures that your sod grass continues to receive the necessary nutrients, maintaining its health and vibrancy.
By testing the soil and addressing any issues identified, you can create an ideal foundation for your sod grass and set it up for success. Investing time in soil testing will ultimately result in a lush and thriving lawn that you can enjoy for years to come.
Preparing the Area
Properly preparing the area before planting sod grass is crucial for its long-term health and success. This stage involves removing existing vegetation, evaluating drainage, and addressing any potential issues that may hinder the growth of your new sod. Here are the key steps to follow when preparing the area for sod grass:
1. Clearing the area:
Start by clearing the area of any existing vegetation, including weeds, rocks, and debris. Use a garden rake or a sod cutter to remove the top layer of grass and roots. This step provides a clean slate and prevents competition between the existing vegetation and the newly planted sod.
2. Evaluating drainage:
Assess the drainage in the area to prevent waterlogged or dry spots. Ensure that the lawn has proper slopes and that there are no low-lying areas where water can accumulate. Amending the soil with organic matter, such as compost, can improve its drainage capabilities.
3. Addressing soil issues:
If the soil is compacted, aerating it will help improve its structure, allowing the roots of the sod grass to penetrate easily. This can be done using a garden fork or a mechanical aerator. Additionally, if the soil is lacking in organic matter or nutrients, consider adding compost or a quality soil amendment to enrich it.
4. Eliminating weeds:
Before laying the sod, take steps to control any existing weeds in the area. You can manually pull them out or use an appropriate weed control method. This will help prevent weed competition and ensure that your sod grass can establish itself without hindrance.
5. Soil leveling:
Ensure the soil is evenly spread and leveled across the area. Use a rake or a leveling tool to create a smooth and even surface. This step is particularly important to achieve a visually appealing and uniform lawn once the sod is installed.
6. Soil moisture:
Ensure that the soil is adequately moist but not overly saturated before installing the sod. It should be slightly moist to the touch, allowing the roots to establish and make contact with the soil easily.
By following these steps and properly preparing the area, you provide a favorable environment for your sod grass to take root and flourish. A well-prepared area sets the stage for a healthy and vibrant lawn that you can enjoy for years to come.
Calculating the Amount of Sod Grass Needed
Accurately calculating the amount of sod grass needed for your lawn is essential to ensure you order the right quantity and avoid unnecessary waste or shortages. Here’s a step-by-step guide to help you calculate the exact amount of sod grass required:
1. Measure the area:
Start by measuring the length and width of the area where you plan to install the sod grass. Use a measuring tape or a measuring wheel to get accurate measurements. It’s best to break down irregularly shaped areas into smaller sections and measure them individually.
2. Calculate the square footage:
To calculate the square footage, multiply the length by the width of each section. If you have multiple sections, sum up the square footage of each to get the total square footage of the area.
3. Consider additional sod:
It’s a good idea to order slightly more sod grass than the calculated square footage to account for any potential errors, trimming, or unavoidable waste. Overestimate by around 5-10% to ensure you have enough sod to fill in any gaps or irregular shapes.
4. Account for slopes and curves:
If your lawn has any slopes or curves, calculate the square footage of those sections separately. Use the same process of measuring the length and width, and then add that square footage to the total calculated in step 2.
5. Consult with the supplier:
Once you have the total square footage, consult with your sod grass supplier or local garden center to determine how many square feet of sod are typically in each roll or pallet. This information will help you determine the number of sod rolls or pallets you’ll need to purchase.
6. Plan for delivery and installation:
Coordinate with your supplier to schedule the delivery of the sod grass. Ensure that you have assistance available for unloading and installing the sod promptly to prevent it from drying out or losing its quality.
By accurately calculating the amount of sod grass needed, you can order the right quantity and make the installation process smoother. Taking the time to measure and plan ensures that you have sufficient sod to cover the entire area, resulting in an aesthetically pleasing and cohesive lawn.
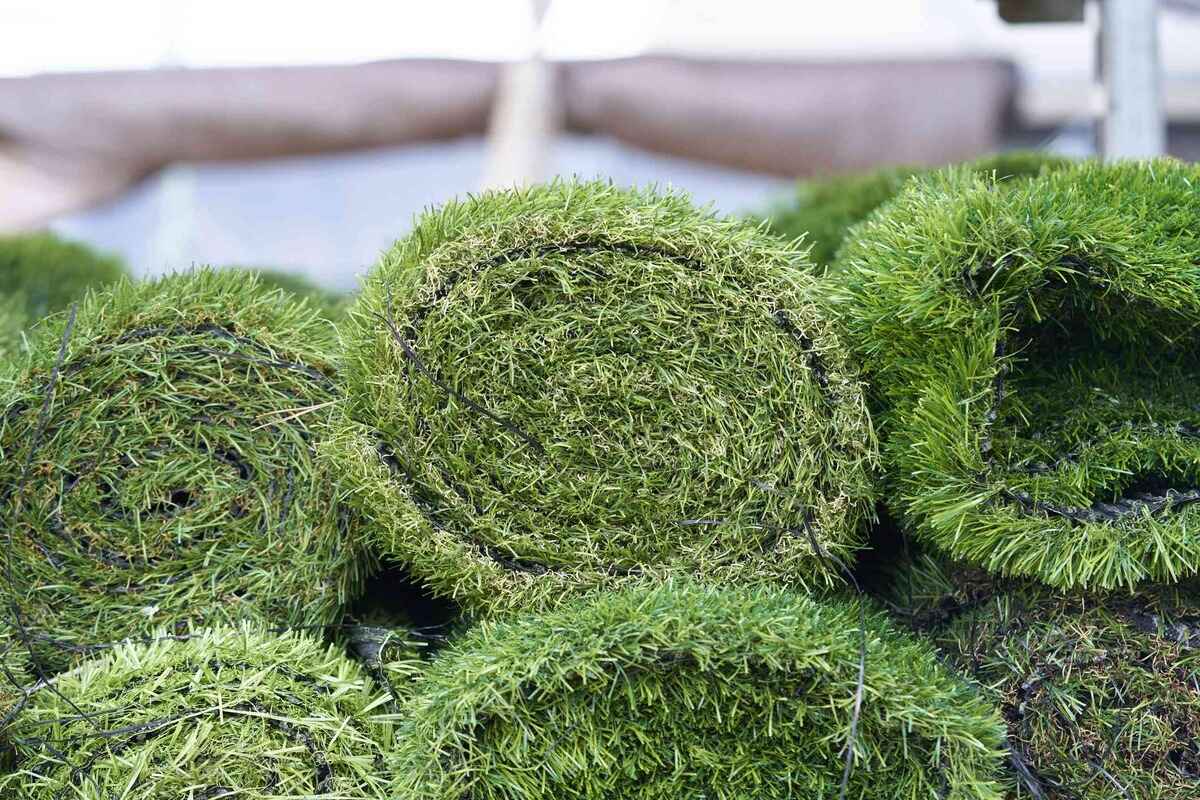
Acquiring the Sod Grass
Once you have determined the type of sod grass you need and calculated the amount required for your lawn, it’s time to acquire the sod grass. Here are some key steps to ensure you acquire high-quality sod and make the most informed decisions:
1. Research reliable suppliers:
Start by researching local sod suppliers in your area. Look for reputable suppliers with positive reviews and a track record of delivering fresh and healthy sod. Seek recommendations from friends, neighbors, or professional landscapers who have recently purchased sod grass.
2. Contact multiple suppliers:
Reach out to multiple suppliers to inquire about their availability, pricing, and any special offers or services they may provide. This will help you compare options and make an informed decision. Ask about their sod guarantee and return policy in case you encounter any issues after the purchase.
3. Inspect the sod quality:
If possible, visit the sod farm or supplier’s location to inspect the quality of the sod grass firsthand. Check for signs of pests, disease, or discoloration. The sod should be lush, green, and well-maintained. Avoid purchasing sod with yellow or brown patches, as it may indicate poor health.
4. Verify the sod’s age:
Ask the supplier about the age of the sod. Freshly cut sod is generally preferred, as it has a higher chance of successful transplantation. Avoid purchasing sod that has been sitting for an extended period, as it may have lost its freshness and vigor.
5. Coordinate delivery and installation:
Discuss the delivery logistics with the supplier, including the date, time, and any specific requirements for unloading the sod. Ensure that you arrange for the sod to be delivered on the same day you plan to install it to minimize any potential damage or deterioration.
6. Follow proper handling and storage:
Upon delivery, handle the sod with care to avoid damaging the grass. It’s important to install the sod as soon as possible to prevent it from drying out. If there’s a delay, store the sod in a shaded area and keep it moist by lightly watering it or covering it with a tarp.
By following these steps, you can acquire high-quality and fresh sod grass for your lawn. Working with a reliable supplier ensures that you start with healthy and vibrant sod, setting the stage for a successful installation and the subsequent growth of a beautiful and flourishing lawn.
Clearing the Area
Clearing the area where you plan to install sod grass is an important step in preparing the land for a new and thriving lawn. Properly clearing the area ensures that there are no obstacles or competing vegetation that could hinder the growth and establishment of the sod. Here are the key steps to follow when clearing the area:
1. Remove existing vegetation:
Start by removing any existing vegetation in the area, such as grass, weeds, and plants. Use a garden rake, lawn mower, or even a sod cutter to cut and remove the top layer of grass and roots. Be thorough in this process to prevent any unwanted vegetation from competing with the newly installed sod.
2. Eliminate rocks and debris:
Inspect the area for rocks, stones, and debris. Remove them by hand or by using a garden rake or wheelbarrow. Clearing the area of these objects will provide a smooth and even surface for laying the sod.
3. Address tree roots and stumps:
If there are any tree roots or stumps in the area, either remove them completely or ensure they are cut as close to the ground as possible. Tree roots can pose obstacles for the sod and may interfere with its growth. Removing or cutting them down will create a level surface for the sod to be installed.
4. Check for underground utilities:
Before digging or tilling the area, be sure to check for any underground utilities, such as gas, water, or electrical lines. Contact the respective utility companies to mark the location of these lines to avoid any accidental damage or disruptions during the clearing process.
5. Dispose of cleared vegetation:
Properly dispose of the cleared vegetation, rocks, and debris. You can either compost the organic materials or arrange for them to be collected by your local waste management services. Follow the guidelines and regulations for waste disposal in your area.
6. Evaluate the cleared area:
Inspect the cleared area to ensure it is free from any remaining vegetation or obstacles. Take a moment to visualize how the sod will be laid out and make any necessary adjustments to ensure even coverage and a visually pleasing result.
By thoroughly clearing the area, you provide a clean and obstruction-free space for the sod to be installed. This step sets the foundation for a successful and healthy lawn, and it ensures that the sod has the best possible chance of establishing roots and growing into a lush and vibrant carpet of grass.
Leveling and Tilling the Soil
Leveling and tilling the soil is a crucial step in preparing the land for sod grass installation. It helps create a smooth and even surface that promotes proper root growth and ensures uniform coverage and appearance of your lawn. Here’s how to effectively level and till the soil:
1. Assess the soil:
Start by assessing the condition of the soil. Check for any high or low spots, compacted areas, or unevenness in the surface. Identifying these areas will help you understand the extent of leveling and tilling required.
2. Remove large debris:
Before tilling the soil, remove any large rocks, sticks, or other debris that may hinder the process. These obstacles can cause uneven tilling and affect the overall appearance and health of your sod grass.
3. Start with a light tilling:
Use a garden tiller or a tiller attachment on a power rake to loosen the top layer of soil. Start with a light tilling to break up any compacted areas and improve the soil’s overall structure. Avoid over-tilling, as it can disrupt the soil’s natural composition.
4. Remove weeds and roots:
While tilling, keep an eye out for any remaining weeds or their roots. Remove them to prevent their growth from affecting the sod grass. Be thorough in this process to create a clean and weed-free soil bed for the sod.
5. Incorporate organic matter:
If your soil lacks organic matter or is heavy in texture, consider incorporating compost or other organic amendments. This will enhance the soil’s nutrient content, improve drainage, and promote healthy root development for the sod grass.
6. Level the soil:
Using a rake or a leveling tool, distribute the tilled soil evenly across the area. Smooth out any bumps or depressions and create a level surface for the sod to be installed. Take your time in this step to ensure a uniform appearance and maximize the establishment of the sod grass.
7. Compact the soil:
After leveling the soil, lightly compact it using a lawn roller or by walking over the area. This helps to provide firm ground for the sod and enables good root-to-soil contact for optimal growth.
Leveling and tilling the soil creates an ideal foundation for your sod grass installation. By ensuring a flat and tilled soil bed, you promote proper drainage, root development, and overall health of the sod, resulting in a visually appealing and healthy lawn.
Installing an Irrigation System (if necessary)
Installing an irrigation system for your sod grass is a crucial step to ensure proper watering and maintenance. Irrigation systems provide consistent and controlled moisture to the grass, promoting healthy growth and reducing the risk of under or over-watering. Here are the key considerations and steps involved in installing an irrigation system:
1. Determine the need for an irrigation system:
Evaluate the climate and specific requirements of your lawn to determine if an irrigation system is necessary. Consider factors such as rainfall patterns, sun exposure, soil moisture retention, and the specific water needs of the sod grass variety you have chosen. If necessary, installing an irrigation system will help provide adequate and efficient watering.
2. Choose the right irrigation system:
Select the appropriate irrigation system based on your lawn’s size, shape, and water requirements. There are various options available, including sprinkler systems, drip irrigation, or a combination of both. Consider factors such as water efficiency, ease of maintenance, and the ability to customize watering schedules.
3. Plan the system layout:
Create a detailed plan for the placement and layout of the irrigation system. Consider the location of existing obstacles, such as trees or structures, and ensure that the system covers the entire lawn area evenly. Proper coverage is crucial to ensure all parts of the sod grass receive adequate water.
4. Gather the necessary materials:
Purchase the required materials, including pipes, sprinkler heads, valves, controllers, and any additional components based on your irrigation system design. Ensure that you select high-quality materials that are suited for your specific needs and will withstand the test of time.
5. Prepare the area for installation:
Before installing the irrigation system, clear the area of any obstacles such as weeds, rocks, or debris. This will facilitate easy and efficient installation and prevent any interference with the functioning of the system.
6. Install the irrigation system:
Follow the manufacturer’s instructions or consult a professional if needed to correctly install the irrigation system. Lay out the pipes, connect the sprinkler heads, valves, and controllers, and ensure that everything is securely in place. Test the system to check for any leaks or malfunctions.
7. Set up watering schedules:
Configure the watering schedules on the irrigation system’s controller based on the specific water needs of your lawn and local water regulations. Set timers and adjust settings to provide efficient watering at appropriate times to avoid over or under-watering.
Installing an irrigation system can ensure that your sod grass receives consistent and adequate moisture, promoting healthy growth and vibrant appearance. A well-designed and properly functioning irrigation system simplifies the watering process, saving you time and effort while keeping your lawn lush and thriving.
Laying the Sod Grass
Once the area is properly prepared, it’s time to lay the sod grass and bring your lawn to life. Proper installation of the sod is crucial to ensure its integration with the soil and its ability to establish strong roots. Here are the key steps to follow when laying the sod grass:
1. Begin with a clean surface:
Ensure that the cleared and prepared area is free from debris, rocks, and any remaining vegetation. A clean surface provides the best foundation for the sod to establish itself and grow.
2. Start from a straight edge:
Begin laying the sod along a straight edge of your lawn, such as a walkway or driveway. This will help you create neat and straight lines, ensuring an organized and visually appealing appearance.
3. Lay the sod in a staggered pattern:
Place the first piece of sod at the edge, ensuring that it is tightly against the straight edge. Lay the subsequent pieces of sod in a staggered pattern, similar to the brickwork. This helps to prevent visible seams and creates a stronger bond between the sod pieces.
4. Butt edges tightly together:
Ensure that each piece of sod is placed tightly against the adjacent piece, with no gaps in between. This prevents the sod from drying out and aids in the establishment of proper root systems.
5. Use a sharp knife for trimming:
As you reach the edges, pathways, or irregular shapes, use a sharp knife or sod cutter to carefully trim the sod to fit the desired area. Precise trimming helps in achieving a clean and seamless appearance.
6. Press down on the sod:
Press down firmly on the laid sod to ensure proper soil-to-sod contact. This allows the roots to anchor to the soil and facilitates water absorption. Use a lawn roller or simply walk on the sod to ensure good contact.
7. Water immediately after installation:
Water the entire sodded area immediately after installation. This helps in settling the sod and aids in its establishment. Ensure that the water penetrates through the sod and reaches the underlying soil.
8. Water regularly:
Continue to water the sod grass regularly, following the watering schedule recommended for your specific sod grass type. Monitor the moisture level to prevent over or under-watering, which can adversely affect its growth.
By following these steps, you can ensure a proper and successful installation of the sod grass. Take your time to lay the sod carefully, paying attention to detail, and maintaining proper watering schedules. This will help your sod grass thrive and result in a lush, green, and inviting lawn.
Watering and Fertilizing the Sod Grass
Watering and fertilizing are critical aspects of maintaining the health and vitality of your newly laid sod grass. Proper hydration and nutrient supply ensure that the sod establishes strong roots, develops lush foliage, and remains resilient against environmental stresses. Here’s what you need to know about watering and fertilizing your sod grass:
Watering:
1. Initial watering: Immediately after laying the sod, water the entire area thoroughly. This helps settle the sod and promotes root-to-soil contact. Ensure that the water penetrates through the sod and reaches the underlying soil.
2. Initial watering frequency: Water the sod 2-3 times a day for the first couple of weeks after installation. This helps keep the soil consistently moist and encourages root growth. Avoid overwatering, which can lead to fungal diseases or shallow root development.
3. Adjusting watering frequency: Gradually reduce the watering frequency as the sod grass becomes established. Transition to a deep and infrequent watering schedule, aiming for about 1 inch of water per week. This encourages deep root growth and strengthens the sod’s resilience.
4. Watering timing: Water your sod grass in the early morning or late afternoon to minimize water loss due to evaporation. Avoid watering in the evening, as it can create conditions favorable for disease development.
Fertilizing:
1. Wait for the right time: Avoid fertilizing the sod immediately after installation. Allow the sod to root and establish itself for at least 4-6 weeks before applying any fertilizer. This allows the roots to grow deep into the soil and reduces the risk of fertilizer burn.
2. Choose the right fertilizer: Select a high-quality, slow-release fertilizer specially formulated for sod grass. Read the fertilizer label and follow the instructions for application rates according to your specific sod grass variety.
3. Fertilizing frequency: Typically, sod grass needs to be fertilized once every 6-8 weeks during the growing season. However, refer to the specific fertilizer instructions for the recommended frequency and timing of applications.
4. Even application: Spread the fertilizer evenly using a broadcast spreader or by hand. Avoid getting the fertilizer on the foliage to prevent burning and wash it off the grass immediately if any accidental contact occurs.
5. Watering after fertilizing: After applying fertilizer, water the sod grass thoroughly to ensure proper activation and absorption of the nutrients into the soil.
6. Follow local regulations: Be mindful of any local regulations or restrictions regarding fertilizer usage. Some areas have specific guidelines to protect water bodies and prevent pollution.
By following proper watering and fertilizing practices, you will provide your sod grass with the essential moisture and nutrients it needs to establish a strong root system and maintain its lush and healthy appearance over time.
Establishing a Maintenance Routine
Establishing a regular maintenance routine is essential to ensure the long-term health and beauty of your sod grass. By following a consistent maintenance schedule, you can keep your lawn looking vibrant, lush, and free from common issues. Here are some key aspects to consider when establishing a maintenance routine:
1. Regular mowing:
Mow your sod grass on a regular basis to maintain the ideal height for your specific grass variety. Avoid cutting too much grass at once to prevent stress on the sod. Set your mower at the recommended height for your sod grass, typically around 2-3 inches, and never remove more than one-third of the grass blade length at a time.
2. Proper watering:
Continue watering your sod grass on a regular basis, adhering to the established watering schedule. Deep and infrequent watering helps develop strong roots. Ensure that your lawn receives approximately 1 inch of water per week, either from rainfall or irrigation. Adjust the watering schedule based on seasonal weather conditions.
3. Weed control:
Regularly inspect your sod grass for the presence of weeds and promptly address them. Hand-pull weeds as soon as they appear, ensuring you remove the entire root system. Consider using pre-emergent herbicides in early spring to prevent the germination of weed seeds.
4. Fertilizer application:
Continue to fertilize your sod grass according to the recommended schedule and the specific fertilizer instructions. Apply a slow-release or controlled-release fertilizer that is appropriate for your sod grass variety. This provides a steady supply of nutrients to support healthy growth and vibrant color.
5. Aerating:
Aerate your sod grass periodically to improve soil compaction and enhance water and nutrient absorption. Use a core aerator to remove small plugs of soil, allowing air, water, and nutrients to penetrate the root zone more effectively. Aeration is particularly beneficial in areas with heavy foot traffic or compacted soil.
6. Overseeding:
Consider overseeding your sod grass in the fall to fill in any thin or patchy areas and promote a denser lawn. Choose a grass seed that matches your existing sod grass variety and follow the recommended instructions for overseeding, including proper watering and mowing practices.
7. Pest and disease management:
Regularly inspect your sod grass for any signs of pests or diseases. Look for discoloration, wilting, or unusual growth patterns. If any issues are detected, promptly take appropriate measures such as applying targeted insecticides or fungicides or seeking professional advice.
8. Seasonal and annual care:
Adjust your maintenance routine based on the specific needs of your sod grass throughout the seasons. For example, consider dethatching in early spring, winterizing the lawn in the fall, and applying appropriate treatments for seasonal challenges.
By establishing a regular maintenance routine and staying attuned to the specific needs of your sod grass, you can ensure a healthy, vibrant, and long-lasting lawn that will be the envy of the neighborhood.