
Selecting the Right Rose Cuttings
When propagating roses from cuttings, it is crucial to select the right type of cuttings to ensure successful growth. The selection process involves choosing healthy and vigorous stems that have the potential to develop into thriving rose plants. Here are some key factors to consider when selecting your rose cuttings:
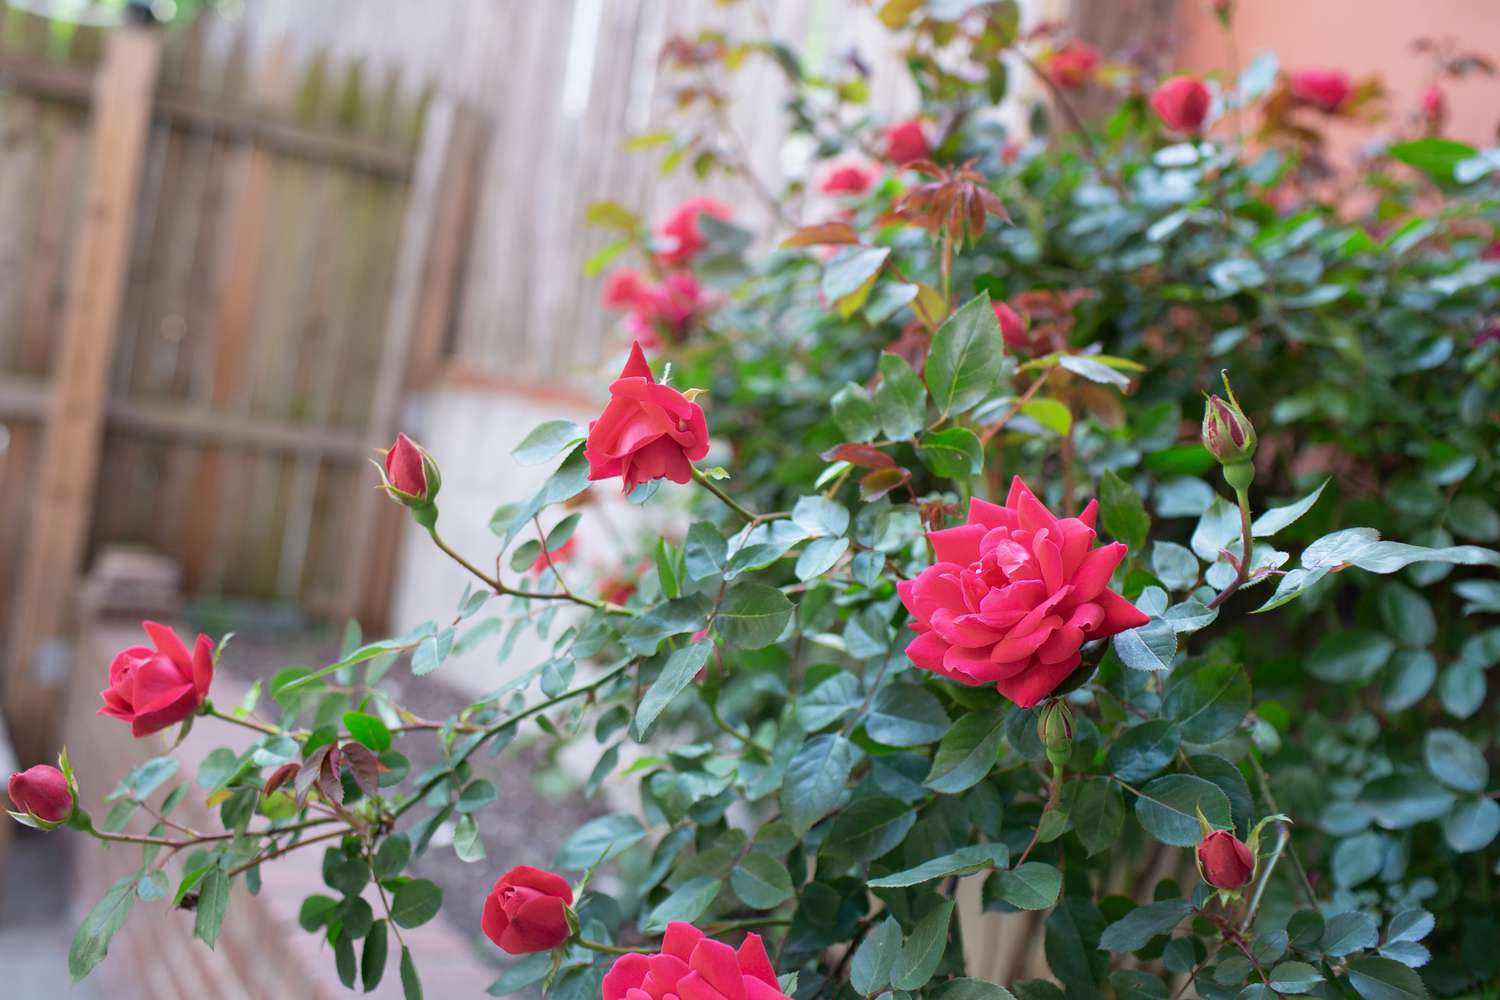
- Variety: Choose cuttings from your favorite rose varieties or those known for their desirable traits, such as color, fragrance, or disease resistance.
- Age: Select cuttings from stems that are at least one-year-old. This ensures that the stems are mature enough to root and establish themselves as independent plants.
- Health: Inspect the stems for any signs of diseases, such as black spots or deformities. It is best to choose healthy stems to prevent the spread of diseases to the new plants.
- Size: Opt for stems that are 6-8 inches in length. This length provides an adequate surface area for rooting while ensuring that the cutting is not too long or too short.
- Growth Stage: Look for stems that have finished blooming and started to develop new growth. This indicates that the stem is actively growing, increasing its chances of successful rooting.
- Leaf Node Placement: Examine the stem for visible leaf nodes—the areas where leaves emerge from the stem. Choose cuttings with at least 3-4 leaf nodes as these are the locations where roots will readily grow.
By considering these factors, you can select the right rose cuttings that have the best potential for successful propagation. With the proper selection in place, you can move on to the next step of preparing the planting materials.
Preparing the Planting Materials
Before you start planting rose cuttings, it is essential to ensure that you have the right materials ready. Proper preparation of the planting materials contributes to the success of rooting and the overall growth of your new rose plants. Here is a step-by-step guide on how to prepare the planting materials:
- Rooting Hormone: Obtain a rooting hormone powder or gel from a gardening store. This hormone promotes root development and increases the chances of successful rooting. Follow the instructions provided with the rooting hormone for proper application.
- Potting Mix: Prepare a well-draining potting mix that consists of equal parts of perlite, vermiculite, and peat moss. This mixture provides a suitable medium for root development and moisture retention while preventing excessive water accumulation.
- Pot and Tray: Select a suitable pot or container for planting your rose cuttings. Make sure it has drainage holes to prevent waterlogging. Place the pots on a tray to catch excess water and facilitate easy watering.
- Clean Tools: Use clean and sharp gardening tools to make clean cuts on the stems. Disinfect the tools before and after using them to prevent any contamination or spread of diseases.
- Watering Can or Spray Bottle: Keep a watering can or spray bottle filled with water nearby. This will be used to moisten the potting mix and settle it around the cuttings.
By preparing these essential planting materials in advance, you can ensure a smooth planting process and give your rose cuttings the best possible start. Remember to follow proper sanitation practices, as cleanliness plays a crucial role in preventing diseases and ensuring healthy growth.
Taking the Cuttings
Once you have selected the right rose stems and prepared the planting materials, it’s time to take the cuttings. Taking the cuttings correctly is essential to ensure their viability and successful rooting. Follow these steps to properly take the rose cuttings:
- Choose the Right Time: The best time to take rose cuttings is during the dormant season, which is usually in late winter or early spring. The plants are less active during this time, increasing the chances of successful rooting.
- Find the Node: Locate a dormant bud union or a swollen area where leaves emerge from the stem. This indicates the presence of a leaf node, which is essential for rooting. The node should be on the bottom end of the cutting.
- Make the Cut: Using clean and sharp pruning shears, make a 45-degree angled cut just below the leaf node. The cutting should be approximately 6-8 inches long, with at least three leaf nodes.
- Remove Extra Foliage: Trim away any excess leaves or side branches from the lower two-thirds of the cutting. By reducing the foliage, the cutting can focus its energy on root development rather than sustaining the leaves.
- Apply Rooting Hormone: Dip the bottom end of the cutting into a rooting hormone powder or gel. Make sure to cover the cut end and the bottom leaf nodes thoroughly. The rooting hormone aids in root development and enhances the cutting’s chances of rooting successfully.
Remember to work quickly to prevent the cuttings from drying out. Immediately after taking the cuttings, transfer them to a damp paper towel or place them in a container with water until you are ready to plant them.
Taking the cuttings correctly ensures that you have healthy and viable pieces that are ready for the next step: preparing the cuttings for planting.+
Preparing the Cuttings
After taking the rose cuttings, it’s important to properly prepare them before planting. The preparation process helps increase the chances of successful rooting and ensures the cuttings are in optimal condition for growth. Here are the steps to prepare the cuttings:
- Trim the Cut Ends: Trim the bottom end of the cutting just below the lowest leaf node. Make a clean cut to remove any damaged or uneven parts.
- Remove Lower Leaves: Strip off the leaves from the bottom one-third to one-half of the cutting. This allows the focus to be on root development, rather than sustaining unnecessary foliage.
- Trim Remaining Leaves: If the remaining leaves are large, you can trim them down to reduce water loss through transpiration. Aim for smaller leaf sizes to minimize stress on the cuttings.
- Mist the Cuttings: Lightly mist the cuttings with water to keep them hydrated and prevent drying out during the preparation process.
- Optional: Apply Rooting Hormone: Although you already applied rooting hormone after taking the cuttings, you may choose to reapply it to the freshly trimmed ends to ensure maximum coverage.
- Make a Small Hole in the Potting Mix: Use a clean pencil or stick to create a small hole in the potting mix. The hole should be deep enough to accommodate the trimmed end of the cutting.
- Plant the Cuttings: Gently insert the prepared cuttings into the holes in the potting mix. Ensure that the bottom leaf node is slightly below the surface, while the remaining nodes and trimmed end are securely placed in the soil.
By properly preparing the cuttings, you maximize their chances of successful rooting and establishment. The next step involves planting the prepared cuttings and providing the necessary care for their growth.
Planting the Cuttings
Now that you have prepared the rose cuttings, it’s time to plant them in their designated pots. Proper planting ensures that the cuttings have the necessary support and environment to root and establish themselves as new rose plants. Follow these steps to plant the cuttings:
- Moisten the Potting Mix: Before planting, lightly moisten the potting mix in the pots. This ensures that the cuttings have access to adequate moisture from the start.
- Make a Hole: Use a pencil or your finger to create a small planting hole in the potting mix. The hole should be deep enough to accommodate the trimmed end of the cutting.
- Place the Cutting: Gently place the prepared cutting into the planting hole, making sure the bottom leaf node is slightly below the surface of the potting mix.
- Compact the Soil: Press the soil gently around the base of the cutting to secure it in place and provide stability. Ensure that the cutting is upright and supported.
- Repeat for Additional Cuttings: If you have multiple cuttings, repeat the process for each one, ensuring adequate spacing between them.
- Water the Cuttings: After planting, water the cuttings thoroughly to settle the soil around them and provide enough moisture for their initial rooting.
- Label the Pots: Use plant labels or popsicle sticks to label the pots with the rose variety and the date of planting. This helps keep track of the cuttings and their progress.
- Place in a Suitable Location: Choose a location that provides bright but indirect sunlight for the cuttings. Avoid direct sunlight, as it can scorch the tender new growth.
Planting the cuttings properly sets a solid foundation for their growth and rooting. Now that the cuttings are in their pots, it’s important to provide them with the right conditions and care to facilitate their development.
Providing Proper Watering and Sunlight
Ensuring the right amount of water and sunlight is crucial for the growth and establishment of your rose cuttings. Proper care in these areas will provide the ideal conditions for root development and overall plant health. Here are some guidelines for providing proper watering and sunlight:
- Watering: Keep the potting mix consistently moist but not overly saturated. Water the cuttings whenever the top inch of soil feels dry to the touch. Avoid overwatering, as it can lead to root rot and other problems. Always water at the base of the plants to prevent wetting the leaves, which can lead to fungal diseases.
- Sunlight: Place the pots in a location that receives bright, indirect sunlight for at least 6-8 hours a day. Avoid direct sunlight, especially during the hottest hours of the day, as it can scorch the delicate cuttings. If necessary, use shade cloth or sheer curtains to filter the sunlight and protect the plants from excessive heat.
- Temperature: Maintain a moderate temperature range of 65-75°F (18-24°C) for optimal growth. Avoid exposing the cuttings to extreme heat or cold, as it can hinder their development. Protect them from frost and freezing temperatures, as they are still fragile at this stage.
- Humidity: Roses prefer moderate humidity levels. If you live in a dry climate, consider placing a tray of water near the cuttings or using a humidifier to increase the humidity around the plants. Avoid excessive humidity, as it can lead to fungal diseases.
- Monitor Moisture Levels: Regularly check the moisture levels in the pots by inserting your finger into the soil. If it feels dry, it’s time to water the cuttings. Adjust the watering frequency and amount based on the environmental conditions and the plant’s needs.
- Observe Growth Patterns: Pay attention to how the cuttings respond to the sunlight and watering. Look for signs of healthy growth, such as new leaves and root development. Adjust the light and water levels accordingly if you notice any signs of stress or lack of progress.
- Keep a Consistent Routine: Establish a regular watering and sunlight schedule to provide consistency for the cuttings. Avoid sudden changes in watering or light conditions, as it can stress the plants. Consistency is key for successful growth and establishment.
By providing proper watering and sunlight, you create the ideal environment for your rose cuttings to thrive and develop strong root systems. Along with these factors, it’s important to provide appropriate care and attention to ensure their overall health and vitality.
Taking Care of the Cuttings
Proper care is essential for the successful growth of your rose cuttings. By providing the right conditions, nutrients, and protection, you can foster their development and increase their chances of becoming healthy rose plants. Here are some important aspects to consider when taking care of the cuttings:
- Regular Watering: Maintain consistent moisture levels in the potting mix by watering the cuttings as needed. Keep the soil slightly moist but not waterlogged. Avoid letting the soil dry out completely or become overly saturated.
- Fertilizing: After the initial rooting phase, start fertilizing the cuttings with a balanced water-soluble fertilizer. Follow the dosage instructions provided on the fertilizer packaging. Apply the fertilizer every two to three weeks to provide the necessary nutrients for growth.
- Weed Control: Regularly inspect the pots for weed growth. Remove any weeds promptly, as they compete with the cuttings for nutrients and can hinder their growth. Be careful when pulling weeds to avoid disturbing the cuttings’ delicate roots.
- Pruning: As the cuttings develop new growth, consider lightly pruning them to encourage bushier and more compact growth. Pinch off the tips of the stems, just above a set of leaves, to stimulate branching.
- Protection from Pests: Inspect the cuttings regularly for signs of pests, such as aphids or spider mites. If you notice any pests, treat them with organic pest control methods or insecticidal soap. Protect the cuttings from potential pest infestations by maintaining a clean and healthy environment.
- Support and Training: As the cuttings grow, provide support for the stems by gently tying them to stakes or trellises. This will help prevent damage and promote upright growth. As necessary, guide the stems in the desired direction to shape the plants as they mature.
- Keep an Eye on Diseases: Monitor the cuttings for any signs of diseases, such as powdery mildew or black spot. If you observe any symptoms, take immediate action to treat the disease and prevent its spread to other plants. Proper sanitation practices and good airflow around the cuttings can help minimize disease risks.
- Regular Monitoring: Regularly observe the overall health and progress of the cuttings. Look for signs of new growth, roots, and healthy foliage. If you notice any issues or abnormalities, investigate and address them promptly to ensure the well-being of the plants.
By providing proper care, you can nurture the cuttings into strong and healthy rose plants. Regular watering, fertilizing, pruning, and pest control are essential components of caring for your cuttings and assisting in their successful growth.
Gradually Acclimating the Cuttings
As your rose cuttings grow and develop, it is important to gradually acclimate them to the outside environment. This process, known as hardening off, prepares the cuttings for the eventual transfer to their permanent location in the garden. Here are the steps to gradually acclimate the cuttings:
- Timing: Wait until the threat of frost has passed before beginning the hardening off process. Typically, this is around spring when the weather becomes consistently warmer.
- Start Slowly: Begin by exposing the cuttings to outdoor conditions for a short period each day, preferably during mild weather. Start with a couple of hours and gradually increase the time each day over the course of a week or two.
- Choose Optimal Conditions: Select a location outdoors that provides partial shade and protection from strong winds. This helps prevent the cuttings from becoming stressed or damaged during the acclimation process.
- Monitor Weather Conditions: Keep an eye on the weather forecast and avoid exposing the cuttings to extreme weather conditions, such as heavy rain, strong winds, or intense sunlight. Gradually increase exposure as the cuttings become more resilient.
- Control Moisture Levels: Keep the potting mix evenly moist during the hardening off period. Monitor the moisture levels closely, as outdoor conditions may require more frequent watering than indoor conditions.
- Observe Plant Responses: Pay attention to how the cuttings respond to the outdoor environment. Look for signs of stress, such as wilting or leaf discoloration. If necessary, adjust their exposure or provide temporary shelter to protect them from harsh conditions.
- Extend Exposure: Over time, gradually increase the amount of time the cuttings spend outdoors until they are accustomed to being outside for the entire day and night.
- Prepare for Transplanting: Once the cuttings are fully acclimated, it’s time to prepare them for transplanting into the garden. Ensure the soil in the planting area is well-prepared and amend it with compost or organic matter if needed.
By gradually acclimating the cuttings to the outdoor environment, you give them the opportunity to adjust to the changes in temperature, sunlight, and airflow. This process prepares them for a successful transition from their pots to the garden, where they can continue to grow and flourish.
Monitoring the Growth of the Cuttings
Monitoring the growth of your rose cuttings is an essential part of ensuring their development and taking appropriate actions when necessary. By regularly assessing their progress, you can identify any issues early on and provide the necessary care to support their growth. Here are important aspects to consider when monitoring the growth of the cuttings:
- Observing New Growth: Keep an eye on the cuttings for signs of new growth, such as the emergence of leaves, buds, or branches. These indicate that the cuttings are establishing roots and starting to grow.
- Checking Root Development: Gently lift one of the cuttings from the pot to check if roots have developed. Be cautious not to disturb the other cuttings. If you observe healthy root growth, it is a positive indication that the cuttings are progressing well.
- Assessing Foliage Appearance: Observe the condition of the foliage on the cuttings. Look for vibrant, healthy leaves and monitor for any signs of discoloration, yellowing, or wilting, which could indicate problems such as nutrient deficiencies or disease.
- Monitoring Height and Branching: Keep track of the height and branching patterns of the cuttings. Measure the growth periodically to see how much they have developed. Encourage branching by pinching off the tips, which stimulates the growth of lateral branches.
- Tracking Overall Health: Assess the overall health of the cuttings, considering factors such as vigor, resilience, and resistance to pests and diseases. Healthy cuttings should exhibit strong growth, maintain good foliage color, and be free from infestations or signs of diseases.
- Recording Progress: Maintain a record of the growth of your cuttings by taking photos or documenting their development. Note any changes, observations, or concerns you have noticed during the monitoring process. This record can help you track the progress and make better decisions regarding care.
- Adjusting Care as Needed: Based on your observations, adjust the care given to the cuttings. This may include modifying the watering schedule, fertilizing, or providing additional support as the plants continue to grow. Address any signs of stress or issues promptly to prevent further decline.
- Seeking Expert Advice: If you encounter challenges or are unsure about the growth of your cuttings, don’t hesitate to seek advice from local garden centers, horticulturists, or experienced rose growers. They can provide specific guidance based on your location and the conditions of your cuttings.
By closely monitoring the growth of your rose cuttings, you can identify any areas that need attention and take appropriate measures to ensure their healthy development. Regular observation and proactive care contribute to their successful establishment as mature rose plants in the future.
Transferring the Cuttings to Larger Pots
As your rose cuttings continue to grow and develop, they may outgrow their current pots and require more space for their roots to expand. Transferring them to larger pots is an important step in ensuring their continued growth and overall health. Here’s a guide on how to transfer the cuttings to larger pots:
- Choose the Right Time: Wait until the cuttings have established a strong root system and show signs of vigorous growth before transferring them to larger pots. This is typically after several months of growth.
- Select Suitable Pots: Choose pots that are one or two sizes larger than the current containers. Opt for pots with drainage holes to prevent waterlogging that could lead to root rot.
- Prep the New Pots: Ensure the new pots are clean and ready for use. Add a layer of fresh, well-draining potting mix to the bottom of each pot.
- Water the Existing Pots: Thoroughly water the current pots to help loosen the potting mix and make it easier to remove the cuttings without damaging their roots.
- Gently Remove the Cuttings: Carefully remove the cuttings from their current pots by gently loosening around the edges. Be cautious not to damage the roots or break the stems.
- Place the Cuttings in New Pots: Position the cuttings in the center of the new pots. Add more potting mix around the roots, ensuring they are well-covered but not buried too deeply.
- Firm the Soil: Gently press the potting mix around the roots of the cuttings to secure them in place and provide stability. Be careful not to compact the soil excessively, as it can hinder proper drainage.
- Water the New Pots: Thoroughly water the newly transferred cuttings to settle the soil and ensure good contact between the roots and the potting mix. Monitor the moisture levels in the following days to avoid overwatering.
- Give Adequate Space: Allow appropriate spacing between each cutting in the new pots to prevent crowding and competition for resources. This promotes healthy growth and reduces the risk of disease spread.
- Resume Care Routine: Once the cuttings are successfully transferred to larger pots, continue with their regular care routine, including watering, fertilizing, and monitoring their growth.
Transferring the cuttings to larger pots provides them with the necessary room for root expansion and encourages continued growth. By following these steps and providing proper care, you can ensure the well-being and development of your rose cuttings as they progress towards becoming mature plants.
Planting the Mature Cuttings in the Garden
Once your rose cuttings have matured and developed strong roots and foliage, it’s time to transplant them into the garden. Planting them in the right location and providing proper care will ensure their successful integration into your garden landscape. Here’s how to plant the mature cuttings in the garden:
- Choose the Right Location: Select a location in your garden that receives at least 6-8 hours of direct sunlight daily. Ensure the soil is well-draining and enriched with organic matter to promote healthy growth.
- Prepare the Planting Hole: Dig a hole that is wide and deep enough to accommodate the root ball of the mature cutting. Loosen the soil at the bottom of the hole and remove any rocks, weeds, or debris that may hinder root growth.
- Amend the Soil (if necessary): If your soil is heavy or clay-like, incorporate compost, well-rotted manure, or organic matter to improve drainage and soil fertility.
- Remove the Cutting from its Pot: Gently slide the mature cutting out of its pot, being careful not to disturb the root ball. If the pot is stuck, tap it gently or use a plastic knife to loosen the edges.
- Place the Cutting in the Hole: Position the root ball of the mature cutting in the center of the planting hole. Ensure that the bud union (the swollen area where the rose was grafted onto the rootstock) is level with or slightly above the soil surface.
- Backfill the Hole: Fill the hole with the backfilled soil, firming it gently around the root ball. Be careful not to bury the bud union or create air pockets around the roots.
- Water the Plant: After planting, thoroughly water the mature cutting to settle the soil and provide hydration to the roots. This helps eliminate air pockets and encourages root establishment.
- Apply Mulch: Apply a layer of organic mulch around the base of the plant to conserve soil moisture, suppress weeds, and maintain a more consistent soil temperature.
- Stake if Necessary: If the mature cutting is tall or prone to bending, secure it to a sturdy support or stake to provide stability until it becomes firmly established.
- Monitor and Care: Regularly monitor the newly planted mature cutting for signs of stress, such as wilting or leaf discoloration. Provide adequate water, fertilizer, and protection from pests or diseases as needed.
By planting the mature cuttings in the garden with proper care and attention, you are giving them the opportunity to thrive and become beautiful, established rose plants in your landscape. Regular maintenance and care will help them flourish and contribute to the overall beauty of your garden.