
Choosing the Right Bulbs
When it comes to planting paperwhite bulbs, choosing the right bulbs is crucial for successful growth and beautiful blooms. Here are some important factors to consider when selecting your bulbs:
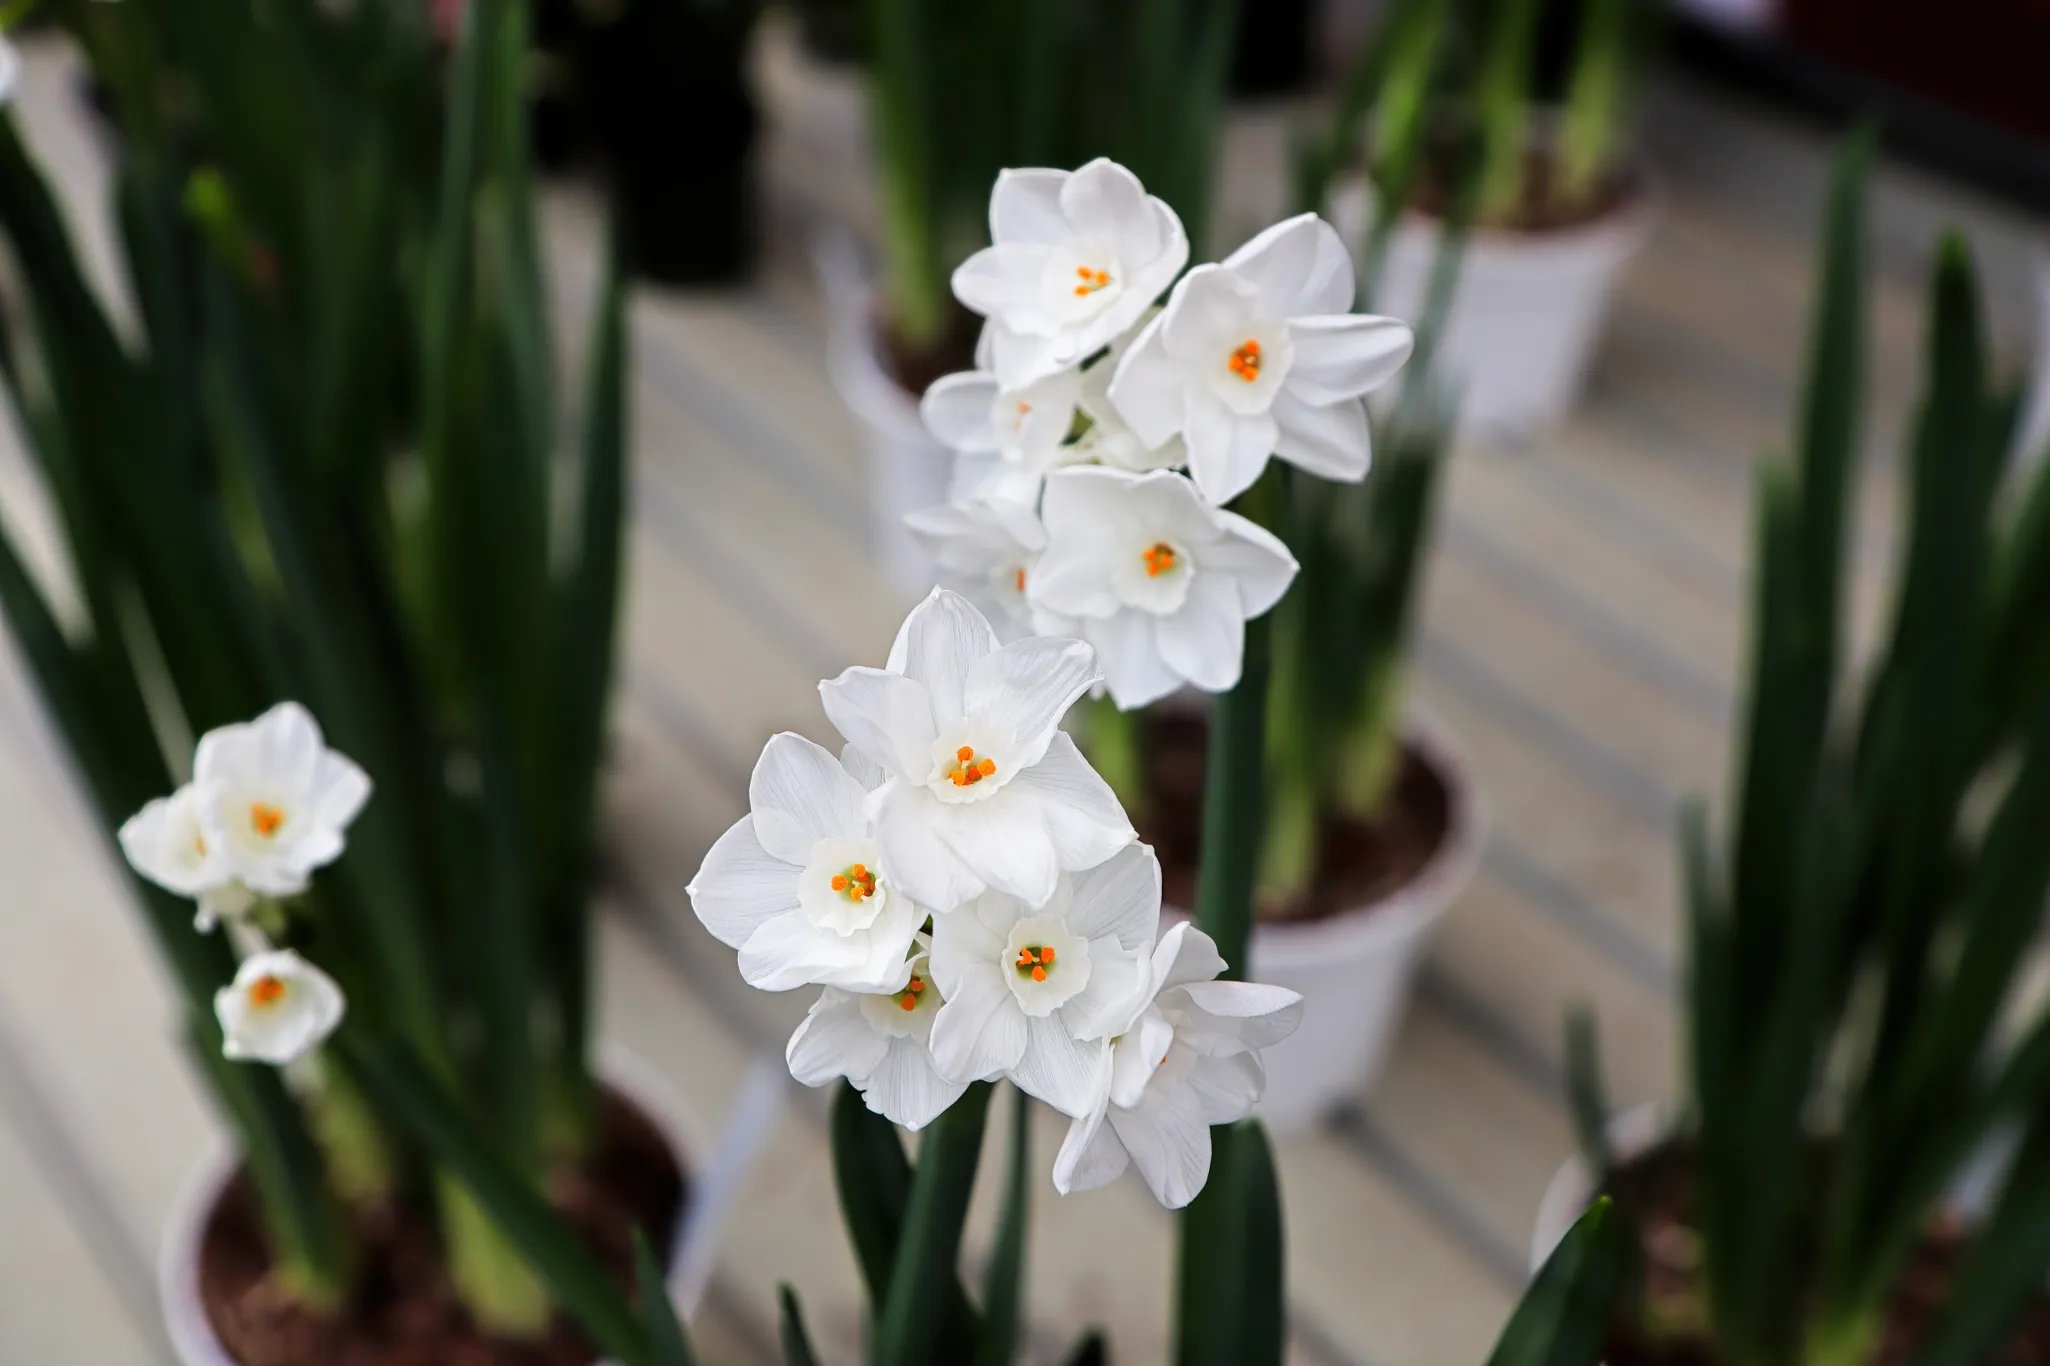
1. Variety and Quality: Paperwhite bulbs come in different varieties, each offering its own unique characteristics. Look for bulbs labeled as “Ziva” or “Inbal,” as these are known for their high quality and reliable performance. Consider purchasing bulbs from reputable nurseries or garden centers to ensure you’re getting healthy, disease-free bulbs.
2. Size and Firmness: Opt for bulbs that are plump, firm, and free from any signs of rot or damage. Bulbs that feel hollow or soft may not produce strong, healthy plants. Larger bulbs tend to produce more blooms, so if you’re looking for a bountiful display, choose bulbs that are on the larger side.
3. Sprouting Stage: It can be helpful to select bulbs that have already started sprouting. These bulbs indicate that they are healthy and have the potential to grow quickly and produce lovely flowers. However, if you’re unable to find sprouted bulbs, don’t worry – you can still achieve successful results with non-sprouted bulbs.
4. Fragrance Preference: Paperwhite bulbs are well-known for their delightful fragrance. Some varieties have a stronger scent than others, so consider your personal preference when making your selection. Keep in mind that the fragrance can be quite potent, so if you’re sensitive to strong smells, you might want to opt for a variety with a milder scent.
5. Planting Season: Paperwhite bulbs can be planted both indoors and outdoors, but the timing will depend on your desired bloom time. If you prefer to enjoy the blooms during the winter months, plant the bulbs indoors in late fall. For outdoor planting, wait until the soil has warmed up in early spring.
By considering these factors, you can make an informed decision and choose the perfect paperwhite bulbs for your planting project. Remember, selecting healthy, high-quality bulbs sets the foundation for successful growth and a stunning display of fragrant flowers.
Preparing the Pot
Preparing the pot is an important step in ensuring the proper growth and development of your paperwhite bulbs. Follow these guidelines to prepare the pot:
1. Size and Material: Choose a pot that is at least 6-8 inches deep to provide enough space for the bulbs’ roots to spread. The pot should also have drainage holes to prevent waterlogging. Opt for a material such as clay or ceramic, as they provide better airflow and moisture regulation than plastic pots.
2. Sterilization: Before planting, sterilize the pot to eliminate any potential bacteria or fungi that could harm your bulbs. Wash the pot with a mixture of one part bleach to nine parts water, or use a commercial pot sterilizer, ensuring to rinse it thoroughly afterwards.
3. Potting Mix: Use a well-draining potting mix specifically designed for bulbs or indoor plants. Avoid using garden soil, as it can be too heavy and may not provide adequate drainage. A mixture of equal parts potting soil, perlite, and sand is an excellent choice for paperwhite bulbs.
4. Moisture Control: Fill the pot with the potting mix, leaving about 1-2 inches of space at the top. This space will allow for watering without overflow. Firmly press the soil to ensure it settles evenly in the pot.
5. Optional Additions: If desired, you can add a layer of small stones or pebbles at the bottom of the pot to enhance drainage and create a decorative touch. However, make sure the layer is not too thick to avoid hindering water movement.
By following these steps, you’ll create an optimal environment for your paperwhite bulbs to thrive. A properly prepared pot will provide the necessary conditions for healthy root development, moisture regulation, and overall successful growth.
Planting the Bulbs
Now that you’ve chosen the right bulbs and prepared the pot, it’s time to plant your paperwhite bulbs. Follow these steps for successful planting:
1. Bulb Placement: Place the bulbs in the prepared pot with their pointed ends facing upwards. Space the bulbs evenly, leaving some room between them for growth. You can plant multiple bulbs in the same pot to create a fuller display.
2. Planting Depth: Cover the bulbs with potting mix, leaving the tips of the bulbs exposed. As a general rule, plant the bulbs at a depth that is about twice their diameter. This allows for proper root growth and supports the plants as they develop.
3. Soil Moisture: After planting, water the pot thoroughly until water drains out of the bottom. This initial watering helps to settle the soil and provides the bulbs with the necessary moisture to begin their growth cycle.
4. Temperature and Location: Place the pot in a location where it will receive bright, indirect sunlight. Paperwhite bulbs prefer cool temperatures for root development, so it’s best to keep them in a room with temperatures between 50 and 60 degrees Fahrenheit (10-15 degrees Celsius).
5. Avoiding Overwatering: While it’s important to keep the soil moist, be careful not to overwater the bulbs. Overwatering can lead to rot and damage the bulbs. Allow the top layer of soil to dry slightly before watering again.
By following these steps, you’ll ensure that your paperwhite bulbs are properly positioned and have the ideal conditions to grow and flourish. The planting process sets the stage for healthy root development and ensures the bulbs have the best start for producing beautiful blooms.
Watering and Maintenance
Proper watering and maintenance is essential for the health and growth of your paperwhite bulbs. Follow these guidelines to ensure optimal care:
1. Watering Frequency: Monitor the soil regularly and water when the top inch of soil feels dry to the touch. Avoid overwatering, as excessive moisture can lead to root rot. Aim to keep the soil evenly moist but not waterlogged.
2. Watering Technique: When watering, pour water directly into the pot until it drains out of the bottom. This ensures that water reaches the bulbs’ roots and helps flush out any accumulated salts or toxins in the soil. Avoid getting water directly on the foliage to prevent fungal diseases.
3. Fertilization: Paperwhite bulbs do not typically require fertilizer. However, if you notice weak growth or pale leaves, you can dilute a balanced liquid fertilizer and apply it sparingly once every 3-4 weeks. Be cautious not to over-fertilize, as this can lead to excessive leaf growth at the expense of flower production.
4. Soil Maintenance: Remove any dead or yellowing foliage as it appears to prevent the spread of diseases or pests. Gently loosen the top layer of soil occasionally to improve aeration and water penetration. This will help the bulbs establish a strong root system.
5. Preventing Pests and Diseases: Monitor your paperwhite bulbs for signs of pests, such as aphids or fungal diseases like gray mold. If pests or diseases are detected, treat them promptly with appropriate organic or chemical solutions to prevent further damage to the plants.
By providing adequate moisture, occasional maintenance, and monitoring for any potential issues, you’ll ensure the well-being of your paperwhite bulbs. A consistent and attentive approach to watering and maintenance will help your bulbs flourish and produce stunning blooms.
Providing Adequate Light
Proper lighting is crucial for the growth and development of paperwhite bulbs. These tips will help you provide the right amount of light for your bulbs:
1. Indirect Sunlight: Paperwhite bulbs thrive best in bright, indirect light. Place your potted bulbs near a sunny window, but avoid exposing them to direct sunlight, as it can cause the leaves to burn or scorch.
2. Rotate the Pot: To ensure even growth and prevent the bulbs from leaning towards the light source, rotate the pot every few days. This will encourage symmetric growth and prevent your plants from becoming lopsided.
3. Supplemental Lighting: If you don’t have access to sufficient natural light, you can use supplemental lighting to provide the necessary illumination for your paperwhite bulbs. Use a fluorescent or LED grow light and position it about 6-12 inches above the foliage. Keep the light on for 12-14 hours a day, simulating daylight conditions.
4. Light Intensity: Paperwhite bulbs require bright, but not intense, light to grow successfully. If the light in your chosen spot is too harsh, filter it through a light curtain or sheer blind. Alternatively, you can place the bulbs in a location with bright, indirect light for most of the day, and then move them to a dimmer location in the evening to simulate a natural light cycle.
5. Monitoring Light Levels: Keep an eye on your paperwhite bulbs for signs of inadequate lighting. If you notice elongated or weak stems, pale or yellowing leaves, or a lack of flower production, it may indicate that your bulbs are not receiving enough light.
By providing the appropriate amount of light, either through natural sources or supplemental lighting, you’ll encourage healthy growth and vibrant blooms in your paperwhite bulbs. Pay attention to light levels and make adjustments as needed to ensure your bulbs receive the optimal lighting conditions.
Encouraging Growth
To promote strong and robust growth in your paperwhite bulbs, follow these steps:
1. Temperature Control: Maintain a cool environment for your paperwhite bulbs during their growth period. Aim for temperatures between 50 and 60 degrees Fahrenheit (10-15 degrees Celsius). Cooler temperatures help prevent leggy growth and promote sturdy stems and foliage.
2. Proper Air Circulation: Adequate air circulation around your paperwhite bulbs is vital for their growth. Avoid overcrowding them by planting multiple bulbs too closely together. This allows for better airflow, reducing the risk of fungal diseases and promoting healthier growth.
3. Support for Tall Stems: As your paperwhite bulbs grow, some varieties may develop tall, top-heavy stems that have a tendency to droop or tip over. Use plant supports or stakes to gently prop up the stems and prevent them from bending or breaking. This will help the plants maintain an upright and attractive appearance.
4. Avoiding Ethylene Exposure: Paperwhite bulbs are sensitive to ethylene gas, which is emitted from ripening fruits, decaying plants, and certain household appliances. Keep your bulbs away from ethylene-producing sources as exposure to this gas can cause distorted growth and premature aging of the flowers.
5. Regular Monitoring and Care: Keep a close eye on your paperwhite bulbs as they grow. Remove any yellowing or dead leaves promptly to maintain a tidy appearance. Provide continuous care with proper watering, maintaining the right temperature and light levels, and addressing any issues that may arise promptly.
By implementing these strategies, you can encourage strong and healthy growth in your paperwhite bulbs. With the right conditions and attentive care, your bulbs will flourish, producing vibrant foliage and abundant, fragrant blooms.
Dealing with Common Issues
While growing paperwhite bulbs can be quite rewarding, they may encounter some common issues. Here are some tips for addressing these problems:
1. Yellowing Foliage: If you notice yellowing leaves, it can be a sign of overwatering. Ensure that your bulbs are not sitting in waterlogged soil and adjust your watering schedule accordingly. Allow the soil to dry out slightly between waterings to prevent root rot and maintain healthy foliage.
2. Leggy Growth: Leggy growth occurs when the stems of your paperwhite bulbs grow too tall and weak. To prevent this, make sure your bulbs are receiving adequate light. Increase the light intensity or move them closer to a natural light source to encourage more compact and sturdy growth.
3. Floppy Stems: Sometimes, the top-heavy nature of paperwhite blooms can cause stems to bend or droop. You can provide support by gently tying the stems to stakes or using decorative twine or clips. This will help maintain an upright and attractive appearance.
4. Lack of Blooms: If your paperwhite bulbs fail to produce blooms, it could be due to insufficient chilling period, improper planting depth, or insufficient light. Ensure that you are providing the bulbs with the recommended cooling period before planting. Plant bulbs at the correct depth and make sure they are receiving adequate light, both natural and supplemental if necessary.
5. Pest Infestation: Some common pests that may affect paperwhite bulbs include aphids, fungus gnats, and spider mites. Treat infestations promptly by using organic pest control methods or insecticidal soap. Regularly inspect your plants for signs of pests and take proactive measures to prevent infestations.
6. Fungal Diseases: Fungal diseases like gray mold or root rot can damage paperwhite bulbs. To prevent fungal issues, ensure good air circulation, avoid overwatering, and remove any dead foliage promptly. If disease occurs, treat it with appropriate fungicides and adjust your watering practices to prevent further spread.
By addressing these common issues promptly and taking proactive measures to prevent them, you can ensure the health and vitality of your paperwhite bulbs. Regular monitoring and adjusting care practices as needed will help your bulbs thrive and produce beautiful blooms.
Harvesting and Displaying the Blooms
After patiently caring for your paperwhite bulbs, it’s time to harvest the beautiful blooms and create stunning displays. Here are some tips to guide you through the harvesting and displaying process:
1. Bloom Stage: Harvest the blooms when they are in their prime. Wait until the buds have fully opened and the flowers have reached their desired size. The blooms should appear fragrant, lush, and vibrant in color. Harvesting at the perfect stage ensures maximum beauty and longevity when displayed.
2. Cutting Technique: To harvest the blooms, use clean, sharp scissors or garden shears. Cut the stems at a 45-degree angle, about one inch from the base. This angle allows the stems to absorb water more efficiently when placed in a vase, prolonging the life of the cut flowers.
3. Water Temperature: Fill a clean vase with room temperature water. Paperwhite blooms prefer cooler water, so avoid using very cold or warm water. Changing the water every few days will also help to keep the blooms fresh and vibrant for a longer duration.
4. Displaying Options: There are several ways to display your paperwhite blooms. You can arrange them in a simple glass vase or get creative with unique containers like vintage teacups, mason jars, or decorative ceramic pots. Experiment with different arrangements to showcase the beauty of the blooms.
5. Enhancements: Consider adding a touch of greenery or other complementary flowers to your paperwhite arrangement. Sprigs of fresh foliage, such as eucalyptus or ferns, can add texture and visually enhance the display. However, be cautious not to overcrowd the vase, as it may affect the longevity of the paperwhite blooms.
6. Placement: Choose a location to display your paperwhite blooms where they will receive indirect sunlight, away from direct heat sources, and drafts. A well-lit area will help the flowers last longer while preserving their vibrant colors and delicate fragrance.
7. Enjoyment and Maintenance: Admire your beautiful paperwhite arrangement daily and enjoy its fragrance. Monitor the water level in the vase and refill as needed to keep the stems submerged. Remove any discolored or wilted blooms to maintain the overall appearance of the display.
By following these guidelines and using your creativity, you can create visually stunning arrangements with your harvested paperwhite blooms. Display them proudly and enjoy their beauty, fragrance, and the sense of accomplishment that comes from cultivating your own indoor garden.