
Finding a Healthy Mango Seed
When it comes to planting mango seeds, it’s important to start with a healthy seed. Choosing the right mango seed will greatly impact the success of your planting endeavor. Here are some key tips on finding a healthy mango seed:
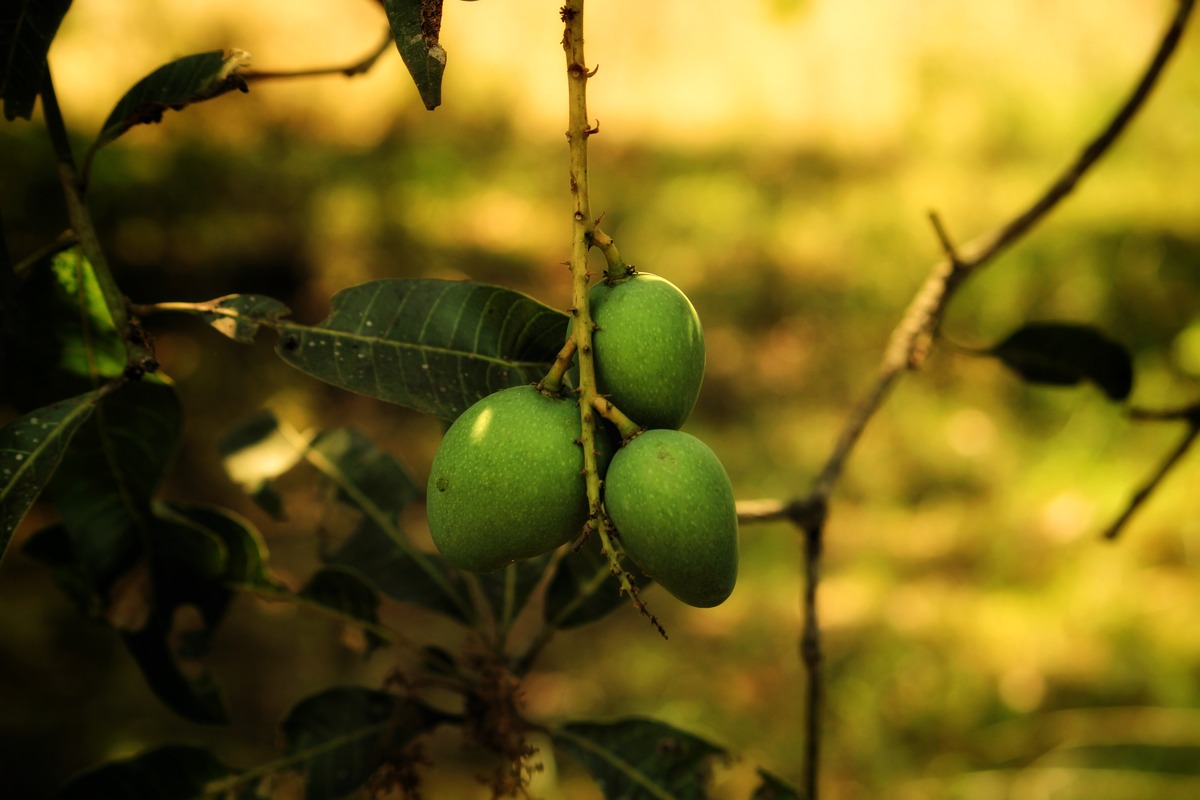
- Look for a freshly fallen mango fruit: The ideal time to collect mango seeds is when they have just fallen from the tree. This ensures that they are ripe and ready for planting.
- Check the condition of the seed: Inspect the seed for any signs of damage or rot. A healthy mango seed should be firm and intact, with no visible blemishes or mold.
- Consider the size and weight: Larger mango seeds often yield stronger and more vigorous plants. Additionally, heavier seeds are typically a good indicator of maturity.
- Choose a variety you prefer: There are various mango varieties available, each with its own unique flavor and characteristics. Select a mango fruit whose variety you enjoy to ensure you’ll be satisfied with the outcome.
- Ask local farmers or nurseries for recommendations: Local farmers and nurseries are knowledgeable about the different mango varieties that thrive in your region. Seek their advice to ensure you choose a suitable mango seed for your location.
By taking the time to find a healthy mango seed, you increase the chances of growing a successful mango tree. Remember to handle the seed with care to avoid damaging it during the planting process. Once you have found the perfect mango seed, you’re ready to move on to the next step of removing the outer shell.
Removing the Outer Shell
After you have found a healthy mango seed, the next step is to remove its outer shell. This outer shell can be tough and fibrous, making it necessary to remove it to allow for successful germination. Here’s how you can remove the outer shell of a mango seed:
- Allow the mango seed to dry: Before attempting to remove the outer shell, let the mango seed dry for a few days. This will make it easier to handle and remove the shell.
- Locate the “eye” of the seed: Look for the “eye” at the pointed end of the mango seed. This is the spot where the plant will emerge, so it’s important to identify it before proceeding.
- Carefully remove the outer shell: Using a sharp knife or pruners, make a small incision on the side of the seed opposite the “eye”. Gently pry open the shell, being cautious not to damage the inner seed.
- Peel away the shell: Once you have created an opening, carefully peel away the outer shell using your fingers or a knife. Take your time to avoid injuring the seed within.
- Inspect the inner seed: After removing the outer shell, examine the inner seed for any signs of damage or disease. If the inner seed appears healthy, you can proceed to the next step of preparing it for germination.
Remember to handle the mango seed with care during the shell removal process. Damaging the seed at this stage can hinder its ability to germinate and grow into a healthy seedling. Once the outer shell has been successfully removed, you are ready to move on to the next step of preparing the seed for germination.
Preparing the Seed for Germination
Now that you have removed the outer shell of the mango seed, it’s time to prepare it for germination. This step is crucial in providing the seed with the optimal conditions for sprouting. Here are the key steps to prepare the seed for germination:
- Soak the seed in water: Fill a container with room temperature water and place the mango seed in it. Allow the seed to soak for 24 to 48 hours. This soaking process will help to soften the seed coat, which aids in germination.
- Remove the seed from the water: After the soaking period, remove the seed from the water and discard any remaining liquid. The seed should feel slightly softer and more pliable compared to before soaking.
- Wrap the seed in a damp paper towel: Take a paper towel and wet it thoroughly. Place the mango seed on the damp paper towel and fold it to cover the seed completely. The moist environment created by the paper towel helps to promote germination.
- Place the wrapped seed in a plastic bag: Put the paper towel-wrapped seed into a sealed plastic bag. This creates a humid environment, perfect for germination. Make sure the bag is tightly sealed to retain moisture.
- Store the bag in a warm location: Find a warm spot in your home, such as on top of the refrigerator or near a heater, and place the bag there. The ideal temperature for germination is around 75 to 85 degrees Fahrenheit (24 to 29 degrees Celsius).
- Check regularly for signs of germination: After a week or two, check the seed regularly for any signs of germination. Look for small sprouts or root formations. Once you see these signs, it’s time to move on to the next step of planting the mango seed.
By following these steps and providing the right conditions for germination, you give the mango seed the best chances of sprouting successfully. Keep an eye on the seed’s progress and be patient, as germination can take anywhere from a few weeks to a couple of months. With proper care, your mango seed will soon transform into a thriving seedling ready for planting.
Choosing the Right Soil
When it comes to planting a mango seed, selecting the right soil is crucial for providing the necessary nutrients and a suitable growing environment. Here are some key factors to consider when choosing the right soil for your mango seed:
- Well-draining soil: Mango trees prefer well-draining soil that allows excess water to flow away. Avoid heavy clay soils, as they tend to retain water and can lead to root rot. Look for loamy or sandy soil that provides good drainage.
- Rich in organic matter: Mango trees thrive in soil that is rich in organic matter. Organic matter helps improve soil fertility and moisture retention. Adding compost or well-rotted manure to the soil can provide the necessary organic matter for optimal growth.
- pH level: Mango trees prefer slightly acidic to neutral soil, with a pH range of 6.0 to 7.5. Test the soil pH using a soil testing kit and make any necessary adjustments using organic amendments or additives.
- Adequate moisture retention: While well-draining soil is important, it’s also crucial to choose soil that retains moisture. Mango trees require consistently moist soil for proper growth and fruit production. Adding mulch around the base of the tree can help retain moisture and regulate soil temperature.
- Good fertility: Mango trees are heavy feeders and require fertile soil to thrive. Look for soil that is naturally rich in nutrients or amend the soil with organic fertilizers to ensure adequate nutrition for the growing mango tree.
- Consider local climate and soil conditions: Keep in mind the specific climate and soil conditions of your area. Different mango varieties have varying soil preferences, so it’s important to select a variety that is well-suited to your local soil conditions.
By choosing the right soil for your mango seed, you provide a solid foundation for healthy growth and development. Ensure that the soil is well-prepared before planting the seed, as this will greatly contribute to the long-term health and productivity of your mango tree.
Planting the Mango Seed
Once you have selected the right soil, it’s time to plant the mango seed. Proper planting ensures that the seed has the best chance of germination and establishment. Here are the steps to follow when planting the mango seed:
- Choose a suitable planting location: Select a sunny spot in your garden or yard where the mango tree will receive at least 6 to 8 hours of direct sunlight daily. Ensure there is enough space for the tree to grow and spread its branches.
- Prepare the planting hole: Dig a hole in the soil that is wider and deeper than the size of the mango seed’s root system. This will provide ample space for the roots to grow and establish themselves.
- Amend the soil: If the soil lacks fertility or drainage, add organic matter such as compost or well-rotted manure to the bottom of the hole. Mix it well with the existing soil to create a nutrient-rich growing environment.
- Place the mango seed in the hole: Gently place the mango seed in the center of the hole with the eye facing upwards. The eye is the pointy end of the seed from which the sprout will emerge.
- Backfill the hole: Carefully fill the hole with the amended soil, ensuring that the root system is completely covered but the top of the seed is exposed. Tamp down the soil gently to eliminate any air pockets.
- Water thoroughly: Give the newly planted mango seed a thorough watering, soaking the soil around it. This helps settle the soil and provides immediate moisture for the seed.
- Mark the planting spot: Place a marker or stake in the ground near the seedling to mark its location. This will prevent accidental damage or disturbance to the seedling as it grows.
- Provide ongoing care: Keep the soil consistently moist but not waterlogged during the early stages of growth. Apply a layer of mulch around the base of the seedling to conserve moisture and suppress weed growth. Monitor the plant for any signs of pests or diseases and take appropriate action if necessary.
Proper planting techniques are essential for the successful growth of a mango seedling. By following these steps, you give your mango seed the best chance of establishing a healthy and sturdy tree that will eventually yield delicious mango fruits.
Watering and Caring for the Seedling
After planting the mango seed, proper watering and care are crucial for the healthy growth and development of the seedling. Here are some important tips to follow when it comes to watering and caring for your mango seedling:
- Establish a watering routine: Water the seedling regularly, especially during the first few months of growth. Keep the soil consistently moist but not waterlogged. As the tree matures, water deeply and less frequently, allowing the soil to dry out slightly between watering sessions.
- Monitor soil moisture: Regularly check the moisture level of the soil around the seedling. Insert your finger into the soil about an inch deep to determine if it requires watering. If the soil feels dry at that depth, it’s time to water.
- Avoid overwatering: While it’s important to provide adequate moisture, be cautious not to overwater the seedling. Overwatering can lead to root rot and other moisture-related issues. Allow the top layer of soil to dry out slightly before the next watering session.
- Fertilize appropriately: Apply a balanced and slow-release fertilizer specifically formulated for fruit trees. Follow the recommended dosage instructions on the fertilizer package. Over-fertilizing can be harmful to the seedling, so it’s important to use fertilizer sparingly and correctly.
- Prune when necessary: As the seedling grows, monitor its branches and remove any diseased, damaged, or overcrowded sections. Pruning helps promote healthy growth, improves airflow, and prevents the spread of diseases.
- Protect from extreme weather: Mango seedlings are susceptible to extreme temperatures, especially during their early stages of growth. Protect the seedling from frost, strong winds, and excessive heat by providing shade, windbreaks, or covering it with a protective cloth or bucket during extreme weather conditions.
- Keep weeds at bay: Regularly remove any weeds that grow near the seedling. Weeds compete with the seedling for nutrients and moisture, potentially hampering its growth. Mulching around the base of the tree can help suppress weed growth.
- Monitor for pests and diseases: Keep a close eye on the seedling for any signs of pests or diseases, such as aphids, caterpillars, or fungal infections. If you notice any issues, take appropriate measures to control and mitigate the problem, such as using natural or organic pest control methods.
By providing proper watering and care to the mango seedling, you create an environment that supports healthy growth and development. Regular monitoring, adjustments, and attention to the seedling’s needs will ensure its successful transition into a mature and fruitful mango tree.
Transplanting the Mango Seedling
As your mango seedling grows and develops, there may come a time when it needs to be transplanted into a larger container or into the ground. Transplanting allows the seedling to have more space to spread its roots and continue its growth. Here’s what you need to know about transplanting a mango seedling:
- Choose the right time: The best time to transplant a mango seedling is during its dormant period or early spring. This allows the seedling to recover from the shock of transplantation and establish itself in its new location.
- Select a suitable planting location: Consider the needs of the mango tree when choosing a new planting location. It should have well-draining soil, receive ample sunlight, and have enough space for the tree to grow to its full size.
- Prepare the new planting hole: Dig a hole that is wider and deeper than the root ball of the seedling. Loosen the soil around the hole to encourage root penetration into the surrounding soil.
- Carefully remove the seedling from its current container: Gently tap or squeeze the sides of the container to loosen the root ball. Slowly and carefully remove the seedling, ensuring that the root system remains intact.
- Place the seedling in the new hole: Position the seedling in the center of the hole, making sure that it sits at the same depth as it was in its previous container. Backfill the hole with soil, taking care not to damage the roots.
- Water thoroughly after transplanting: Give the newly transplanted seedling a thorough watering to help settle the soil and eliminate air pockets. Ensure that the soil is evenly moist but not waterlogged.
- Provide ongoing care after transplanting: Continue to water the transplanted seedling regularly, maintaining steady moisture levels. Apply a layer of mulch around the base of the tree to help retain moisture and suppress weed growth. Monitor the seedling for signs of stress or shock and take appropriate action if needed.
- Support the seedling if necessary: If the seedling is tall or top-heavy, you may need to provide support in the form of stakes or ties. This will help keep the young tree upright and stable until its roots establish themselves in the new location.
Transplanting a mango seedling requires care and attention to ensure its successful adaptation to its new environment. By following these steps and providing the necessary care, your transplanted mango seedling will have the opportunity to continue its growth and thrive in its new location.
Pruning the Mango Tree
Pruning is an essential practice for maintaining the health, shape, and productivity of a mango tree. It helps remove diseased or damaged branches, improves airflow, encourages new growth, and promotes fruit production. Here are some key tips for pruning a mango tree:
- Timing: The best time to prune a mango tree is during its dormant period, typically in late winter or early spring before new growth begins. Pruning during this time minimizes stress on the tree and allows it to heal quickly.
- Remove dead, diseased, or damaged branches: Start by inspecting the tree for any dead, diseased, or damaged branches. Prune these branches back to healthy wood, making clean cuts just above the branch collar or the main trunk.
- Thin out crowded branches: Mango trees can develop dense canopies, which hinder airflow and light penetration. Identify and remove any crossing or overcrowded branches to promote better air circulation and sunlight exposure.
- Control tree height: If your mango tree is growing too tall and becoming difficult to manage, you can selectively prune the upper branches to reduce its overall height. However, be cautious not to remove too many branches and destabilize the tree.
- Encourage lateral branching: Mango trees typically produce fruit on lateral branches. To encourage lateral growth, selectively prune the tips of the branches to stimulate the growth of side shoots. This helps increase the number of potential fruit-bearing branches.
- Shape the tree: Depending on your preference and the space available, you can prune the mango tree to achieve a desired shape, such as an open vase or a central leader form. Regular pruning over the years will maintain the tree’s desired shape.
- Avoid excessive pruning: While pruning is important, avoid excessive removal of branches as it can negatively impact fruit production. Mango trees require a balance between foliage and fruit-bearing branches to ensure a healthy yield.
- Prune after fruiting: Once the mango tree has finished fruiting, you can prune it to remove any remaining fruit stalks or thin out branches that have borne fruit. This helps redirect the tree’s energy towards new growth and future fruit production.
Remember to use clean, sharp pruning tools and make careful cuts to minimize damage to the tree. Proper pruning practices, performed at the right time and with the tree’s health in mind, will help your mango tree thrive, produce abundant fruit, and maintain an attractive appearance.
Protecting the Mango Tree from Pests and Diseases
Like any other plant, mango trees are susceptible to various pests and diseases that can hinder their growth and reduce fruit quality. Fortunately, there are steps you can take to protect your mango tree and keep it healthy. Here are some key strategies to protect your mango tree from pests and diseases:
- Monitor regularly: Regularly inspect your mango tree for any signs of pests or diseases. Look for visual symptoms such as discolored leaves, chewed foliage, or pests crawling on the tree. Early detection is crucial for effective treatment.
- Practice good sanitation: Keep the area around the mango tree clean and free of fallen leaves, fruits, and other debris. This helps eliminate hiding places for pests and prevents the spread of diseases.
- Implement cultural practices: Follow good cultural practices to promote tree health. This includes watering at the base of the tree instead of overhead to prevent fungal infections, avoiding over-fertilization which can attract pests, and ensuring proper spacing between trees for adequate airflow.
- Use organic pest control methods: Consider using organic methods to control pests and diseases. This includes introducing beneficial insects, such as ladybugs or lacewings, that feed on pests, or using organic insecticides or fungicides approved for use in mango cultivation.
- Identify and treat pests promptly: If you notice pests on your mango tree, identify them correctly and choose appropriate treatment methods. This may involve spraying targeted insecticides or using traps to catch specific pests.
- Prevent fungal diseases: Mango trees are prone to fungal diseases such as anthracnose and powdery mildew. Apply preventive fungicides during periods of high humidity or when disease symptoms are first observed. Prune out infected branches promptly to prevent the spread of fungal spores.
- Protect against fruit flies: Fruit flies can cause significant damage to mango fruits. Cover the developing fruits with bags or nylon stockings to prevent infestation. Additionally, practice proper fruit thinning to reduce the number of fruits and ensure healthier growth.
- Seek professional advice if needed: If you are unsure about the identification or treatment of a pest or disease, consult with a knowledgeable arborist, horticulturist, or your local agricultural extension service for expert advice and guidance.
By implementing these preventive measures and promptly addressing any issues, you can protect your mango tree from common pests and diseases and ensure its continued growth and productivity.
Harvesting Mangoes
One of the most exciting parts of growing a mango tree is the eventual harvest of delicious, ripe mangoes. Harvesting mangoes at the right time ensures optimal flavor and sweetness. Here are some important considerations and steps to follow when harvesting mangoes:
- Observe the fruit’s maturity: Before harvesting mangoes, it’s crucial to determine their maturity level. Pay attention to the color, size, and firmness of the fruit. Different varieties have varying characteristics, so consult the specific guidelines for your mango variety.
- Check for ripeness indicators: Look for visual cues to assess mango ripeness. Most mango varieties change color as they ripen, transitioning from green to yellow, orange, red, or a combination of these hues. Additionally, a ripe mango will have a sweet aroma emanating from the stem end.
- Gently twist the fruit: To determine if a mango is ready to be harvested, give it a gentle twist. If the fruit detaches easily from the stem with slight resistance, it is likely ripe and ready to be picked.
- Use pruning shears or scissors: When harvesting mangoes, it’s best to use sharp pruning shears or scissors to cut the fruit from the tree. Make clean cuts about an inch or so above the stem end to avoid any damage to the fruit or nearby branches.
- Avoid pulling or yanking: Avoid pulling or yanking the mangoes from the tree as it may cause damage to the fruit or even harm the tree itself.
- Handle with care: Handle harvested mangoes with care to prevent bruising or damage. Place them gently in a basket or tray, taking care not to stack or squeeze them together.
- Allow for further ripening if needed: If the mangoes are slightly underripe, you can allow them to ripen further at room temperature. Place them in a paper bag to expedite the ripening process. Once the mangoes are fully ripe, store them in the refrigerator to extend their shelf life.
- Enjoy the fruits of your labor: Now that your mangoes are harvested and ready, it’s time to savor their juicy, sweet flavor! Enjoy them fresh, include them in tropical recipes, blend them into smoothies, or freeze them for use in various dishes throughout the year.
Harvesting mangoes at the perfect moment allows you to fully enjoy their deliciousness and savor the rewards of your hard work and dedication. By following these guidelines, you’ll ensure that each mango you harvest is ripe, flavorful, and brings delight to your taste buds.