
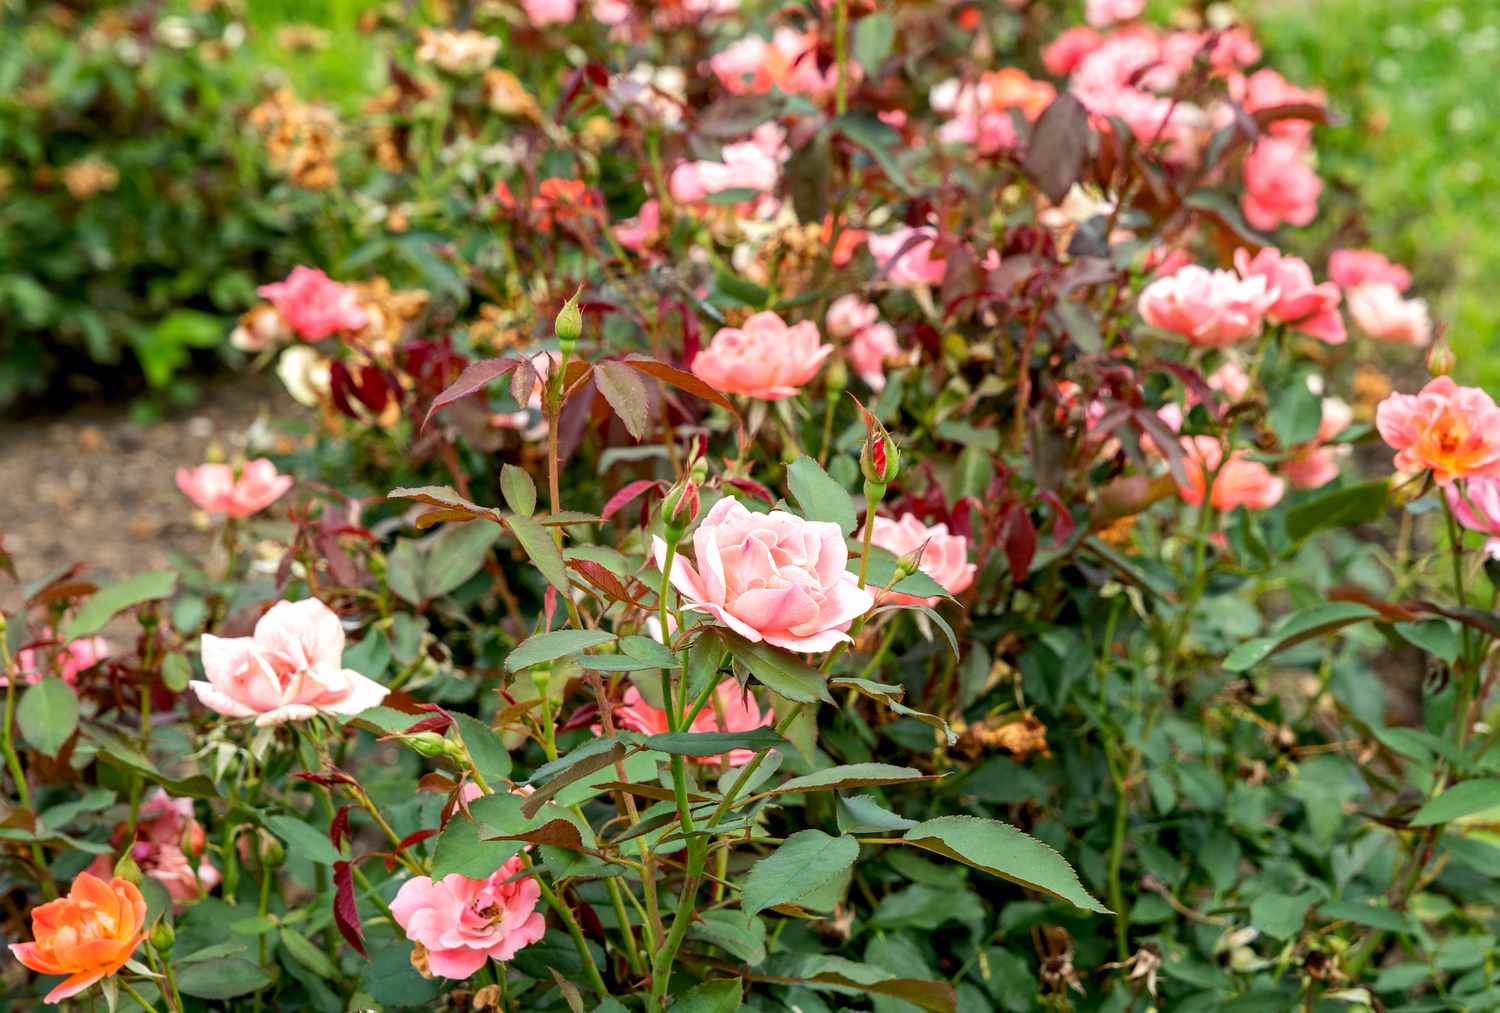
Choosing the Right Location for Knockout Roses
When it comes to planting knockout roses, selecting the right location is crucial for their growth and blooming. Here are some important factors to consider:
Sunlight: Knockout roses thrive in full sunlight, so choose a location that receives at least 6 hours of direct sunlight per day. Avoid areas with too much shade, as it can hinder their development and result in fewer blooms.
Soil Drainage: Good drainage is essential for knockout roses. They prefer well-drained soil to avoid root rot and other diseases. If your soil tends to retain water, consider amending it with organic matter, such as compost, to improve drainage.
Soil pH: Knockout roses prefer slightly acidic to neutral soil with a pH range of 6.0 to 7.0. Test your soil’s pH using a soil testing kit and adjust it accordingly. If the pH is too high or low, you can amend the soil with lime or sulfur to bring it to the desired range.
Space: Ensure that you have enough space for the knockout roses to grow and spread. They can reach a width of 3 to 4 feet, so provide adequate spacing between plants to allow air circulation and prevent overcrowding.
Protection from Harsh Elements: Choose a location that offers some protection from strong winds, as they can damage the delicate petals and cause stress to the plants. If necessary, consider installing a windbreak or selecting a spot near a fence or building for added protection.
Accessibility: Select a location that is easily accessible for maintenance tasks such as pruning, watering, and fertilizing. Avoid planting knockout roses too close to walkways or structures that may hinder access and make maintenance difficult.
By considering these factors and selecting the right location, you set your knockout roses up for success. They will receive the necessary sunlight, nutrients, and protection to grow into healthy, vibrant plants that will bloom abundantly.
Preparing the Soil for Planting
Before planting knockout roses, it’s essential to prepare the soil to create a favorable environment for their growth. Here are the steps to follow:
1. Clear the Area: Start by removing any weeds, grass, or debris from the planting area. This will prevent competition for nutrients and ensure a clean space for your knockout roses.
2. Loosen the Soil: Use a garden fork or tiller to loosen the soil in the planting area. This will help improve aeration and drainage, allowing the roots to penetrate the soil more easily.
3. Amend the Soil: If your soil is heavy clay or lacks organic matter, it’s beneficial to amend it with compost or well-rotted manure. These organic amendments will improve soil structure, fertility, and moisture retention.
4. Test the Soil: Consider testing the soil’s nutrient levels to determine if any additional amendments are required. A soil testing kit can provide valuable information about the pH, nitrogen, phosphorus, and potassium levels in the soil. Follow the recommendations from the test results for necessary adjustments.
5. Incorporate Organic Matter: Mix in the compost, well-rotted manure, or other organic matter into the top 12 inches of the soil. This will enrich the soil with nutrients, improve drainage, and promote healthy root development.
6. Smooth and Level the Soil: Use a rake to smooth and level the soil surface. This will provide an even planting bed for your knockout roses and prevent water from pooling around the plant’s base.
7. Water the Soil: Before planting, thoroughly water the soil in the planting area. This will ensure that the soil is evenly moist and ready to receive the knockout roses.
By taking the time to properly prepare the soil, you create a fertile and well-drained environment that will support the growth and development of your knockout roses. The enriched soil will provide a solid foundation for the plants to establish themselves and thrive.
Selecting and Purchasing Healthy Knockout Roses
Choosing healthy knockout roses is crucial for their long-term success in your garden. Here are some important factors to consider when selecting and purchasing your knockout roses:
1. Choose Reputable Suppliers: Look for reputable nurseries or garden centers that specialize in roses. The quality of the roses will often be superior, and they can provide expert advice on selecting the right varieties for your specific needs.
2. Select Disease-Resistant Varieties: Knockout roses are known for their exceptional disease resistance. However, it’s still important to choose varieties that have been bred for resistance to common rose diseases such as blackspot and powdery mildew. This will ensure that you start with strong and healthy plants.
3. Inspect the Rose Plants: Before purchasing, thoroughly inspect the rose plants to check for signs of disease or pest infestations. Look for healthy foliage, strong stems, and no signs of wilting or discoloration. Avoid plants with yellow leaves, black spots, or signs of insect damage.
4. Check the Root System: Gently remove the rose plant from its container and examine the roots. Healthy roots should be light-colored, firm, and have a fibrous appearance. Avoid plants with roots that are brown, mushy, or show signs of root damage.
5. Size and Vigor: Choose knockout roses that have a good balance between size and vigor. Look for plants that are not too leggy or stunted. Opt for plants that have a well-developed branching structure and multiple stems, as they indicate healthy growth.
6. Purchase at the Right Time: Timing is important when buying knockout roses. Ideally, purchase them in early spring or late fall when the weather is cooler and more favorable for establishing new plants. Avoid purchasing roses during extreme weather conditions.
7. Ask for Care Instructions: Before leaving the nursery or garden center, ask for specific care instructions for your knockout roses. This will ensure that you have the necessary knowledge to provide proper care and maintenance for your newly acquired plants.
By following these guidelines, you can select and purchase healthy knockout roses that will thrive in your garden. Starting with strong and disease-resistant plants sets the foundation for beautiful, vibrant roses that will bring color and fragrance to your outdoor space.
Digging the Planting Hole
Properly digging the planting hole is essential for setting the stage for successful growth and establishment of your knockout roses. Follow these steps to ensure you create a suitable planting hole:
1. Determine the Hole Size: The size of the planting hole should be wide and deep enough to accommodate the root ball of the rose plant. Generally, a hole that is 2-3 times the width of the root ball and equally deep is sufficient.
2. Mark the Area: Use a shovel or garden trowel to mark the perimeter of the planting hole. This will provide a clear guide for digging and help maintain a consistent hole size.
3. Dig the Hole: Start by digging straight down into the soil, loosening it as you go. Remove the soil and set it aside. As you dig, periodically check the depth of the hole using a measuring tape or the rose plant’s container as a reference.
4. Roughen the Hole’s Sides: Use the edge of the shovel or a garden fork to roughen the sides of the hole. This helps with root penetration and encourages outward root growth, allowing the rose plant to establish more easily.
5. Amend the Soil: If you have heavy clay soil or poor drainage, consider mixing in some compost or organic matter with the excavated soil. This will improve the soil’s texture and drainage capabilities.
6. Remove any Debris: Before placing the rose plant in the hole, ensure that there are no rocks, roots, or other debris that could hinder root growth or cause damage to the plant.
7. Center the Plant: Carefully place the rose plant in the center of the hole, ensuring that it is positioned at the same depth as it was in the container. The crown, where the stems meet the roots, should be level with or slightly above the soil surface.
8. Backfill the Hole: Begin backfilling the hole with the excavated soil, gently firming it around the roots as you go. Avoid compacting the soil too tightly, as this can impede water and air movement.
9. Water and Settle the Soil: Once the hole is backfilled, thoroughly water the plant to settle the soil and remove any air pockets around the root system. This will ensure good contact between the roots and the soil.
By following these steps, you can ensure that your knockout roses are off to a great start. A properly dug planting hole provides the necessary space and soil conditions for the roots to establish and grow, setting the stage for healthy growth and abundant blooms in the future.
Positioning and Placing the Knockout Rose
The proper positioning and placement of your knockout rose in the planting hole is crucial for its overall health and growth. Here are some essential steps to follow:
1. Center the Rose Plant: Ensure that the rose plant is centered in the planting hole. This will provide it with enough space to grow evenly and prevent it from being crowded by surrounding plants or structures.
2. Spread out the Roots: Gently spread out the roots of the rose plant in the planting hole. This will help them establish contact with the surrounding soil and encourage outward growth. Be careful not to excessively bend or damage the roots.
3. Adjust the Planting Depth: The crown of the rose plant, where the stems meet the roots, should be level with or slightly above the soil surface. Adjust the depth of the plant by adding or removing soil as necessary. Planting too deep can lead to crown rot, while planting too shallow can expose the roots and cause drying out.
4. Backfill the Hole: Gradually backfill the planting hole with the excavated soil, gently firming it around the roots. Take care not to compact the soil too tightly, as it may restrict air and water movement to the roots.
5. Create a Soil Basin: Build a small soil basin around the base of the rose plant to help retain water during watering and prevent runoff. This will allow the water to penetrate deeply, ensuring that the roots receive sufficient moisture.
6. Mulch the Base: Apply a layer of organic mulch, such as wood chips or shredded bark, around the base of the rose plant. This will help conserve moisture, control weed growth, and regulate soil temperature. Keep the mulch a few inches away from the stem to prevent rotting.
7. Stabilize the Plant: If necessary, use stakes or plant ties to stabilize the rose plant and protect it from strong winds or heavy rain. Secure the ties loosely to avoid damaging the stems and allow for natural movement and growth.
8. Water Thoroughly: After planting, water the rose plant deeply to ensure that the soil is evenly moist. Maintain proper watering practices throughout the growing season, providing adequate moisture without overwatering.
Following these steps will help position and place your knockout rose in the planting hole effectively. By providing the right environment for the roots to establish, you are setting the stage for a healthy and beautiful rose plant that will flourish in your garden.
Backfilling and Mulching Around the Rose Plant
Backfilling the planting hole and applying mulch around the rose plant are important steps in creating optimal growing conditions and promoting the health of your knockout roses. Here’s what you need to know:
1. Backfilling the Hole: Once the rose plant is positioned in the planting hole, begin backfilling it with the excavated soil. Gently firm the soil around the roots to eliminate any air pockets. Take care not to compress the soil too tightly, as it may hinder water and air movement.
2. Watering: After backfilling, thoroughly water the rose plant to settle the soil and ensure a good connection between the roots and the surrounding soil. This will help the roots establish quickly and promote healthy growth.
3. Applying Mulch: Apply a layer of organic mulch, such as wood chips, shredded bark, or straw, around the base of the rose plant. The mulch should be around 2-3 inches deep, but make sure to keep it a few inches away from the stem to prevent rotting.
4. Mulch Benefits: Mulching offers several benefits for knockout roses. It helps conserve moisture by reducing evaporation from the soil surface, ensuring a consistent supply of water to the plants. Additionally, mulch acts as an insulating layer, protecting the roots from extreme temperatures.
5. Preventing Weed Growth: Mulch helps suppress weed growth around the rose plant, reducing competition for nutrients and moisture. Keep the area around the plant clear of weeds before applying the mulch.
6. Organic Mulch Breakdown: Over time, organic mulch breaks down and enriches the soil with organic matter. As it decomposes, it provides essential nutrients to the rose plant, contributing to its overall health and vitality.
7. Replenishing Mulch: As the mulch decomposes, it may thin out or become compacted. It’s important to replenish the mulch layer annually, preferably in late winter or early spring, to maintain its benefits and appearance.
8. Mulch Maintenance: Regularly monitor the mulch layer and remove any weeds or grass that may grow through it. This will help keep the area around the rose plant clean and prevent competition for resources.
By backfilling the planting hole properly and applying mulch around the base of the rose plant, you create a favorable environment for your knockout roses. The soil will retain moisture, weed growth will be minimized, and the roots will be protected, contributing to the overall health and beauty of your roses.
Watering the Newly Planted Rose
Proper watering is essential for the successful establishment and growth of your newly planted knockout rose. Here are some important considerations when watering your newly planted rose:
1. Initial Watering: After planting the rose, give it a thorough soaking to ensure that the soil is evenly moist. This initial watering helps settle the soil and provides the necessary moisture for the plant to start establishing its roots.
2. Watering Frequency: During the first few weeks after planting, it’s crucial to keep the soil consistently moist. Water the rose plant deeply, providing enough water to penetrate the root zone. As a general guideline, aim for 1-2 inches of water per week.
3. Avoid Overwatering: While it’s important to keep the soil moist, be cautious not to overwater. Excessive water retention can lead to root rot and other diseases. Allow the top inch or two of soil to dry out slightly before watering again.
4. Morning Watering: Watering in the morning allows the foliage and soil to dry throughout the day, reducing the risk of fungal diseases. It also ensures that the plant has sufficient moisture to endure the heat of the day.
5. Deep Watering: Rather than frequent shallow watering, aim for deep watering sessions. This encourages the rose plant’s roots to grow deeper into the soil, making them more resilient and less dependent on frequent watering.
6. Water at the Base: Direct the water at the base of the rose plant, near the soil surface. Avoid watering the foliage excessively, as this can lead to fungal issues. Watering at the base allows the plant to absorb water efficiently through its root system.
7. Adjust for Weather Conditions: Take into account the weather conditions when determining watering frequency. During hot and dry periods, you may need to increase the frequency of watering to ensure that the rose plant receives adequate moisture.
8. Mulch Retention: Mulching around the base of the rose plant helps retain soil moisture and reduces evaporation. The layer of mulch acts as a barrier, keeping the roots cool and preventing water loss from the soil surface.
By providing proper and consistent watering to your newly planted knockout rose, you give it the best chance to establish and thrive. Regular monitoring of the soil moisture and adjusting watering accordingly will contribute to the healthy growth and long-term health of your rose plant.
Pruning and Deadheading Knockout Roses
Pruning and deadheading are essential tasks for maintaining the health, shape, and blooming performance of your knockout roses. Here’s what you need to know about pruning and deadheading these beautiful roses:
1. Pruning for Shape and Size: Pruning helps maintain a desired shape and size for your knockout roses. It is best to prune them during their dormant period, which is usually in early spring before new growth begins. Remove any dead, damaged, or crossing branches, and aim to open up the center of the plant to promote air circulation.
2. Deadheading Faded Flowers: Deadheading refers to the removal of faded flowers. It not only improves the overall appearance of the plant but also directs the plant’s energy into producing new blooms. Use clean, sharp pruning shears to snip off the faded flowers just above a healthy leaf node or bud.
3. Regular Deadheading Benefits: By deadheading regularly, you encourage your knockout roses to produce more blooms throughout the growing season. It prevents the formation of seed pods, redirecting the plant’s energy into creating new flowers, resulting in a prolonged and abundant blooming display.
4. Pruning to Encourage Rejuvenation: Over time, knockout roses can become leggy or overgrown. To rejuvenate the plant and promote healthy growth, you can perform more severe pruning during its dormant period. Cut back the entire plant to around 12 inches above ground level, allowing it to regrow with renewed vigor.
5. Pruning to Maintain Shape: If you’re happy with the size and shape of your knockout roses, regular maintenance pruning can suffice. Remove any dead or diseased wood, as well as any branches that are crossing or rubbing against each other. This will help maintain the desired shape and form of the plant.
6. Clean and Sterilize Tools: Before pruning or deadheading, make sure your pruning tools are clean and sterilized to prevent the spread of diseases. Wipe the blades with a disinfectant solution or rubbing alcohol between cuts to eliminate any potential pathogens.
7. Monitor for Disease and Pests: During and after pruning, carefully inspect your knockout roses for any signs of disease or pests. Remove and dispose of any infected or infested plant material to help prevent the spread of problems.
8. Regular Maintenance: Regularly maintaining your knockout roses through pruning and deadheading contributes to their overall health and appearance. By removing dead or faded blossoms and shaping the plant, you encourage new growth and ensure that your roses remain healthy and beautiful throughout the season.
By following these pruning and deadheading practices, you can keep your knockout roses looking their best, promote continuous blooming, and support overall plant health.
Fertilizing and Feeding Knockout Roses
Fertilizing and properly feeding your knockout roses is essential for their overall health, vigorous growth, and abundant blooming. Here are some important considerations for fertilizing and feeding your knockout roses:
1. Soil Testing: Before applying any fertilizers, it’s recommended to conduct a soil test to determine the nutrient levels and pH of the soil. The test results will guide you in choosing the right fertilizers and making necessary soil amendments.
2. Choose the Right Fertilizer: Select a well-balanced granular rose fertilizer specifically formulated for roses or flowering plants. Look for fertilizers with a balanced NPK ratio (nitrogen, phosphorus, and potassium), as well as essential micronutrients.
3. Timing: Start fertilizing your knockout roses in early spring, just as new growth begins. Repeat applications every 4-6 weeks throughout the growing season, ending in early fall. Avoid fertilizing close to winter, as it can stimulate new, tender growth that may be damaged by freezing temperatures.
4. Application Method: Apply the fertilizer around the base of the rose plant, being careful not to allow it to touch the stems or foliage. Follow the package instructions for the specific fertilizer you are using, as rates may vary. Water the area thoroughly after application to help the nutrients penetrate the soil.
5. Watering after Fertilizing: After fertilizing, water your knockout roses deeply to help distribute the nutrients throughout the root zone. This will also prevent potential root burn if any concentrated fertilizer comes in contact with the roots.
6. Organic Alternatives: If you prefer to use organic fertilizers, there are many options available. Compost, well-rotted manure, and organic liquid fertilizers can provide the necessary nutrients for knockout roses in a more natural and sustainable way.
7. Additional Feeding: In addition to regular fertilizing, consider supplementing your knockout roses with additional nutrients. This can be done by applying compost or a slow-release organic fertilizer around the base of the plants. This helps improve soil fertility and provides a continuous source of nutrients.
8. Monitoring and Adjusting: Regularly observe the growth and appearance of your knockout roses. If they show signs of nutrient deficiencies, such as yellowing leaves or weak growth, adjust your fertilization regimen or consult with a local garden expert for guidance.
By providing the right nutrients through proper fertilizing and feeding, you can ensure that your knockout roses receive the essential elements for healthy growth, abundant blooms, and overall vigor.
Protecting Knockout Roses from Pests and Diseases
Protecting your knockout roses from pests and diseases is crucial to maintain their health and beauty. Here are some important steps to ensure their protection:
1. Regular Inspection: Regularly inspect your knockout roses for any signs of pests or diseases. Check the foliage, stems, and flowers for any abnormalities, such as discoloration, spots, holes, or webbing.
2. Identify Common Pests: Be familiar with common pests that affect roses, such as aphids, mites, rose slugs, and Japanese beetles. Learn to recognize the signs of infestation, like distorted leaves, sticky residue, or visible insects.
3. Monitor for Diseases: Keep an eye out for common diseases that can afflict knockout roses, such as blackspot, powdery mildew, and rust. These diseases can cause leaf discoloration, spotting, and wilting.
4. Provide Good Air Circulation: Proper air circulation around your rose plants helps prevent fungal diseases. Make sure to space the plants adequately and avoid planting them too close to walls or other structures that restrict airflow.
5. Water at the Base: When watering your knockout roses, try to avoid wetting the foliage. Watering at the base of the plant reduces moisture on the leaves, minimizing the risk of fungal diseases.
6. Regularly Remove Fallen Leaves: Fallen leaves can harbor fungal spores or pests. Regularly clean up any fallen leaves around your knockout roses, disposing of them in a sealed bag or container to prevent disease spread.
7. Prune Infected Plant Parts: If you notice any signs of disease or pest infestation, promptly prune and remove affected plant parts. Dispose of them properly to prevent further spread of the problem.
8. Use Organic and Chemical Controls: Depending on the severity of the pest or disease problem, consider using organic controls like insecticidal soaps, neem oil, or horticultural oils. In severe cases, chemical treatments may be necessary, but always follow the instructions carefully to avoid harming beneficial insects or the environment.
9. Encourage Beneficial Insects: Attracting beneficial insects like ladybugs and lacewings can help keep pest populations in check. Planting companion flowers like marigolds and yarrow can attract these beneficial insects to your garden.
10. Practice Good Garden Hygiene: Practicing good garden hygiene, such as regularly cleaning your gardening tools, removing weeds, and avoiding overcrowding, can help prevent the spread of pests and diseases to your knockout roses.
By following these protective measures, you can maintain the health and vitality of your knockout roses, ensuring that they remain free from pest infestations and diseases, and continue to bloom beautifully in your garden.
Winterizing Knockout Roses for Cold Weather
Preparing your knockout roses for cold weather is essential to protect them from the potentially damaging effects of frost and freezing temperatures. Here are some important steps to winterize your knockout roses:
1. Stop Fertilizing: Around four to six weeks before the first expected frost, stop fertilizing your knockout roses. This will discourage new growth, allowing the plants to transition into dormancy.
2. Hydrate the Plants: Before the winter cold sets in, provide a deep watering to ensure the roots are well-hydrated. Moist soil helps to insulate the roots and provides necessary moisture during the dormant period.
3. Mulch the Base: Apply a layer of organic mulch around the base of the rose plants, about 2-3 inches deep. This mulch will help insulate the roots, retain moisture, and protect them from extreme temperature fluctuations.
4. Protect the Canes: To safeguard the canes from freezing temperatures, consider using protective coverings. Wrap the canes in burlap or use foam pipe insulation to provide additional insulation and protect them from harsh winter winds.
5. Prune Dead or Weakened Canes: Before winter arrives, remove any dead, damaged, or weakened canes. This helps prevent diseases and allows the plant to focus its energy on healthier growth during the next growing season.
6. Cover the Soil: In colder climates, cover the soil around the base of the rose plant with additional mulch, leaves, or straw to provide extra insulation and protection against extreme cold.
7. Avoid Heavy Pruning: In most cases, it is best to avoid heavy pruning before winter. Any pruning done should be minimal and focused on removing dead or damaged wood. Severe pruning can stimulate new growth that is vulnerable to winter damage.
8. Monitor Moisture Levels: Throughout the winter, periodically check the moisture levels around the rose plants. Water sparingly if the soil becomes extremely dry, being careful not to overwater or create waterlogged conditions.
9. Remove Coverings in Spring: In early spring, as temperatures begin to rise, remove any coverings or insulation from the rose plants. This allows the plants to acclimate to the changing weather conditions and encourages new growth.
By following these winterization tips, you can help protect your knockout roses from the cold weather and ensure their survival during the winter months. Come springtime, your roses will have a head start in blooming beautifully once again.