
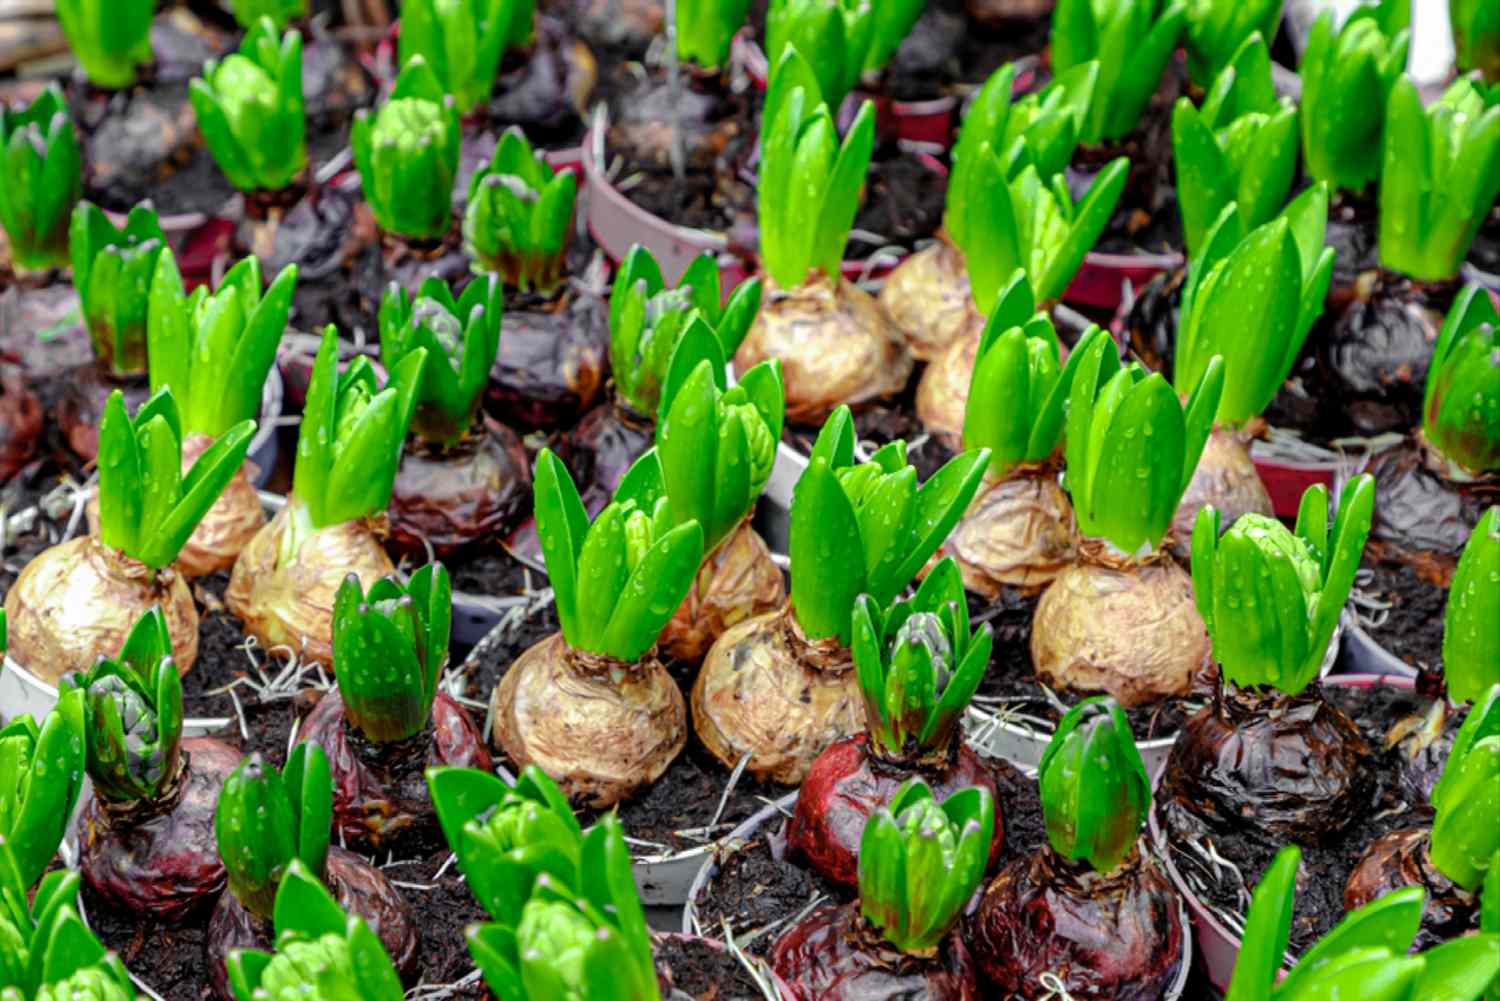
Choosing the Right Bulbs
When it comes to planting hyacinth bulbs, choosing the right ones is essential for ensuring a successful and vibrant garden display. Here are some key factors to consider when selecting your bulbs:
- Quality: Opt for bulbs that are firm, plump, and free from any mold or damage. Look for bulbs that have a good amount of healthy roots attached.
- Size: Larger bulbs tend to produce larger and more robust flowers. Choose bulbs that are at least 2-2.5 inches in diameter for optimal results.
- Variety: Hyacinths come in a wide range of colors, including vibrant shades of blue, pink, purple, white, and yellow. Consider the color scheme and overall aesthetic of your garden when selecting the variety.
- Climate: Take into account the climate in your area. Some hyacinth varieties are more suitable for colder regions, while others thrive in milder climates. Choose bulbs that are recommended for your specific climate zone.
- Fragrance: Hyacinths are known for their exquisite fragrance. If you want to enjoy the sweet scent of these flowers, opt for cultivars that are specifically bred for their fragrance.
- Supplier: Purchase your hyacinth bulbs from a reputable supplier to ensure that you are getting high-quality bulbs that will produce healthy and beautiful flowers.
By carefully considering these factors, you can select the perfect hyacinth bulbs that will thrive in your garden and provide a stunning display of color and fragrance. Remember, investing a little time and effort in choosing the right bulbs will greatly contribute to the overall success of your hyacinth planting venture.
Preparing the Soil
Preparing the soil is a crucial step in successfully planting hyacinth bulbs. By creating the ideal growing conditions, you can encourage strong root development and ensure that your bulbs thrive. Here are some steps to prepare the soil for planting:
- Choose the right location: Hyacinths prefer well-draining soil that receives full sun or partial shade. Select a spot in your garden that meets these requirements.
- Clear the area: Remove any weeds, rocks, or debris from the planting area. This will create a clean and fertile space for the bulbs to grow.
- Improve the soil: If your soil is heavy and clay-like, mix in organic matter such as compost or well-rotted manure. This will improve drainage and add nutrients to the soil.
- Test the pH: Hyacinths thrive in slightly acidic to neutral soil with a pH range of 6.0 to 7.5. Test the pH of your soil using a soil testing kit, and make any necessary adjustments by adding lime or sulfur.
- Loosen the soil: Use a garden fork or a tiller to loosen the soil to a depth of at least 12 inches. This will improve aeration and allow the roots of the hyacinth bulbs to penetrate easily.
- Add fertilizers: Incorporate a balanced slow-release fertilizer into the soil before planting. This will provide essential nutrients to support healthy growth.
By following these steps, you can ensure that the soil in your planting area is well-prepared to provide optimal growing conditions for your hyacinth bulbs. Taking the time to properly prepare the soil will greatly increase the chances of successful growth and abundant blooms.
Digging the Hole
Digging the hole to plant your hyacinth bulbs is an important step that will directly impact their growth and overall health. Follow these guidelines to ensure you dig the right hole for your bulbs:
- Size the hole: The depth of the hole should be about 4-6 inches, allowing the bulb to be planted with its top just below the soil surface. The width of the hole should be wide enough to comfortably accommodate the bulb and allow for root growth.
- Spacing: Leave a gap of about 4-6 inches between each bulb to allow room for the flowers to grow and prevent overcrowding.
- Planting in clusters: If you prefer a more visually appealing display, you can plant the bulbs in clusters rather than individual holes. Dig a larger hole to accommodate multiple bulbs and arrange them in a close grouping.
- Planting depth: Place the bulb in the hole with the pointed end upwards and the flat end downwards. The top of the bulb should be just below the soil surface.
- Backfilling: Gently fill the hole with soil, ensuring that the bulb is firmly in place. Avoid compacting the soil too tightly, as this can hinder root development.
- Labeling: If you are planting different varieties or colors, it’s helpful to label each hole or cluster to keep track of the bulbs.
By following these guidelines, you can ensure that your hyacinth bulbs are properly placed in the ground, allowing them to establish a strong root system and grow into vibrant and healthy plants. Take care to dig the hole with the right dimensions and provide adequate spacing for optimal growth.
Planting the Bulbs
Once you have prepared the soil and dug the holes, it’s time to plant the hyacinth bulbs. Follow these steps to ensure proper planting:
- Place the bulbs: Gently place each bulb into the prepared hole, taking care not to damage the roots or the bulb itself. Position the bulb with the pointed end facing upwards and the flat end downwards.
- Spacing: If you are planting individual bulbs, leave a gap of about 4-6 inches between each one. For clustered planting, space the clusters at least 8-12 inches apart to allow for adequate growth.
- Fill the hole: Once the bulbs are in place, cover them with soil, backfilling the hole gently. Ensure that the bulbs are covered with enough soil so that only the tips are visible above the ground.
- Water thoroughly: After planting, water the area thoroughly to provide the bulbs with the necessary moisture. This will help settle the soil and initiate root growth.
- Labeling: If you are planting different varieties or colors, label each planting area to keep track of the bulbs. This will also help in identifying specific plants during their growth and blooming stages.
Remember to handle the bulbs with care during planting to avoid causing any damage. By following these steps, you are ensuring that your hyacinth bulbs are properly positioned in the soil, setting the stage for healthy growth and beautiful blooms.
Watering the Bulbs
Proper watering is essential for the successful growth and development of hyacinth bulbs. Here are some guidelines to follow when it comes to watering your bulbs:
- Initial watering: After planting the bulbs, give them a thorough watering. This will help settle the soil and provide the bulbs with the moisture they need to start establishing roots.
- Regular watering: Hyacinth bulbs require consistent moisture throughout their growth cycle. Water them regularly, especially during dry spells or periods of drought.
- Avoid overwatering: While it’s important to keep the soil moist, be careful not to overwater. Hyacinth bulbs can rot in waterlogged soil. Ensure that the soil is well-draining and never allow the bulbs to sit in standing water.
- Consider rainfall: Take into account the amount of rainfall in your area. If there has been sufficient rainfall, adjust your watering schedule accordingly. Too much water can lead to bulb rot, so it’s important to find the right balance.
- Water at the base: When watering, aim to water at the base of the plant rather than overhead. This helps prevent water from collecting on the flowers, which can cause damage or promote the spread of diseases.
- Mulching: Applying a layer of organic mulch around the bulbs can help retain moisture in the soil and reduce evaporation. Mulching also helps regulate soil temperature, keeping it cooler during hot weather.
- Monitor soil moisture: Regularly check the moisture level of the soil by inserting your finger into the soil up to the second knuckle. If it feels dry, it’s time to water. If it feels moist, wait a bit longer before watering again.
By providing the right amount of water and maintaining the proper moisture levels, you are creating the ideal conditions for your hyacinth bulbs to grow and thrive. Remember to adjust your watering schedule based on the specific needs of your garden and the prevailing weather conditions.
Mulching the Soil
Mulching is an excellent practice for maintaining soil moisture, suppressing weed growth, and providing insulation to the bulbs. Here are some key points to keep in mind when it comes to mulching your hyacinth bulbs:
- Timing: Apply mulch after planting the bulbs and watering the area thoroughly. This will help seal in moisture and create a protective layer.
- Type of mulch: Use organic mulch, such as shredded leaves, straw, or wood chips. These materials gradually break down, enriching the soil as they decompose.
- Application method: Spread a layer of mulch around the base of the hyacinth plants, ensuring that it covers the soil surface to a thickness of about 2-3 inches. Take care not to pile the mulch directly against the stems to prevent rotting.
- Mulch depth: Avoid excessive mulch depth, as this can lead to poor air circulation and potentially cause bulb rot. Maintain a consistent mulch depth to provide insulation without smothering the plants.
- Weed suppression: Mulching helps suppress weed growth by blocking sunlight and preventing weed seeds from germinating. This reduces competition for nutrients and water, allowing the hyacinths to thrive.
- Moisture retention: Mulch acts as a barrier, reducing evaporation and helping to retain soil moisture. This is particularly beneficial in dry or hot weather, as it helps to keep the soil consistently moist.
- Winter protection: In colder climates, mulching provides insulation to the bulbs during the winter months, protecting them from frost and temperature fluctuations.
Applying mulch around your hyacinth bulbs not only helps improve soil moisture and suppress weeds, but it also enhances the overall appearance of your garden bed. Be sure to monitor the mulch periodically, making adjustments as needed to maintain the proper depth and condition of the mulch layer.
Caring for the Hyacinth Bulbs
Taking proper care of your hyacinth bulbs is crucial for ensuring their growth and longevity. Here are some essential care practices to keep in mind:
- Watering: Hyacinth bulbs require regular watering, especially during dry periods. Keep the soil consistently moist but avoid overwatering, as this can lead to bulb rot. Adjust your watering schedule based on rainfall and soil moisture levels.
- Fertilizing: Feed your hyacinth bulbs with a balanced slow-release fertilizer in the early spring, just as the shoots begin to emerge from the ground. This will provide them with the necessary nutrients for healthy growth.
- Deadheading: Once the hyacinth flowers have bloomed and faded, remove the spent flower stalks by cutting them back to the base. This prevents the plant from expending energy on producing seeds and encourages the development of new bulbs for the following year.
- Supporting: If your hyacinth plants grow tall and become top-heavy, provide support by gently staking them. This will prevent the flower stalks from drooping or breaking and allow them to remain upright for a more visually appealing display.
- Protection from extreme weather: In regions with extreme heat, provide some shade or protection to prevent the bulbs and foliage from scorching. Similarly, in regions with harsh winter conditions, mulch around the bulbs to protect them from frost and temperature fluctuations.
- Avoiding overcrowding: Over time, the bulbs will multiply and produce offsets or daughter bulbs. If the area becomes overcrowded, it can lead to competition for resources and reduced flower production. Dig up and divide the bulbs every few years, replanting them with adequate spacing.
- Cleanliness: Remove any fallen leaves or debris around the plants regularly. This helps reduce the risk of pest and disease problems, as well as keeping the garden bed tidy and visually appealing.
By following these care practices, you can ensure that your hyacinth bulbs thrive and provide beautiful blooms year after year. Regular maintenance and attention will help keep your hyacinth garden healthy and vibrant.
Dealing with Pests and Diseases
While hyacinth bulbs are generally resistant to pests and diseases, it’s important to be aware of potential issues and take proactive measures to prevent and address them. Here are some common pests and diseases that may affect hyacinth bulbs and how to deal with them:
- Bulb Rot: Bulb rot can occur due to excessively wet soil or poor drainage. To prevent bulb rot, ensure that the planting area has well-draining soil and avoid overwatering. If you notice signs of bulb rot such as mushy, discolored bulbs, remove and discard affected bulbs to prevent the spread of the disease.
- Squirrels and Rodents: Squirrels and other rodents may be attracted to the bulbs as a food source. To deter these pests, cover the planting area with wire mesh or place plastic netting over the bulbs. You can also use repellents or install motion-activated sprinklers to keep them away.
- Aphids: Aphids can be a common problem in gardens and may attack hyacinth plants. To control aphids, you can spray the affected plants with a mixture of water and mild soap or use an insecticidal soap. Regularly inspect your plants and remove any heavily infested leaves or stems.
- Slugs and Snails: Slugs and snails can feed on the leaves and flowers of hyacinth plants. To minimize damage, you can create physical barriers such as copper tape or use organic slug and snail baits. Additionally, remove any debris or hiding spots around the plants where these pests may take shelter.
- Gray Mold (Botrytis): Gray mold is a fungal disease that can affect the foliage and flowers of hyacinth plants, causing them to become discolored and develop a fuzzy grayish growth. To prevent gray mold, provide adequate air circulation around the plants by spacing them properly and avoiding overhead watering. If gray mold is detected, remove and destroy infected plant material to prevent its spread.
Regularly inspect your hyacinth plants for any signs of pests or diseases, and take prompt action to address any issues. By practicing good garden hygiene, providing proper plant care, and using preventative measures, you can keep your hyacinth bulbs healthy and free from pests and diseases.
Harvesting the Flowers
Harvesting the flowers of your hyacinth plants is an exciting moment, as it allows you to enjoy the beauty and fragrance they bring. Here are some tips on when and how to harvest hyacinth flowers:
- Timing: The ideal time to harvest hyacinth flowers is when they are fully open and in their prime. This is usually when the majority of the florets on the spike have opened but before they start to wilt or fade.
- Choosing stems: Select the healthiest and most attractive flower spikes for harvesting. Look for clean, vibrant, and evenly colored blooms without any signs of damage or disease.
- Tools: Use sharp and clean garden clippers or shears to cut the stems. Make a clean, angled cut just above a leaf node or junction to encourage the growth of new leaves and potential offsets.
- Quantity: Harvest only a portion of the flower spikes, leaving some on the plant to enjoy in the garden. This will allow the plant to continue photosynthesis and store energy for the following year’s growth.
- Water immediately: After harvesting, place the cut stems in a bucket of water. This will help keep the flowers hydrated and maintain their freshness until they are used in floral arrangements or displayed indoors.
- Removing foliage: If desired, you can remove some of the lower foliage from the stems before placing them in the water. This prevents the leaves from wilting and ensures that the focus is on the beautiful blooms.
- Displaying the flowers: To enjoy the beauty and fragrance of hyacinth flowers indoors, place them in a clean vase filled with fresh water. Keep them away from direct sunlight and drafts to prolong their lifespan.
By harvesting your hyacinth flowers at the right time and taking proper care of the cut stems, you can enjoy the beauty and fragrance of these blooms in your home or share them as thoughtful gifts to brighten someone’s day.
Storing Bulbs for Next Season
Properly storing hyacinth bulbs after they have finished flowering is essential for their survival and success in the following growing season. Here are some steps to follow when storing hyacinth bulbs:
- Allow foliage to die back naturally: After the blooms have faded, it is important to allow the foliage to die back naturally. This process allows the bulbs to absorb nutrients and store energy for future growth.
- Remove yellowed foliage: Once the foliage has turned yellow and died back completely, it can be safely removed from the bulbs. Gently pull or cut off the yellowed leaves, taking care not to damage the bulbs.
- Digging and drying: When the foliage has been removed, carefully dig up the bulbs from the ground. Shake off any excess soil and let the bulbs dry for a few days in a cool, well-ventilated area. This allows any remaining moisture to evaporate and reduces the risk of bulb rot during storage.
- Cleaning and inspecting: Once the bulbs have dried, gently remove any remaining soil or debris from the bulbs. Inspect the bulbs for any signs of damage or disease, discarding any that appear soft, moldy, or diseased.
- Labeling: It is important to label the bulbs before storing them. Use markers or labels to indicate the variety or color, as this will help you remember and plan for the next planting season.
- Choose a storage container: Select a cool and dry storage container for the bulbs, such as a mesh bag, a paper bag, or a breathable container. Avoid airtight plastic bags or containers, as they can retain moisture and promote mold or rot.
- Layer and store the bulbs: Place the bulbs in the storage container, making sure to leave some space between them to allow for air circulation. Layer the bulbs, if necessary, separated by sheets of newspaper or sawdust.
- Providing overwinter conditions: Store the bulbs in a cool and dry location with temperatures ranging from 35°F to 50°F (2°C to 10°C). Avoid areas prone to extreme temperatures or fluctuations, as this can negatively impact bulb viability.
- Check periodically: Throughout the storage period, check the bulbs regularly for any signs of decay or mold. Discard any bulbs that show signs of damage to prevent the spread to other bulbs.
By following these steps, you can properly store your hyacinth bulbs and ensure their viability for the next planting season. With a little care and preparation, you can enjoy the beauty and fragrance of hyacinths year after year.