
Choosing the Right Variety of Dill
When it comes to planting dill, choosing the right variety is crucial. With several varieties available, each offering its own unique flavor and growth characteristics, it’s important to select one that suits your preferences and growing conditions.
Here are a few popular varieties of dill to consider:
- Bouquet Dill: This is the most commonly used variety for culinary purposes. It produces abundant foliage with a strong, tangy flavor, making it perfect for pickling and seasoning.
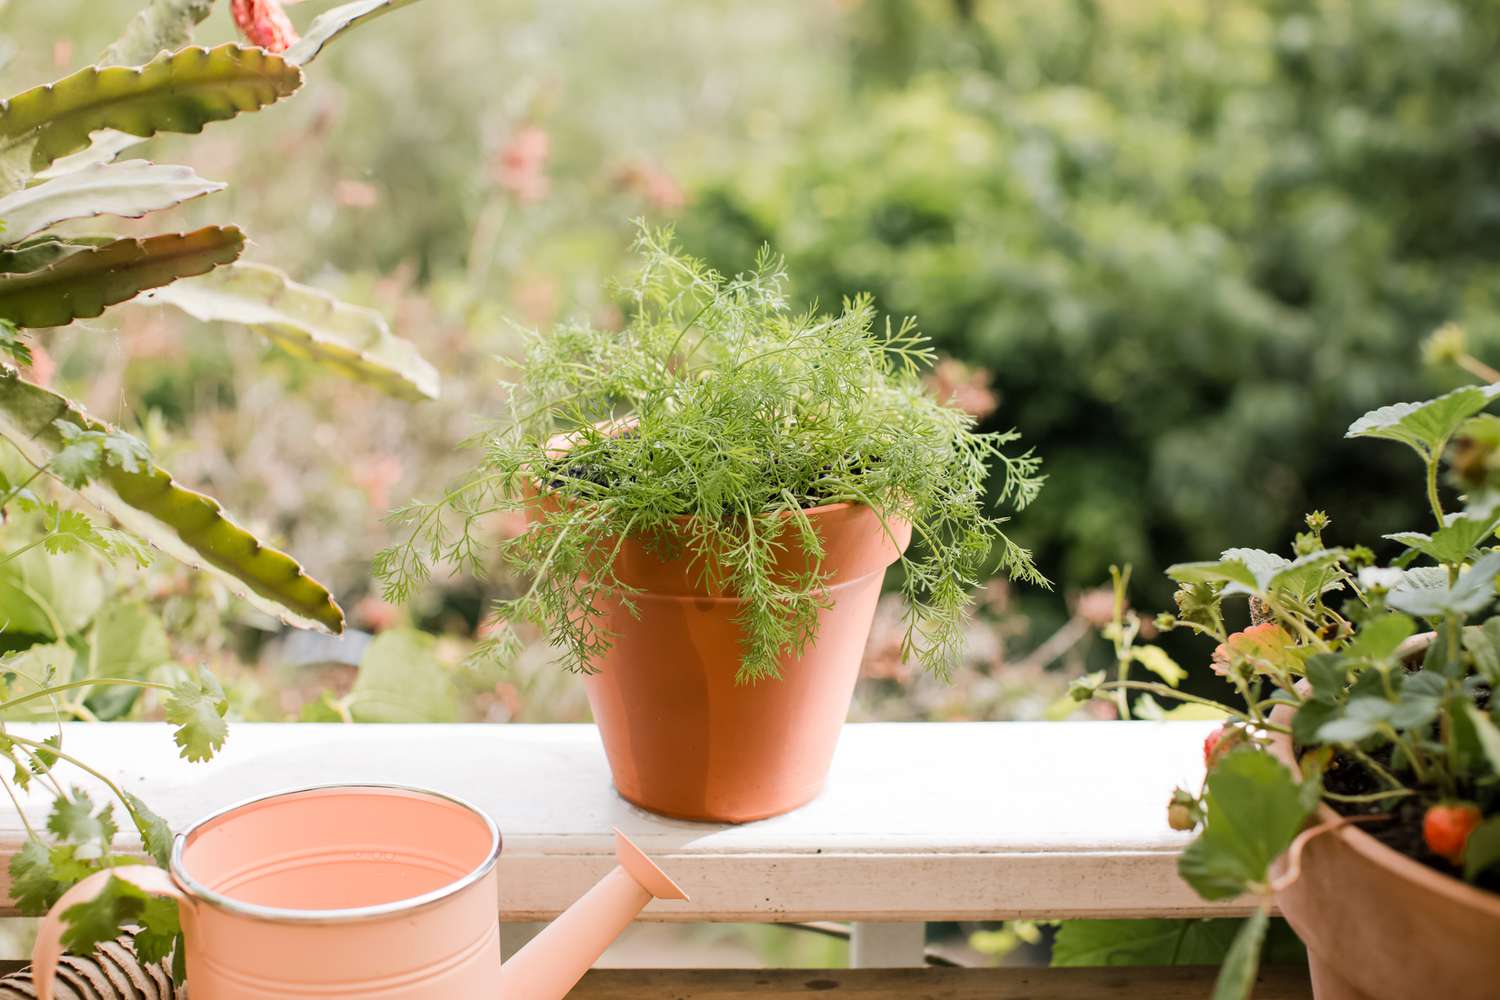
- Fernleaf Dill: If you have limited space, this compact variety is an excellent choice. It has finely divided leaves and a milder flavor compared to other varieties. It is perfect for container gardening.
- Mammoth Dill: As the name suggests, this variety grows tall, reaching heights up to 4 feet. It produces large, flavorful leaves that are ideal for fresh use and can add a distinctive taste to salads, sauces, and soups.
- Dukat Dill: This variety is known for its higher essential oil content, giving it a more intense and aromatic flavor. It is perfect for culinary use and commonly used in Scandinavian dishes.
Consider the space available in your garden, the intended use of the dill, and your personal taste preferences when choosing a variety. Additionally, check the seed packet or consult a local gardening expert for guidance on which varieties thrive in your specific climate.
By choosing the right variety of dill, you can ensure a successful and flavorful harvest.
Selecting an Ideal Location for Planting Dill
When it comes to growing dill, selecting the right location is essential for the plant’s overall health and productivity. Dill requires certain environmental conditions to thrive and produce abundant foliage. Consider the following factors when choosing the perfect spot for your dill plants:
- Sunlight: Dill plants thrive in full sun, so choose a location that receives at least 6-8 hours of direct sunlight each day. Insufficient sunlight can result in leggy growth and decreased yield.
- Soil Quality: Dill prefers well-drained soil with a pH level between 5.5 and 7.5. Good drainage prevents waterlogged roots, which can lead to root rot. If your garden has heavy clay soil, amend it with organic matter such as compost or well-decomposed manure to improve drainage and fertility.
- Wind Protection: Dill plants have delicate feathery leaves that can be prone to damage from strong winds. Plant dill in a location that is sheltered from strong gusts by surrounding structures, such as fences or bushes.
- Proximity to Other Plants: Dill is known to attract beneficial insects like ladybugs and lacewings, which can help control garden pests. Planting dill near vegetables susceptible to pest damage, such as cabbage or tomatoes, can provide natural pest control.
Additionally, it’s important to consider the convenience of the location. Since dill is often used as a culinary herb, planting it near your kitchen or in a container garden close to your cooking area can make it easily accessible when needed.
By selecting an ideal location that meets the sun, soil, and protection requirements, you can provide the best growing conditions for your dill plants, ensuring a bountiful harvest of flavorful leaves and seeds.
Preparing the Soil for Dill
Before planting dill, it’s important to prepare the soil to provide the ideal growing conditions for the plants. Proper soil preparation helps promote healthy root development, nutrient uptake, and overall plant vigor. Here are some steps to prepare the soil for dill:
- Clear the Area: Start by removing any weeds, rocks, or debris from the planting area. This ensures that the dill plants won’t have to compete with unwanted vegetation for nutrients and water.
- Loosen the Soil: Use a garden fork or tiller to loosen the soil to a depth of 8-10 inches. This improves the soil’s texture, allowing for proper drainage and root penetration.
- Amend the Soil: Dill thrives in well-drained soil that is rich in organic matter. Incorporate compost or well-rotted manure into the soil to improve its fertility and provide essential nutrients. Aim to add around 2-3 inches of organic matter and work it into the top layer of soil.
- Adjust Soil pH: Dill prefers slightly acidic to neutral soil conditions, typically with a pH level between 5.5 and 7.5. If your soil is too acidic (lower pH) or alkaline (higher pH), you can adjust it accordingly by adding lime to increase pH or sulfur to decrease it.
- Level and Rake the Soil: Once you have amended the soil, level the surface using a rake. This ensures an even planting bed and helps with water distribution and seedling emergence.
By taking the time to properly prepare the soil, you set the stage for healthy dill plants that will thrive and produce abundant foliage. Remember to conduct a soil test beforehand to determine the specific needs of your soil and make adjustments accordingly. Adequate soil preparation is a key step in successfully growing flavorful dill in your garden.
Planting Dill Seeds
Planting dill seeds is an exciting step towards growing your own fresh and flavorful herb. Proper planting techniques can ensure successful germination and healthy growth. Here’s a guide on how to plant dill seeds:
- Timing: Dill seeds can be planted directly in the garden once the soil temperature reaches around 60°F (15°C) in early spring or early fall. Avoid planting during extreme temperatures to prevent stress on the young seedlings.
- Spacing: Space the dill seeds or seedlings 12-18 inches apart. This provides enough room for the plants to grow and prevents overcrowding, which can lead to poor airflow and increased risk of disease.
- Sowing Depth: Plant the dill seeds around ¼ to ½ inch deep in the soil. Dill seeds are small, so avoid burying them too deep, as it may hinder germination.
- Watering: After planting the seeds, gently water the area to keep the soil moist. Avoid overwatering, as excess moisture can lead to seed rot. Continue to water the seeds regularly, keeping the soil consistently moist until germination occurs.
- Germination: Dill seeds usually take about 7-14 days to germinate. Keep an eye on the planting area and be patient. Once the seedlings emerge, thin them to the desired spacing mentioned earlier.
Dill is a cool-season herb, and its seeds are sensitive to being transplanted. Therefore, it is recommended to directly sow the seeds where you want the plants to grow rather than starting them indoors and transplanting later.
By following these planting tips, you can ensure successful germination and establish a healthy dill crop in your garden. Soon, you’ll be enjoying the delightful aroma and distinctive flavor of homegrown dill in your culinary creations.
Caring for Dill Plants
To ensure the optimal growth and productivity of your dill plants, proper care and attention are essential. By following these guidelines, you can keep your dill plants healthy and thriving throughout the growing season:
- Watering: Dill plants prefer slightly moist soil, so regular watering is necessary, especially during dry periods. Water deeply, ensuring the moisture reaches the root zone. Avoid overwatering, as dill plants are susceptible to root rot. Mulching around the plants can help retain soil moisture.
- Support: As dill plants grow tall and bushy, it’s a good idea to provide support to prevent them from toppling over. Installing stakes or cages around the dill plants can help keep them upright, especially during windy conditions or when heavy seed heads develop.
- Pruning: Regular pruning can encourage bushier growth and prevent the plants from becoming leggy. Pinch off the tips of the dill plants once they reach about 12 inches in height. This helps promote lateral branching and more abundant foliage.
- Weed Control: Keep the area around the dill plants free from weeds. Weeds can compete with dill for resources and hinder its growth. Regularly remove any weeds that emerge, taking care not to disturb the shallow root system of the dill plants.
- Protection from Extreme Temperatures: Dill is a cool-season herb, and it is sensitive to extreme heat or cold. Provide shade during hot summer afternoons to prevent wilting, or consider planting dill as a fall crop when temperatures are more moderate.
- Harvesting: Regularly harvest the dill leaves and seeds to encourage continuous growth. Harvest the leaves when they are young and tender, before the plant starts flowering. When the seed heads turn brown and begin to dry, carefully cut them and hang them upside down to collect the mature seeds.
By caring for your dill plants with proper watering, support, pruning, and weed control, you can promote healthy growth and enjoy an abundant harvest of flavorful leaves and seeds. With a little attention and care, your dill plants will reward you with their delightful aroma and unique flavor.
Watering Dill Properly
Proper watering is essential for the health and vitality of dill plants. The right amount of water ensures that the plants receive the necessary moisture for growth without causing waterlogged conditions that can lead to root rot. Follow these guidelines to water your dill plants effectively:
- Monitoring Soil Moisture: Check the soil regularly to gauge its moisture level. Stick your finger into the soil about an inch deep. If it feels dry at this depth, it’s time to water. Dill plants prefer slightly moist soil, so aim to keep the soil consistently damp but not soaked.
- Watering Frequency: Dill plants generally require watering around once or twice a week, depending on weather conditions. If your area experiences prolonged dry spells, more frequent watering may be necessary. Adjust the watering schedule as needed to maintain optimal soil moisture.
- Watering Depth: Water deeply to ensure that the moisture reaches the root zone. A good rule of thumb is to provide at least an inch of water during each watering session. This allows the water to penetrate deeply into the soil, encouraging the dill plants to develop a strong and extensive root system.
- Time of Watering: Water dill plants early in the morning to give them ample time to dry before evening. Wet foliage during the night can increase the risk of fungal diseases. Avoid watering late in the day when the sun is scorching, as it can lead to rapid evaporation and water loss.
- Avoid Overwatering: Overwatering can be detrimental to dill plants, leading to root rot and the decline of plant health. Allow the top layer of soil to dry slightly between watering sessions to prevent waterlogged conditions. If the leaves of the dill plant appear yellow and wilted, it could be a sign of overwatering.
- Mulching: Applying a layer of organic mulch around the dill plants can help retain soil moisture and regulate soil temperature. Mulching also reduces weed growth, preventing competition for water and nutrients. Use organic materials such as straw, wood chips, or compost around the base of the plants.
By following these watering practices, you can ensure that your dill plants receive the right amount of water to thrive. Consistent and appropriate watering will contribute to the overall health and productivity of your dill plants, providing you with fresh and flavorful leaves for culinary use.
Fertilizing Dill Plants
Fertilizing dill plants is essential to provide them with the necessary nutrients for healthy growth and abundant foliage. While dill is typically a low-maintenance herb, a well-balanced fertilizer can help optimize its growth and flavor. Follow these guidelines for fertilizing your dill plants:
- Soil Testing: Before fertilizing, it’s beneficial to conduct a soil test to determine the nutrient levels and pH of your soil. This will help you identify any deficiencies and guide you in selecting the appropriate fertilizer.
- Organic Matter: Prior to planting, incorporate organic matter such as compost or well-rotted manure into the soil. Organic matter enriches the soil with essential nutrients and improves its structure, providing a foundation for healthy dill growth.
- Slow-Release Fertilizer: Consider using a slow-release granular fertilizer formulated for herbs or vegetables. These fertilizers release nutrients gradually over time, ensuring a steady supply of essential elements for the dill plants throughout the growing season.
- Application Schedule: Apply the fertilizer according to the package instructions or as advised by a local gardening expert. Typically, a single application at the beginning of the growing season is sufficient. Avoid over-fertilization, as it can lead to excessive foliage growth and diminished flavor.
- Side-Dressing: As the dill plants grow, you can provide additional nutrients by side-dressing with compost or a balanced organic fertilizer. Sprinkle the fertilizer around the base of the plants, keeping it a few inches away from the stems, and gently incorporate it into the soil. Repeat this process every 4-6 weeks during the growing season.
- Watering After Fertilizing: After applying fertilizer, water the dill plants well. This helps dissolve the fertilizer and ensures the nutrients reach the root zone effectively.
Remember to monitor the dill plants for any signs of nutrient deficiencies, such as yellowing leaves or stunted growth. If deficiencies are observed, you may need to adjust the fertilization regimen or consider foliar feeding with a water-soluble fertilizer for a quick nutrient boost.
By providing the appropriate fertilizer and nutrients, you can support the growth and vitality of your dill plants, resulting in robust foliage and a bountiful harvest of flavorful leaves and seeds.
Protecting Dill from Pests and Diseases
Like any other plant, dill is susceptible to certain pests and diseases that can hinder its growth and productivity. However, with proper preventive measures and prompt action, you can protect your dill plants and ensure their health. Here are some effective ways to protect dill from pests and diseases:
- Inspect Regularly: Monitor your dill plants closely for any signs of pests or diseases. Regular inspection allows you to identify problems early on and take immediate action before they have the chance to spread.
- Companion Planting: Interplanting dill with companion plants, such as marigolds, basil, or onions, can help deter pests that are attracted to dill. The strong scents and natural repellent properties of these companion plants can create a hostile environment for pests.
- Integrated Pest Management (IPM): Implement an IPM system by using a combination of cultural, biological, and chemical control methods, depending on the severity of the pest or disease issue. Use cultural practices such as proper spacing, sanitation, and crop rotation to reduce pest and disease pressure.
- Handpicking: If you notice pests like aphids or caterpillars on your dill plants, consider handpicking them. Wear gloves and physically remove the pests from the plants. This method can be effective for small infestations.
- Organic Pest Control: Utilize organic pest control methods, such as insecticidal soaps or neem oil, to combat common pests like aphids or mites. These products are safe to use around edible plants and pose minimal risk to beneficial insects.
- Proper Sanitation: Regularly remove any fallen leaves or plant debris around the dill plants. This helps prevent the buildup of diseases and reduces the hiding places for pests.
- Vigilance against Diseases: Some common diseases that can affect dill plants include powdery mildew, leaf spots, and damping-off. To prevent these diseases, avoid overhead watering, provide adequate airflow around the plants, and avoid overcrowding.
By implementing these preventive measures and promptly addressing pest and disease issues, you can protect your dill plants and ensure their continued health and productivity. Regular care and attention will help your dill plants thrive and provide you with a steady supply of flavorful leaves and seeds.
Harvesting Dill
Harvesting dill is an exciting moment for gardeners as it allows you to enjoy the flavorful leaves and seeds that this herb offers. Harvesting dill at the right time ensures optimal taste and freshness. Here are some guidelines to help you properly harvest dill:
- Timing: The timing of dill harvest depends on your intended use. For fresh leaves, start harvesting when the plant reaches about 12 inches in height and has plenty of foliage. For seeds, wait until the seed heads turn brown and begin to dry.
- Harvesting Leaves: Use sharp, clean scissors or pruning shears to harvest dill leaves. Cut the leafy stems close to the base of the plant, leaving a few inches of growth to allow for regrowth. Harvest the outer stems first, which are older and more mature, and leave the inner stems to continue growing.
- Harvesting Seeds: To harvest dill seeds, wait until the seed heads have turned brown and dried on the plant. Carefully cut the entire seed head from the plant, making sure to avoid dropping any seeds. Place the seed heads in a paper bag or place a tray underneath to catch any falling seeds during the process.
- Drying Seeds: After harvesting the seed heads, place them in a well-ventilated area and allow them to dry completely. This can take anywhere from a week to two weeks. Once dried, gently rub the seed heads or shake them to release the seeds. Collect the seeds in an airtight container for storage.
- Storage: Store harvested dill leaves in the refrigerator, loosely wrapped in a damp paper towel or placed in a plastic bag. They can stay fresh for up to a week. Dill seeds should be stored in an airtight container in a cool, dark place to maintain their flavor and aroma.
Remember to harvest dill regularly to encourage continuous growth and prevent the plant from flowering and going to seed prematurely. As you harvest, take care to maintain the overall health and vitality of the dill plant by not removing all of the foliage at once.
Whether you harvest the savory leaves for culinary use or gather the aromatic seeds for preservation, proper harvesting techniques ensure the best flavor and quality of the dill plant. Enjoy the fruits of your labor in various culinary dishes and savor the distinct taste that fresh dill brings to your recipes.
Storing and Using Dill
Once you’ve harvested your dill, knowing how to properly store it ensures that you can enjoy its fresh flavor for an extended period. Additionally, understanding various ways to use dill in cooking allows you to incorporate this versatile herb into a variety of dishes. Here’s how to store and make the most of your dill:
- Storing Fresh Dill: To keep your freshly harvested dill fresh, trim the ends of the stems and place the bunch in a glass of water, similar to a bouquet. Cover the leaves with a plastic bag and store it in the refrigerator. This method helps to retain the moisture and keep the dill fresh for up to a week.
- Drying Dill: If you have a large harvest, drying dill is a great way to preserve it. Tie the dill stems together in small bundles and hang them upside down in a dry, well-ventilated area away from direct sunlight. Once dried, remove the leaves from the stems and store them in an airtight container in a cool, dark place.
- Freezing Dill: Freezing dill is another excellent method for long-term storage. Wash and dry the dill leaves thoroughly, then chop or mince them. Place the chopped dill in an ice cube tray, fill it with water, and freeze. Once frozen, transfer the dill cubes to a freezer bag or container. This allows you to easily grab a cube or two whenever a recipe calls for dill.
- Using Dill in Cooking: Dill offers a fresh and aromatic flavor that complements a wide range of dishes. It pairs well with fish, seafood, poultry, salads, dressings, and soups. Sprinkle chopped dill over roasted vegetables or incorporate it into sauces and marinades for a burst of flavor. Additionally, dill is a popular herb for pickling cucumbers and other vegetables.
- Dill as a Garnish: Use dill sprigs to garnish finished dishes for an appealing touch. The feathery fronds of dill add visual appeal and a subtle hint of flavor to your culinary creations.
Experiment with different recipes and dishes to explore the versatility of dill. Whether using it as a main flavor or as a complementary herb, dill adds a unique and refreshing taste to your cooking.
By storing dill correctly and incorporating it into various culinary creations, you can savor the vibrant flavor of dill long after the harvest. Enjoy the delightful taste and aroma of your homegrown dill in every dish you prepare.