
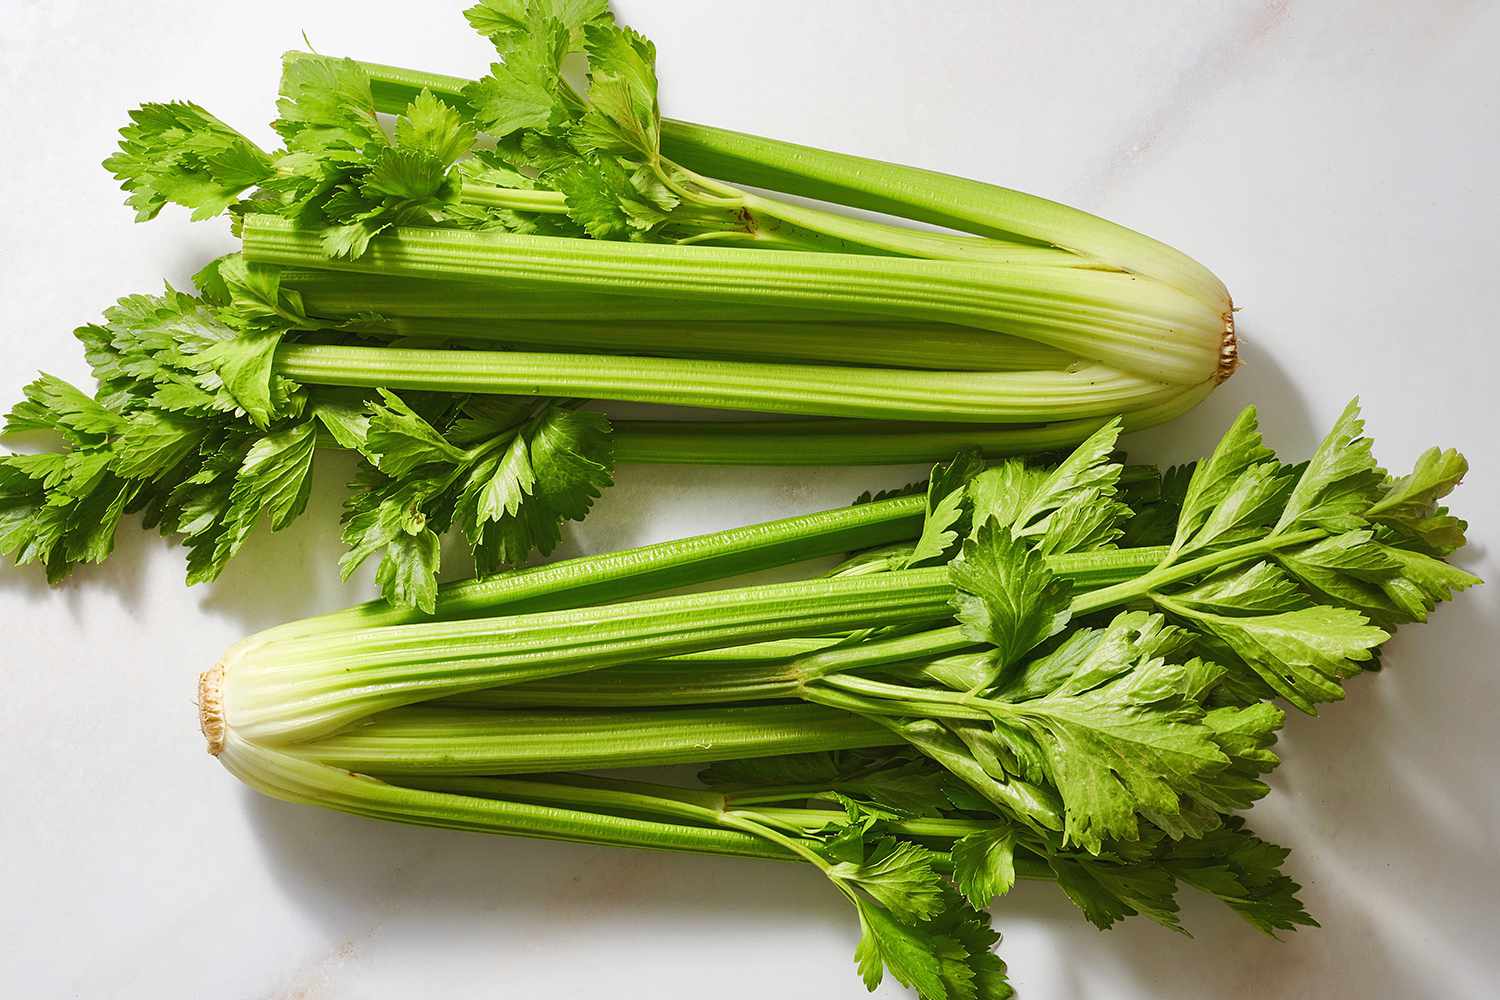
Choosing the Right Variety of Celery
When it comes to planting celery, choosing the right variety is essential for a successful harvest. Celery varieties vary in terms of flavor, texture, and growth requirements, so it’s important to select the one that suits your preferences and growing conditions. Here are some factors to consider when choosing the right variety of celery:
- Size: Celery varieties come in different sizes, ranging from standard to dwarf. Standard varieties typically grow taller and produce larger stalks, while dwarf varieties are more compact and better suited for container gardening.
- Growth habit: Celery varieties can have different growth habits. Some are self-blanching, meaning the inner stalks whiten naturally as they grow, while others require blanching techniques to achieve that desirable pale color.
- Flavor: Celery can have different flavor profiles, from mild and sweet to strong and pungent. Consider the taste you prefer when selecting a variety.
- Maturity: Celery varieties have varying maturity times, with some taking longer to reach harvest than others. Take into account the length of your growing season and choose a variety that fits within that timeframe.
- Resistance: Certain celery varieties are more resistant to common diseases, such as blight and leaf spot. If you live in an area prone to these issues, opt for disease-resistant varieties to increase your chances of a successful crop.
Some popular celery varieties to consider include ‘Golden Self-Blanching,’ known for its sweet flavor and self-blanching characteristics, and ‘Utah Tall,’ which is a standard variety with tall stalks and excellent flavor. ‘Giant Red’ is a unique variety with red stalks that adds visual interest to dishes.
Ultimately, the right variety of celery will depend on your personal preferences and growing conditions. It’s a good idea to research different options and read reviews from other gardeners to get an idea of which varieties perform well in your area. By selecting the right variety, you’ll set yourself up for a successful celery-growing experience.
Preparing the Soil for Planting Celery
Before you start planting celery, it’s crucial to prepare the soil to provide an optimal growing environment for your plants. Celery requires nutrient-rich, well-drained soil to thrive. Here are the steps to prepare the soil for planting celery:
- Clear the area: Begin by clearing the planting area of any weeds, rocks, or debris. This will create a clean space for your celery plants to grow.
- Loosen the soil: Use a garden fork or tiller to loosen the soil to a depth of at least 12 inches. This will improve drainage and allow the celery roots to penetrate the soil easily.
- Amend the soil: Celery thrives in soil that is rich in organic matter. Incorporate well-rotted compost or aged manure into the soil to improve its fertility and nutrient content. Aim for a ratio of 2-3 inches of organic matter per square foot of planting area.
- Adjust the pH: Celery prefers slightly acidic to neutral soil with a pH range of 6.0-7.0. If your soil is too acidic, add lime to raise the pH. If it’s too alkaline, add sulfur or peat moss to lower the pH.
- Test the soil: Consider getting a soil test done to assess the nutrient levels and pH of your soil accurately. This will help you determine if any additional amendments are needed.
After preparing the soil, it’s recommended to let it settle for a few days before planting. This allows any disturbances caused during the preparation process to settle, ensuring the optimal growing conditions for your celery plants.
Remember to consider the specific requirements of your celery variety when preparing the soil. Some varieties prefer slightly different soil conditions, so it’s always best to check the seed packet or do some research to ensure you’re meeting those specific needs.
By taking the time to properly prepare the soil, you’ll give your celery plants a solid foundation for healthy growth and abundant harvests.
Starting Celery Seeds Indoors
If you want to get a head start on your celery crop, starting celery seeds indoors is a great option. By starting seeds indoors, you can extend your growing season and ensure strong and healthy seedlings. Here’s how to start celery seeds indoors:
- Timing: Start celery seeds indoors about 10-12 weeks before the last expected frost date in your area. This will give the seedlings enough time to grow before transplanting them outdoors.
- Seed trays: Fill seed trays or small pots with a quality seed-starting mix. Moisten the mix before planting the seeds to promote germination.
- Planting: Sow the celery seeds on the surface of the soil and lightly press them into the mix. Be careful not to bury the seeds too deep, as they require light to germinate.
- Cover and label: Place a thin layer of vermiculite or seed-starting mix on top of the seeds to provide moisture and help maintain humidity. Label each tray or pot with the celery variety and the planting date.
- Light and temperature: Celery seeds require light to germinate, so place the trays in a well-lit location or under grow lights. Maintain a consistent temperature of around 70-75°F (21-24°C) during the germination period.
- Watering: Keep the soil evenly moist, but avoid overwatering as it can lead to damping-off disease. Use a spray bottle or a gentle watering can to avoid disturbing the seeds.
- Transplanting: When the celery seedlings have grown to a height of about 2 inches and have developed their first true leaves, they’re ready for transplanting outdoors.
It’s important to note that celery seedlings can be delicate, so handle them carefully during the transplanting process to reduce the risk of damage. Harden off the seedlings for about a week before planting them in the garden to acclimate them to outdoor conditions gradually.
Starting celery seeds indoors allows you to get a jumpstart on the growing season and ensure a healthy crop. With proper care and attention, your celery seedlings will flourish and provide you with a bountiful harvest.
Transplanting Celery Seedlings to the Garden
Once your celery seedlings have reached a suitable size, it’s time to transplant them to the garden. Transplanting celery seedlings requires careful handling and proper preparation of the planting area to ensure their successful establishment. Here’s how to transplant celery seedlings to the garden:
- Timing: Wait until all danger of frost has passed and the soil has warmed up before transplanting celery seedlings, typically around 2-3 weeks after the last expected frost date in your area.
- Prepare the soil: Choose a sunny location in the garden with well-drained soil. Remove any weeds and work the soil to a depth of at least 8 inches, incorporating organic matter such as compost or well-aged manure for added fertility.
- Spacing: Space the celery seedlings about 8-10 inches apart, leaving rows that are 24 inches apart. This will give them enough room to grow and develop healthy stalks.
- Transplanting process: Gently remove the celery seedlings from their containers, taking care to avoid damaging their delicate roots. Dig a hole in the prepared soil that is deep enough to accommodate the root ball of the seedling without bending or crowding the roots. Place the seedling in the hole and backfill with soil, gently firming it around the base of the plant.
- Watering: After transplanting, water the seedlings thoroughly to settle the soil around the roots and eliminate any air pockets. Provide regular waterings, keeping the soil evenly moist but not waterlogged.
- Mulching: Apply a layer of organic mulch, such as straw or shredded leaves, around the base of the celery plants. Mulching helps conserve moisture, suppresses weed growth, and regulates soil temperature.
- Care: Continue to monitor the celery plants for any signs of pests or diseases. Keep the area around the plants free from weeds, and fertilize the plants as needed according to the specific requirements of the celery variety you’re growing.
Transplanting celery seedlings can be a delicate process, but with careful attention and proper care, they will establish themselves in the garden and continue to grow into healthy and productive plants. By providing them with the right conditions and regular maintenance, you’ll be rewarded with a successful celery harvest.
Planting Celery Seedlings in a Container
If you have limited space or prefer to grow celery in containers, you’ll be glad to know that celery can be successfully grown in pots or other suitable containers. Planting celery seedlings in a container allows you to have fresh, homegrown celery even in small spaces or urban settings. Here’s how to plant celery seedlings in a container:
- Container selection: Choose a container that is at least 12-16 inches deep to accommodate the celery plants’ root system. Ensure the container has drainage holes to prevent waterlogging.
- Soil mixture: Use a well-draining potting mix specifically formulated for container gardening. You can also add organic matter, such as compost or aged manure, to improve the soil’s fertility and water-holding capacity.
- Spacing: Leave adequate space between the celery seedlings when planting in a container. Aim for a spacing of about 6-8 inches between plants to allow for proper growth and development.
- Transplanting process: Gently remove the celery seedlings from their original containers and carefully separate them. Dig a hole in the potting mix that is deep enough to accommodate the root ball of each seedling without bending or crowding the roots. Place the seedling in the hole and backfill with the potting mix, ensuring the plant is at the same depth as it was in its original container.
- Watering: After planting, water the celery seedlings thoroughly to settle the potting mix around the roots. Water as needed, keeping the soil evenly moist, but avoid overwatering, as excessive moisture can lead to root rot.
- Sunlight: Place the container in a location that receives at least 6-8 hours of sunlight daily. Celery plants need ample sunlight for healthy growth and development.
- Care: Provide regular fertilization using a balanced, water-soluble fertilizer formulated for vegetable plants. Follow the instructions on the fertilizer package for application rates and frequency.
- Harvesting: Once the celery stalks have reached the desired size and flavor, you can start harvesting by cutting them at the base with a sharp knife or scissors. Leave the inner stalks and leaves intact for continued growth.
When planting celery in containers, it’s important to ensure they receive proper care, including regular watering, fertilization, and attention to pest and disease management. With the right conditions and maintenance, you can enjoy a bountiful harvest of homegrown celery from your container garden.
Caring for Celery Plants
Celery plants require consistent care throughout their growing season to ensure healthy growth and a bountiful harvest. From watering and fertilizing to pest and disease management, here are some essential aspects to consider when caring for celery plants:
Watering: Celery plants need consistent moisture to thrive, so it’s important to provide them with regular watering. Keep the soil evenly moist, but avoid overwatering, as it can lead to root rot. Water deeply at the base of the plants to encourage deep root growth.
Fertilizing: Celery is a nutrient-hungry plant, so regular fertilization is essential. Apply a balanced fertilizer, such as a 10-10-10 or 14-14-14 blend, every two to three weeks during the growing season. Follow the fertilizer package instructions for proper application rates.
Weed control: Keep the area around the celery plants free from weeds, as they can compete for nutrients and water. Regularly remove any weeds that emerge and consider applying a layer of organic mulch to suppress weed growth.
Hilling: Some celery varieties benefit from hilling, which involves mounding soil around the base of the plants. This technique helps to blanch the inner stalks, resulting in a more tender and mild flavor. Carefully mound soil around the celery plants when they reach a height of about 10-12 inches, taking care not to bury the entire plant.
Pest management: Watch out for common pests that can affect celery plants, such as aphids, celery worms, and slugs. Regularly inspect your plants for signs of infestation and take appropriate measures to manage pests. This can include using organic insecticides, implementing physical barriers, or introducing beneficial insects.
Disease prevention: Celery plants are susceptible to diseases like blight and leaf spot. To prevent these diseases, avoid overhead watering, as wet foliage can encourage disease development. Provide adequate spacing between plants to promote air circulation and remove any infected leaves immediately to prevent the spread of disease.
Supporting: As celery plants grow, they may become top-heavy, especially when the stalks fill out. Use stakes or plant supports to provide support and prevent the plants from falling over or breaking.
Monitoring: Regularly monitor your celery plants for any signs of stress, disease, or nutrient deficiencies. Inspect the leaves, stalks, and overall appearance of the plants to catch any issues early and address them promptly.
Caring for celery plants requires a proactive approach to ensure their optimal growth and productivity. By providing the necessary care and attention, you’ll be rewarded with healthy plants and a delicious harvest of homegrown celery.
Watering and Fertilizing Celery Plants
Proper watering and fertilizing are crucial for the healthy growth and development of celery plants. These two elements play a significant role in providing the necessary nutrients and moisture for robust stalks and flavorful celery. Here’s what you need to know about watering and fertilizing celery plants:
Watering: Celery plants have high water requirements, and consistent moisture is essential for their optimal growth. Water the plants deeply and evenly to keep the soil consistently moist but not waterlogged. Avoid allowing the soil to dry out completely, as this can lead to stunted growth or bitter stalks. Regularly check the moisture level by inserting your finger into the soil near the plants’ base. If it feels dry, it’s time to water. Consider using drip irrigation or a soaker hose to deliver water directly to the plants’ base, minimizing foliage wetting and reducing the risk of diseases.
Fertilizing: Celery is a heavy feeder and benefits from regular fertilization throughout the growing season. Begin by incorporating a balanced, slow-release fertilizer into the soil before planting. Once the plants are established, apply a liquid fertilizer every two to three weeks, following the product’s instructions for proper dilution and application rates. Alternatively, you can use organic fertilizers such as compost or well-rotted manure to provide the essential nutrients for celery growth. Pay attention to nitrogen levels, as celery requires adequate nitrogen for foliage and stalk development. Nitrogen-deficient plants may exhibit yellowing leaves or stunted growth.
Additionally, consider incorporating compost or well-rotted organic matter into the soil before planting celery. This enhances soil fertility, promotes beneficial microbial activity, and improves moisture retention, reducing the frequency of watering. A layer of organic mulch around the plants can also help retain soil moisture and suppress weed growth.
Keep in mind that the specific watering and fertilizing requirements may vary depending on your climate, soil conditions, and the specific celery variety you are growing. It’s essential to monitor your plants closely and make adjustments as needed based on their individual needs.
Remember, consistency is key when it comes to watering and fertilizing celery plants. Maintaining adequate soil moisture and providing balanced nutrition will support the growth of strong, healthy celery stalks, ensuring a successful and satisfying harvest.
Preventing and Managing Common Celery Pests and Diseases
Celery plants can be susceptible to various pests and diseases that can hinder their growth and reduce harvest yields. However, with proper prevention and management strategies, you can keep these issues under control and ensure the health of your celery plants. Here are some common pests and diseases of celery and how to prevent and manage them:
Pests:
Aphids: These tiny, sap-sucking insects can cause curling leaves and stunted growth. To prevent infestations, encourage natural predators like ladybugs and lacewings by planting companion plants such as dill and yarrow. If necessary, use organic insecticidal soap or neem oil to control aphids.
Celery worms: The caterpillars of celery worms can feed on the foliage and cause substantial damage. Regularly inspect your plants and remove any visible worms by hand. Applying Bacillus thuringiensis (Bt) can provide effective control for celery worms without harming beneficial insects.
Slugs and snails: These slimy pests can chew holes in the leaves of celery plants. To deter them, create physical barriers like copper tape around the base of the plants or use organic slug and snail bait, such as iron phosphate-based products.
Diseases:
Leaf blight: This fungal disease causes brown spots with yellow halos on the celery leaves. To prevent leaf blight, avoid overhead watering and provide adequate spacing between plants for proper air circulation. Remove any infected plant debris promptly and consider applying organic fungicides like copper-based sprays if necessary.
Leaf spot: Leaf spot disease appears as brown spots on the celery leaves with concentric rings. To manage leaf spot, avoid overhead watering, provide good airflow, and remove any infected leaves. Applying fungicides labeled for leaf spot control can help suppress the disease.
Blackheart: Blackheart is a physiological disorder that causes black discoloration in the celery stalks. It is often associated with inconsistent watering or a calcium deficiency. Maintain consistent soil moisture levels and ensure proper calcium availability through soil amendments or foliar applications to prevent blackheart.
Crop rotation: To prevent the buildup of pests and diseases, practice crop rotation, avoiding planting celery in the same location year after year. Rotate with unrelated crops like legumes or brassicas to disrupt pest and disease cycles.
Regularly monitoring your plants for early signs of pests and diseases is essential for effective management. Integrated pest management (IPM) techniques, including cultural practices, biological controls, and targeted treatments, can help keep pest populations in check while minimizing environmental impact.
By being proactive and implementing preventive measures, you can successfully prevent and manage common celery pests and diseases, ensuring the health and productivity of your crop.
Harvesting Celery at the Right Time
Knowing when to harvest celery is crucial to ensure optimal flavor, texture, and yield. Harvesting celery at the right time involves considering various factors such as plant maturity, stalk size, and desired taste. Here’s a guide to help you harvest celery at the appropriate time:
Maturity: Celery typically takes around 16-18 weeks to reach maturity from the time of transplanting. Check the seed packet or variety information for estimated maturity dates specific to your celery variety. Harvesting too early may result in underdeveloped stalks, while waiting too long can lead to tough, fibrous celery.
Stalk size: Evaluate the size of the celery stalks as a guide for harvesting. In general, the stalks should be at least 8 inches tall, thick, and solid. Avoid harvesting celery that has slender or spindly stalks, as they may not have reached their full potential.
Blanching: Blanching is an optional technique that can be done to improve the flavor and tenderness of celery stalks. Blanching involves shielding the stalks from sunlight by wrapping them with newspaper or tying them with twine. Blanching can be done a couple of weeks before harvest, but it’s important not to wait too long as the celery flavor can become bitter.
Taste test: One of the best ways to determine if celery is ready for harvest is to taste it. Sample a small piece of the outer stalk to assess its flavor. If the celery has a mild, crisp, and slightly sweet taste, it’s a good indication that it’s ready to be harvested.
Harvesting process: When it’s time to harvest, use a sharp knife or garden shears to cut the stalks at the base, just above ground level. Take care not to damage neighboring plants or nearby stalks. For continuous harvest throughout the season, you can remove individual outer stalks as needed, allowing the inner stalks to continue growing.
Storage: If you’re not consuming the celery immediately, remove the leaves and store the stalks in the refrigerator. Place them in a sealed plastic bag or wrap them in damp paper towels to maintain freshness. Properly stored celery can last for several weeks in the refrigerator.
Remember, harvesting celery at the right time ensures the best taste and texture. Regular monitoring and assessing the maturity and quality of the stalks will help you determine the ideal moment to enjoy your homegrown celery.
Storing and Preserving Celery
Once you’ve harvested your celery, it’s essential to properly store and preserve it to maintain its freshness and flavor. Correct storage methods can help extend the shelf life of celery and ensure its usability in various culinary preparations. Here are some tips for storing and preserving celery:
Storage in the refrigerator: Celery is best stored in the refrigerator to keep it crisp and flavorful. Before storing, remove any leaves attached to the stalks, as they can draw moisture from the stalks, causing them to wilt faster. Wrap the celery stalks loosely in a damp paper towel to help retain moisture. Then, place the wrapped celery in a sealed plastic bag or container to prevent moisture loss and maintain freshness. Stored this way, celery can stay crisp for up to two weeks.
Freezing: Freezing celery is a great option if you have an abundance of harvest that you want to preserve for later use. However, it’s important to note that freezing can slightly alter the texture of celery, making it less suitable for raw dishes. To freeze celery, chop it into desired-sized pieces, blanch them in boiling water for a couple of minutes, then transfer them to an ice bath to cool. Drain the celery thoroughly and place it in airtight freezer bags or containers. Frozen celery can be used in cooked dishes like soups, stews, or casseroles.
Dehydrating: Dehydrating celery is another preservation method that allows for long-term storage. To dehydrate celery, wash and trim the stalks, then slice them into thin pieces. Arrange the celery slices on a dehydrator tray or in a single layer on a baking sheet. Set the dehydrator or oven to a low temperature (around 125°F or 52°C) and dry the celery until it becomes crispy. Store the dehydrated celery in airtight containers or jars in a cool, dark place. Dried celery can be rehydrated and used in soups, stocks, or as a seasoning.
Pickling: Another way to preserve celery is by pickling it. Pickled celery adds a tangy and flavorful twist to salads, sandwiches, and more. Prepare a pickling brine using vinegar, water, salt, sugar, and spices of your choice. Cut the celery into desired lengths and blanch them in boiling water for a few minutes. Place the blanched celery in sterilized jars and pour the pickling brine over them, ensuring the celery is fully submerged. Seal the jars and refrigerate for several days to allow the flavors to develop. Pickled celery can be stored in the refrigerator for several weeks.
By utilizing these storage and preservation methods, you can make the most out of your celery harvest and enjoy its flavor and versatility even after the growing season. Whether refrigerating, freezing, dehydrating, or pickling, choose the method that suits your needs and culinary preferences.