
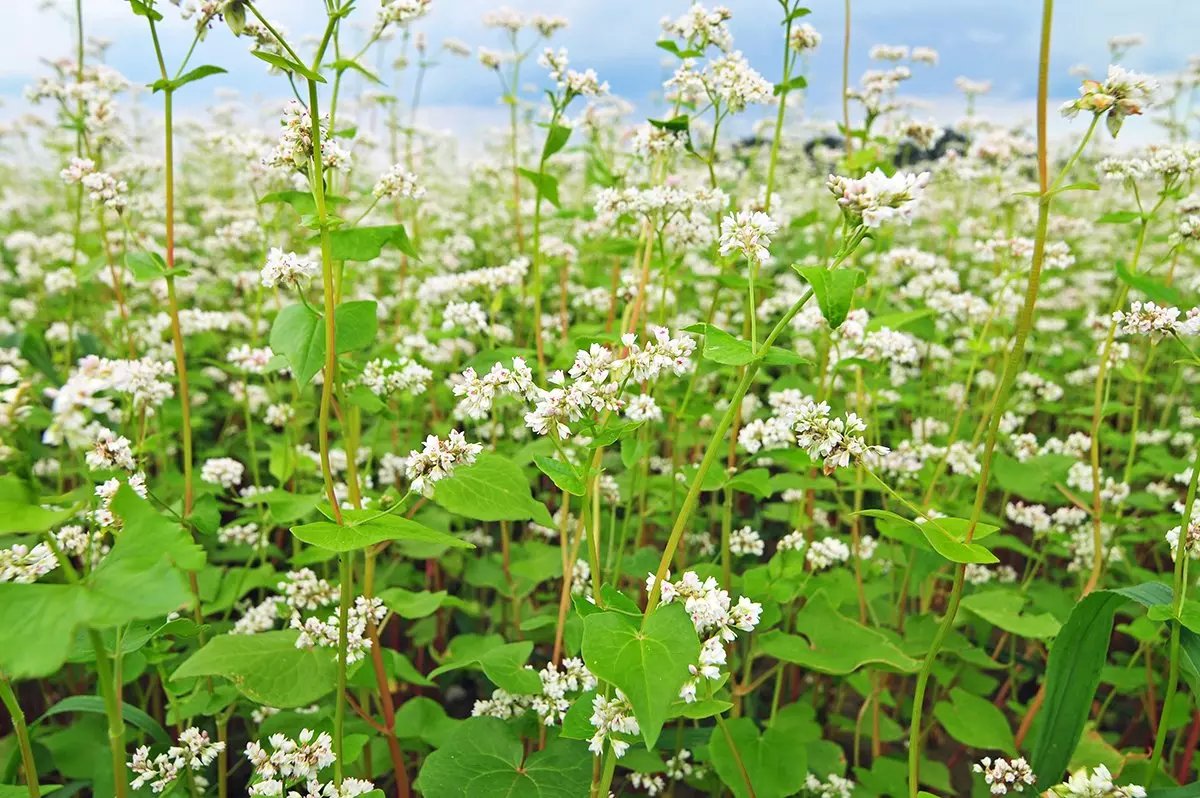
Choosing the Right Variety of Buckwheat
When it comes to planting buckwheat, selecting the right variety is crucial. With several options available, it’s essential to choose the one that suits your specific needs and growing conditions. Here are a few considerations to keep in mind:
Climate: Buckwheat varieties differ in their ability to tolerate various climates. Some are better suited for cooler regions, while others thrive in warmer climates. Research the climate requirements of each variety and choose accordingly.
Intended Use: Determine the purpose of planting buckwheat. Are you looking for a cover crop to improve soil fertility or a grain crop for human consumption? Different varieties have different characteristics, so select the one that aligns with your goals.
Growth Habit: Buckwheat varieties can be categorized into determinate and indeterminate types based on their growth habit. Determinate varieties reach a specific height and then stop growing, while indeterminate varieties continue to grow until they reach maturity. Consider the desired height and growth pattern when choosing a variety.
Flowering Time: Buckwheat varieties also vary in their flowering time, which influences the crop’s overall duration. If you have a specific timeframe or want to coordinate buckwheat with other crops in your rotation, select a variety with an appropriate flowering time.
Disease Resistance: Some buckwheat varieties exhibit better resistance to certain diseases or pests. If you are aware of common issues in your area, opt for a variety with increased resistance to help minimize potential problems.
Take into account these factors when selecting the right variety of buckwheat. It’s advisable to consult with local agricultural experts or reputable seed suppliers to get personalized recommendations based on your specific growing conditions and goals. By choosing the right variety, you set a solid foundation for successful buckwheat cultivation.
Selecting the Ideal Location for Planting
Choosing the right location for planting buckwheat is vital to ensure its optimal growth and yield. Here are some key considerations to keep in mind when selecting the ideal location:
Sunlight: Buckwheat thrives in full sun, so select a location that receives at least six to eight hours of direct sunlight daily. Avoid areas with excessive shade, as it can hinder the plant’s growth and development.
Soil Quality: Buckwheat prefers well-draining soil with a pH level between 5.5 and 7.5. Conduct a soil test to assess its fertility and make any necessary amendments before planting. Additionally, avoid areas with compacted or waterlogged soil, as it can impede root development.
Temperature: Buckwheat is a cool-season crop that performs best in temperatures ranging from 60°F to 75°F (15°C to 24°C). Choose a location with a climate that falls within this range for optimal growth.
Avoiding Contaminated Sites: Check the history of the potential planting site to avoid areas previously contaminated with herbicides, pesticides, or other harmful chemicals. Buckwheat can accumulate these substances, leading to crop damage or potential health risks.
Wind Protection: Consider the wind patterns in your location and select a site that offers some protection from strong winds. Buckwheat plants can be delicate, and excessive wind can cause lodging, where the plants bend or break under the pressure.
Proximity to Pollinators: Buckwheat relies on pollinators, such as bees, for successful fertilization and seed production. Choose a location near bee-friendly plants or bee colonies to attract these crucial pollinators and ensure optimal pollination.
By carefully selecting the ideal location for planting buckwheat, you can promote healthy growth, maximize yield potential, and minimize potential challenges. Take into account the sunlight, soil quality, temperature, contamination risks, wind protection, and proximity to pollinators when choosing the perfect spot for your buckwheat crop.
Preparing the Soil for Buckwheat
Proper soil preparation is essential for the successful cultivation of buckwheat. By adequately preparing the soil, you create a favorable environment for the plant’s growth and ensure optimal nutrient availability. Follow these steps to prepare the soil for buckwheat:
Clear the Area: Start by clearing the planting area of any weeds, rocks, or debris. This will provide a clean slate for planting and prevent competition for resources.
Loosen the Soil: Buckwheat prefers loose, well-draining soil. Use a garden fork or tiller to loosen the soil to a depth of 4 to 6 inches. This promotes root penetration and allows for better water infiltration.
Amend the Soil: Conduct a soil test to determine the nutrient levels and pH of the soil. Buckwheat thrives in slightly acidic to neutral soil with a pH ranging from 5.5 to 7.5. If needed, amend the soil by adding organic matter or adjusting the pH using appropriate amendments.
Add Organic Matter: Incorporate organic matter such as compost or well-rotted manure into the soil. This improves soil structure, enhances moisture retention, and provides essential nutrients for healthy plant growth.
Apply Fertilizer: Based on the soil test results, apply a balanced, slow-release fertilizer to provide the necessary nutrients for buckwheat growth. Follow the recommended application rates and incorporate the fertilizer into the top few inches of soil.
Smooth the Surface: Level the soil surface using a rake to create an even planting bed. This facilitates uniform germination and emergence of buckwheat plants.
Water the Soil: Before sowing the buckwheat seeds, thoroughly water the prepared soil. Moisture helps settle the soil and creates favorable conditions for seed germination.
By following these steps to prepare the soil for buckwheat, you create an optimal growing environment for the crop. Adequate soil preparation sets the stage for healthy plant development, nutrient uptake, and overall successful buckwheat cultivation.
Sowing Buckwheat Seeds
Sowing buckwheat seeds correctly is vital to ensure proper germination and establish a healthy crop. Follow these guidelines for successful sowing of buckwheat seeds:
Timing: Choose the appropriate time to sow buckwheat seeds based on your climate and growing conditions. Buckwheat is generally sown in spring or early summer when the soil temperature reaches around 50°F (10°C) or above.
Seed Selection: Select high-quality buckwheat seeds from a reputable supplier. Look for seeds that are clean, viable, and free from foreign matter or impurities.
Seedbed Preparation: Ensure that the soil is properly prepared as discussed in the previous section. A well-prepared seedbed provides an optimal environment for seed germination and early plant growth.
Spacing: Buckwheat plants should be spaced adequately to allow for proper growth and air circulation. Sow the seeds in rows with a spacing of approximately 6 to 12 inches apart, depending on the variety.
Sowing Method: There are different methods for sowing buckwheat seeds, including broadcasting, drilling, or using a seed spreader. Choose a method that suits your preferences and the size of the area to be planted. Ensure even distribution of seeds across the designated area.
Seed Depth: Sow the buckwheat seeds at a depth of around 1 inch (2.5 cm) into the soil. Firmly press the soil over the seeds to ensure good soil-to-seed contact.
Watering: After sowing, water the seeded area gently yet thoroughly. Adequate moisture helps initiate germination and encourages the establishment of young buckwheat plants.
Maintenance: Keep the seeded area moist until the seedlings emerge. Monitor the soil moisture levels and water as needed to prevent drying out or flooding.
Thinning: Once the buckwheat seedlings reach a height of a few inches, thin them out to maintain the desired spacing between plants. Remove the excess seedlings, leaving behind the healthiest and strongest ones.
By following these steps, you can ensure proper sowing of buckwheat seeds and set the stage for their successful germination and growth. Pay attention to timing, spacing, seed quality, and watering to promote a healthy and thriving buckwheat crop.
Watering and Maintaining Buckwheat Plants
Proper watering and maintenance are essential for the healthy growth and development of buckwheat plants. By following these guidelines, you can ensure optimal conditions for your buckwheat crop:
Watering:
- Monitor the moisture levels of the soil regularly. Buckwheat requires consistent moisture, especially during its early growth stages.
- Water the plants deeply and thoroughly. Aim to keep the soil evenly moist, but avoid overwatering, as it can lead to disease development and root rot.
- Apply water directly to the base of the plants to minimize moisture on the leaves, which can attract pests or cause diseases.
- During periods of rainfall, reduce or skip watering as necessary to prevent waterlogged soil.
Mulching:
- Apply a layer of organic mulch around the base of the buckwheat plants, such as straw or wood chips. Mulching helps retain moisture in the soil, suppresses weed growth, and regulates soil temperature.
- Mulching also contributes to improved soil structure and fertility as it breaks down over time.
Fertilization:
- Monitor the growth and appearance of your buckwheat plants. If necessary, apply a nitrogen-rich fertilizer during the early growth stages to support healthy foliage development.
- Avoid excessive nitrogen application, as it can result in lush foliage but minimal seed production.
- If using organic fertilizers, follow the recommended application rates and guidelines provided on the package.
Weed Control:
- Regularly inspect the planting area for weed growth and promptly remove any weeds that compete with the buckwheat plants for nutrients and resources.
- Avoid using herbicides, as buckwheat is sensitive to certain chemicals, and they can harm the crop.
- Consider mulching or employing manual weed control methods to keep the planting area weed-free.
Pest and Disease Management:
- Monitor your buckwheat plants for signs of pests, such as aphids or mites. If necessary, employ organic pest control methods, such as neem oil or insecticidal soap, to manage infestations.
- Avoid excessive use of pesticides, as they can harm beneficial insects and disrupt the ecological balance.
- If you notice any symptoms of diseases, such as root rot or powdery mildew, promptly take action to prevent the spread and address the issue.
By following these watering and maintenance guidelines, you can ensure the vitality and productivity of your buckwheat plants. Consistent watering, proper fertilization, weed control, and pest management contribute to a thriving buckwheat crop.
Managing Weeds and Pests in Buckwheat
Effective weed and pest management is crucial for maintaining the health and productivity of your buckwheat crop. By employing proper techniques and strategies, you can minimize weed competition and prevent pests from causing significant damage. Here are some useful tips for managing weeds and pests in buckwheat:
Weed Control:
- Preventive Measures: Start by preparing a weed-free seedbed and removing any existing weeds before planting. This minimizes the weed seed bank in the soil.
- Mulching: Apply a layer of organic mulch, such as straw or wood chips, around the base of the buckwheat plants. This helps suppress weed growth by blocking sunlight and smothering weed seedlings.
- Hand Pulling: Regularly inspect the planting area and manually remove any emerging weeds. Pull weeds by hand, making sure to remove the roots to prevent regrowth.
- Cultivation: Use a hoe or cultivator to disturb the soil surface and kill small weed seedlings without harming the buckwheat plants. Take care not to disturb the plant’s shallow root system.
Pest Management:
- Monitoring: Regularly inspect your buckwheat plants for signs of pest infestations, such as chewed leaves, holes, or discolored foliage. Early detection allows for prompt intervention.
- Beneficial Insects: Encourage beneficial insects, such as ladybugs or lacewings, that prey on common pests. Planting companion flowers or providing insect habitat can attract these helpful predators.
- Organic Sprays: If pest populations become problematic, consider using organic insecticidal soaps or botanical sprays that specifically target the pests while minimizing harm to beneficial insects.
- Barriers and Traps: Use physical barriers, such as floating row covers, to prevent pests from accessing the plants. Sticky traps can also be effective in capturing flying insects like aphids or whiteflies.
Disease Prevention:
- Sanitation: Remove and destroy any infected plant material to prevent the spread of diseases. Practice good sanitation by cleaning tools and equipment to avoid transferring pathogens.
- Adequate Air Circulation: Ensure proper spacing between buckwheat plants to promote air circulation, reducing the likelihood of fungal diseases like powdery mildew.
- Watering Practices: Avoid overhead watering, as wet foliage can create a conducive environment for disease development. Instead, water at the base of the plants to keep the leaves dry.
By implementing these weed and pest management techniques, you can maintain a healthy buckwheat crop. Regular monitoring, preventive measures, and timely interventions are key to reducing weed competition, preventing pest damage, and ensuring the overall success of your buckwheat cultivation.
Harvesting and Using Buckwheat
Knowing when and how to harvest buckwheat is essential to ensure that you obtain high-quality seeds or grains for various culinary or agricultural purposes. Here are the steps for harvesting and utilizing buckwheat:
Timing:
- Monitor the buckwheat plants during their growth and observe the color change of the seeds. Buckwheat is typically ready for harvest when about 80% of the seeds have turned dark brown or black.
- Harvesting too early may lead to low-quality seeds that may not fully mature, while delaying the harvest may result in seed shedding or vulnerability to inclement weather.
Harvesting:
- Use a combine harvester or a scythe for larger-scale harvests. Ensure that the equipment is set to the appropriate height, cutting the plants just above the soil surface to collect the seed heads.
- For small-scale harvests, cut the buckwheat plants at ground level using a sickle or pruning shears. Bundle the harvested plants together to facilitate drying and seed extraction.
Drying:
- Hang the bundled plants upside down in a dry location with good air circulation. This allows the seed heads to dry naturally while preventing moisture accumulation and the potential for rot.
- Ensure that the drying area is well-ventilated and protected from rain or excessive humidity, as damp conditions can impact seed quality.
- Once the seed heads are thoroughly dry, remove the seeds from the plants by threshing or rubbing them against a screen or clean cloth.
Cleaning:
- After threshing, separate the seeds from any remaining plant debris or chaff. You can achieve this by winnowing the seeds outdoors on a breezy day or by using a fan or sieve to separate the lighter chaff from the heavier seeds.
Utilization:
- Buckwheat seeds can be used in various culinary applications. Grind them into flour to make gluten-free pancakes, bread, or pasta, or use them whole as a nutritious addition to salads, stir-fries, or granola.
- As a cover crop, buckwheat can be tilled back into the soil to improve its fertility, increase organic matter content, and suppress weed growth. It serves as a green manure that enriches the soil for future plantings.
- Buckwheat straw can be used for mulching, composting, or as animal bedding, providing additional value after the harvest.
By following these guidelines, you can harvest buckwheat at the optimal time and utilize the seeds or grains for various culinary or agricultural purposes. Enjoy the nutritious and versatile benefits of this wonderful crop!