
Choosing the Right Time and Location
Planting arborvitae requires careful consideration of the timing and location. By choosing the right time and location, you can ensure the optimal growth and health of your arborvitae shrubs. Here are some key factors to keep in mind:
Time of Planting: The ideal time to plant arborvitae is during the spring or fall seasons. Avoid planting during the extreme heat of summer or the freezing temperatures of winter. In mild climates, planting can be done year-round, but aim for periods of moderate weather.
Location: Arborvitae thrives in full sun to partial shade conditions. Choose a location that receives at least 6 hours of direct sunlight per day. Additionally, consider the soil conditions. Arborvitae prefers well-draining soil with a neutral to slightly acidic pH level. Avoid areas with poor drainage or heavy clay soil, as this can lead to root rot and other moisture-related issues.
Space Requirements: Consider the mature size of your chosen arborvitae variety and plan accordingly. Make sure you have enough space for the tree to grow and spread without interference from other structures or plants. Proper spacing allows for good air circulation, which is essential in preventing diseases.
Climate Considerations: Different arborvitae varieties have varying cold hardiness levels. Check the USDA plant hardiness zone map to ensure that the variety you choose is suitable for your specific climate. This will help prevent the tree from experiencing cold damage or stress.
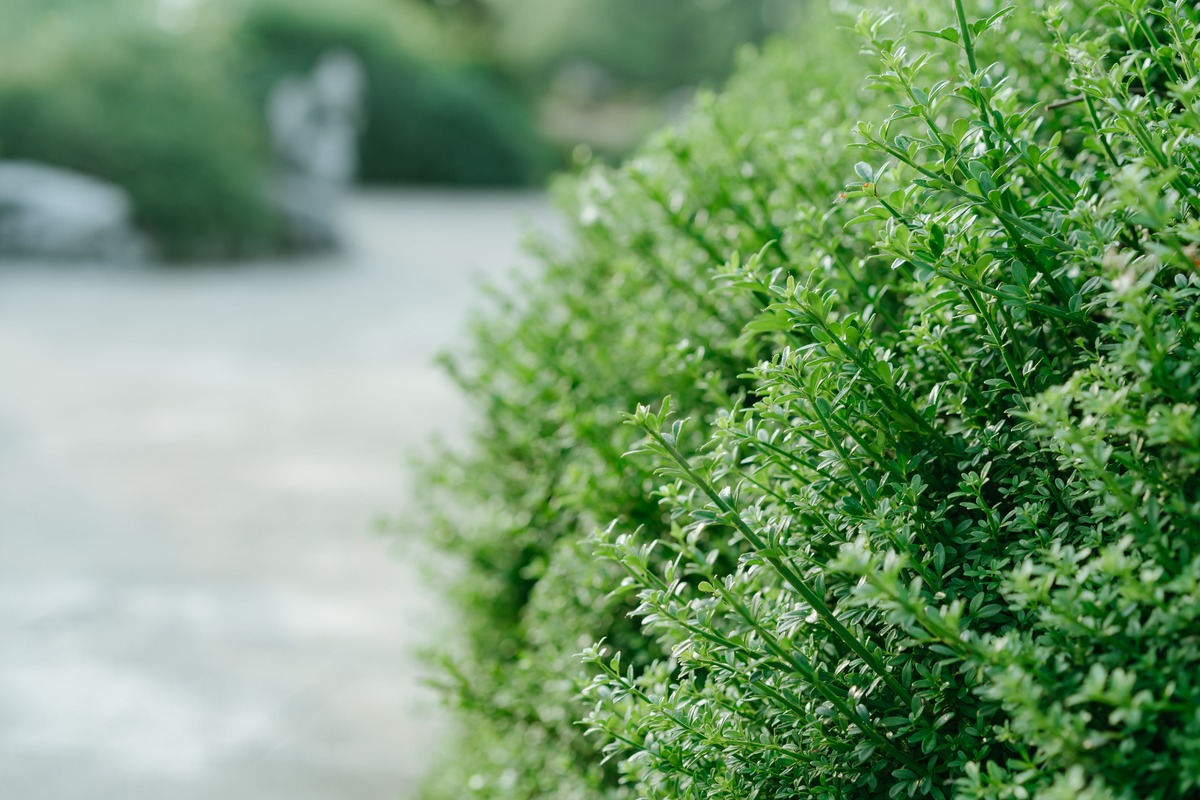
Neighbor Compatibility: If you are planting arborvitae as a hedge or privacy screen, consider the compatibility with nearby plants and structures. Ensure that the height and width of the arborvitae will not encroach upon neighboring areas or obstruct views.
By carefully considering these factors, you can choose the right time and location for planting arborvitae and set the stage for successful growth and development. Remember to research specific guidelines for the particular variety you have chosen, as they may have additional requirements or considerations. With proper planning, your arborvitae will thrive and provide beauty and privacy to your outdoor space.
Preparing the Soil
Before planting arborvitae, it’s crucial to prepare the soil properly to provide the best growing conditions for your shrubs. Good soil preparation promotes healthy root development and overall plant growth. Here are some essential steps to prepare the soil:
Testing the Soil: Start by conducting a soil test to assess its pH level, nutrient content, and structure. You can purchase a home soil testing kit or send a sample to a local agricultural extension office for a more comprehensive analysis. Understanding the soil’s composition will help you determine if any amendments are necessary.
Improving Drainage: Arborvitae prefers well-draining soil. If your soil tends to be heavy or clay-like, amend it with organic matter such as compost or aged manure. This helps improve soil structure, allowing excess water to drain away and prevent waterlogged conditions that can lead to root rot.
Adjusting Soil pH: Most arborvitae varieties thrive in slightly acidic to neutral soil conditions, with a pH level of around 6.0 to 7.0. If your soil is too acidic or alkaline, you can adjust the pH by adding soil amendments such as lime or sulfur. Follow the recommendations from your soil test to achieve the desired pH range.
Removing Weeds and Debris: Clear the planting area of any weeds, grass, or debris. These can compete with the arborvitae for nutrients and water, hindering its growth. Dig out any persistent weeds by their roots to prevent regrowth.
Loosening the Soil: Use a garden fork or a tiller to loosen the soil in the planting area. Break up any compacted soil to facilitate root penetration and encourage root establishment. Avoid over-tilling, as this can disrupt the natural structure of the soil.
Adding Organic Matter: Work in a generous amount of organic matter, such as compost or well-rotted manure, into the top layer of soil. Organic matter improves soil fertility, nutrient availability, and moisture retention. This amendment provides a nutrient-rich environment for the roots to thrive.
Leveling the Soil: Smooth out the soil surface, ensuring a level planting area. This helps prevent issues such as water pooling around the roots or uneven growth. Use a rake or a garden roller to achieve a flat and even surface.
By following these steps, you can prepare the soil to create an ideal foundation for the successful growth of your arborvitae. Remember to check specific requirements for the arborvitae variety you are planting, as some may have specific soil preferences or additional considerations.
Digging the Hole
Properly digging the hole for your arborvitae is crucial to ensure that it establishes a strong root system and thrives in its new environment. Follow these guidelines to dig the hole correctly:
Size of the Hole: The size of the hole should be wide and deep enough to accommodate the root ball of the arborvitae sapling. As a general rule of thumb, the hole should be two to three times wider and slightly shallower than the root ball. This allows the roots to spread out and establish themselves more easily.
Removing the Turf: Before digging the hole, remove the turf or grass in the area where you plan to plant the arborvitae. Use a spade or a turf cutter to cut around the perimeter and remove the turf in one piece. Set it aside for later use or repurpose it elsewhere in your garden.
Digging Depth: The depth of the hole should be such that the top of the root ball is level with or slightly above the surrounding soil. This prevents issues such as the tree sinking too deep after planting or water pooling around the roots. Measure the depth using a measuring tape or a stick.
Sloping Sides: It’s advisable to slope the sides of the hole rather than leaving them perfectly vertical. This allows for better root growth and prevents the risk of the hole collapsing. The sloped sides also provide better soil contact with the roots, facilitating nutrient uptake.
Breaking up the Sides: Use a garden fork or a small shovel to gently break up the sides of the hole. This helps loosen the soil and encourages root penetration. Be careful not to damage the root ball or excessively disrupt the surrounding soil.
Backfilling: While digging the hole, keep the topsoil and subsoil separate. Once the hole is dug, use the topsoil to backfill around the root ball. Gently firm the soil using your hands or the back of a shovel, ensuring that there are no air pockets. Avoid compacting the soil too firmly, as this can hinder proper root growth.
Watering: After backfilling the hole, thoroughly water the arborvitae to settle the soil and provide moisture to the roots. This step helps eliminate air pockets and ensures that the roots make good contact with the surrounding soil.
By following these guidelines, you can dig the hole properly and create an optimal environment for your arborvitae to thrive. Remember to adjust the hole size and depth according to the specific requirements of the arborvitae variety you are planting.
Transplanting the Arborvitae
Transplanting an arborvitae sapling from its container or another location to its final planting spot is a delicate process. Following proper transplanting techniques will help minimize stress and ensure the successful establishment of your arborvitae. Here are the steps to transplant your arborvitae:
Preparing the Arborvitae: Before transplanting, water the arborvitae thoroughly the day before. This ensures that the root ball is adequately hydrated and helps prevent transplant shock. If the arborvitae is in a container, gently tap the sides of the container and loosen the root ball before removing it. Do this carefully to avoid damaging the roots.
Positioning the Arborvitae: Place the arborvitae in the center of the prepared hole, ensuring that it is upright and at the desired depth. Check that the top of the root ball is level with or slightly above the surrounding soil. This prevents moisture accumulation around the trunk and minimizes the risk of rot.
Backfilling the Hole: Begin backfilling the hole with the soil you previously set aside. Fill in around the root ball, gently firming the soil as you go. Avoid compacting the soil too tightly, as this can impede root growth. Continue until the hole is completely filled, ensuring that the arborvitae remains upright throughout the process.
Watering the Transplanted Arborvitae: After backfilling, thoroughly water the transplanted arborvitae. This helps settle the soil around the roots and provides essential moisture for establishment. Water until the soil feels evenly moist but not saturated. After watering, check for any settling of the soil and add additional soil if necessary.
Applying Mulch: Apply a layer of organic mulch, such as wood chips or bark, around the base of the arborvitae. This helps retain moisture, suppresses weeds, and moderates soil temperature. Avoid piling mulch against the trunk, as this can lead to moisture-related issues and encourage pest infestation.
Staking, if needed: In some cases, staking may be necessary to provide additional support to the newly transplanted arborvitae. Use soft tree ties or flexible materials to secure the tree to a sturdy stake. Place the stake away from the root ball to avoid damaging the roots. Keep the stakes in place for at least a year or until the arborvitae has rooted and can stand on its own.
By following these steps, you can transplant your arborvitae with care and increase the chances of successful establishment. Remember to provide regular watering and monitor the tree’s progress in the weeks and months following transplantation.
Watering the Arborvitae
Proper watering is essential for the health and vitality of your arborvitae. Adequate moisture helps the tree establish its root system, withstand periods of drought, and maintain its overall well-being. Follow these guidelines to effectively water your arborvitae:
Watering Frequency: Water newly planted arborvitae regularly, especially in the first year. This is crucial to support root establishment. As a general rule, water deeply once or twice a week, providing enough moisture to saturate the root zone. However, avoid overwatering, as this can lead to root rot and other moisture-related issues.
Monitoring Soil Moisture: Regularly check the moisture level of the soil around the arborvitae. Use your fingers or a moisture meter to determine if the soil is dry or moist. Ideally, the top few inches of soil should be evenly moist, but not waterlogged. Adjust your watering schedule accordingly, taking into account weather conditions, rainfall, and the specific needs of the arborvitae variety.
Watering Depth: It’s essential to water deeply, encouraging deep root growth. Focus on saturating the root zone, which is typically located within the top 12 to 18 inches of soil. Slowly apply water to the base of the arborvitae, allowing it to penetrate deeply into the soil. This encourages the roots to grow downward in search of moisture, creating a strong foundation.
Watering Techniques: Use a soaker hose, drip irrigation system, or a watering can to provide water directly to the base of the arborvitae. Avoid overhead watering, as this can lead to foliage diseases. Direct the water flow towards the root zone, ensuring that it penetrates deeply and reaches all sides of the root ball.
Watering During Dry Periods: During periods of drought or hot weather, it’s important to increase the frequency and duration of watering. Pay attention to signs of stress in the arborvitae, such as wilting foliage or dry soil. Adjust your watering schedule to meet the increased moisture needs of the tree.
Mulching: Apply a layer of organic mulch, such as wood chips or bark, around the base of the arborvitae. This helps retain moisture in the soil, reduces evaporation, and regulates soil temperature. Maintain a mulch depth of 2 to 4 inches, ensuring that the mulch does not touch the trunk. Mulching also helps suppress weeds and protect the roots from extreme temperature fluctuations.
Observing Water Stress: Pay attention to signs of under or overwatering. Overwatering can lead to yellowing leaves, root rot, or other fungal diseases. Underwatering can cause wilting, browning of foliage, or stunted growth. Adjust your watering practices accordingly to maintain a healthy balance.
By following these guidelines, you can ensure that your arborvitae receives proper hydration and develops a strong root system. Consistent and appropriate watering practices contribute to the overall health and beauty of your arborvitae.
Mulching
Mulching is a beneficial practice that provides numerous advantages for the health and well-being of your arborvitae. Applying a layer of mulch around the base of the tree offers various benefits, including moisture retention, weed suppression, and soil temperature regulation. Here’s what you need to know about mulching your arborvitae:
Benefits of Mulching: Mulching helps conserve soil moisture by reducing evaporation. It acts as a protective barrier, slowing down water loss from the soil and preserving moisture for the roots of the arborvitae. Additionally, mulch helps suppress weeds by blocking their access to sunlight, minimizing competition for resources such as water and nutrients.
Choosing the Right Mulch: Select organic mulch materials such as wood chips, bark, shredded leaves, or straw. These materials break down slowly over time, improving soil fertility as they decompose. Avoid using plastic or synthetic mulch, as they do not provide the same benefits and may hinder water and air circulation in the soil.
Applying Mulch Properly: Apply a layer of mulch around the base of the arborvitae, extending it out to the tree’s drip line. Maintain a mulch depth of 2 to 4 inches, ensuring that it is evenly spread and doesn’t mound against the trunk. Keep a small gap around the trunk to prevent moisture accumulation and potential rot issues.
Mulch Volcanoes: Avoid creating mulch volcanoes around the base of your arborvitae. Piling up mulch against the trunk can lead to excessive moisture retention, which promotes rot and pest infestation. It’s important to keep a clear, exposed area around the trunk to facilitate proper air circulation and prevent damage to the stem and bark.
Renewing Mulch: Mulch gradually decomposes over time, so it’s important to renew the layer periodically. Typically, mulch should be replenished once a year or as needed to maintain the desired depth. Before applying fresh mulch, remove any existing debris or compacted mulch to promote better air and water exchange with the soil.
Considerations for Sloped Areas: If your arborvitae is planted on a slope, take special care when mulching. It’s important to prevent the mulch from washing away during heavy rainfall or irrigation. Consider using erosion control measures such as woven landscape fabric or rocks to secure the mulch in place on slopes.
Mulching and Tree Health: Proper mulching helps regulate soil temperature, keeping it cooler in the summer and insulating against extreme temperature fluctuations in the winter. This protection supports root health and encourages vigorous growth, improving the overall resilience of your arborvitae.
Mulching your arborvitae provides multiple benefits that contribute to the growth and well-being of the tree. By following proper mulching practices, you can improve its overall health, conserve moisture, reduce weed competition, and create a more favorable growing environment for your arborvitae.
Pruning and Trimming
Pruning and trimming are essential practices for maintaining the health, shape, and appearance of your arborvitae. By properly pruning your arborvitae, you can promote healthy growth, control its size, and enhance its overall aesthetic appeal. Follow these guidelines for effective pruning and trimming:
Timing of Pruning: The best time to prune arborvitae is during late winter or early spring, before new growth begins. Pruning during this period allows the tree to recover quickly and promotes healthy regrowth. Avoid pruning during extreme heat or cold as it can stress the tree.
Reasons for Pruning: Pruning serves various purposes, including removing dead or diseased branches, shaping the tree, and promoting air circulation. Regular pruning helps maintain the form and structure of the arborvitae, prevents overcrowding, and minimizes the risk of branch breakage during storms.
Tools for Pruning: Use clean, sharp tools specifically designed for pruning, such as hand pruners, loppers, and pruning saws. Ensure that your tools are sterilized to prevent the spread of any plant diseases. Clean the tools with a solution of one part bleach to nine parts water or rubbing alcohol before and after use.
Removing Dead or Diseased Branches: Start by inspecting the arborvitae for any dead, damaged, or diseased branches. Using clean pruning tools, make a clean cut just above the branch collar, the raised ridge at the base of the branch. Removing these branches prevents the spread of disease and allows the tree to allocate resources to healthy growth.
Shaping and Controlling Size: To shape the arborvitae, selectively prune branches to create a desired form. Trim branches that are growing too long or in irregular directions, maintaining a natural and balanced shape. Be cautious not to remove an excessive amount of foliage, as this can stress the tree.
Avoiding Over-Pruning: While it’s important to prune for health and aesthetics, avoid over-pruning your arborvitae. Removing too many branches can disrupt its natural growth pattern and lead to weak or sparse foliage. Aim for a balanced approach, selectively removing branches as needed without compromising the overall structure of the tree.
Pruning Tips: When pruning, make clean cuts just above the branch collar, avoiding leaving stubs or tearing the bark. Take care not to damage surrounding branches or the main trunk. Step back occasionally to evaluate the tree’s shape and ensure a balanced and visually pleasing result.
Professional Help: If you’re unsure about pruning or have larger, more complex pruning needs, consider consulting with a professional arborist. They have the expertise and knowledge to assess the tree’s needs and carry out proper pruning techniques.
By following these pruning and trimming guidelines, you can maintain the health, shape, and overall appearance of your arborvitae. Regular pruning promotes healthy growth, improves aesthetic appeal, and ensures the long-term vitality of your tree.
Providing Proper Care and Maintenance
Proper care and maintenance are key to ensuring the long-term health and vitality of your arborvitae. By implementing essential care practices, you can help your arborvitae thrive and enhance its beauty in your landscape. Here are some important tips for providing the right care and maintenance:
Watering: Water your arborvitae regularly, especially during its first few years of growth. Deep watering is preferred over frequent shallow watering to encourage the roots to establish deeply. However, be cautious not to overwater, as excessively wet soil can lead to root rot and other moisture-related issues. Monitor the soil moisture and adjust your watering accordingly based on weather conditions and the needs of the tree.
Fertilizing: Arborvitae generally do not require fertilizer if planted in nutrient-rich soil. However, if your soil lacks essential nutrients or if the tree shows signs of nutrient deficiencies, you may consider applying a slow-release, balanced fertilizer in early spring. Always follow the manufacturer’s instructions and avoid overfertilizing, as excessive nutrients can harm the tree.
Weed Control: Regularly inspect your arborvitae for weeds and remove them promptly. Weeds compete with the tree for nutrients, water, and sunlight, hindering its growth. Utilize mulch around the base of the tree to suppress weed growth and conserve soil moisture.
Pruning and Trimming: Prune your arborvitae as needed to remove dead or damaged branches and shape the tree. Proper pruning promotes healthy growth, prevents overcrowding, and enhances the tree’s aesthetic appeal. Prune during the appropriate time of year and follow the correct pruning techniques to avoid over-pruning and causing harm to the tree.
Monitoring for Pests and Diseases: Regularly inspect your arborvitae for signs of pests and diseases such as spider mites, aphids, or fungal infections. Early detection allows for prompt treatment and minimizes the potential damage to the tree. Consider using organic or chemical controls, depending on the severity of the infestation and your preference for environmentally friendly options.
Protecting from Winter Injury: In colder climates, arborvitae can be susceptible to winter damage. Prepare your trees for winter by properly watering them before the ground freezes. Mulch around the base of the tree to insulate the soil and minimize temperature fluctuations. Additionally, consider using burlap or protective covers to shield the arborvitae from harsh winter winds.
Monitoring Overall Health: Regularly assess the overall health of your arborvitae by observing its foliage, growth patterns, and any signs of stress. Look for discoloration, wilting, or unusual growth patterns. Address any concerns promptly to prevent further damage or decline.
Professional Assistance: If you’re uncertain about any aspect of caring for your arborvitae or if you encounter significant issues, it’s beneficial to consult with a professional arborist. They can provide expert advice, diagnose any problems, and suggest appropriate treatments or interventions.
By following these care and maintenance practices, you can ensure the long-term health and beauty of your arborvitae. Regular monitoring, appropriate watering, pruning, and addressing potential issues promptly are essential for the well-being and longevity of your tree.
Troubleshooting Common Problems
While arborvitae is generally a hardy and resilient plant, it can still experience certain problems. Understanding and addressing these common issues promptly can help you maintain the health and beauty of your arborvitae. Here are some troubleshooting tips for common problems:
Browning Foliage: If you notice browning foliage, it could be a sign of various issues. Overwatering, underwatering, inadequate drainage, or excessive heat can cause foliage to turn brown. Assess your watering practices, soil moisture, and ensure proper drainage. Adjust watering as necessary and provide shade during hot periods.
Yellowing Foliage: Yellowing foliage can indicate nutrient deficiencies, such as nitrogen, iron, or magnesium. Test your soil to determine if any deficiencies exist and apply appropriate fertilizers or soil amendments. However, be mindful not to overfertilize, as excessive nutrients can also cause problems.
Pest Infestation: Arborvitae can be susceptible to pests such as spider mites, aphids, bagworms, or scale insects. Regularly inspect your trees for signs of pest infestation, such as discolored or distorted foliage, webs, or insect presence. Use appropriate control methods, such as insecticidal soaps or horticultural oils, following the manufacturer’s instructions.
Fungal Diseases: Arborvitae can be prone to common fungal diseases such as needle blight, canker, or root rot. Proper watering practices, avoiding overwatering or waterlogged conditions, and promoting good air circulation can help prevent fungal diseases. If you suspect a fungal infection, consult a professional arborist for appropriate diagnosis and treatment options.
Winter Damage: In colder climates, arborvitae can experience winter injury, characterized by browning or discoloration of foliage. Protect your arborvitae from harsh winter conditions by watering adequately before the ground freezes, applying mulch around the base, and using burlap or protective covers to shield against winter winds.
Environmental Stress: Extreme heat, cold, drought, or excessive wind can stress arborvitae and affect their health. Consider planting the appropriate arborvitae variety for your climate and providing supplemental watering during dry periods. Protect your trees from extreme weather conditions and provide proper care and maintenance throughout the year.
Improper Pruning: Incorrect pruning techniques or over-pruning can harm the health and appearance of arborvitae. Ensure that you prune at the correct time and follow proper pruning practices. Avoid removing too many branches or leaving stubs. Consult a professional arborist if you’re unsure about proper pruning techniques.
Soil pH Imbalance: Arborvitae prefers slightly acidic to neutral soil pH. Perform a soil test to determine if the pH is outside the suitable range. Adjust the pH by adding appropriate amendments such as lime or sulfur, following the recommendations from your soil test results.
If you encounter any of these common problems with your arborvitae, it’s crucial to take action promptly. Identifying the cause and implementing the appropriate solutions can help restore the health of your arborvitae and ensure its long-term well-being.
Frequently Asked Questions (FAQs)
Here are some common questions that people have about arborvitae:
1. How tall does arborvitae get?
Arborvitae can reach varying heights depending on the specific variety. Some smaller cultivars stay around 3-5 feet tall, while larger types can grow up to 40 feet or more. It’s important to research the specific variety you have or plan to plant to determine its mature height.
2. How fast does arborvitae grow?
The growth rate of arborvitae can vary depending on the variety, environmental conditions, and available nutrients. Generally, arborvitae grows at a moderate pace, averaging around 6 to 12 inches of growth per year. However, some faster-growing varieties can exceed this rate.
3. Can I trim arborvitae into different shapes, like a hedge or topiary?
Yes, arborvitae is often used for hedges and topiaries due to its dense foliage and versatility. With regular pruning, you can shape your arborvitae into various forms to suit your landscaping needs. It’s important to use appropriate pruning techniques and consider the specific growth habits of the variety you have.
4. Does arborvitae require full sun or can it tolerate shade?
Arborvitae generally prefers full sun to partial shade conditions for optimal growth. While it can tolerate some shade, it may become thin or leggy in lower light conditions. It’s best to provide arborvitae with at least 6 hours of direct sunlight per day for optimal health and dense foliage.
5. How often should I water my arborvitae?
The frequency of watering depends on various factors such as climate, soil type, and age of the tree. Generally, it’s recommended to water newly planted arborvitae deeply, at least once or twice a week, during the first year. Established arborvitae may only require supplemental watering during dry periods. Monitor soil moisture and adjust your watering schedule accordingly.
6. Is it necessary to fertilize arborvitae?
In most cases, arborvitae does not require regular fertilization if planted in nutrient-rich soil. However, if your soil lacks essential nutrients or the tree shows signs of deficiencies, you can consider applying a slow-release, balanced fertilizer during the early spring. Always follow the instructions and avoid overfertilizing, as excessive nutrients can be harmful.
7. Can arborvitae be grown in containers or pots?
Yes, certain smaller varieties of arborvitae can be grown in containers or pots. Select compact or dwarf cultivars with slower growth rates, and ensure the container has good drainage. Regular watering and appropriate fertilization are essential for container-grown arborvitae.
8. Are there any specific diseases or pests that affect arborvitae?
Arborvitae can be affected by various diseases such as needle blight, canker, or root rot, as well as pests like spider mites, aphids, or bagworms. Regular inspection, proper watering, pruning for good air circulation, and timely treatment using organic or chemical controls can help prevent and manage these issues.
9. Can I transplant an established arborvitae?
Transplanting an established arborvitae can be challenging due to the size and established root system. It’s best to transplant arborvitae when they are young or consider consulting a professional arborist for assistance. Proper preparation, care, and timing are crucial for successful transplantation.
10. Can arborvitae be used as a privacy screen?
Yes, arborvitae is commonly used as a privacy screen due to its dense foliage and tall growth habit. Select taller varieties and plant them in close proximity to create a barrier. Consider the mature height and width of the variety you choose to ensure it meets your privacy needs.
If you have any specific questions or concerns about your arborvitae, it’s always best to consult with a local horticulturist or arborist who can provide personalized advice based on your location and specific circumstances.