
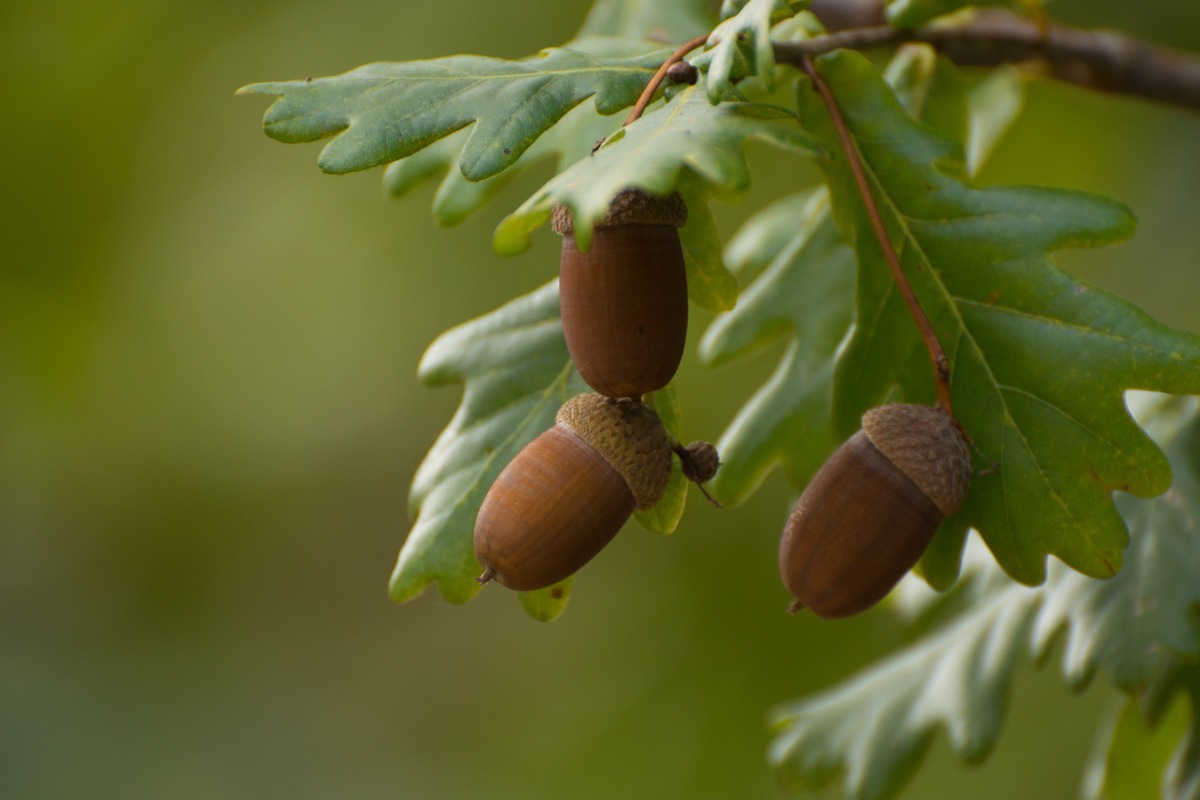
Choosing the Right Acorns
When it comes to planting acorns, choosing the right ones is essential for successful germination and growth. Here are some factors to consider when selecting acorns:
- Species: Not all acorns are the same. Different oak tree species produce different types of acorns, so it’s important to identify the species you want to grow. Native oak species are often the best choice as they are well adapted to the local climate and soil conditions.
- Freshness: Freshly fallen or collected acorns have a higher chance of germinating compared to older ones. Look for acorns with intact caps and shells, and avoid those with holes or signs of damage. Ideally, select acorns that are plump, heavy, and free from mold or discoloration.
- Maturity: Acorns should be fully mature before planting. This can be determined by their color. Mature acorns typically have a dark brown or mahogany color. Avoid green or pale-colored acorns, as they are likely not mature enough to germinate successfully.
- Size: Larger acorns tend to have a higher likelihood of successful germination and growth. However, this can vary depending on the oak species. Research the specific species you are planting to determine the optimal size for the acorns.
- Collecting Location: If possible, collect acorns from healthy and disease-free oak trees in your area. Trees that have displayed good growth and vigor are more likely to produce viable acorns.
By considering these factors, you can increase the chances of selecting acorns that will successfully germinate and grow into healthy oak trees. Remember to collect a sufficient number of acorns as not all of them will successfully sprout. Prepare your soil and follow the proper planting and care techniques to give your acorns the best chance at thriving.
Preparing the Soil
Preparing the soil properly is vital for creating a healthy and supportive environment for your acorns to germinate and grow into strong oak trees. Follow these steps to prepare your soil:
- Clear the area: Start by clearing the planting area of any weeds, grass, or other vegetation. Remove any rocks, debris, or other obstructions that may hinder root growth.
- Loosen the soil: The soil should be loose and well-draining to promote healthy root development. Use a garden fork or tiller to loosen the soil to a depth of at least 12 inches. Break up any clumps and remove large rocks or roots that may impede root growth.
- Amend the soil: Assess the soil’s nutrient content and pH level. If necessary, amend the soil by adding organic matter such as compost or well-rotted manure. This will improve its fertility and drainage. Additionally, adjust the pH level according to the specific requirements of the oak species you are planting.
- Test the soil: Consider conducting a soil test to determine the nutrient levels and pH of the soil accurately. This will help you determine the specific amendments needed to optimize the soil conditions for the oak trees.
- Level the ground: Once the soil amendments are added, use a rake or shovel to level the ground. This will provide a smooth and even surface for planting the acorns.
By properly preparing the soil, you create an optimal environment for the acorns to take root and begin their journey towards becoming sturdy oak trees. Adequate soil preparation sets the foundation for healthy growth and helps the young seedlings thrive in their early stages of development.
Germinating Acorns
Germinating acorns is a crucial step in the oak tree planting process, as it allows the dormant embryo within the acorn to start growing and developing. Follow these steps to increase the chances of successful germination:
- Soak the acorns: Fill a container with room-temperature water and place the acorns in it. Allow them to soak for 24 to 48 hours. This soaking helps to soften the outer shell and remove any chemical inhibitors that may prevent germination.
- Perform a float test: After soaking, discard any acorns that float as they are less likely to be viable for germination. Viable acorns usually sink to the bottom of the container.
- Cold stratification: Cold stratification is a method of simulating winter conditions, which helps to trigger germination. Place the viable acorns in a sealed plastic bag with moist vermiculite or peat moss. Store the bag in the refrigerator for about 2 to 3 months.
- Check for sprouts: After the cold stratification period, periodically check the acorns for sprouting. Once you notice sprouts emerging from the acorns, they are ready for planting.
- Handle with care: When handling germinated acorns, do so gently to avoid damage to the delicate sprouts. Avoid touching or breaking the emerging root or shoot as this can hinder their growth.
Germinating acorns requires patience and attention to detail. Not all acorns will successfully germinate, but by following these steps, you can increase the chances of successful sprouting. The germinated acorns are now ready to be planted and nurtured into thriving young oak trees.
Planting the Acorns
Now that your acorns have germinated and are ready to be planted, it’s time to find them a permanent home in the soil. Follow these steps to plant your acorns:
- Choose a suitable location: Select a suitable planting site that provides ample sunlight, good drainage, and enough space for the oak trees to grow to their full size. Consider the mature height and spread of the oak species you are planting.
- Prepare individual planting holes: Dig individual holes for each acorn, approximately 2 to 3 inches deep. Space the holes about 6 to 8 feet apart to allow for healthy root development and future tree growth.
- Plant the acorns: Place one germinated acorn in each hole, with the root facing downwards and the sprout facing upwards. Gently cover the acorn with soil, ensuring that it is securely planted and surrounded by loose soil.
- Water the newly planted acorns: After planting, thoroughly water the newly planted acorns. This helps settle the soil around the acorns and provides much-needed moisture for germination and early growth.
- Mark the planting spots: To prevent accidental damage, mark the planting spots with stakes or markers. This will help you identify the planted acorns and avoid disturbing them during routine lawn maintenance or gardening activities.
By following these steps, you give your germinated acorns the best chance of success as they take root in their new environment. Proper planting techniques and care during this stage contribute to the healthy establishment and growth of the oak trees.
Mulching and Watering
Mulching and watering are essential practices to ensure the successful growth and establishment of your newly planted acorns. Proper mulching helps conserve moisture, suppress weed growth, and regulate soil temperature, while adequate watering provides the necessary hydration for the young oak trees. Follow these guidelines for mulching and watering:
- Mulching: Apply a layer of organic mulch, such as wood chips or shredded bark, around the base of each planted acorn. Make sure the mulch layer is about 2 to 3 inches thick, avoiding direct contact with the trunk of the seedling. This mulch layer helps retain moisture in the soil, prevents weed competition, and maintains an even soil temperature.
- Watering: Newly planted acorns require consistent moisture for healthy growth. Water the seedlings deeply but infrequently, aiming for a slow and deep soak rather than frequent shallow watering. As a general guideline, provide approximately 1 inch of water per week during the growing season. Adjust the watering schedule based on weather conditions and the moisture needs of the specific oak species.
- Monitor soil moisture: Regularly monitor the soil moisture levels around the planted acorns. The soil should remain evenly moist but not waterlogged. Avoid allowing the soil to dry out completely between waterings, as this can stress the young seedlings.
- Be mindful of rainfall: Take into account the amount of rainfall your area receives and adjust the watering schedule accordingly. During periods of heavy rainfall, you may need to reduce or even suspend watering to prevent overwatering and potential root rot issues.
Mulching and watering play vital roles in creating a favorable environment for the young oak trees to thrive. Proper mulching conserves moisture and reduces weed competition, while regular watering ensures adequate hydration for healthy growth and establishment. Together, these practices help provide the necessary support and care for the young saplings as they develop into mature oak trees.
Protecting the Seedlings
Protecting the seedlings is crucial to ensure their survival and growth in their early stages. Various threats, including animals, insects, and weather conditions, can harm the seedlings. Implement these measures to safeguard your young oak trees:
- Use protective barriers: Install physical barriers around the seedlings to prevent damage from animals, such as rabbits, deer, or rodents. These barriers can be made from wire mesh or fencing and should be tall enough to deter the animals from reaching the young seedlings.
- Apply tree wraps: Wrap the lower trunk of the seedlings with tree wraps or tree guards to protect them from sunscald, winter damage, and mechanical injury. These wraps provide insulation and protect against external threats.
- Monitor for pests: Regularly inspect the seedlings for signs of pest activity, such as chewed leaves or insect infestations. If pests are present, employ appropriate pest control methods, whether that be organic insecticides or introducing beneficial insects to combat the pests naturally.
- Protect from extreme weather: Shield the young seedlings from extreme weather conditions, such as frost, strong winds, or intense sunlight. Consider using shade cloth or temporary windbreaks to mitigate the effects of adverse weather on the fragile oak trees.
- Remove competing vegetation: Remove any competing vegetation or weeds growing near the seedlings. Weeds can deprive the oak trees of vital nutrients, water, and sunlight. Regular weeding around the seedlings helps reduce competition and allows the young trees to thrive.
By implementing these protection measures, you significantly increase the chances of survival and healthy growth for your young oak tree seedlings. Monitoring for threats, applying physical barriers, and providing proper care all contribute to the long-term success of the seedlings.
Transplanting the Seedlings
Transplanting the seedlings is a critical step in the growth process of your oak trees. When the seedlings outgrow their initial planting location or need to be relocated, follow these steps to ensure a successful transplant:
- Choose an appropriate time: Select the appropriate time of year to transplant the seedlings. In general, early spring or fall is ideal, as the temperatures are cooler and the seedlings are less likely to experience heat stress.
- Prepare the new planting hole: Dig a new hole in the desired transplant location that is slightly larger and deeper than the seedling’s root ball. Ensure that the soil in the new hole is loosened and amended if necessary.
- Gently remove the seedling: Carefully dig around the root system of the seedling, ensuring minimal disturbance to the roots. Use a spade or garden fork to loosen the soil around the seedling and lift it from the ground, taking care to keep the roots intact.
- Transplant the seedling: Place the seedling into the new planting hole, making sure that the root collar (where the roots meet the stem) is level with or slightly above the soil surface. Backfill the hole with soil, firming it gently around the roots to eliminate air pockets.
- Water and mulch: After transplanting, water the seedling thoroughly to settle the soil around the roots. Apply a layer of mulch around the base of the seedling, leaving a small gap around the stem to prevent moisture buildup and potential rot.
Transplanting can be a stressful process for seedlings, so it’s crucial to handle them with care and provide proper aftercare. Monitor the transplanted seedling closely, ensuring it receives adequate water and protection from extreme weather conditions. With time and proper care, the transplanted oak tree seedling will establish its roots in its new location and continue its growth journey.
Caring for Young Oak Trees
Caring for young oak trees is essential to ensure their healthy growth and long-term success as they mature into majestic trees. Here are some important care practices to implement for the well-being of your young oak trees:
- Watering: Provide regular watering during the first few years of the tree’s life, especially during dry periods. Deeply water the tree, ensuring the water reaches the root zone. Adjust the amount of water based on weather conditions, avoiding overwatering that may lead to root rot.
- Mulching: Maintain a layer of organic mulch around the base of the tree, keeping it away from the trunk. Mulching conserves moisture, regulates soil temperature, and suppresses weed growth, providing a beneficial environment for the young oak tree.
- Pruning: Prune the oak tree selectively to remove dead or damaged branches, promote proper structure, and improve air circulation within the canopy. Pruning should be done during the dormant season to minimize stress on the tree.
- Fertilizing: A well-established oak tree typically does not require fertilizer. However, if the soil lacks essential nutrients or shows signs of deficiency, consult with an arborist or horticulturist to determine appropriate fertilization methods tailored to the specific needs of your oak tree.
- Protection from herbicides: Protect young oak trees from herbicides and weed killers, as they can cause severe damage or even death. Follow proper application techniques and be cautious when using chemical substances around the tree.
- Monitoring for pests and diseases: Regularly inspect the tree for signs of pests or diseases, such as discoloration, wilting, or abnormal growth. If any issues are detected, consult with a professional to identify the problem and implement appropriate treatment measures, such as organic pest control or disease management techniques.
- Support for weak or leaning trees: If a young oak tree is weak or leaning, consider staking or bracing it to provide support. Use soft materials to avoid damaging the tree’s bark or trunk, and regularly check the tree’s stability, adjusting or removing the support as needed.
- Maintain a buffer zone: Establish a buffer zone around the young oak tree to protect it from construction activities and foot traffic. Limit disturbances to the soil, roots, and surrounding environment to minimize stress on the tree.
By implementing these care practices, you can nurture the young oak trees and provide them with the support they need to grow strong and healthy. Regular monitoring, watering, mulching, and protection measures ensure the long-term success of your oak trees, allowing them to grace your landscape for generations to come.