Choosing a Location
When it comes to planting a sago palm, selecting the right location is crucial for its growth and overall health. The sago palm thrives in well-drained soil and prefers a spot that receives ample sunlight. Here are some key factors to consider when choosing a location for your sago palm:
- Sunlight: Sago palms require at least 6 hours of sunlight each day to thrive. Look for a spot in your garden that receives ample sunlight and has minimal shade.
- Soil Drainage: Sago palms prefer well-drained soil to avoid root rot. Make sure the soil in the chosen location is loose and well-draining. If your soil is heavy or clay-like, you can improve drainage by adding organic matter or creating raised beds.
- Temperature: Sago palms are hardy in USDA zones 8-11 and can tolerate a range of temperatures. However, it is best to avoid planting them in areas with extreme heat or cold, as it can stress the plant and hinder its growth.
- Space: Consider the mature size of the sago palm when choosing a location. These palms can grow up to 10 feet tall and have a spread of 6-8 feet. Ensure that there is enough space for the palm to fully grow and spread its fronds.
- Protection from Wind: While sago palms are relatively sturdy, strong winds can damage their foliage. If your area is prone to strong winds, consider planting the sago palm near a wall, fence, or other structures that provide some protection from the wind.
By carefully selecting a suitable location for your sago palm, you are setting it up for success. The right amount of sunlight, well-drained soil, and protection from extreme weather conditions will ensure that your sago palm thrives and adds beauty to your garden for years to come.
Preparing the Soil
Before planting a sago palm, it’s important to prepare the soil to create an optimal growing environment. Well-prepared soil provides the necessary nutrients and drainage for the palm’s roots to thrive. Here’s how you can prepare the soil for your sago palm:
- Test the Soil: Start by testing the soil pH and nutrient levels. Sago palms prefer slightly acidic to neutral soil with a pH range of 6.0 to 7.0. Conduct a soil test to identify any deficiencies and adjust the soil accordingly.
- Remove Weeds and Debris: Clear the planting area of any weeds, rocks, or other debris that may impede the growth of the sago palm. This will help create a clean and fertile space for the palm to establish itself.
- Loosen the Soil: Use a garden fork or tiller to loosen the soil in the planting area. This will improve the soil’s texture and allow for better root penetration and drainage. Avoid compacting the soil as it can hinder the plant’s growth and development.
- Amend the Soil: If the soil lacks nutrients or has poor drainage, you can amend it by adding organic matter such as compost or well-rotted manure. These amendments improve the soil structure, fertility, and water-holding capacity.
- Mix in Fertilizer: Prior to planting, incorporate a slow-release fertilizer into the soil. Choose a fertilizer specifically formulated for palms or use a balanced fertilizer with equal amounts of nitrogen, phosphorus, and potassium. These nutrients will support the healthy growth of the sago palm.
By carefully preparing the soil before planting, you are ensuring that your sago palm has a strong foundation to thrive. The right soil pH, proper drainage, and ample nutrients will provide the plant with the necessary conditions for optimal growth and vibrant foliage.
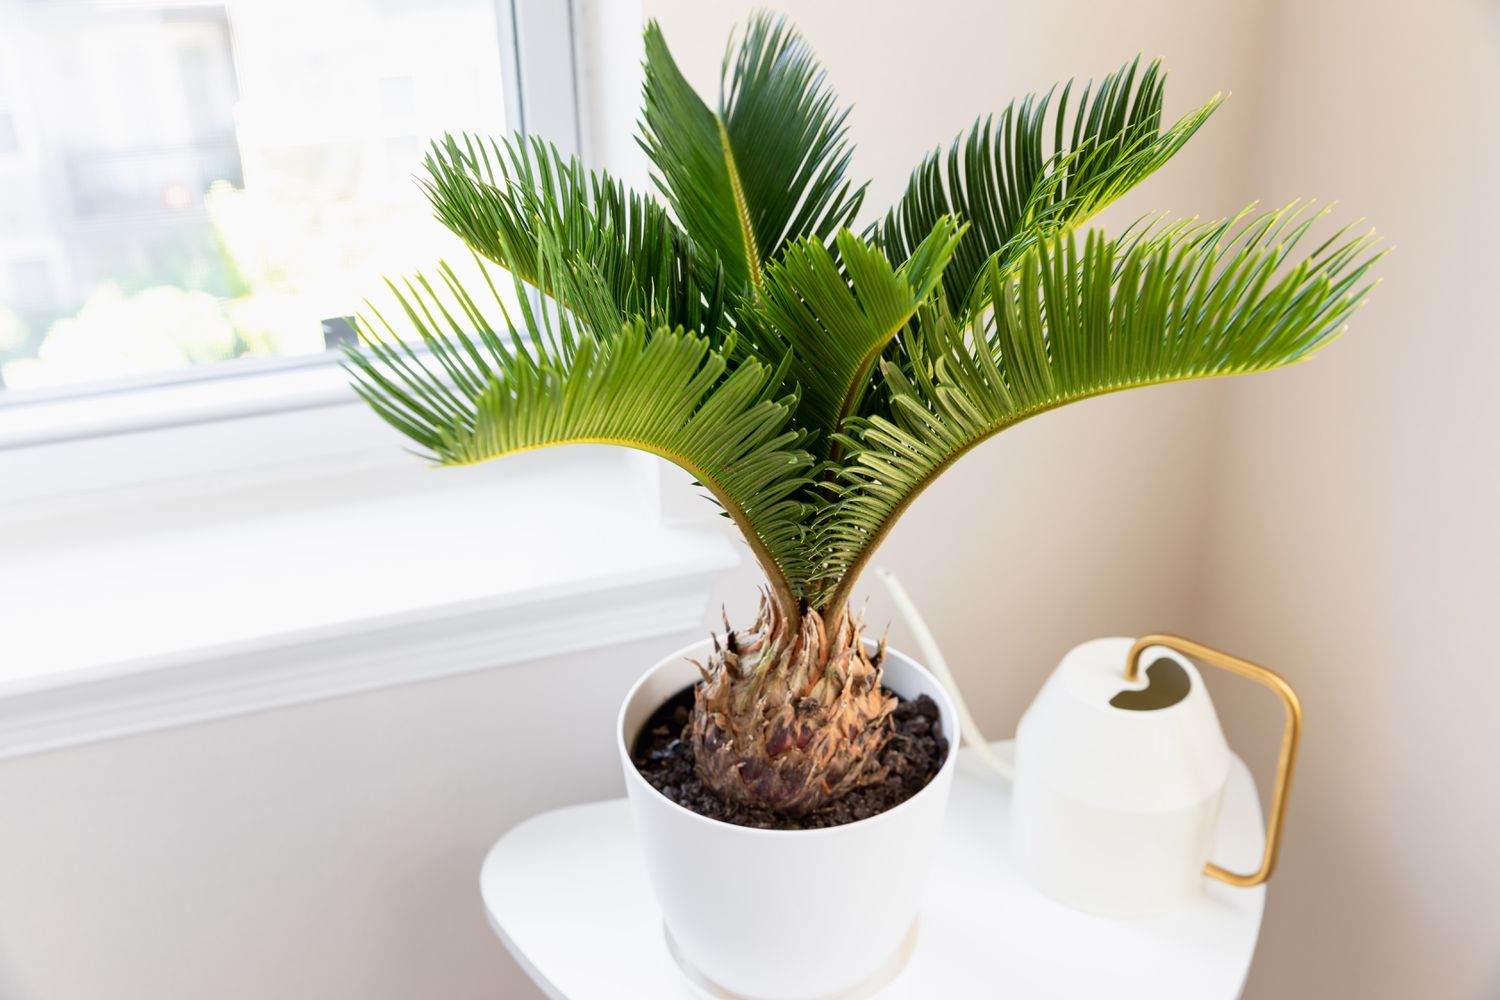
Selecting the Right Sago Palm
When it comes to selecting a sago palm for your garden or landscape, there are a few important factors to consider. Choosing the right sago palm ensures that you will have a healthy and beautiful plant that fits well with your space. Here are some key tips for selecting the right sago palm:
- Species: There are two main species of sago palms: Cycas revoluta and Cycas rumphii. Cycas revoluta is the most commonly found species and is known for its hardiness. Cycas rumphii, on the other hand, is a larger species that requires more space to grow. Consider the size and growth habit of each species before making your selection.
- Size: Sago palms come in various sizes, ranging from small container-sized plants to large specimens that can reach several feet in height. Determine the available space in your garden or landscape and choose a sago palm that will fit well without overpowering the area.
- Visual Appearance: Take note of the overall appearance of the sago palm. Look for healthy, green fronds with no signs of discoloration or damage. Avoid plants with yellowing or wilting leaves, as these can be signs of stress or disease.
- Root System: When purchasing a sago palm, check the root system to ensure that it is healthy and well-developed. Ideally, the roots should be firm and spread out evenly. Avoid plants with rotting or mushy roots, as this can indicate poor health.
- Pest and Disease Resistance: Some sago palm varieties have better resistance to pests and diseases than others. Research the specific variety you are considering and choose one that has a reputation for being resilient and less prone to common palm pests and diseases.
By carefully selecting the right sago palm for your garden, you are setting yourself up for success. Take into account the species, size, appearance, root system, and resistance to pests and diseases. These factors will help ensure that you choose a sago palm that not only thrives in your environment but also adds beauty and elegance to your landscape.
Digging the Hole
When it comes to planting a sago palm, digging the right hole is crucial for its proper growth and establishment. The size and depth of the hole are important factors that will determine how well the palm adapts to its new surroundings. Here’s a step-by-step guide on how to dig the hole for your sago palm:
- Measure the Root Ball: Start by measuring the size of the root ball of your sago palm. This will help you determine the appropriate size of the hole. The hole should be at least twice as wide and slightly shallower than the root ball.
- Mark the Location: Use stakes or spray paint to mark the desired location for your sago palm. This will serve as a guide for digging the hole and ensure that it is placed in the right spot.
- Start Digging: Using a shovel or a garden spade, start digging the hole. The width of the hole should be wide enough to accommodate the root ball with some extra space. The depth of the hole should be slightly shallower than the root ball, leaving some space for settling.
- Loosen the Soil: As you dig, loosen the soil around the edges of the hole. This will help the roots penetrate the surrounding soil more easily and encourage proper drainage.
- Remove Rocks and Debris: While digging, be sure to remove any rocks, roots, or debris that may hinder the growth of the sago palm. This will provide a clean and unobstructed space for the roots to spread.
- Prepare the Soil: Mix some well-rotted compost or organic matter with the soil that you removed from the hole. This will help improve the soil’s fertility and create a healthy environment for the sago palm.
- Backfill the Hole: Carefully place the sago palm into the hole, making sure the top of the root ball is level with or slightly above the ground level. Gently backfill the hole with the prepared soil mixture, firming it around the roots as you go.
By digging the hole to the appropriate size and depth and ensuring proper soil preparation, you are providing the ideal conditions for your sago palm to establish its roots and grow successfully. Taking these steps will help set the stage for a healthy and thriving sago palm in your landscape.
Transplanting the Sago Palm
Transplanting a sago palm from one location to another requires careful handling to minimize stress on the plant and ensure successful transplantation. Here’s a step-by-step guide on how to properly transplant your sago palm:
- Choose the Right Time: Transplant your sago palm during the cooler months when the plant is dormant. This reduces the chances of transplant shock and allows the palm to adjust to its new environment more easily.
- Prepare the New Planting Hole: Dig a new hole in the desired location, making sure it is wider and slightly shallower than the root ball. Prepare the soil by incorporating organic matter to provide a nutrient-rich environment for the palm’s roots.
- Water the Palm: Prior to transplanting, thoroughly water the sago palm to ensure it is well-hydrated. This helps reduce stress on the plant during the transplantation process.
- Carefully Remove the Palm: Gently dig around the base of the sago palm, ensuring you are not damaging the roots. Lift the palm out of the ground, keeping the root ball intact as much as possible.
- Inspect the Roots: Take a moment to inspect the roots of the sago palm for any signs of damage or disease. Trim off any broken or rotting roots with clean and sterilized pruning shears.
- Place the Palm in the New Hole: Carefully place the sago palm into the new planting hole, ensuring that it is positioned at the same depth as it was in its previous location. Gently backfill the hole with soil, firming it around the roots to eliminate air pockets.
- Water Thoroughly: After transplanting, water the sago palm thoroughly to help settle the soil and ensure good root-to-soil contact. Continue to water regularly, keeping the soil evenly moist during the palm’s establishment period.
Transplanting a sago palm may initially cause some stress to the plant, but by following these steps, you can minimize the shock and help your palm adapt to its new location more effectively. With proper care and attention, your transplanted sago palm will establish itself and continue to thrive in its new home.
Watering and Mulching
Proper watering and mulching are essential for the health and growth of a sago palm. These practices help maintain moisture levels, regulate temperature, and inhibit weed growth. Here’s what you need to know about watering and mulching your sago palm:
- Watering: Sago palms prefer moist but not waterlogged soil. Deep watering, allowing the water to penetrate the root zone, is ideal. Water the palm thoroughly, ensuring the soil is evenly moist. Avoid overwatering, which can lead to root rot.
- Frequency: Water young sago palms more frequently, as their root systems are still developing. As the palm matures, you can reduce the frequency of watering. Monitor the moisture level by checking the soil’s moisture content regularly.
- Caution in Winter: During cooler months, water sparingly, as sago palms require less water when they are dormant. Too much moisture in winter may lead to root rot. Adjust watering based on the climate and the palm’s water needs.
- Mulching: Apply a layer of organic mulch around the base of the sago palm, leaving a gap around the trunk to prevent moisture buildup. Mulching helps retain soil moisture, regulate temperature, and inhibit weed growth, which can compete with the sago palm for water and nutrients.
- Choosing Mulch: Select a coarse organic mulch, such as wood chips or bark, that allows for proper water penetration and airflow. Avoid piling mulch against the trunk, as it can create a damp environment and promote rotting.
- Applying Mulch: Spread the mulch in a 2 to 3-inch layer around the base of the sago palm, extending it outwards to cover the root zone. Take care not to mound the mulch directly against the trunk, as this can invite pests and diseases.
- Mulch Renewal: Periodically replenish the mulch layer as it decomposes over time. This maintains the benefits of mulching, such as conserving moisture and suppressing weeds.
Consistent and appropriate watering, along with a well-applied mulch layer, will promote the health and vitality of your sago palm. Monitoring the moisture levels and adjusting watering based on the palm’s needs will ensure optimal growth and a beautiful addition to your landscape.
Caring for the Sago Palm
Caring for a sago palm involves regular maintenance and a few key practices to ensure its continued health and vitality. By following these guidelines, you can keep your sago palm thriving for years to come:
- Regular Inspections: Regularly inspect your sago palm for any signs of pests, diseases, or nutrient deficiencies. Look for yellowing or browning fronds, unusual spots, or wilting foliage. Address any issues promptly to prevent further damage.
- Pruning: Remove any dead, damaged, or yellowing fronds as they occur. Use clean and sharp pruning shears to make clean cuts, minimizing the risk of infection. Be careful not to damage the trunk or healthy growth when pruning.
- Fertilization: Apply a balanced slow-release palm fertilizer in spring and early summer to provide the necessary nutrients for growth. Follow the manufacturer’s instructions regarding the application rate and frequency. Avoid overfertilizing, as excessive nutrients can harm the palm.
- Protection from Frost: If you live in an area with cold winters, protect your sago palm from frost. Cover the palm during cold snaps with a frost blanket or burlap, and provide additional insulation around the trunk. Consider moving potted sago palms indoors during winter.
- Managing Pests: Keep an eye out for common pests that affect sago palms, such as scale insects and mealybugs. If an infestation occurs, treat it promptly with an appropriate insecticide or horticultural soap, following the instructions carefully.
- Warm Climate Maintenance: In warm and humid climates, monitor your sago palm for signs of fungal diseases, such as leaf spot or crown rot. Avoid overhead watering to minimize humidity around the foliage. Remove any affected fronds and ensure good air circulation.
- Stabilizing the Trunk: Support the sago palm’s trunk by staking it, especially when the palm is young and establishing its roots. Use soft ties or horticultural tape to secure the trunk to the stakes. Remove the support once the trunk is sturdy enough to stand on its own.
Caring for your sago palm requires regular attention and proactive maintenance. By inspecting, pruning, fertilizing, protecting from frost, managing pests, and providing proper support, you can ensure the continued health and beauty of your sago palm for years to come.
Pruning and Fertilizing
Pruning and fertilizing are essential practices to promote the health, aesthetics, and growth of a sago palm. Regular pruning helps maintain the desired shape, remove dead or damaged fronds, and encourage new growth. Fertilizing provides the necessary nutrients for optimal growth and foliage vigor. Here’s what you need to know about pruning and fertilizing your sago palm:
- Pruning: Prune your sago palm regularly to remove dead or yellowing fronds. This helps improve the palm’s appearance and overall health. Use clean and sharp pruning shears to make clean cuts, ensuring you do not damage the trunk or healthy growth.
- Timing: Prune your sago palm in late winter or early spring before new growth emerges. This allows the palm to recover and minimize stress during its active growing season.
- Frond Removal: Remove dead or damaged fronds by cutting them as close to the trunk as possible. Be cautious not to remove too many green fronds, as they are responsible for photosynthesis and the palm’s vitality.
- Trimming off Pups: Sago palms produce offsets or “pups” around the base of the mother plant. These can be left to form a cluster or removed to control the palm’s size. If you choose to remove pups, do so carefully using a clean, sharp knife.
- Fertilizing: Fertilize your sago palm during the growing season to provide essential nutrients. Use a slow-release palm fertilizer or a balanced granular fertilizer formulated for palms. Follow the package instructions for proper application rates, as over-fertilization can harm the palm.
- Timing and Frequency: Apply fertilizer in late winter or early spring just as new growth begins. Repeat the application every 2-3 months during the growing season. Adjust the frequency and amount based on the specific fertilizer used and the palm’s response.
- Application: Distribute the fertilizer evenly around the base of the palm, avoiding contact with the trunk. Water the palm thoroughly after fertilizing to help the nutrients reach the root zone.
- Organic Alternatives: If you prefer organic options, you can use well-decomposed compost or organic palm fertilizers to nourish your sago palm. These organic alternatives provide slow-release nutrients and promote soil health.
By regularly pruning and fertilizing your sago palm, you can maintain its visual appeal and support its healthy growth. Proper timing, precision in pruning, and balanced fertilization will ensure that your sago palm thrives and remains a stunning addition to your garden or landscape.
Protecting the Sago Palm from Cold Temperatures
Sago palms are generally hardy and can tolerate a range of temperatures. However, in colder regions or during extreme winter conditions, it’s important to take steps to protect your sago palm from cold temperatures. Here are some measures you can take to safeguard your sago palm:
- Choose a Sheltered Location: Plant your sago palm in a sheltered area of your garden or landscape, such as near a building or a wall. This provides some protection from cold winds and helps create a microclimate that is slightly warmer.
- Apply Mulch: Before the onset of winter, apply a thick layer of organic mulch around the base of the sago palm. This helps insulate the soil, retain moisture, and regulate soil temperature, protecting the palm’s roots from harsh cold.
- Cover the Palm: When a cold snap or freeze is expected, cover the sago palm with a frost blanket or burlap. Wrap the material loosely around the palm, ensuring it reaches the ground. This provides an additional layer of insulation and protects the fronds from frost damage.
- Use Heat Sources: In extremely cold climates, you can use heat sources, such as outdoor heating cables or Christmas lights, to provide extra warmth to the sago palm. Place the lights or cables around the base of the palm and cover them with the frost blanket or burlap.
- Potting and Wintering Indoors: If you live in an area with harsh winters, consider potting your sago palm and bringing it indoors during the coldest months. Place the potted palm near a sunny window or provide supplemental grow lights to ensure it receives enough light.
- Watering Carefully: During winter, adjust your watering practices to avoid overwatering the sago palm. Water sparingly, allowing the soil to dry slightly between waterings. Too much moisture in winter can increase the risk of root rot.
- Monitor and Inspect: Regularly monitor your sago palm during the winter months for signs of stress or cold damage. Look for leaf discoloration, wilting, or fronds turning brown. If you notice any issues, take appropriate action to address them promptly.
By taking these protective measures, you can safeguard your sago palm from the damaging effects of cold temperatures. Provide insulation, cover the palm, adjust watering practices, and consider bringing the palm indoors if necessary. With proper care, your sago palm can survive and thrive even in chilly climates.