
Choosing the Right Japanese Maple Variety
When it comes to planting a Japanese Maple, one of the most important decisions you’ll make is choosing the right variety for your garden. There are numerous varieties of Japanese Maples available, each with its own unique characteristics and features. Here are some factors to consider to help you select the perfect Japanese Maple for your landscape:
- Growth Habit: Japanese Maples come in various growth habits, including weeping, upright, and cascading. Consider the overall look and feel you want to achieve in your garden and choose a variety that complements your aesthetic vision.
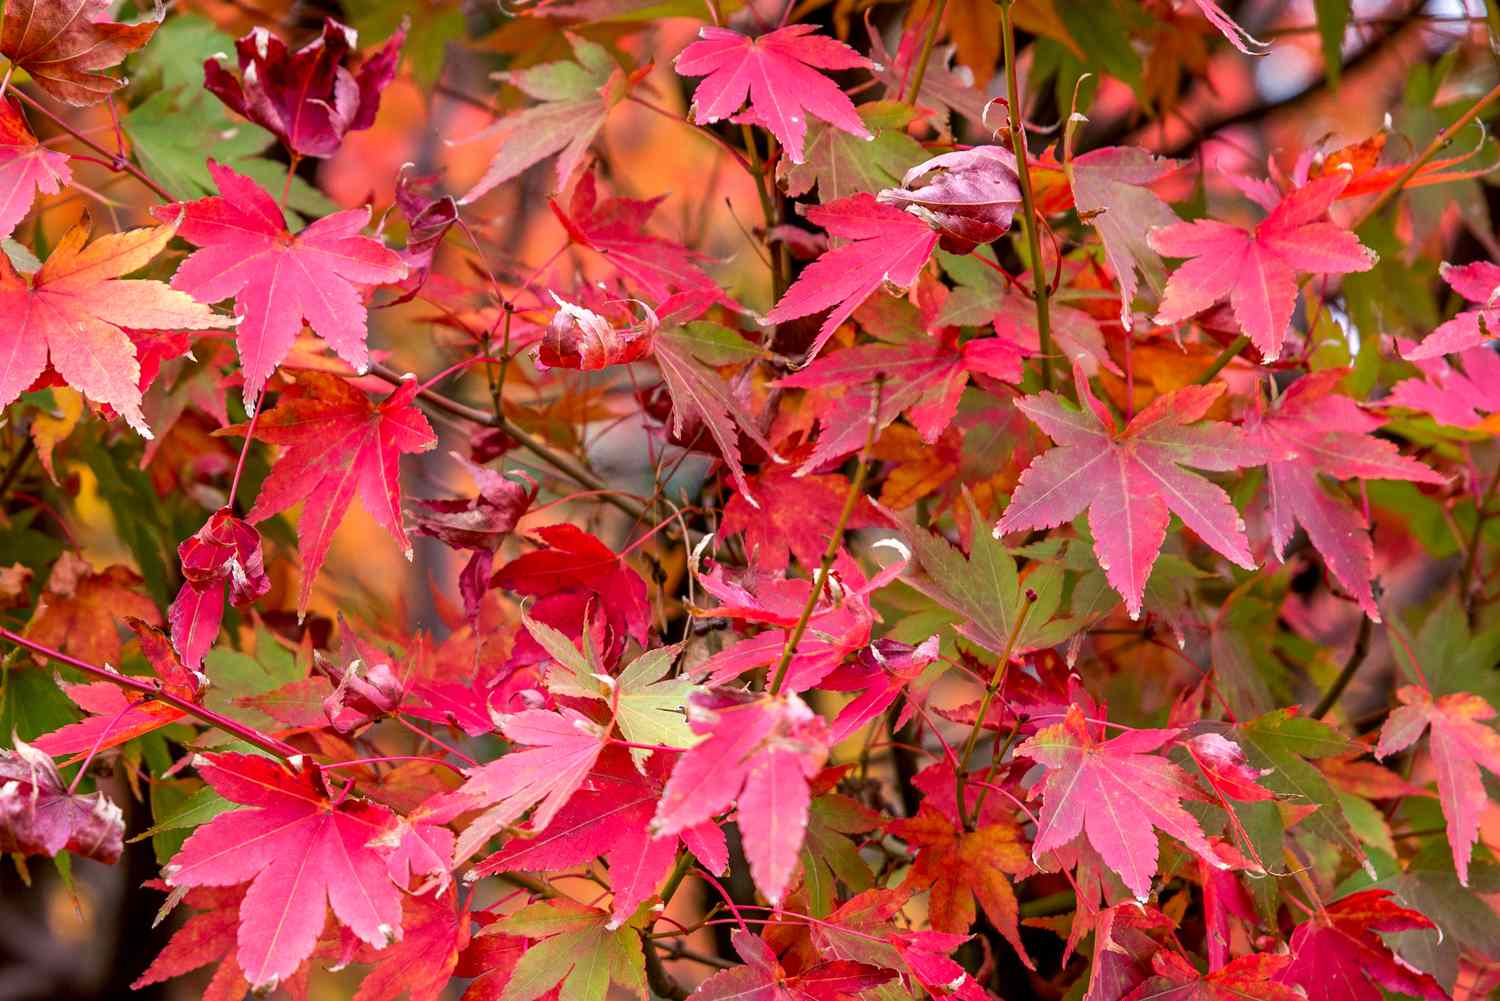
- Foliage Color: Japanese Maples offer a stunning array of foliage colors, including shades of green, red, purple, and even variegated patterns. Take into account the color scheme of your garden and select a variety that will make a bold statement or provide a harmonious blend of colors.
- Size: Consider the available space in your garden and the eventual size of the mature Japanese Maple variety you choose. Some varieties remain relatively small and compact, making them suitable for smaller gardens or containers, while others can grow into large, statement-making trees.
- Tolerances: Assess the climate and conditions in your area and choose a Japanese Maple variety that can tolerate and thrive in those conditions. Some varieties are more sun or shade tolerant, while others can handle a wide range of conditions.
- Leaf Shape: Japanese Maples exhibit different leaf shapes, such as laceleaf, palmate, and dissected. Each leaf shape contributes to the overall visual appeal of the tree. Consider the texture and intricacy of the leaf shape and choose a variety that aligns with your preferences.
Take the time to research and explore the different Japanese Maple varieties available, keeping in mind your specific requirements and preferences. Visiting a local nursery or consulting with an arborist can also be helpful in finding the right variety for your garden. By carefully selecting the perfect Japanese Maple variety, you will have a beautiful and captivating addition to your landscape that will bring years of enjoyment.
Selecting the Perfect Location for Your Japanese Maple Tree
Choosing the right location for your Japanese Maple tree is crucial for its health and overall growth. Here are some key factors to consider when selecting the perfect spot:
- Sunlight: Japanese Maples thrive in partial shade to full sun, depending on the variety. Ensure that the location you choose provides the ideal amount of sunlight for your specific type of Japanese Maple. Too much direct sunlight can scorch the leaves, while inadequate sunlight can result in weak growth.
- Soil Conditions: Japanese Maples prefer well-draining soil that is rich in organic matter. Test the soil pH and fertility level to ensure it meets the tree’s requirements. If the soil is heavy and clay-like, incorporate organic matter such as compost or peat moss to improve drainage and nutrient availability.
- Proximity to Buildings and Other Trees: Consider the future growth of your Japanese Maple and ensure it has enough space to spread its branches without being cramped by nearby buildings or overshadowed by other trees. Adequate air circulation and space will help prevent diseases and maintain the tree’s health.
- Protection from Harsh Elements: While Japanese Maples are generally hardy, it’s important to protect them from extreme weather conditions such as strong winds or frost. Choose a location that provides some natural windbreaks or consider planting the tree near structures that offer protection.
- Aesthetics: Japanese Maples are known for their stunning foliage and graceful form. Select a location that will highlight and showcase the tree’s beauty. Consider incorporating it into your garden design, where it can serve as a focal point or provide a burst of color during different seasons.
Take the time to assess your landscape and find the perfect spot that meets these requirements. Keep in mind that Japanese Maples can be planted in the ground or in containers, allowing for versatility in your garden design. By selecting the right location, you’ll ensure that your Japanese Maple thrives and becomes a striking centerpiece in your outdoor space.
Preparing the Soil for Planting
Proper soil preparation is essential for the successful growth and development of your Japanese Maple tree. By creating the ideal soil conditions, you will provide a healthy foundation for your tree to thrive. Follow these steps to prepare the soil for planting:
- Remove Weeds and Grass: Start by clearing the planting area of any weeds, grass, or other unwanted vegetation. This will prevent competition for nutrients and allow your Japanese Maple to establish itself without obstruction.
- Test the Soil: Conduct a soil test to assess the pH level and nutrient content of your soil. Japanese Maples prefer slightly acidic soil with a pH range of 5.5 to 6.5. Based on the test results, you may need to amend the soil to achieve the ideal pH and nutrient balance.
- Amend the Soil: If the soil pH is too alkaline, you can lower it by incorporating elemental sulfur or other acidifying agents. Likewise, if the soil lacks fertility, you can improve it by adding organic matter such as compost, well-rotted manure, or leaf mold. Tilling these amendments into the soil will enhance its structure and nutrient-holding capacity.
- Ensure Good Drainage: Japanese Maples prefer well-draining soil to avoid waterlogged conditions that can lead to root rot. If your soil has poor drainage, consider incorporating sand or perlite into the planting area to improve it.
- Loosen the Soil: Use a garden fork or tiller to loosen the soil in the planting area to a depth of about 12-18 inches. This will help the roots penetrate easily and encourage healthy root growth.
By taking the time to prepare the soil correctly, you will create an optimal environment for your Japanese Maple tree to establish itself and thrive. A nutrient-rich, well-draining soil will provide the necessary support and nourishment for your tree, promoting healthy growth and vibrant foliage.
Digging the Planting Hole
Properly digging the planting hole is a crucial step in ensuring the success of planting your Japanese Maple tree. Follow these steps to create a suitable hole for your tree’s roots:
- Measure the Root Ball: Determine the size of the root ball of your Japanese Maple tree. This will guide you in digging a hole that is appropriately sized to accommodate the roots.
- Mark the Area: Use marking spray or stakes to outline the perimeter of the planting hole. This will ensure that the hole is accurately positioned and allows for appropriate spacing from other plants or structures.
- Dig the Hole: Begin digging the hole, making it wider and slightly shallower than the root ball. The width should be about two to three times the diameter of the root ball. Avoid digging too deep, as planting the tree too deep can lead to stress and hinder proper root development.
- Loosen the Sides: Use a garden fork or shovel to loosen the sides of the hole. This provides a loose, friable environment for the roots to spread and establish themselves.
- Remove Rocks and Debris: Take the time to remove any rocks, roots, or debris from the hole. This will prevent any obstructions that could impede root growth or cause damage to the tree.
Once you have finished digging the planting hole, take a moment to assess the depth and width to ensure it is appropriate for your Japanese Maple tree. The goal is to create a hole that allows the roots to spread outward and establish a strong foundation for the tree.
Removing the Japanese Maple from Its Container
When it’s time to plant your Japanese Maple tree, you’ll need to carefully remove it from its container to ensure a smooth transition into its new home. Follow these steps to safely remove the tree from its container:
- Moisten the Soil: Prior to removing the tree from the container, thoroughly water the soil. This will help prevent the roots from sticking to the sides of the container and make it easier to remove the tree without causing damage.
- Inspect the Root Ball: Take a moment to inspect the root ball of the tree. Look for any circling or tangled roots. If you notice any, use your fingers or a sharp knife to gently loosen or prune them. This will encourage the roots to grow outwards once the tree is planted.
- Tap the Container: Carefully tap the sides of the container to loosen the root ball. This will help the tree slide out more easily. If the tree doesn’t budge, you can gently squeeze the sides of the container or tap the bottom to encourage it to release.
- Support the Tree: Once the tree is loosened, support the base of the trunk with one hand while using the other hand to gently tilt and slide the tree out of the container. Avoid pulling on the trunk or branches, as this can cause damage.
- Inspect the Roots: After removing the tree from the container, take a moment to inspect the roots. Look for any damaged or diseased roots and trim them with sterilized pruning shears. This will promote healthy root development and prevent potential issues in the future.
By following these steps, you can safely remove your Japanese Maple tree from its container and prepare it for planting. Taking the time to ensure the roots are healthy and free from any restrictions will contribute to the successful establishment and growth of your tree in its new location.
Planting the Japanese Maple in the Hole
Now that you have prepared the hole for your Japanese Maple tree, it’s time to plant it and give it a secure and stable foundation. Follow these steps to properly plant your tree:
- Place the Tree in the Hole: Gently lower the Japanese Maple tree into the planting hole, ensuring that it is centered and upright. Position the tree so that the base of the trunk is level with or slightly above the surrounding soil.
- Backfill the Hole: Begin filling the hole with soil, starting from the bottom and working your way up. Use your hands or a small garden shovel to carefully backfill the soil around the roots, ensuring that there are no air pockets. Take your time to add the soil gradually and avoid compacting it too firmly.
- Monitor the Tree’s Position: As you backfill the hole, periodically check the positioning of the tree to ensure it remains upright. Adjust the placement if needed to maintain a straight and balanced tree.
- Gently Firm the Soil: Once the hole is filled, gently press down on the soil around the base of the tree to provide stability and remove any excess air pockets. Be careful not to apply too much pressure, as this can compact the soil and hinder root growth.
- Water the Tree: After planting, thoroughly water the Japanese Maple to settle the soil and hydrate the roots. Slowly pour water around the base of the tree until the surrounding soil is evenly moist. This will help eliminate any remaining air pockets and establish good root-to-soil contact.
By following these steps, you will ensure that your Japanese Maple tree is properly planted and has a solid foundation for growth. Taking the time to plant the tree correctly will give it the best chance to establish itself and thrive in its new environment.
Backfilling and Tamping Down the Soil
After planting your Japanese Maple tree, the next step is to backfill the hole and firmly tamp down the soil around the roots. This process ensures stability and good root-to-soil contact. Here’s how to do it:
- Backfilling the Hole: Start by gradually adding the soil mixture back into the hole. Begin from the bottom and work your way up, gently filling the space around the tree’s roots. Take care not to bury the trunk or cover any major root flare at the base of the tree.
- Tamping the Soil: Once the hole is filled, lightly tamp down the soil around the base of the tree. Use the back of a rake, your hands, or a small hand shovel to gently press down the soil. This helps to remove any air pockets and provides stability for the tree.
- Repeat the Process: Continue the process of backfilling and tamping down the soil until the hole is completely filled. Take your time and make sure to evenly distribute the soil around the roots.
- Watering: After backfilling and tamping, thoroughly water the area around the tree. This helps to settle the soil and provides moisture for the roots. Give the tree a deep watering to ensure proper hydration.
- Avoid Over-Tamping: While it is important to slightly compress the soil for stability, be cautious not to over-tamp or compact the soil too much. Excessive compaction can hinder root growth and drainage. Aim for a firm, but not excessively compacted soil around the tree.
Remember that Japanese Maples prefer well-drained soil, so be careful not to create a compacted layer that can impede water penetration and oxygen flow to the roots. By taking the time to properly backfill and tamp down the soil, you will provide a solid foundation for your Japanese Maple tree to grow and flourish.
Watering the Newly Planted Maple Tree
Proper watering is crucial for the establishment and survival of your newly planted Japanese Maple tree. Adequate hydration ensures that the roots receive the necessary moisture to develop and grow. Follow these guidelines to effectively water your newly planted maple tree:
- First Watering: Immediately after planting, give the tree a thorough watering. Slowly pour water around the base of the tree, allowing it to soak the surrounding soil. This initial watering helps settle the soil, eliminates air pockets, and ensures good root-to-soil contact.
- Watering Frequency: Regularly water the newly planted tree during the first year, especially during dry spells. Generally, providing around 1-2 inches of water every week is sufficient. Adjust the frequency based on the weather conditions and the moisture needs of your tree.
- Deep Watering: Focus on providing deep watering rather than frequent shallow watering. Deep watering encourages the roots to grow deeper into the soil, promoting stability and resilience. Allow the water to penetrate the soil deeply, reaching the root zone.
- Watering Techniques: Use a soaker hose, drip irrigation system, or a watering wand with a slow, steady flow to ensure deep penetration of water. Avoid using a strong jet of water that can wash away the soil or damage the small and delicate roots.
- Monitor Moisture Levels: Check the moisture levels in the soil regularly. Gently dig into the soil around the tree, about 6 inches deep, and assess the moisture content. The soil should be consistently moist but not waterlogged. Adjust the watering frequency accordingly.
- Seasonal Watering: During hot summer months or periods of drought, increase the frequency of watering to prevent the soil from drying out. Pay attention to the tree’s foliage; if the leaves start to wilt or curl, it may be a sign that the tree needs more water.
- Mulching: Apply a layer of organic mulch around the base of the tree, about 2-4 inches deep. This helps retain soil moisture, regulates soil temperature, and prevents weed growth. Keep the mulch a few inches away from the trunk to prevent moisture accumulation and potential rot.
Remember that the specific watering requirements may vary depending on factors such as climate, soil type, and tree age. The goal is to maintain a consistent level of moisture in the soil throughout the growing season, ensuring that the new Japanese Maple tree has adequate hydration to establish and thrive.
Mulching Around the Base of the Tree
Mulching is an essential practice for maintaining the health and vitality of your Japanese Maple tree. Applying a layer of mulch around the base of the tree provides numerous benefits, including moisture retention, weed suppression, and soil temperature regulation. Here’s how to effectively mulch around your tree:
- Choose the Right Mulch: Select an organic mulch, such as wood chips, bark nuggets, or shredded leaves. These materials provide excellent moisture retention and gradually break down, enriching the soil with organic matter.
- Prepare the Area: Clear any weeds, grass, or debris from the area around the base of the tree. Create a circular or donut-shaped bed approximately 2-4 inches deep and extend it to the outer edge of the tree’s canopy.
- Apply the Mulch: Spread a layer of mulch around the tree, ensuring a thickness of 2-4 inches. Keep the mulch a few inches away from the trunk to prevent moisture buildup and potential rot.
- Avoid Piling Mulch Against the Trunk: Piling mulch against the trunk can create a moist environment that encourages rot and provides a hiding place for pests. Maintain a gap between the mulch and the base of the tree, known as the “mulch-free zone.”
- Extend the Mulch Bed: Extend the mulch bed to the outer edge of the tree’s canopy or even slightly beyond. This helps create a larger area for moisture retention, weed suppression, and protection of the tree’s root zone.
- Replenish the Mulch: Over time, the mulch will break down and decompose. Monitor the mulch depth annually and replenish as needed to maintain a consistent 2-4 inch layer. This will ensure continued benefits and protection for the tree.
- Monitor Moisture Levels: Check the soil moisture regularly, especially during dry periods. The mulch helps retain moisture, but it’s important to ensure that the soil doesn’t become waterlogged or excessively dry. Adjust watering accordingly.
Mulching around the base of your Japanese Maple tree provides multiple benefits, including conserving moisture, reducing weed competition, and improving soil health. It also adds a decorative element to your landscape. By following these steps, you’ll create a nurturing environment for your tree and help it thrive for years to come.
Pruning and Shaping Your Japanese Maple Tree
Pruning and shaping your Japanese Maple tree is important for maintaining its health, promoting proper growth, and enhancing its aesthetic appeal. Proper pruning helps to remove dead or diseased branches, improve air circulation, and shape the tree’s silhouette. Here are some guidelines for pruning and shaping your Japanese Maple:
- Timing: The best time to prune a Japanese Maple is during late winter or early spring, while the tree is still dormant. Avoid pruning during the summer as the sap flow is high, making the tree more susceptible to stress and disease.
- Tools: Ensure you have the proper tools for pruning, including sharp bypass pruners, clean pruning saws, and loppers. Disinfect the tools before use to minimize the risk of spreading diseases between cuts.
- Dead and Diseased Branches: Begin by removing any dead, damaged, or diseased branches. Cut these branches cleanly just above the branch collar, which is the slightly swollen area where the branch attaches to the main trunk.
- Crossing and Rubbing Branches: Identify any branches that are crossing or rubbing against each other. These can cause damage and create entry points for diseases. Remove the smaller or less desirable branch to improve structure and airflow.
- Thinning: Thin out overcrowded branches by selectively removing branches to open up the tree’s canopy. This improves sunlight penetration and allows for better air circulation, reducing the risk of fungal diseases.
- Structural Pruning: Shape the tree by pruning for structural integrity and desired form. Begin training the tree early by selectively removing or shortening branches to create a balanced and aesthetically pleasing shape.
- Limits on Pruning: Avoid excessive pruning, especially drastic “topping” or removing large portions of the tree’s canopy. Japanese Maples have a delicate structure, and drastic pruning can weaken the tree and cause it to lose its natural grace and form.
- Clean Cuts: Use clean and sharp cutting tools to make cuts. Avoid tearing or splintering the bark, as this can create entry points for diseases. Make smooth cuts just outside the branch collar to facilitate proper healing.
- Regular Maintenance: Regularly monitor and prune your Japanese Maple, focusing on corrective pruning and shaping to maintain the desired size and form. Remember to avoid heavy pruning during the summer to minimize stress on the tree.
Pruning and shaping your Japanese Maple tree requires care and attention to maintain its health and beauty. By following these guidelines, you can promote proper growth, improve structural integrity, and enhance the overall appearance of your tree.
Caring for Your Japanese Maple Tree After Planting
After planting your Japanese Maple tree, it’s essential to provide proper care to ensure its continued growth and health. Here are some important care practices to follow:
- Watering: Continue to water your Japanese Maple tree regularly, especially during the first year. Deep, thorough watering is preferable to frequent shallow watering. Monitor soil moisture to prevent overwatering or allowing the soil to dry out excessively.
- Fertilizing: Japanese Maples generally do not require heavy fertilization. However, you can provide a balanced slow-release fertilizer in early spring to provide essential nutrients. Follow the instructions on the fertilizer packaging for appropriate application rates.
- Mulching: Maintain a layer of organic mulch around the base of the tree. Mulch helps to retain moisture, regulate soil temperature, and suppress weed growth. Ensure the mulch does not directly touch the trunk to prevent moisture buildup and potential rot.
- Protection from Extreme Conditions: During harsh weather conditions, such as strong winds or frost, protect your Japanese Maple tree. Shield it with a burlap cover or create windbreaks to minimize stress and prevent damage.
- Pruning: Regularly inspect your tree for any dead, diseased, or crossing branches and promptly prune them. Shape the tree as desired during the dormant season, following proper pruning techniques to maintain its structure and aesthetics.
- Pest and Disease Control: Monitor your tree for any signs of pests or diseases, such as aphids, scale insects, or fungal infections. Treat infestations or diseases promptly with appropriate organic or chemical control methods to prevent further damage.
- Sun and Shade: Monitor your tree’s exposure to sunlight and make any necessary adjustments. Japanese Maples prefer partial shade to filtered sunlight, especially during the hottest part of the day. Too much direct sunlight can scorch the leaves, while inadequate sunlight can result in weak growth.
- Regular Inspections: Regularly inspect your Japanese Maple tree for any warning signs of stress or decline. Look for wilting foliage, discoloration, or abnormal growth. Early detection allows for prompt intervention and treatment, enhancing the tree’s chances of recovery.
- Seasonal Care: Adjust your care practices according to the seasons. Be mindful of temperature extremes, water requirements, and any specific needs your Japanese Maple may have during different times of the year.
Proper care is vital for the long-term health and vitality of your Japanese Maple tree. By providing regular watering, mulching, pruning, and monitoring for pests and diseases, you can ensure that your tree thrives and remains a beautiful focal point in your landscape for years to come.
Common Problems and Solutions for Japanese Maple Trees
While Japanese Maple trees are generally resilient, they can still face certain problems that can affect their health and appearance. By being aware of these common issues and implementing appropriate solutions, you can help your Japanese Maple thrive. Here are some problems you may encounter and their respective solutions:
- Leaf Scorch: Leaf scorch, characterized by browning or crisping of the leaf edges, can occur from excessive sun exposure or inadequate watering. Protect your tree from intense sunlight, especially during the afternoon, and ensure proper watering to maintain soil moisture.
- Aphids: Aphids are common sap-sucking insects that can infest Japanese Maples. Control them by spraying a strong stream of water to dislodge them or use insecticidal soap. Encourage natural predators like ladybugs to help keep aphid populations in check.
- Scale Insects: Scale insects are tiny pests that attach themselves to branches and suck sap from the tree. Use horticultural oil or insecticidal soap applied during the dormant season to control the infestation and prevent their spread.
- Root Rot: Root rot can occur if the soil becomes waterlogged, leading to decay and poor root function. Ensure proper drainage and avoid overwatering. If root rot is suspected, remove affected roots and replant in well-drained soil.
- Twig Blights: Fungal diseases like twig blights can cause dieback of branches. Prune and destroy affected branches, ensuring clean cuts below the infected areas. Apply a fungicide as directed to prevent further spread.
- Leaf Spot: Leaf spot diseases can cause brown or black spots on the leaves. Rake up and dispose of fallen leaves to reduce the spread of the fungus. Apply a fungicide labeled for leaf spot prevention if the problem persists.
- Winter Damage: In colder regions, Japanese Maples can experience winter damage like frozen branches or bark splitting. Protect the tree from harsh winter conditions by wrapping it in burlap or applying a layer of mulch around the base for insulation.
- Girdling Roots: Girdling roots can encircle the trunk, constricting the flow of water and nutrients. Corrective pruning and/or root pruning may be required to address girdling roots and improve the tree’s health and stability.
- Improper Pruning: Improper pruning practices, such as heavy pruning during the summer or excessive topping, can weaken the tree and disrupt its natural form. Follow correct pruning techniques and prune during the dormant season.
- Improper Planting: Planting the tree too deep or failing to adequately prepare the soil can lead to stress and poor growth. Ensure proper planting depth, provide well-drained soil, and follow recommended planting guidelines.
By being attentive to these common problems and implementing the appropriate solutions, you can help your Japanese Maple tree overcome challenges and maintain its health and beauty. Regular monitoring and proactive care will contribute to the long-term success of your tree in your landscape.