
Materials Needed
To make a chimney sweep broom, you will need the following materials:
- A wooden dowel or broom handle
- Bristles made from natural materials such as straw or stiff bristle brush
- Heavy-duty twine or wire
- A drill with a small drill bit
- Scissors or wire cutters
- Sandpaper or a file
- A tape measure or ruler
- A pencil or marker
- Protective gloves and goggles
These materials can be easily obtained from your local hardware store or online. It’s important to choose high-quality materials that are durable and able to withstand the rigors of chimney sweeping.
When selecting the wooden dowel or broom handle, opt for a sturdy and ergonomic design that fits comfortably in your hand. The length of the handle should be sufficient to reach the entire length of the chimney, while still allowing you to maintain control and maneuverability.
For the bristles, straw or stiff bristle brushes are ideal as they effectively capture soot and debris without scratching the chimney’s interior. Ensure the bristles are of sufficient length and density to effectively clean the chimney.
Heavy-duty twine or wire is necessary for securely attaching the bristles to the handle. It’s important to choose a strong and durable material that will withstand the force exerted during sweeping.
Lastly, protective gloves and goggles are crucial to ensure your safety during the chimney sweeping process. The gloves will protect your hands from potential cuts and splinters, while the goggles will shield your eyes from debris and dust particles.
Once you have gathered all the necessary materials, you are ready to proceed to the next step of assembling the chimney sweep broom.
Step 1: Gathering the Materials
Before you can start making your chimney sweep broom, it’s important to gather all the necessary materials. This step ensures that you have everything you need within reach, making the process smoother and more efficient.
First, make a list of the materials needed. This list should include a wooden dowel or broom handle, bristles made from natural materials such as straw or stiff bristle brush, heavy-duty twine or wire, a drill with a small drill bit, scissors or wire cutters, sandpaper or a file, a tape measure or ruler, a pencil or marker, and protective gloves and goggles.
Next, head to your local hardware store or browse online to purchase the supplies. When selecting the wooden dowel or broom handle, look for a sturdy and ergonomic design that fits comfortably in your hand. Consider the length of the handle, ensuring it is long enough to reach the entire length of the chimney while still allowing for control and maneuverability.
For the bristles, choose materials like straw or stiff bristle brushes that effectively capture soot and debris without scratching the chimney’s interior. Evaluate the length and density of the bristles to ensure they are suitable for chimney cleaning.
Heavy-duty twine or wire, such as nylon twine or steel wire, is essential for securely attaching the bristles to the handle. Opt for a strong and durable material that can withstand the force exerted during sweeping to ensure a secure attachment.
Additionally, gather the necessary tools for the assembly process. This includes a drill with a small drill bit to create holes in the handle for attaching the bristles, scissors or wire cutters for cutting the twine or wire, and sandpaper or a file for smoothing any rough edges.
Lastly, don’t forget to equip yourself with protective gloves and goggles. These items will ensure your safety during the chimney sweeping process by protecting your hands from potential cuts and splinters, as well as shielding your eyes from debris and dust particles.
Once you have all the materials at hand, you are ready to move on to the next step of assembling the chimney sweep broom. With everything prepared, you are now one step closer to having a functional and effective chimney sweep broom of your own creation.
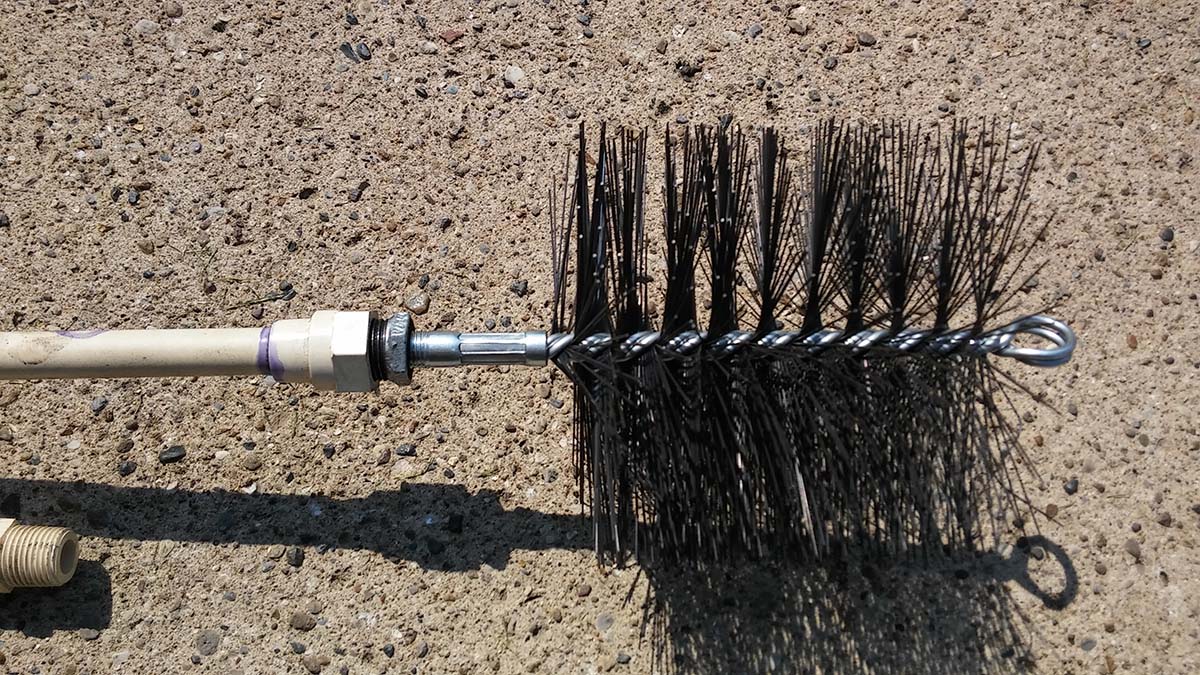
Step 2: Assembling the Bristles
Once you have gathered all the materials needed to make a chimney sweep broom, it’s time to move on to assembling the bristles. This step is crucial as it determines the effectiveness and durability of your broom.
Start by taking the bristles, whether it’s straw or stiff bristle brushes, and align them in a uniform and neat manner. Trim any excess length if necessary to ensure that all bristles are of equal size. This will help in achieving an even distribution of bristles on your broom.
Next, measure and mark the desired width of the bristle bundle on the wooden dowel or broom handle. Use a tape measure or ruler to ensure accuracy. The width should be slightly wider than the bristles to provide adequate support and stability.
With the width marked, drill small holes along the marked line on the handle. Make sure the drill bit size matches the size of your heavy-duty twine or wire, as this is what will be threaded through the holes to secure the bristles.
Take the bristle bundle and position it over the drilled holes on the handle. Insert the twine or wire through one hole, across the bristles, and then through the corresponding hole on the other side. Make sure the twine or wire is pulled tightly to hold the bristles securely in place.
Repeat this process for each set of holes, ensuring that the bristle bundle remains aligned throughout. As you go, periodically tighten the twine or wire to maintain a secure attachment. Use scissors or wire cutters to trim any excess twine or wire.
Once you have threaded and secured the bristles on the entire length of the handle, give them a gentle tug to ensure they are tightly fastened. Adjust as needed to ensure all bristles are evenly distributed and tightly held.
Finally, use sandpaper or a file to smooth any rough edges on the handle and around the drilled holes. This will prevent any splinters from forming and make the broom more comfortable to hold during use.
By following these steps, you have successfully assembled the bristles onto the handle of your chimney sweep broom. The next step is to attach the bristles securely to the handle, which will be covered in the following section.
Step 3: Preparing the Handle
Before attaching the bristles to the handle of your chimney sweep broom, it is important to properly prepare the handle to ensure a secure and stable connection. This step will help ensure that your broom functions effectively and lasts for a long time.
Start by examining the wooden dowel or broom handle for any rough or uneven sections. Use sandpaper or a file to smooth out these imperfections, creating a more comfortable grip and reducing the risk of splinters.
If the handle is too long for your liking, this is a good time to trim it down to your desired length. Measure and mark the desired length using a tape measure or ruler, and use a saw to carefully cut the handle, ensuring a clean and straight cut.
In addition to sanding and trimming, consider adding a protective finish to the handle. This can be accomplished by applying a coat of varnish or wood sealant. This not only enhances the appearance of the handle but also helps protect it from moisture and prolong its lifespan.
Allow the varnish or sealant to dry completely before moving on to the next step. Follow the manufacturer’s instructions regarding drying time to ensure optimal results.
Once the handle is sanded, trimmed, and protected with a finish, it is now ready for the attachment of the bristles. Proceed to the next step to learn how to securely fasten the bristles to the handle.
Remember, taking the time to properly prepare the handle ensures that your chimney sweep broom is sturdy, comfortable to use, and able to withstand the rigors of chimney cleaning.
Step 4: Attaching the Bristles to the Handle
With the bristles prepared and the handle of your chimney sweep broom ready to go, it’s time to attach the bristles securely to the handle. This step ensures that the bristles remain in place during use, allowing for effective chimney cleaning.
Begin by positioning the bristle bundle over the drilled holes on the handle. Make sure that the bristles are evenly spread out and aligned along the width of the handle.
Take the heavy-duty twine or wire and thread it through one of the holes on the handle, then weave it through the bristles, and finally thread it through the corresponding hole on the other side. Ensure that the twine or wire is pulled tight to hold the bristles firmly in place.
Repeat this process for each set of holes along the handle, making sure to maintain an even distribution of bristles and a secure attachment throughout the length of the broom.
As you attach the bristles, periodically tighten the twine or wire to keep the bristles secure. This will prevent them from becoming loose or falling out while you are using the broom.
If using twine, tie a tight knot at the end to secure it in place. If using wire, twist the ends together tightly and use wire cutters to trim any excess length.
After the bristles are securely attached, give them a gentle tug to ensure they are tightly fastened to the handle. Make any necessary adjustments to ensure the bristles are evenly distributed and properly aligned.
By carefully attaching the bristles to the handle, you are taking a crucial step towards completing your chimney sweep broom. The next step involves securing the bristles further to ensure they remain in place, which will be covered in the following section.
Step 5: Securing the Bristles
After attaching the bristles to the handle of your chimney sweep broom, it’s essential to take the time to secure them further. This step ensures that the bristles remain firmly in place during the sweeping process and prevents them from coming loose or falling out.
Start by inspecting the attachment points where the twine or wire holds the bristles to the handle. Check for any signs of looseness or gaps between the bristles and the handle.
If you notice any areas that need extra reinforcement, carefully use a small drill bit to create additional holes near those spots. Make sure the new holes are positioned evenly and adequately spaced apart.
Once you have created the additional holes, thread the twine or wire through them and weave it through the bristles and existing holes. Pull it tightly to secure the bristles and create a strong connection between the bristles and the handle.
Continue this process for any other areas that require extra reinforcement. The goal is to ensure all parts of the bristle bundle are secured tightly to the handle.
If using twine, tie knots at the end of each section to keep the twine from unraveling. For wire, twist the ends together tightly and trim any excess length with wire cutters.
After securing the bristles, give them a firm tug to test their stability. If any bristles feel loose, adjust the twine or wire accordingly to enhance their grip on the handle.
It’s important to note that while securing the bristles, you want to maintain an even and uniform appearance. Ensure the bristles are evenly distributed along the width and length of the broom for optimal performance.
By taking the time to secure the bristles, you are guaranteeing that your chimney sweep broom is ready for effective use. The final steps of cleaning and adding finishing touches will help complete the process, which will be covered in the following sections.
Step 6: Cleaning and Finishing Touches
Once the bristles of your chimney sweep broom are securely attached to the handle, it’s time to give them a final cleaning and add some finishing touches. This step ensures that your broom is clean, presentable, and ready for effective chimney sweeping.
Start by inspecting the bristles for any loose or stray fibers. Use your fingers to gently comb through the bristles, removing any debris or tangled fibers. This will ensure that your broom is free from loose bristles that could potentially scatter or damage the chimney during use.
Next, give the bristles a thorough cleaning to remove any dust or dirt. You can do this by gently tapping the broom on the ground or against a hard surface. This will help dislodge any loose particles from the bristles.
If your broom is particularly dirty, you can also rinse the bristles under running water. Use your fingers to comb through the bristles while rinsing, ensuring that all dirt and grime are removed. Allow the bristles to air dry completely before proceeding.
Once the bristles are clean and dry, check the handle for any rough edges or splinters. Use sandpaper or a file to gently smooth out any imperfections, making the handle more comfortable to grip during use.
If desired, you can also personalize your chimney sweep broom by adding decorative elements. Consider wrapping the handle with colorful twine, ribbon, or fabric to enhance its appearance. Alternatively, you can paint or stain the handle to match your aesthetic preferences.
Lastly, take a few moments to inspect the overall appearance of your chimney sweep broom. Ensure that the bristles are evenly distributed and aligned parallel to the handle. Adjust as necessary to achieve a uniform and professional-looking broom.
By cleaning the bristles and adding finishing touches, you are giving your chimney sweep broom that extra touch of professionalism and functionality. With the final step of testing the broom, you will be ready to put it to use in sweeping your chimney effectively and efficiently.
Step 7: Testing the Chimney Sweep Broom
After assembling and preparing your chimney sweep broom, the final step is to test its effectiveness by putting it to use in sweeping your chimney. This step ensures that your broom is functioning properly and can effectively remove soot and debris from your chimney.
Before you begin sweeping, make sure to take the necessary safety precautions. Wear protective gloves and goggles to shield yourself from soot and debris. If possible, cover the area surrounding the fireplace or stove with a drop cloth to catch any falling debris.
Start by inserting the broom into the chimney, making sure it reaches all the way to the bottom. Firmly hold the handle and begin to sweep the brush in an up-and-down motion, using moderate force to dislodge any built-up soot and debris.
As you sweep, be attentive to any resistance or obstacles that may indicate a blockage or creosote buildup. Pay close attention to any unusual sounds or obstructions that may hinder the sweeping process.
Continue sweeping the chimney from top to bottom, ensuring you cover all areas thoroughly. Use a flashlight or chimney camera if available to inspect and ensure that the chimney is properly cleaned.
If you encounter a particularly stubborn buildup or blockage, consider using a chimney sweep brush extension or consulting a professional chimney sweep for assistance. They have the necessary tools and expertise to handle more challenging cleaning situations.
Once you have completed the sweeping process, carefully remove the broom from the chimney, making sure to minimize any contact with soot or debris. Inspect the broom for any signs of damage or wear, and address any necessary repairs or cleaning before storing it for future use.
Properly disposing of the debris collected from the chimney is important. Make sure to follow local regulations and guidelines for disposing of chimney sweep waste. It’s recommended to seal the debris in a bag or container before disposal to prevent any potential harm to the environment.
By thoroughly testing your chimney sweep broom and completing the sweeping process, you can ensure that your chimney is free from soot and debris, allowing for safe and efficient operation of your fireplace or stove.