
Choosing the Right Carpet Squares
When it comes to making an area rug from carpet squares, one of the first steps is choosing the right carpet squares for your project. The type of carpet squares you select will determine the overall look, feel, and durability of your rug.
First, consider the color and pattern of the carpet squares. Think about the color scheme and style of the room where the area rug will be placed. Do you want a bold, vibrant rug that adds a pop of color to the space? Or do you prefer a more subtle, neutral rug that complements the existing decor? Take some time to browse through different options and envision how each carpet square would look in your room.
In addition to the color and pattern, consider the texture and material of the carpet squares. Do you want a plush and soft rug that feels luxurious underfoot? In that case, look for carpet squares with a higher pile height and a more cushioned texture. Alternatively, if you’re looking for a rug in a high-traffic area and want something durable and easy to clean, opt for carpet squares made from a sturdy material like nylon or polyester. These materials are known for their resilience and stain resistance.
Another important factor to consider is the size of the carpet squares. Measure the space where you plan to place the rug and choose carpet squares that will fit well within that area. Keep in mind that you can always trim the squares to adjust their size, but it’s easier to start with squares that are close to the desired dimensions.
Lastly, consider your budget when choosing carpet squares. Prices can vary depending on the brand, quality, and size of the squares. Set a budget that you are comfortable with and explore options within that range. It’s worth investing in quality carpet squares that will withstand wear and tear over time.
By taking the time to choose the right carpet squares for your area rug project, you can ensure that you end up with a rug that not only looks great but also meets your functional needs. Whether you prefer a colorful statement piece or a durable and practical rug, there are carpet squares available to suit every style and budget.
Preparing and Measuring the Space
Before you start making your area rug from carpet squares, the first step is to prepare the space where the rug will be placed and accurately measure the area. Proper preparation and measurements ensure that the rug will fit well and enhance the overall aesthetic of the room.
Start by clearing the space where you plan to place the rug. Remove any furniture, decorations, or other obstacles that may be in the way. This will allow you to accurately measure the area and ensure that the rug fits seamlessly into the room.
Next, thoroughly clean the floor surface. Vacuum or sweep to remove any dust, dirt, or debris. If necessary, spot clean or deep clean the floor to ensure a clean and smooth surface for the rug.
Once the space is clear and clean, carefully measure the area where the rug will be placed. Use a measuring tape or a ruler to measure the length and width of the space. It’s essential to be as precise as possible to get accurate measurements.
Consider the placement of furniture or other elements in the room when measuring the space. You may want to leave some buffer space between the rug and the walls or furniture for a visually balanced look. Measure from the edges of these elements to determine the exact dimensions of the rug.
If the space has an irregular shape, such as an angled wall or a curved corner, take additional measurements to account for these unique features. Trace the outline of the space on a piece of paper and measure each section separately. This will help you create a template for cutting the carpet squares later on.
Once you have the accurate measurements, make a note of them for reference during the next steps of the rug-making process. Having precise measurements will make it easier to choose the right number of carpet squares and determine the arrangement that will best fit the space.
By properly preparing the space and measuring the area, you are setting a solid foundation for creating an area rug that will perfectly fit and enhance the room. Take your time and ensure accurate measurements, as this will ultimately determine the success of your rug-making project.
Cleaning and Preparing the Carpet Squares
Before you start assembling your area rug from carpet squares, it’s important to ensure that the carpet squares themselves are clean and properly prepared. This step will help ensure the longevity and overall appearance of your rug.
First, inspect each individual carpet square for any signs of dirt, stains, or damage. If you notice any areas that are soiled or stained, it’s best to address them before moving forward. You can use a carpet cleaner or a mild detergent mixed with water to spot clean the affected areas. Gently dab the cleaner onto the stains using a clean cloth or sponge, and then blot the area to remove any excess moisture.
After spot cleaning, allow the carpet squares to fully dry before proceeding. This will prevent any residual moisture from causing mildew or mold growth later on. You can leave them to dry naturally in a well-ventilated area, or you can use a fan or dehumidifier to speed up the drying process.
In addition to cleaning, it’s also crucial to prepare the carpet squares by removing any backing material or adhesive that may be attached to them. This backing can interfere with the proper placement and adherence of the carpet squares when assembling the rug. Carefully peel off any backing or adhesive residue, ensuring that the surface of the carpet squares is clean and smooth.
Once the carpet squares are clean and free from any backing or adhesive, you can lay them out to familiarize yourself with their size, shape, and pattern. Arrange them in the desired pattern or design for your rug, considering how the colors, patterns, and textures complement each other.
At this stage, you may also need to trim the carpet squares to fit your desired dimensions or shape, based on the measurements you took earlier. Use a utility knife or a pair of sharp scissors to carefully trim the edges, ensuring clean and straight cuts.
By thoroughly cleaning and preparing the carpet squares, you are creating a solid foundation for your area rug. Ensuring that they are clean, dry, and free from any backing or adhesive will make the assembly process smoother and ensure a visually appealing and durable finished product.
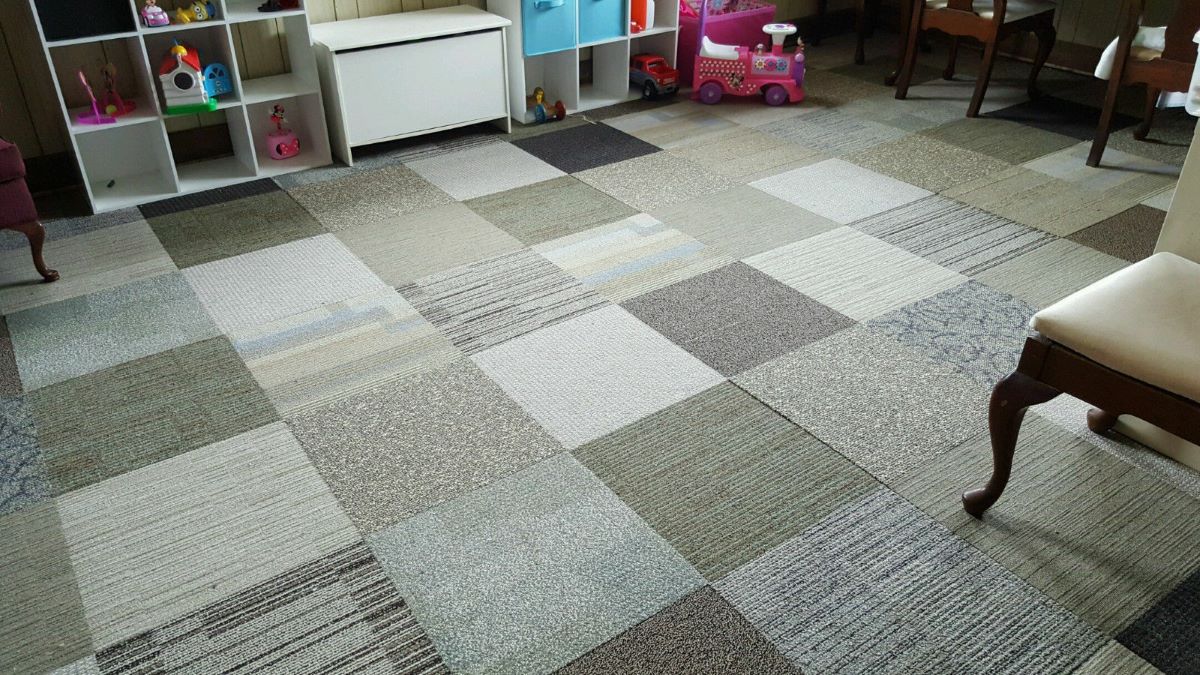
Arranging the Carpet Squares
Once you have cleaned and prepared your carpet squares, it’s time to start arranging them to create your desired pattern or design for the area rug. This step allows you to get creative and customize the rug to match your unique style and aesthetic preferences.
Begin by laying out the carpet squares in the designated area where the rug will be placed. Start with a corner or a focal point and work your way outward. This will help you maintain a consistent pattern and ensure that the design is balanced throughout the rug.
Consider the layout options available for your carpet squares, such as a straight grid, a brick pattern, or a random mix of colors and patterns. Take into account the shape and size of the carpet squares, as well as the overall dimensions of the rug. Experiment with different arrangements to find the one that best suits your vision.
As you arrange the carpet squares, pay attention to the alignment and spacing. Make sure that the edges of each square are flush with one another to create a seamless and polished look. Use a ruler or a straight edge as a guide to ensure straight lines and even spacing between the squares.
Additionally, take note of the pattern and direction of the carpet squares. If they have a specific orientation, such as a directional pattern or texture, ensure that they are all facing the same way. This will create a cohesive and visually appealing design.
It’s also a good idea to stand back and assess the overall look of the rug as you go along. This will help you identify any areas that may need adjustment or improvement. Don’t be afraid to make changes or switch the placement of certain carpet squares if it enhances the overall design.
Remember, arranging the carpet squares is your opportunity to get creative and bring your vision to life. Take your time, be patient, and don’t be afraid to think outside the box. The more thought and effort you put into this step, the more unique and visually stunning your area rug will be.
Securing the Carpet Squares
Now that you have arranged the carpet squares to create your desired pattern or design, the next step is to secure them in place to ensure that your area rug stays intact and doesn’t shift over time.
There are a few methods you can use to secure the carpet squares. One popular option is using carpet tape or adhesive. Apply strips of carpet tape along the edges of each square, making sure to leave a small gap between the squares for flexibility. Press the squares firmly onto the tape to create a strong bond. This method works well for low to medium traffic areas.
An alternative method is using a double-sided carpet adhesive or carpet tile adhesive squares. These adhesives are specifically designed for carpet tiles and provide a stronger bond compared to carpet tape. Follow the manufacturer’s instructions to apply the adhesive to the back of each carpet square, then press the squares firmly onto the floor in the desired pattern. This method is more suitable for high traffic areas or if you want a more permanent installation.
If you prefer a non-adhesive method, you can also use a rug gripper pad or a non-slip rug pad to secure the carpet squares. These pads provide grip and prevent the rug from slipping or sliding on the floor. Simply cut the pad to size and place it under the entire rug or along the edges of the carpet squares.
Regardless of the method you choose, it’s important to ensure that the carpet squares are securely attached and that there are no loose or lifting edges. This will help prevent trips and falls and maintain the overall appearance of your area rug.
Additionally, if you have any uneven floor surfaces, it may be necessary to use a thin layer of adhesive or double-sided tape underneath the carpet squares to provide stability and prevent any movement.
Take your time during this process and make sure each square is properly secured. Once you have completed this step, you can move on to the next phase of finishing the edges and adding any additional features you desire.
Trimming and Finishing the Edges
After securing the carpet squares in place, the next step in creating your area rug is to trim and finish the edges. This step gives your rug a polished and professional look while also ensuring that the edges are neat and tidy.
Start by inspecting the edges of the carpet squares to identify any uneven or excess material. Use a straight edge ruler or a T-square to guide your cuts and ensure clean and straight lines. You can use a utility knife or a pair of sharp scissors to trim the edges, being careful not to cut into the neighboring squares.
If you prefer a clean and seamless look, you can trim the edges so that they align perfectly with the adjacent squares. This creates a straight and uniform edge for your rug. Alternatively, if you want a more decorative finish, you can leave a small border of carpet around the perimeter of the rug. The size of the border is entirely up to your personal preference.
Once you have trimmed the edges, you can consider different methods for finishing them. One option is to use a binding tape or binding adhesive to create a finished edge. Binding tape is a fabric strip with adhesive backing that is placed along the trimmed edge of the rug. It not only provides a clean and finished look but also helps to protect the edges from fraying.
If you prefer a more decorative finish, you can add a decorative trim or fringe to the edges of your rug. These trims or fringes can be sewn or glued onto the trimmed edge, creating a unique and personalized touch.
Another option for finishing the edges is to fold the excess carpet inward, creating a tucked edge. This method requires some sewing skills or the use of a carpet binding machine. The folded edge can then be secured with carpet binding tape or adhesive to create a clean and finished look.
Take your time when trimming and finishing the edges, as precision and attention to detail are key for achieving a professional-looking result. Ensure that all edges are neat, straight, and securely finished, enhancing the overall appearance and durability of your area rug.
Adding a Non-Slip Backing
Once you have trimmed and finished the edges of your area rug, it’s essential to consider adding a non-slip backing to prevent any accidental slips or movement of the rug. Non-slip backing provides an extra layer of safety and stability, keeping your rug in place even in high-traffic areas.
There are various non-slip backing options available, including rug pads, rug grippers, and adhesive tapes. Rug pads are a popular choice as they provide cushioning and grip. They are typically made of rubber or latex materials with a textured surface that helps to prevent the rug from sliding on the floor.
To add a rug pad, simply measure and cut it slightly smaller than the size of your rug to ensure that it remains hidden under the edges. Place the rug pad on the floor and carefully position your rug on top. The grip of the rug pad will help keep your area rug in place, while the extra cushioning provides additional comfort underfoot.
Rug grippers are small adhesive strips or pads that can be attached to the corners or edges of the rug. These grippers have a tacky surface that adheres to both the rug and the floor, preventing any slipping or sliding. They are a convenient solution, especially if you don’t want to use a rug pad for the entire rug.
Another option is adhesive tapes specifically designed for securing rugs. These tapes have a strong adhesive on both sides and are placed on the underside of the rug along the edges or corners. They provide a firm grip, keeping the rug in place and preventing any unwanted movement.
When choosing a non-slip backing, consider the type of flooring you have and the specific needs of your space. Some backing materials may be more suitable for certain flooring types, such as hardwood or tile, while others may work well on carpeted floors. Additionally, consider the level of foot traffic and the size of your rug when selecting a non-slip solution.
By adding a non-slip backing to your area rug, you not only ensure the safety of yourself and others but also protect your rug from potential damage caused by shifting or sliding. It’s an important final step in completing your rug-making project and will provide long-lasting benefits.
Maintaining and Cleaning the Area Rug
Maintaining and cleaning your area rug is essential to keep it looking fresh, prolong its lifespan, and ensure that it continues to enhance the aesthetic appeal of your space. Proper care and regular cleaning will help remove dirt, prevent stains, and maintain the rug’s overall condition.
Regular maintenance of your area rug includes vacuuming on a weekly basis. Use a vacuum cleaner with a brush attachment or a carpet-specific vacuum cleaner to thoroughly and gently clean the rug. Be sure to vacuum both sides of the rug to remove any dirt or debris that may have accumulated.
In addition to regular vacuuming, it’s important to address spills and stains as soon as they occur. Blot the affected area immediately with a clean cloth or paper towel to absorb as much liquid as possible. Avoid rubbing or scrubbing, as this can spread the stain and damage the fibers. If needed, use a mild carpet cleaner or a mixture of vinegar and water to treat the stain. Always test any cleaning products on a small, inconspicuous area of the rug first to ensure they don’t cause discoloration or damage.
To prevent excessive wear and tear, consider rotating your area rug every few months. This helps distribute foot traffic and sun exposure evenly, preventing any one area of the rug from becoming worn or faded. Additionally, use furniture pads or coasters under heavy furniture to prevent indentations and protect the rug’s fibers.
If your area rug is placed in a high-traffic area, consider having it professionally cleaned every 1-2 years. Professional cleaning can remove deep-set dirt and stains that regular vacuuming may not be able to fully address. Be sure to hire a reputable rug cleaning service that specializes in the specific material and construction of your rug.
Lastly, take into account the specific care instructions provided by the manufacturer for your area rug. Different materials and constructions may require different cleaning methods or restrictions, so it’s important to follow the recommended care guidelines to maintain the rug’s appearance and integrity.
By maintaining and cleaning your area rug regularly, you can ensure that it remains a beautiful and functional addition to your space for years to come. Remember to take preventative measures, address stains promptly, and follow the appropriate care instructions to keep your rug looking its best.