
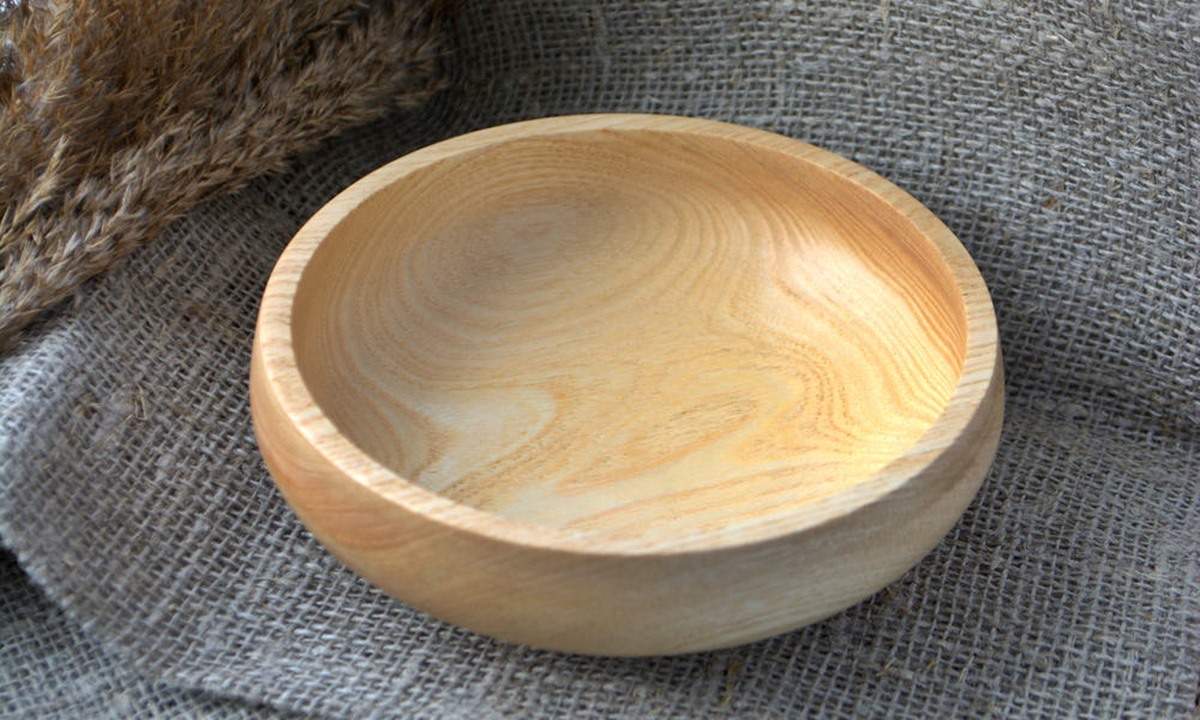
Choosing the Right Wood
Choosing the right type of wood for making a wood bowl is essential to ensure its durability, aesthetics, and functionality. Different woods have varying characteristics that can affect the final outcome of your bowl. Here are some factors to consider when selecting the wood for your project:
- Type of Wood: There are numerous types of wood available, each with its own unique grain pattern and color. Some popular choices for wood bowls include maple, cherry, walnut, and oak. Consider the characteristics of each wood species and choose one that suits your preferences and the intended use of the bowl.
- Wood Moisture Content: It is important to work with wood that has been properly dried to prevent warping or cracking. Look for wood that has a moisture content of around 8-10%, as this is the ideal range for woodworking projects. You can use a moisture meter to ensure the wood is properly dried.
- Grain Orientation: The orientation of the grain in the wood can impact the strength and stability of the bowl. For a more stable bowl, choose wood with straight and even grain patterns. Avoid wood with knots or irregularities that may weaken the bowl’s structure.
- Hardness: Consider the hardness of the wood species you are using. Softer woods may be easier to work with, but they may also be more prone to dents and scratches. Harder woods, on the other hand, can withstand more wear and tear and provide a long-lasting finish.
- Availability: Depending on your location and access to different types of wood, availability may be a factor in your decision-making process. It’s important to choose a wood that you can easily source or purchase from a reliable supplier.
By carefully considering these factors, you can select the right type of wood that meets your requirements and enhances the beauty and functionality of your wood bowl project. Remember to also consider your own woodworking skills and experience when choosing the wood, as some types may be more challenging to work with than others.
Preparing the Wood
Before you begin crafting your wood bowl, it’s important to properly prepare the wood to ensure a successful project. Preparing the wood involves several steps that will help enhance its workability and longevity. Here are the crucial steps involved in preparing the wood:
- Cut and Rough Shape: Start by cutting the wood into a rough shape, similar to the desired final shape of your bowl. Use a bandsaw or a chainsaw to remove any excess material and roughly shape the outer profile.
- Stabilize the Wood: If you are working with freshly cut or green wood, it’s important to stabilize it to prevent cracking and warping. One method is to paint the ends of the wood to slow down the drying process and allow the moisture to leave the wood evenly.
- Seal the Wood: To prevent the wood from drying too quickly or absorbing moisture from the surrounding environment, seal the ends of the wood with a commercial wood sealer or wax. This will help control the moisture content and minimize the risk of cracking.
- Rough Turn: Mount the wood blank on a lathe and start rough turning the outer profile of the bowl using a bowl gouge or a spindle roughing gouge. Take your time to shape the exterior of the bowl, keeping in mind the design and dimensions you want to achieve.
- Prepare the Bowl Blank: Once the outer shape is roughed out, cut a tenon or recess on the base of the bowl blank to secure it on a chuck or faceplate. This will allow you to hollow out the bowl later on.
- Dry the Wood: After rough turning, it’s important to let the wood dry further to stabilize its moisture content. Place the rough-turned bowl in a controlled environment, such as a paper bag or a wood shavings-filled box, and let it dry for several weeks or months depending on the wood species and thickness.
By following these steps to prepare the wood, you can ensure that it is properly stabilized and ready for the next stages of bowl making. Proper preparation will not only enhance the workability of the wood but also minimize the risk of cracking or warping in the finished bowl. Take your time and be patient during the preparation process to achieve the best results.
Designing the Bowl
Designing the bowl is a crucial step in the wood bowl-making process, as it determines the overall aesthetic appeal and functionality of the final product. Here are some key considerations when designing your wood bowl:
- Bowl Shape: Decide on the shape of your bowl, considering both aesthetic appeal and functionality. Common bowl shapes include shallow bowls, deep bowls, and flared or natural-edge bowls. Determine the desired depth, width, and curvature of the bowl based on your personal preference and the wood’s characteristics.
- Bowl Rim: Consider the style of the rim, whether you prefer a thin or thick rim, a rolled rim, or a flat rim. The rim can greatly influence the overall appearance and feel of the bowl.
- Bowl Foot: Decide on the foot or base of the bowl. You can choose a simple flat bottom or incorporate a pedestal or decorative base to elevate the bowl.
- Decorative Elements: Think about adding decorative elements to your bowl, such as burn lines, lamination, or inlays. These details can elevate the visual appeal and add a unique touch to your wood bowl.
- Bowl Size: Consider the size of the bowl based on its intended use. A larger bowl may be suitable for serving or display purposes, while a smaller bowl can be used for personal use or as a decorative item.
- Ergonomics: Pay attention to the ergonomics of the bowl. Ensure that the bowl’s shape and size are comfortable to handle and use. Consider the weight distribution and balance of the bowl for ease of serving or holding.
Take time to sketch and visualize different design ideas for your wood bowl. Experiment with various shapes, sizes, and details to find the perfect design that suits your taste and woodworking skills. Keep in mind that the design should not only be visually appealing but also functional and practical for its intended purpose.
Marking and Cutting the Wood
Once you have designed the shape of your wood bowl, it’s time to mark and cut the wood to bring your design to life. This step requires precision and attention to detail to ensure accurate and clean cuts. Here are the key steps involved in marking and cutting the wood for your bowl:
- Mark the Center: Begin by marking the center of the bowl blank using a pencil or marking gauge. This will serve as a reference point for spindle mounting or chucking the wood on a lathe.
- Mount on the Lathe: Secure the wood blank on a lathe using either a faceplate or a chuck, depending on the size and shape of the bowl. Make sure it is mounted securely, as any wobble or movement can affect the accuracy of your cuts.
- Mark the Outer Profile: Use a pencil or a marking gauge to trace the outer profile of the bowl on the wood blank. This will guide you in making accurate cuts and shaping the bowl according to your design.
- Rough Cutting: Begin rough cutting the outer shape of the bowl using a bandsaw or a turning tool, such as a bowl gouge or a spindle roughing gouge. Follow the marked lines as closely as possible, but leave some extra material for refining the shape later on.
- Mark the Bowl Depth: Determine the desired depth of the bowl and mark it on the inside of the bowl blank. This will guide you in hollowing out the bowl to the desired depth.
- Hollowing Out the Bowl: Use a bowl gouge or a hollowing tool to slowly and carefully remove the material from the center of the bowl. Start from the center and work your way towards the rim, checking the depth with a caliper or a depth gauge as you progress.
- Refine the Shape: Once the bowl is hollowed out, use turning tools to refine the outer shape and create smooth curves and transitions. Pay attention to the details and make small adjustments as needed to achieve your desired design.
- Part Off: Finally, part off the bowl from the lathe using a parting tool or a handsaw, making sure to leave a small tenon or recess for the finishing and sanding process.
Take your time when marking and cutting the wood for your bowl to ensure accuracy and precision. Remember to always prioritize safety and use sharp tools for clean and smooth cuts. By following these steps, you will be well on your way to creating a beautifully shaped wood bowl.
Hollowing Out the Bowl
Hollowing out the bowl is a critical step in the wood bowl-making process, as it determines the depth and shape of the inside of the bowl. This step requires patience, precision, and the right tools to achieve the desired results. Here are the key steps involved in hollowing out the bowl:
- Bowl Mes(“http://www.example.com”)urements: Begin by determining the desired depth and width of the bowl. Measure and mark these dimensions on the inside of the bowl to serve as a guide during the hollowing process.
- Secure the Bowl Blank: Use a chuck or a faceplate to secure the bowl blank on the lathe. Make sure it is firmly held in place to prevent excessive movement during the hollowing process.
- Create a Pilot Hole: Use a spindle gouge or a drill bit to create a pilot hole in the center of the bowl. This will provide a starting point for removing the material and help maintain the symmetry of the bowl.
- Hollowing Tools: Select the appropriate tools for hollowing out the bowl. Bowl gouges, hollowing tools, or scrapers can be used depending on your preference and skill level. Make sure the tools are clean and sharp for optimal cutting performance.
- Begin Hollowing: Start hollowing by entering the pilot hole with the selected tool. Gradually work your way towards the rim, removing small amounts of material at a time. Use smooth and fluid movements, taking care not to dig too deep or apply excessive pressure.
- Check and Adjust Depth: Regularly check the depth of the bowl using a depth gauge or a caliper. Compare the measurement with your predetermined depth to ensure accuracy. Make adjustments as needed to achieve the desired depth.
- Shape the Inside: As you hollow out the bowl, consider the overall shape and design. Use the tools to shape the inside contours, creating smooth curves and transitions. Take your time and refine the shape gradually for the best results.
- Monitor Wall Thickness: Pay attention to the thickness of the bowl walls as you hollow. Aim for a consistent and even thickness throughout the bowl to maintain balance and structural integrity.
- Finish and Sand: Once the hollowing is complete, carefully remove the bowl from the lathe. Sand the inside of the bowl using a progression of sandpaper grits to achieve a smooth and refined surface.
Hollowing out the bowl requires practice and precision. Take your time, be patient, and focus on achieving the desired depth and shape. Remember to prioritize safety by wearing protective gear and following proper lathe and tool handling techniques. With practice and attention to detail, you will be able to create beautifully hollowed wood bowls.
Smoothing and Shaping the Bowl
After hollowing out the bowl, the next step is to smooth and shape the exterior surface. This process involves refining the curves, removing tool marks, and achieving a smooth and visually appealing finish. Here are the key steps involved in smoothing and shaping the bowl:
- Inspect the Surface: Begin by carefully examining the exterior surface of the bowl. Check for any rough spots, tool marks, or irregularities that need to be addressed.
- Refining the Shape: Use a bowl gouge or a spindle gouge to shape and refine the exterior curves of the bowl. Take light, smooth cuts, following the natural contours of the wood.
- Smooth the Surface: Use a variety of sanding tools, such as sandpaper or sanding pads, to smooth the surface of the bowl. Start with a coarser grit, progressively moving to finer grits for a smoother finish.
- Remove Tool Marks: Pay special attention to remove any visible tool marks left from the hollowing process. Take your time and sand with care to achieve a uniform surface.
- Blend Transitions: Focus on blending the transitions between different sections of the bowl, ensuring that the curves flow seamlessly throughout the piece. Take lighter cuts and pay attention to the details.
- Finalize the Shape: Continuously assess the shape of the bowl as you sand and shape. Make any necessary adjustments to achieve your desired design and proportions.
- Smooth the Rim: Give special attention to smoothing and refining the rim of the bowl. Use a combination of hand sanding and rounding techniques to create a comfortable and visually pleasing edge.
- Check for Imperfections: Inspect the entire surface of the bowl for any remaining imperfections, such as scratches or blemishes. Address them by carefully sanding or refining the affected areas.
- Wipe and Dust Off: Once you are satisfied with the shape and smoothness of the bowl, wipe off any dust or debris from the surface using a clean, dry cloth.
By following these steps, you can achieve a beautifully shaped and smoothly finished wood bowl. Remember to take your time and pay attention to the details, as these small refinements can greatly enhance the overall appearance and feel of the bowl.
Sanding and Finishing the Bowl
Sanding and finishing the wood bowl is a crucial step in bringing out its natural beauty and protecting the surface for long-lasting durability. This process involves smoothing the wood further, applying a finish, and enhancing the overall appearance. Here are the key steps involved in sanding and finishing the bowl:
- Remove Sanding Marks: Begin by sanding the bowl using a progression of sandpaper grits, starting with a coarse grit (such as 80 or 120) and gradually moving to finer grits (such as 220, 320, and 400). This will remove any remaining tool marks or imperfections on the surface.
- Sand with the Grain: Always sand with the grain of the wood to avoid creating scratches or swirl marks. Apply consistent pressure and use long, smooth strokes to achieve an even and uniform surface.
- Micro Sanding: After the initial sanding, you can perform micro-sanding by wet sanding the bowl with very fine grit sandpaper (600 to 1200 grit). Wet sanding helps create an ultra-smooth surface, reducing the visibility of any remaining imperfections.
- Remove Dust: To remove the dust generated from sanding, wipe the bowl with a clean, dry cloth or use compressed air to gently blow away any residue.
- Apply a Finish: Choose the right finish for your wood bowl based on your preferences and the intended use of the bowl. Common finishes include food-safe oils, such as walnut or mineral oil, or durable finishes like polyurethane or lacquer. Apply the finish according to the manufacturer’s instructions, using a brush, cloth, or spray, ensuring even coverage.
- Allow for Drying Time: Give the finish sufficient drying time as specified by the manufacturer, allowing it to fully cure and harden before proceeding to the next step.
- Buff and Polish: Once the finish is dry, use a soft cloth or buffing pad to gently buff the surface of the bowl. This will help bring out a subtle shine and enhance the appearance of the wood.
- Apply Additional Coats (Optional): Depending on the desired finish and level of protection, you may choose to apply multiple coats of finish, sanding lightly between each coat to achieve a smooth and glossy surface.
- Inspect and Make Final Touches: Take a final look at the finished bowl and make any necessary touch-ups or adjustments. Sand away any rough edges or imperfections if needed.
By following these steps, you can sand and finish your wood bowl to perfection. Remember to always work in a well-ventilated area, use appropriate safety precautions, and choose finishes that are safe for the intended use of the bowl. With proper sanding and finishing, your wood bowl will be both visually pleasing and protected for years to come.
Applying a Protective Finish
Applying a protective finish to your wood bowl is a crucial step in preserving its beauty and ensuring its longevity. A protective finish not only enhances the appearance of the bowl but also protects the wood from moisture, stains, and wear. Here are the key steps involved in applying a protective finish to your wood bowl:
- Clean and Prepare the Surface: Before applying any finish, ensure that the surface of the bowl is clean and free from dust or debris. Use a clean cloth or compressed air to remove any loose particles from the wood.
- Choose the Right Finish: Select a finish that is suitable for the intended use of the bowl. Common options include oils, such as food-safe mineral oil or walnut oil, or durable finishes like polyurethane or lacquer. Consider factors such as ease of application, desired appearance, and level of protection.
- Apply the Finish: Follow the manufacturer’s instructions for the chosen finish. Use a clean brush, cloth, or applicator pad to apply an even layer of the finish to the entire surface of the bowl, including both the interior and exterior. Ensure that the finish is spread evenly and covers all areas of the wood.
- Allow for Drying Time: Give the finish sufficient drying time as specified by the manufacturer. This will typically involve letting the bowl sit undisturbed in a well-ventilated area, away from dust or other particles that could mar the finish.
- Inspect and Sand (Optional): Once the finish is dry, inspect the bowl for any imperfections or rough spots. If necessary, gently sand the surface with fine grit sandpaper to achieve a smooth finish. Be cautious not to remove too much of the finish or damage the underlying wood.
- Apply Additional Coats (Optional): Depending on the desired level of protection, you may decide to apply additional coats of the finish. Follow the same application process, allowing each coat to dry fully before applying the next. Sand lightly between coats for optimal adhesion and a smooth finish.
- Buff and Polish (Optional): If desired, use a soft cloth or buffing pad to gently buff the surface of the bowl after the final coat has fully dried. This will help achieve a lustrous shine and enhance the visual appeal of the finish.
- Allow for Full Curing: It’s important to note that some finishes may require additional time to fully cure and harden. Follow the recommendations provided by the manufacturer to ensure that the finish is fully cured before using or displaying the wood bowl.
Applying a protective finish to your wood bowl will not only enhance its appearance but also protect the wood from damage. Choose a finish that suits the intended use of the bowl and follow the application instructions carefully for best results. With a properly applied protective finish, your wood bowl will be preserved and can be enjoyed for years to come.
Caring for Your Wood Bowl
Proper care and maintenance are essential to ensure the longevity and beauty of your wood bowl. By following a few simple practices, you can preserve the quality of the bowl and keep it looking its best. Here are some tips for caring for your wood bowl:
- Handwashing Only: To maintain the integrity of the wood and any applied finish, always handwash your wood bowl. Avoid soaking it in water or putting it in the dishwasher, as excessive exposure to moisture can cause warping or damage to the wood.
- Gentle Cleaning: When cleaning your wood bowl, use a mild dish soap and warm water. Gently scrub the surface with a soft sponge or cloth, taking care not to scratch or damage the wood. Rinse thoroughly and dry immediately.
- Avoid Extreme Temperatures: Wood is sensitive to extreme temperatures, so avoid subjecting your wood bowl to sudden changes in temperature. Do not use it in the microwave, oven, or refrigerator, as this can cause the wood to crack or warp.
- Keep Away from Direct Sunlight: Prolonged exposure to direct sunlight can cause the wood to fade or discolor over time. To prevent this, store your wood bowl in a cool, dry place away from direct sunlight when not in use.
- Reapply Finish as Needed: Over time, the protective finish on your wood bowl may wear off. If you notice that water is no longer beading on the surface, it may be time to reapply the finish. Follow the manufacturer’s instructions for applying the specific finish you have chosen.
- Avoid Harsh Chemicals: Avoid using harsh chemicals or abrasive cleaners on your wood bowl, as these can strip away the finish and damage the wood. Stick to mild dish soap or specialized wood cleaners.
- Regularly Oil the Bowl: To prevent the wood from drying out and to maintain its natural luster, periodically apply food-safe wood oil or wax to the bowl. This will help keep the wood nourished and protected.
- Use Coasters or Placemats: When using your wood bowl as a serving dish, it’s a good idea to place it on a coaster or a placemat to protect it from direct contact with hot objects or liquids that could potentially damage the wood.
- Inspect for Damage: Regularly inspect your wood bowl for any signs of damage, such as cracks, splits, or loose parts. Address any issues promptly to prevent further damage or compromising the bowl’s structural integrity.
By following these care guidelines, you can ensure that your wood bowl remains in excellent condition for many years. Remember that wood is a natural material and may change slightly over time, developing a rich patina and further enhancing its character. Enjoy the beauty of your wood bowl and appreciate the craftsmanship that goes into its creation.