
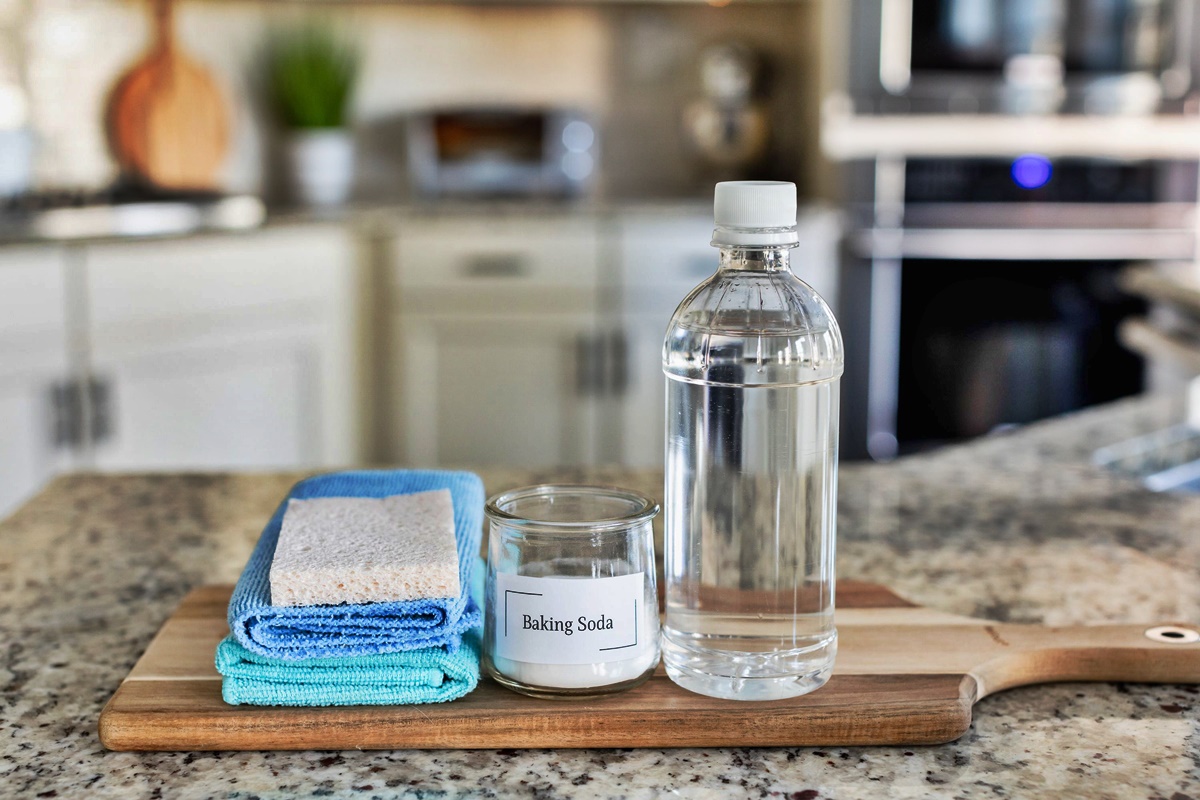
Supplies Needed
To make an effective vinegar cleaning solution, you will need a few basic supplies that are easily accessible. These supplies will help you create a natural and cost-effective cleaning solution that is safe for both you and the environment. Here’s what you’ll need:
- Vinegar: One of the main ingredients for your cleaning solution is vinegar. You can choose between distilled white vinegar or apple cider vinegar. Both types are effective cleaners, but distilled white vinegar is generally preferred for cleaning purposes due to its higher acidity level.
- Water: You will also need water to dilute the vinegar. It is best to use distilled or filtered water to avoid any impurities that may affect the cleaning power of the solution.
- Spray Bottle: A spray bottle is essential for easy application of the vinegar cleaning solution. Look for a durable and reusable bottle that has a fine mist spray nozzle.
- Essential Oils (Optional): If you prefer a pleasant scent or want to enhance the cleaning power of the solution, you can add a few drops of essential oils. Popular choices include lemon, lavender, tea tree, and eucalyptus oils.
- Microfiber Cloth: To wipe and clean various surfaces, having a microfiber cloth is essential. Microfiber cloths are effective at trapping dust and dirt, and they leave surfaces streak-free.
- Scrub Brush: For tougher stains or grime, a scrub brush can come in handy. Choose a brush with bristles that are firm but not too abrasive to avoid damaging surfaces.
By gathering these supplies, you will be well-equipped to make your own vinegar cleaning solution and tackle various cleaning tasks around your home. It’s important to note that these supplies can be easily found at most supermarkets or online retailers, making the vinegar cleaning solution a convenient and eco-friendly alternative to commercial cleaning products.
Choosing the Right Type of Vinegar
When it comes to making a vinegar cleaning solution, choosing the right type of vinegar is crucial for maximum effectiveness. While both distilled white vinegar and apple cider vinegar can be used, it’s important to consider their differences and suitability for different cleaning tasks.
Distilled white vinegar is the most commonly used vinegar for cleaning purposes. It has a high acidity level, which makes it effective at cutting through grease, grime, and mineral deposits. The clear color of distilled white vinegar also ensures that it won’t stain or leave any residue on surfaces. It’s an ideal choice for cleaning windows, glass, countertops, and stainless steel appliances.
On the other hand, apple cider vinegar is slightly less acidic than distilled white vinegar. While it can still be used as a cleaning agent, it is often preferred for its milder scent and potential health benefits. Apple cider vinegar is a popular choice for cleaning surfaces in the kitchen, such as cutting boards, but it may not be as effective on tough stains or grime as distilled white vinegar.
When choosing vinegar for cleaning, it’s important to opt for clear, unfiltered vinegar rather than the flavored varieties. Flavored vinegars may contain additives or sugars that can leave residue or streaks on surfaces.
Ultimately, the choice between distilled white vinegar and apple cider vinegar comes down to personal preference and the specific cleaning task. If you’re uncertain, it’s recommended to start with distilled white vinegar as it is more versatile and effective for most cleaning purposes.
Remember to always label your vinegar cleaning solution properly to avoid any confusion and ensure safe usage. By selecting the right type of vinegar, you can create a vinegar cleaning solution that meets your cleaning needs and helps you achieve a sparkling clean home.
Diluting Vinegar with Water
When using vinegar as a cleaning solution, it’s important to dilute it with water to ensure its effectiveness and safety. Vinegar is highly acidic and can be too strong to use directly on surfaces, especially delicate ones. Diluting vinegar with water is a simple process that allows you to harness its cleaning power while minimizing any potential damage.
To dilute vinegar with water, follow these easy steps:
- First, prepare a clean spray bottle. It’s best to use a bottle made of glass or HDPE plastic to prevent any chemical reactions or leaching.
- Next, measure out the desired ratio of vinegar to water. A popular ratio is 1 part vinegar to 1 part water, but you can adjust the ratio based on the cleaning task at hand. For tougher stains or dirtier surfaces, you may want to increase the amount of vinegar.
- Add the vinegar to the spray bottle, followed by the water. This order ensures that the vinegar gets evenly distributed throughout the solution.
- Screw the spray nozzle securely onto the bottle and gently shake it to mix the vinegar and water together.
Remember to label the bottle appropriately, indicating the contents and dilution ratio for future reference. This will help prevent any accidental misuse or confusion.
It’s worth noting that different cleaning tasks may require different vinegar dilutions. For general-purpose cleaning, the 1:1 ratio is a good place to start. However, for more delicate surfaces like hardwood floors or stone countertops, you may want to use a weaker dilution, such as 1 part vinegar to 3 parts water, to prevent any potential damage.
By diluting vinegar with water, you ensure that its cleaning power is effective while reducing the risk of surface damage. This simple step allows you to safely clean a wide range of surfaces and materials in your home without the need for strong chemicals or harmful ingredients.
Adding Essential Oils (Optional)
If you want to enhance the scent or cleaning power of your vinegar cleaning solution, you have the option to add a few drops of essential oils. While this step is completely optional, it can provide a pleasant aroma and additional benefits to your cleaning routine.
Essential oils are derived from various plants and are known for their aromatic and therapeutic properties. Here’s how you can incorporate essential oils into your vinegar cleaning solution:
- Choose your preferred essential oil(s). Popular choices for cleaning purposes include lemon, lavender, tea tree, and eucalyptus oils. These oils offer invigorating scents and have antimicrobial properties that can boost the cleaning power of your solution.
- Once you have selected your essential oil, add a few drops to your vinegar and water mixture in the spray bottle. Start with 5-10 drops and adjust the quantity based on your personal preference.
- Give the bottle a gentle shake to ensure that the essential oil blends well with the vinegar and water.
When using essential oils in your vinegar cleaning solution, remember that a little goes a long way. Essential oils are highly concentrated, and too much can overpower the solution or leave a residue on surfaces. It’s always best to start with fewer drops and gradually increase if desired.
Not only do essential oils provide a pleasant fragrance, but they also offer additional benefits. Lemon essential oil, for example, has powerful degreasing properties and can help remove tough stains. Lavender essential oil possesses antifungal properties and can add a calming scent to your cleaning routine. Tea tree essential oil is known for its antibacterial properties, making it an excellent choice for disinfecting surfaces.
While essential oils are generally safe to use, it’s essential to consider individual sensitivities or allergies. If you or someone in your household is sensitive to certain scents or has allergies, it’s advisable to do a patch test or avoid using essential oils altogether.
Overall, adding essential oils to your vinegar cleaning solution can enhance both the olfactory experience and cleaning effectiveness. Experiment with different combinations to find your favorite scent and enjoy the added benefits that essential oils bring to your cleaning routine.
Using Vinegar to Clean Windows and Glass Surfaces
Vinegar is a versatile and effective solution for cleaning windows and glass surfaces. With its acidity, it can remove dirt, streaks, and smudges, leaving behind a sparkling, streak-free shine. Follow these steps to achieve crystal-clear windows and glass surfaces:
- Start by preparing your vinegar cleaning solution by diluting equal parts of vinegar and water in a spray bottle. If you prefer a stronger solution, you can adjust the ratio to have more vinegar.
- Spray the vinegar solution onto the glass surface you want to clean. Be sure to cover the entire area without oversaturating it.
- Use a microfiber cloth or a lint-free paper towel to wipe the glass in a circular motion. This motion helps to remove dirt and grime effectively.
- For stubborn spots or sticky residue, allow the vinegar solution to sit on the surface for a few minutes before wiping it away.
- To prevent streaks, make sure to dry the glass surface completely. You can use a separate microfiber cloth or a squeegee for this purpose.
- If there are any remaining streaks or smudges, give the glass a final wipe with a clean, dry microfiber cloth to achieve a crystal-clear finish.
When cleaning windows and glass surfaces, it is best to avoid cleaning on a sunny day or when the glass is hot. This helps to prevent the vinegar solution from drying too quickly and leaving streaks behind.
Using vinegar as a cleaning solution for windows and glass surfaces offers several advantages. It is a natural and non-toxic alternative to commercial glass cleaners, reducing exposure to harsh chemicals. Additionally, vinegar is an affordable option that can save you money while providing excellent cleaning results.
Remember, vinegar may not be suitable for cleaning certain types of tinted or coated glass surfaces. If in doubt, it’s always best to check with the manufacturer’s recommendations or test the vinegar solution on a small inconspicuous area before proceeding with full-scale cleaning.
By utilizing vinegar as a cleaning solution for windows and glass surfaces, you can achieve a sparkling, streak-free shine with ease, making your home look brighter and cleaner.
Using Vinegar to Clean Countertops and Stainless Steel Appliances
Vinegar is an excellent natural cleaner that can be used to effectively clean countertops and stainless steel appliances. The acidic properties of vinegar make it an effective solution for removing grease, grime, and stains, all while being safe for food preparation surfaces. Follow these simple steps to clean your countertops and stainless steel appliances:
- Prepare your vinegar cleaning solution by diluting equal parts of vinegar and water in a spray bottle. This ratio can be adjusted depending on the level of cleaning required.
- Spray the vinegar solution onto the surface you want to clean, covering the entire area.
- Use a microfiber cloth or a sponge to wipe the surface in a circular motion. This motion helps to remove dirt, grease, and food residue effectively.
- For tougher stains or grime, you can let the vinegar solution sit on the surface for a few minutes before wiping it away.
- For stainless steel appliances, be sure to wipe with the grain of the steel to avoid leaving streaks or scratches.
- After wiping the surface, rinse with clean water or wipe with a damp cloth to remove any leftover vinegar residue.
- To keep your stainless steel appliances looking shiny, you can buff them with a soft, dry cloth or use a stainless steel cleaner specific to your appliance.
When cleaning countertops with vinegar, it’s important to note that certain types of surfaces may be sensitive to acidity. For example, natural stone countertops like granite or marble can be etched by the acidic properties of vinegar. It’s best to consult the manufacturer’s guidelines or use a stone-friendly cleaner for such surfaces.
Vinegar is not recommended for use on wood countertops or any surfaces that have been treated with finishes sensitive to acid. In these cases, it’s best to use a cleaner specifically designed for wood or other appropriate cleaning methods.
Using vinegar to clean countertops and stainless steel appliances offers several advantages. Vinegar is a natural and non-toxic option, making it safe for food preparation areas. It also eliminates the need for harsh chemicals, reducing your exposure to potentially harmful substances. Additionally, vinegar is an affordable and environmentally-friendly solution that can effectively clean and disinfect these surfaces.
By incorporating vinegar into your cleaning routine for countertops and stainless steel appliances, you can maintain a clean and hygienic kitchen while also preserving the beauty and shine of your surfaces.
Using Vinegar to Remove Stains and Odors from Carpets and Upholstery
Vinegar is a versatile and effective solution for removing stains and odors from carpets and upholstery. Whether you’re dealing with a spill or a lingering smell, vinegar can help tackle the problem. Here’s how to use vinegar to restore the freshness of your carpets and upholstery:
- Start by blotting up any excess liquid or cleaning up any solid debris from the stained area. Use a cloth or paper towel to absorb as much as possible.
- Prepare your vinegar cleaning solution by diluting equal parts of vinegar and water in a spray bottle. You can also add a few drops of dish soap for more stubborn stains.
- Lightly spray the vinegar solution onto the affected area, making sure not to oversaturate the fabric or carpet.
- Gently blot the stain with a clean cloth or sponge, working from the outside inward to prevent spreading the stain. Avoid rubbing, as it can push the stain deeper into the fibers.
- Continue blotting until the stain starts to fade. For tougher stains, you may need to repeat this process or let the vinegar solution sit on the stain for a few minutes before blotting again.
- Once the stain is removed, rinse the area by spraying clean water onto it and blotting with a clean cloth to remove any vinegar residue.
- To eliminate odors, you can lightly spray the vinegar solution over the entire affected area and allow it to air dry. The vinegar will help neutralize and eliminate the smells.
- If needed, you can finish by vacuuming the carpet or upholstery to remove any remaining debris or fibers.
It’s important to test the vinegar solution on a small, inconspicuous area of the carpet or upholstery first to ensure that it doesn’t cause any discoloration or damage. Additionally, avoid using vinegar on delicate fabrics or materials that are sensitive to acid.
Vinegar is an excellent alternative to chemical-based cleaners, as it is non-toxic and safe for use in homes with children and pets. It is also more cost-effective and environmentally friendly compared to commercial stain removers.
By utilizing vinegar to remove stains and odors from carpets and upholstery, you can restore the cleanliness and freshness of your fabrics, leaving them looking and smelling as good as new.
Using Vinegar to Clean Floors
Vinegar is a versatile and natural solution for cleaning various types of flooring. Whether you have hardwood, laminate, tile, or vinyl floors, vinegar can effectively remove dirt, grime, and stains without leaving behind residue or harmful chemicals. Here’s how you can use vinegar to clean your floors:
- Start by sweeping or vacuuming the floor to remove any loose dirt or debris.
- Fill a bucket with warm water and add 1/2 to 1 cup of vinegar, depending on the size of the bucket and the level of dirtiness.
- If you prefer a pleasant scent, you can also add a few drops of essential oil to the vinegar and water mixture.
- Dip a mop or a microfiber cloth into the vinegar solution, making sure to wring out any excess liquid.
- Begin mopping the floor, working in small sections. For stubborn stains or heavily soiled areas, allow the vinegar solution to sit for a few minutes before scrubbing with a soft brush or cloth.
- Continue mopping the entire floor, rinsing and wringing the mop or cloth as needed.
- For hardwood floors, it’s essential to avoid excess moisture. Wipe up any excess liquid with a dry mop or cloth immediately after cleaning.
- Allow the floor to air dry completely before walking on it again.
It’s important to note that vinegar should not be used on natural stone floors, such as marble or granite, as the acidity can damage the surface. For these types of floors, it’s recommended to use a cleaner specifically designed for natural stone.
Using vinegar as a floor cleaner offers several advantages. It is a cost-effective, non-toxic, and eco-friendly alternative to chemical-based cleaners. Vinegar is also safe for pets and children, making it an ideal choice for households with little ones.
Regularly cleaning your floors with vinegar can help maintain their appearance and prolong their lifespan. However, it’s a good idea to periodically check the manufacturer’s guidelines for your specific flooring type to ensure compatibility with vinegar or other cleaning solutions.
By incorporating vinegar into your floor cleaning routine, you can effectively remove dirt and grime, leaving your floors clean, shiny, and free from harsh chemicals.
Using Vinegar to Clean Bathroom Fixtures and Tiles
Vinegar is a versatile and effective solution for cleaning bathroom fixtures and tiles. Its acidic properties help break down soap scum, mineral deposits, and grime, making it a natural and non-toxic choice for maintaining a clean and fresh bathroom. Follow these steps to use vinegar for cleaning bathroom fixtures and tiles:
- Start by preparing your vinegar cleaning solution. Dilute equal parts of vinegar and water in a spray bottle. If dealing with stubborn stains or grime, you can increase the vinegar concentration.
- Spray the vinegar solution onto the fixtures and tiles that need cleaning. Be sure to cover all areas, especially those with visible dirt or stains.
- Allow the vinegar solution to sit for a few minutes to penetrate and break down the dirt and deposits.
- Using a soft brush or cloth, scrub the surfaces gently to remove the buildup. For fixtures and tiles, pay particular attention to corners, edges, and grout lines.
- Rinse the surfaces with clean water to remove any remaining vinegar residue. Microfiber cloths work well for wiping and drying.
- For tough stains or areas of heavy mineral deposits, you can use undiluted vinegar directly on the affected spots. Let it sit for a few minutes before scrubbing and rinsing.
Vinegar is especially effective for cleaning bathroom fixtures like faucets, showerheads, and handles. Its acidic nature helps dissolve mineral deposits, leaving fixtures shiny and free from build-up. Additionally, vinegar can be used to remove soap scum and grime from bathroom tiles, including both wall and floor tiles.
However, it’s important to note that vinegar should not be used on natural stone tiles, as the acidity can damage the surface. For natural stone tiles, it’s advised to use a cleaner specifically formulated for these materials.
By using vinegar as a cleaning solution in your bathroom, you avoid the use of harsh chemicals found in many commercial cleaners. Not only is vinegar an eco-friendly option, but it’s also safe for your health and won’t leave behind any harmful residues.
Regularly cleaning your bathroom fixtures and tiles with vinegar can help prevent the build-up of soap scum, mineral deposits, and grime, keeping your bathroom clean and hygienic. Incorporate vinegar into your cleaning routine to maintain a sparkling and fresh bathroom environment.
Using Vinegar to Remove Lime and Rust Deposits
Vinegar is a highly effective and natural solution for removing lime and rust deposits. Over time, these unsightly mineral stains can build up on various surfaces, including sinks, faucets, showerheads, and bathroom fixtures. Vinegar’s acidity helps break down these deposits, making it an excellent solution for restoring surfaces to their original shine. Here’s how you can use vinegar to remove lime and rust deposits:
- Start by soaking a towel or cloth in undiluted vinegar.
- Place the soaked cloth directly on the affected area, ensuring that the vinegar is in direct contact with the lime or rust deposit.
- Allow the vinegar-soaked cloth to sit on the deposit for about an hour. This gives the vinegar enough time to break down the mineral buildup.
- After the soaking period, remove the cloth and use a soft brush or sponge to scrub the area gently.
- Rinse the surface with clean water to remove any remaining vinegar residue and dissolved deposits. You can use a damp cloth or sponge for this step.
For larger or more stubborn deposits, you may need to repeat the process and let the vinegar sit for a longer period. Additionally, if the buildup is on a removable fixture or item, you can soak it entirely in vinegar for an extended period to facilitate the removal process.
It’s important to note that vinegar is not recommended for use on natural stone surfaces, such as marble or granite, as the acidity can damage the material. For these surfaces, it’s best to consult the manufacturer’s guidelines or use a cleaner specifically designed for natural stone.
Using vinegar to remove lime and rust deposits offers several advantages. It is a natural and non-toxic alternative to harsh chemical cleaners, making it safe for both you and the environment. Moreover, vinegar is an affordable option that can effectively dissolve and remove these stubborn mineral stains.
Regularly using vinegar to tackle lime and rust deposits helps maintain the aesthetic appeal of your bathroom and kitchen fixtures. By incorporating vinegar into your cleaning routine, you can restore the shine and cleanliness of your surfaces, leaving them looking as good as new.