
Choosing the Right Resin
When it comes to creating a stunning resin sculpture, choosing the right resin is crucial. The type of resin you select will determine the durability, clarity, and overall quality of your finished piece. Here are some factors to consider when choosing the perfect resin for your sculpture:
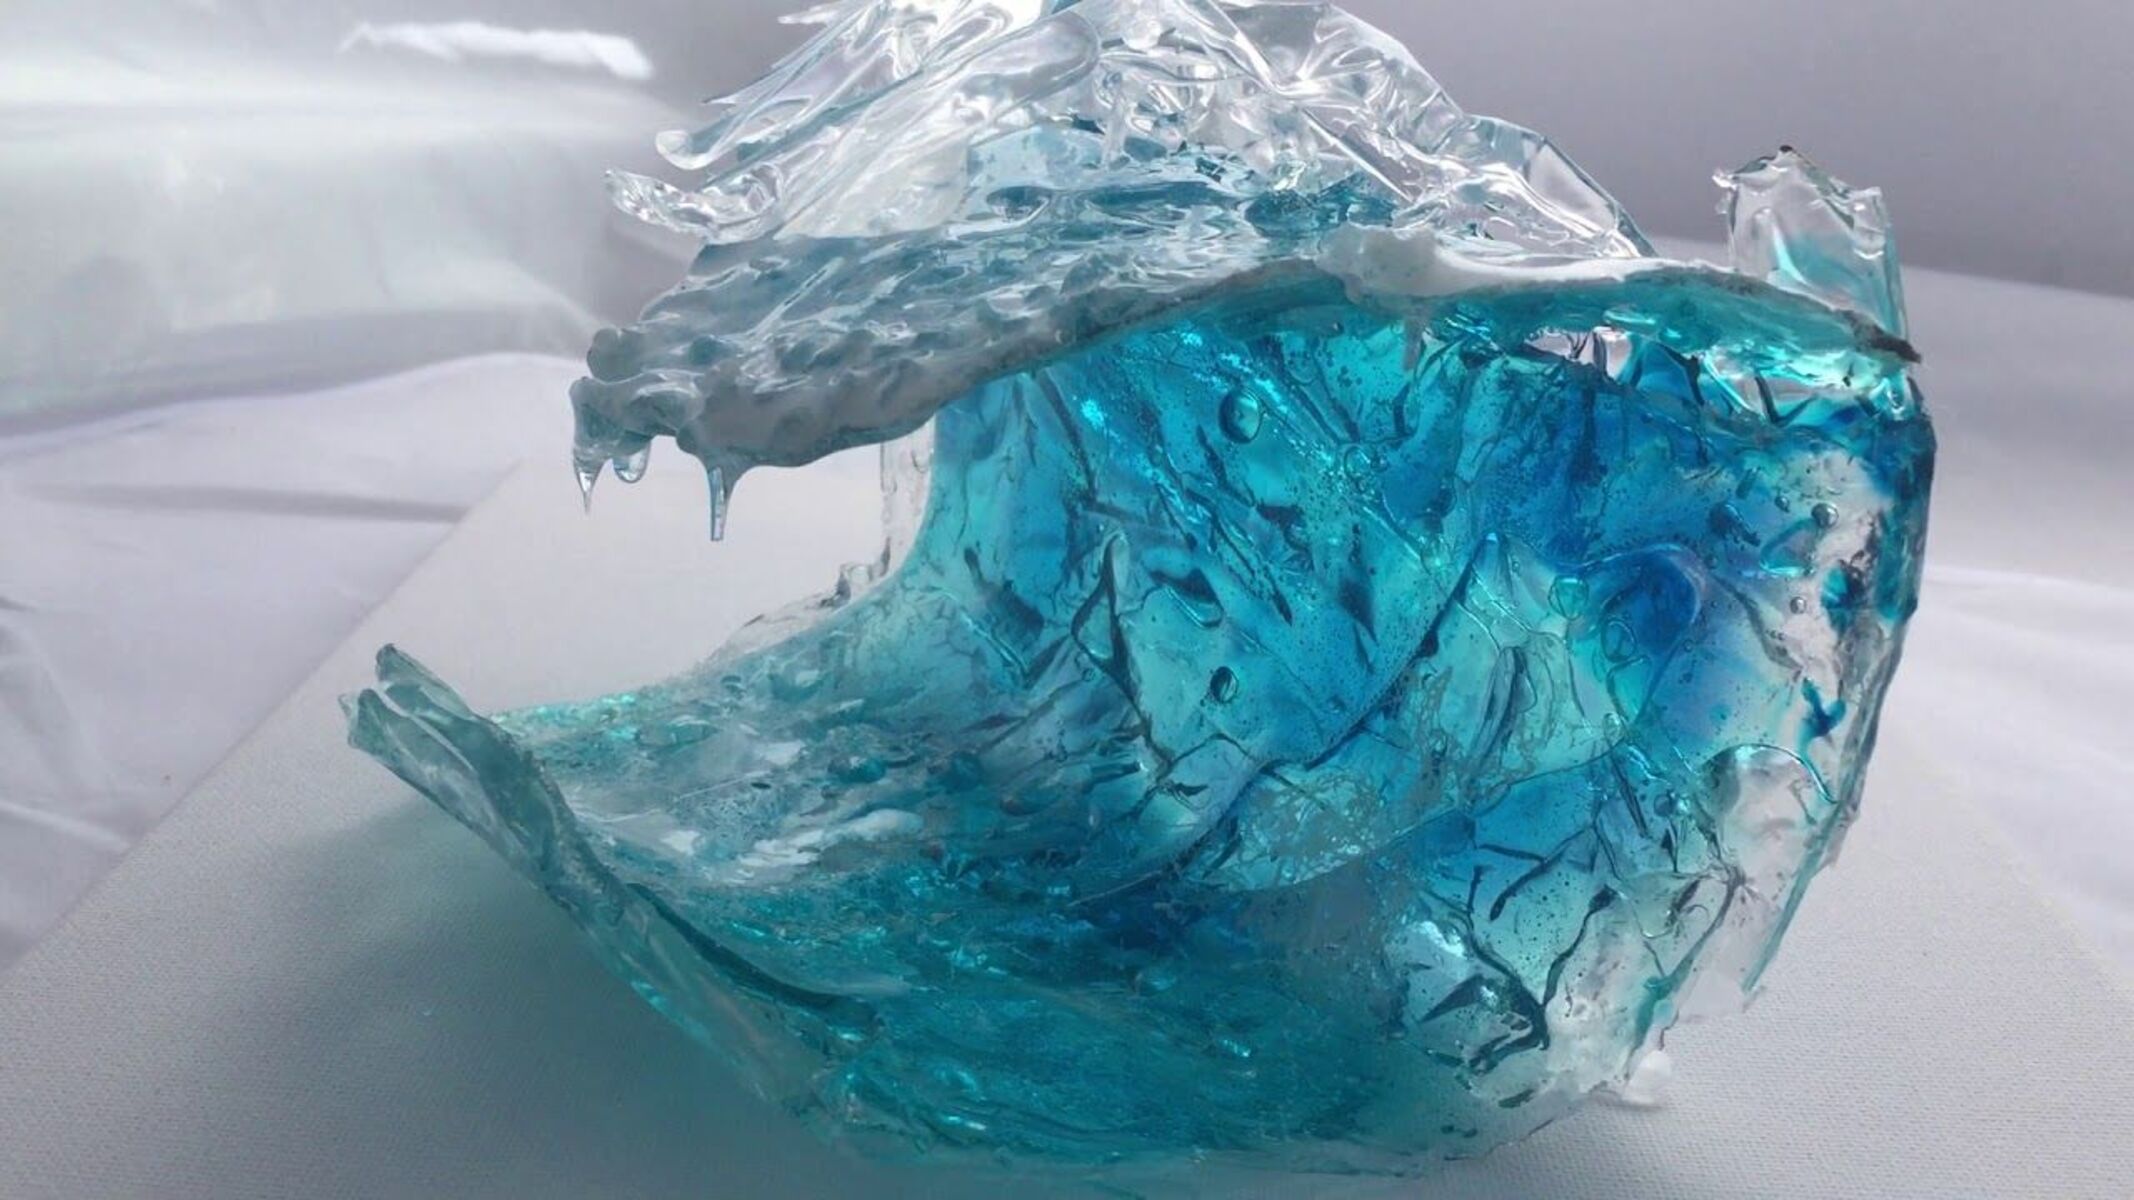
- Resin Type: There are two main types of resin used for sculptures: polyester resin and epoxy resin. Polyester resin is commonly used for larger sculptures due to its affordability and fast curing time, while epoxy resin is renowned for its superior clarity and high strength.
- Transparency: If you want your sculpture to have a crystal-clear appearance, opt for a resin that offers excellent transparency. Epoxy resins are typically favored for their ability to provide a glass-like finish.
- UV Resistance: If your sculpture will be exposed to sunlight or placed outdoors, consider using a resin that has UV resistance. This will ensure that your sculpture remains vibrant and doesn’t yellow or fade over time.
- Viscosity: The viscosity of the resin affects its flow and self-leveling properties. For detailed sculptures or intricate designs, choose a resin with a lower viscosity to ensure it reaches all the nooks and crannies of your mold.
- Curing Time: Depending on your preference and the complexity of your sculpture, consider the curing time of the resin. Some resins cure quickly, allowing you to move on to the next steps sooner, while others have longer curing times, giving you more time to work on intricate details.
Remember, each resin brand may have its own unique properties and specifications, so be sure to read the instructions and product descriptions carefully before making a decision. Additionally, consider the size and weight of your sculpture and choose a resin that can adequately support it.
By carefully selecting the right resin for your sculpture, you will be setting yourself up for success and ensuring a stunning finished piece. Now that you have chosen your resin, it’s time to prepare your workspace and gather the necessary materials.
Preparing Your Workspace
Before diving into the exciting process of creating a resin sculpture, it’s important to properly prepare your workspace. Here are some essential steps to ensure a clean and organized environment for your project:
- Clean and Clear: Start by cleaning your workspace thoroughly. Remove any dust, debris, or other potential contaminants that could mar the quality of your sculpture. A clean surface is essential for achieving a smooth and flawless finish.
- Ventilation: Resin can emit strong fumes, so make sure your workspace is well-ventilated. Open windows or use a fan to circulate the air and prevent the buildup of harmful vapors. Safety should always be your top priority.
- Protective Measures: Cover your work surface with a protective layer, such as plastic sheeting or a silicone mat. This will prevent any accidental spills or drips from damaging your workspace. Additionally, wear protective gloves, goggles, and a face mask to safeguard yourself from the resin and any chemical fumes.
- Temperature Control: Resin cures best at a specific temperature range, so ensure your workspace is maintained within the recommended range. Extreme temperatures can adversely affect the curing process, so avoid working in excessively hot or cold environments.
- Organize your Materials: Gather all the materials and tools you will need for the sculpture-making process. This includes your chosen resin, molds, mixing cups, stirring sticks, and any desired pigments or additives. Having everything readily accessible will help streamline the workflow and prevent any unnecessary delays.
By taking the time to prepare your workspace, you are creating an environment that promotes efficiency, safety, and a smooth workflow. With a clean and well-organized space, you’ll be able to focus on the creative aspects of your sculpture without any unnecessary distractions. Now that your workspace is ready, it’s time to gather the necessary materials and embark on your resin sculpture journey.
Gathering the Necessary Materials
Now that your workspace is prepped and ready, it’s time to gather all the necessary materials for making your resin sculpture. Having everything you need at hand will ensure a smooth and uninterrupted creative process. Here’s a list of essential materials you’ll need:
- Resin: As mentioned earlier, choose the appropriate resin type for your sculpture. Polyester resin or epoxy resin, depending on your preferences and project requirements.
- Molds: Select the molds that best suit your desired sculpture design. Silicone molds are commonly used for resin casting due to their flexibility and ease of releasing the finished sculpture.
- Mixing Cups: Use disposable plastic or silicone measuring cups for accurately measuring and mixing your resin. Graduated ones are ideal for precise measurements.
- Stirring Sticks: Wooden or silicone stirring sticks are essential for thoroughly mixing the resin components together without introducing air bubbles.
- Pigments and Additives: If you want to add color or special effects to your sculpture, gather your desired pigments or additives. These can include resin dyes, mica powders, glitter, or even dried flowers or other decorative elements.
- Protective Gear: Don’t forget to have safety gear like gloves, goggles, and a face mask to protect yourself from any potential resin exposure or fumes.
- Heat Gun or Blow Torch: These tools are useful for removing surface bubbles and creating interesting textures or effects on your sculpture once it’s poured.
- Sanding Tools: Depending on your sculpture’s design, you may need sandpaper or sanding blocks to refine the surface and achieve a smooth and polished finish.
- Finishing Materials: Gather any additional materials you may want for finishing touches, such as varnish or epoxy resin to seal and protect the sculpture, as well as brushes or sponges for applying the finishing materials.
Having all these materials ready and organized will help streamline your workflow and make the sculpting process more enjoyable. It’s a good idea to double-check your supplies before starting to ensure you have everything you need. With your materials gathered, you’re now ready to start sketching and planning your resin sculpture.
Sketching and Planning Your Sculpture
Before diving into the resin pouring process, it’s essential to have a clear vision of the sculpture you want to create. Sketching and planning your sculpture beforehand will help you stay focused and ensure a successful outcome. Here are some steps to guide you:
- Conceptualize: Start by brainstorming ideas and concepts for your resin sculpture. What do you want to create? Is it a figurative sculpture, an abstract piece, or something entirely unique? Consider the subject, theme, and overall aesthetic you want to achieve.
- Sketch: Transfer your ideas onto paper by sketching out the basic shape and form of your sculpture. This sketch will serve as your roadmap during the sculpting process, helping you visualize the final result and make necessary adjustments along the way.
- Consider Size and Proportions: Determine the desired size and proportions of your sculpture. Think about factors such as weight, balance, and the space where the sculpture will be displayed. Make sure your chosen molds can accommodate the size you have in mind.
- Plan for Layers and Details: If you intend to create a multi-layered or intricate sculpture, plan out the different layers or sections. Consider any additional elements or details you want to incorporate and think about the order in which they should be added for the best outcome.
- Experiment and Refine: Don’t be afraid to experiment and make adjustments to your concept and sketch. Sculpting with resin allows for some flexibility, so take the time to refine your ideas until you’re satisfied with the overall design.
Remember, this planning phase is crucial for avoiding mistakes and ensuring a cohesive and visually appealing sculpture. It will also help you determine the amount of resin you’ll need for each layer or section. Once you have finalized your sketch and plan, it’s time to move on to the next step: mixing the resin.
Mixing the Resin
Now that you have your sculpture’s design in mind, it’s time to mix the resin. Properly mixing the resin is essential for achieving the desired strength, clarity, and consistency. Follow these steps to mix your resin correctly:
- Read the Instructions: Always refer to the instructions provided by the resin manufacturer. Different resins may have specific mixing ratios and instructions that you should follow for optimal results.
- Prepare your Workspace: Ensure that your workspace is clean and organized, and that you have all the necessary equipment and materials within reach.
- Measure the Resin Precisely: Use calibrated measuring cups to accurately measure the required amounts of resin and hardener. Maintain the specified ratio to ensure proper curing, strength, and stability of the finished sculpture.
- Pour the Resin First: Start by pouring the resin component into a clean mixing cup. It’s important to pour the resin first, followed by the hardener, to ensure a thorough and consistent mixture.
- Add the Hardener Gradually: Slowly pour the hardener component into the mixing cup with the resin. Be mindful of the ratio and avoid adding too much or too little hardener, as it can impact the curing process and the final outcome of your sculpture.
- Mix Thoroughly: Use a wooden or silicone stirring stick to mix the resin and hardener together. Stir in a gentle, circular motion, making sure to scrape the sides and bottom of the mixing cup to incorporate all the components fully. Continue stirring until the mixture is uniform and free of any streaks or color variations.
- Take Note of Pot Life: Different resins have different pot lives, which is the time it takes for the resin to begin hardening. Work efficiently within this pot life as the resin will gradually become less fluid and more challenging to work with over time.
Remember, it’s crucial to follow the instructions provided by the resin manufacturer. Properly mixing the resin will ensure a strong, clear, and consistent base for your sculpture. With the resin mixed, it’s time to move on to the next step: pouring the base layer of your sculpture.
Pouring the Base Layer
With your resin properly mixed, it’s time to pour the base layer of your sculpture. The base layer sets the foundation and provides stability for the rest of your sculpture. Follow these steps to pour the base layer:
- Prepare your Molds: Ensure that your molds are clean and free from any dust or debris. Apply a mold release agent if needed to facilitate the easy removal of the cured resin later.
- Position your Molds: Place your molds on a level surface in a way that allows you to pour the resin easily and without any obstructions.
- Pour the Resin: Slowly pour the mixed resin into the molds, taking care not to overflow or create air bubbles. Start pouring at one end and continue gradually to allow the resin to flow and fill the mold evenly.
- Use a Stirring Stick: Gently use a stirring stick to guide the resin into the crevices and corners of the mold, ensuring it reaches all areas. This will help eliminate any trapped air bubbles and create a smooth base layer.
- Level the Surface: If necessary, use a flat tool or a heat gun on a low setting to level the resin and remove any surface imperfections or bubbles. Be careful not to overheat the resin, as this may cause it to cure too quickly or create unwanted texture.
- Allow the Base Layer to Cure: Follow the resin manufacturer’s instructions regarding the curing time. Typically, the base layer needs to be partially cured to a tacky or gel-like state before proceeding with the next layers.
Remember to work carefully and methodically during the pouring process to ensure a seamless and bubble-free base layer. Once the base layer is partially cured and tacky to the touch, you can proceed to add additional layers and details to bring your sculpture to life. Now let’s explore the next steps in creating your resin sculpture.
Adding Layers and Details
Now that the base layer of your resin sculpture is partially cured, it’s time to add more layers and intricate details to elevate the visual appeal of your artwork. Here are the steps to follow when adding layers and details:
- Plan the Layers: Refer to your initial sketch and plan to determine the order in which you want to add layers and details. Consider the depth, transparency, and color effects you want to achieve.
- Mix Additional Resin: Mix a fresh batch of resin, following the same process used for the base layer. Ensure that you have enough resin to cover the desired areas and create the desired thickness for the additional layers.
- Color and Pigments: If you want to introduce different colors or effects to your sculpture, add resin dyes or pigments to the newly mixed resin. Mix well to evenly distribute the color throughout the resin.
- Pour and Spread the Resin: Slowly and carefully pour the colored resin onto the partially cured base layer. Use a stirring stick or a brush to spread and manipulate the resin to cover the desired areas. Be mindful not to disturb the base layer or create air bubbles.
- Create Texture and Depth: Use various tools like toothpicks, brushes, or palette knives to create texture, depth, and artistic effects within the resin layers. Experiment with different techniques to achieve the desired visual impact.
- Add Decorative Elements: If you plan to incorporate decorative elements such as dried flowers, leaves, or small trinkets, carefully place them within the resin layer while it is still wet. Arrange and adjust them as desired, ensuring they are fully embedded in the resin.
- Eliminate Air Bubbles: Use a heat gun or a torch on a low setting to remove any surface bubbles that may have formed during the pouring process. Gently move the heat tool across the surface, allowing the heat to pop the bubbles and smooth out the resin.
- Cure and Repeat: Allow each layer to partially cure before adding subsequent layers or details. Follow the resin manufacturer’s instructions regarding the recommended curing times between layers.
Adding layers and details is a creative process that allows you to bring depth and visual interest to your resin sculpture. Take your time, experiment with different techniques, and let your artistic vision guide you. With each layer added, your sculpture will gradually come to life. The next step involves removing any air bubbles to ensure a flawless final result.
Removing Air Bubbles
Air bubbles can sometimes form during the pouring and layering process of creating a resin sculpture. These bubbles can affect the clarity and overall appearance of your artwork. However, there are several methods you can use to remove air bubbles and achieve a flawless finish. Here’s what you can do to remove air bubbles from your resin sculpture:
- Use a Heat Gun or Torch: Pass a heat gun or a culinary torch over the surface of the resin, at a safe distance, using a sweeping motion. The heat will encourage the air bubbles to rise and pop. Be cautious not to apply too much heat, as it can cause the resin to overheat and degrade.
- Apply Resin Retarder: Mix a few drops of resin retarder, or bubble release agent, into your resin mixture before pouring. This additive helps reduce the surface tension of the resin, making it easier for air bubbles to rise and release.
- Use a Toothpick or Pin: Gently poke the surface of the resin sculpture with a toothpick or a pin, targeting any noticeable air bubbles. This action will cause the bubbles to rise and burst. Be careful not to disturb the surrounding resin or create new bubbles.
- Lightly Tap or Shake the Mold: Tap or shake the mold gently to encourage any trapped air bubbles to rise to the surface. The vibration will assist in releasing the bubbles, allowing them to escape from the resin.
- Apply Pressure: If working with a silicone mold, you can apply gentle pressure on the sides of the mold to encourage the air bubbles to rise. This pressure will help dislodge the bubbles and promote the release of trapped air.
- Allow Natural Settling Time: Sometimes, air bubbles will naturally rise and dissipate over time. After pouring the resin, allow it to rest undisturbed for a period of time to let the air bubbles naturally escape and the resin to level out.
Remember, it’s normal to have a few tiny bubbles present in your resin. However, employing these methods will help minimize their presence and create a smoother, bubble-free surface. Be patient and methodical when removing air bubbles, ensuring that you don’t inadvertently introduce new bubbles or damage the existing layers of resin.
With the air bubbles removed, it’s time to let the resin sculpture cure and dry to its final form. The curing process can take some time, so ensure you allocate an appropriate timeframe for the resin to fully harden before proceeding with the next steps of sanding and adding finishing touches.
Curing and Drying the Sculpture
After completing the resin pouring and air bubble removal process, it’s important to allow your sculpture time to cure and dry properly. Curing is the process in which the resin hardens and reaches its full strength and stability. Follow these steps to ensure the proper curing and drying of your resin sculpture:
- Read the Manufacturer’s Instructions: Refer to the resin manufacturer’s instructions for the recommended curing time. Different resins may have varying curing times, so it’s important to follow the specific guidelines provided.
- Keep the Sculpture Undisturbed: During the curing period, avoid touching or moving the sculpture to prevent any unnecessary disturbances. This will ensure that the resin can set and harden without any disruptions.
- Find a Suitable Environment: Place your sculpture in a controlled environment with stable temperature and low humidity. Extreme temperatures or high humidity can compromise the curing process, resulting in undesirable effects on the final sculpture.
- Patience is Key: Give the resin ample time to fully cure and dry. Rushing the process can lead to premature handling, which may result in fingerprints, smudges, or accidental damage to the surface of the sculpture.
- Monitor the Curing Progress: Check the sculpture periodically to monitor the curing progress. The resin should become solid and firm to the touch and lose its tackiness as it cures. If you notice any soft spots or areas that haven’t fully hardened, give it additional time to cure.
- Consider Post-Curing: Some resins may benefit from post-curing to achieve maximum strength and durability. If recommended by the manufacturer, you can place the cured sculpture in an oven or use a UV light box to undergo post-curing. Follow the specific instructions provided for post-curing, including temperature and time recommendations.
Remember, the curing and drying process is a crucial part of creating a successful resin sculpture. It allows the resin to fully harden and stabilize, ensuring the longevity and integrity of your artwork. Be patient and dedicated to providing the optimal conditions for the resin to cure and dry properly.
Once the resin sculpture has cured and dried completely, it’s time to move on to the next step: sanding and applying finishing touches to achieve a smooth and polished appearance.
Sanding and Finishing Touches
After the resin sculpture has fully cured and dried, it’s time to refine the surface through sanding and apply the finishing touches to achieve a smooth and polished appearance. Follow these steps to sand and add the final touches to your resin sculpture:
- Prepare the Work Area: Set up a clean and well-lit workspace where you can comfortably sand and work on your sculpture. Consider using a drop cloth or protective covering to catch any dust or resin particles.
- Safety First: Put on a face mask and safety goggles to protect yourself from dust particles that may be generated during sanding. Additionally, wear gloves to prevent any oils from your hands transferring onto the sculpture.
- Sanding the Surface: Start with a coarse-grit sandpaper (around 120 to 180 grit) and gently sand the surface of the sculpture in a circular or back-and-forth motion. This will help smooth out any imperfections or uneven areas. Gradually progress to finer-grit sandpapers (320, 400, and 600 grit) for a progressively smoother surface.
- Wet Sanding (Optional): If desired, you can wet sand the sculpture by using water to lubricate the sandpaper. Wet sanding can help prevent the buildup of dust and result in an even smoother finish.
- Inspect the Surface: After each sanding step, wipe away any dust or debris and inspect the surface. This will allow you to identify any remaining imperfections or uneven areas that may require further sanding.
- Resin Polishing: Once the surface is satisfactorily smooth, you can move on to polishing the resin. Apply a resin-specific polishing compound to a soft cloth and gently buff the surface in circular motions. This will enhance the shine and clarity of the resin.
- Final Cleaning: After polishing, clean the sculpture thoroughly to remove any residue or polishing compound. Use a soft cloth or a microfiber cloth to ensure a clean and residue-free finish.
- Review and Make Adjustments: Take the time to review your sculpture and make any final adjustments or touch-ups as needed. This could include adding more layers of resin, applying varnish or sealant, or adding additional decorative elements.
Sanding and adding the finishing touches are essential for creating a polished and professional-looking resin sculpture. Take your time to ensure a smooth surface and pay attention to detail. Remember that each sculpture is unique, so follow your artistic instincts and make adjustments based on your vision. With the sanding and finishing steps complete, you can now move on to mounting or displaying your resin sculpture.
Mounting or Displaying the Sculpture
Once your resin sculpture is fully finished and polished, it’s time to consider how you want to mount or display it. The mounting or display method you choose will depend on the size, shape, and overall design of your sculpture. Here are some ideas on how to effectively showcase and present your resin sculpture:
- Base or Stand: Place your sculpture on a decorative base or stand to give it a stable foundation and elevate its presence. Choose a base that complements the style and aesthetic of your sculpture.
- Wall Mounting: If your sculpture is designed to be wall-mounted, consider using hooks or brackets to securely hang it on the wall. Make sure to use appropriate hardware and ensure the sculpture is properly supported.
- Shadow Box: Display your sculpture in a shadow box frame to provide a three-dimensional effect. This method allows for protection while still showcasing the intricate details of your sculpture.
- Pedestal: Place your sculpture on a pedestal or plinth to give it a museum-like display. Opt for a natural wood, marble, or acrylic pedestal that complements the overall aesthetics and style of your sculpture.
- Curio Cabinet or Display Case: If you want to protect your sculpture from dust, sunlight, or potential damage, consider placing it in a curio cabinet or display case. This allows for easy viewing while keeping the sculpture safe and secure.
- Group Display: If you have multiple resin sculptures or want to create a visually striking arrangement, consider displaying them together as a group. Arrange them in a cohesive manner, considering size, color, and theme.
- Lighting: Strategically place lighting to highlight the features and details of your sculpture. This can be achieved by using spotlights, LED strips, or ambient lighting to enhance the overall visual impact.
- Rotating Display: If your sculpture has interesting angles or different views, consider using a rotating display stand or turntable. This enables viewers to appreciate the sculpture from various perspectives.
Remember, the mounting or display of your resin sculpture is an opportunity to showcase its beauty and captivate viewers. Choose a method that suits the style and context in which you want your artwork to be presented. Be creative and experiment with different display ideas to find the best way to highlight the unique qualities of your sculpture.
With your sculpture effectively mounted or displayed, take a moment to appreciate your hard work and enjoy the admiration it receives. Properly maintaining and caring for your resin sculpture will help preserve its beauty and ensure its longevity.
Tips for Maintenance and Care
After investing time and effort into creating your resin sculpture, it’s important to properly maintain and care for it to ensure its longevity and continued beauty. Here are some tips to help you effectively maintain and care for your resin sculpture:
- Dust regularly: Dust your resin sculpture regularly using a soft, lint-free cloth or a feather duster. This will help prevent the buildup of dust and maintain its visual appeal.
- Avoid direct sunlight: Keep your resin sculpture away from direct sunlight as prolonged exposure to UV rays can fade or discolor the resin over time. If displaying your sculpture near a window, consider using UV-filtering glass or curtains to protect it.
- Avoid extreme temperatures: Extreme temperatures can have detrimental effects on resin. Avoid placing your sculpture in areas that are too hot or too cold, as this can weaken or distort the resin material.
- Handle with care: When handling your sculpture, be gentle and avoid placing unnecessary pressure on delicate parts. Support the sculpture from the base or sturdier areas to prevent accidental damage or breakage.
- Use caution with cleaning products: If you need to clean your sculpture, use mild, non-abrasive cleaners and a soft cloth. Avoid harsh chemicals or abrasive materials that can damage the resin’s surface. Always test a small, inconspicuous area first before applying any cleaner.
- Protect from impact: Avoid placing your sculpture in high-traffic areas where it could be accidentally bumped or knocked over. Keep it in a safe and secure location to minimize the risk of damage.
- Occasional re-polishing: Over time, the shine of the resin may dull. To restore its luster, gently polish the surface with a resin-specific polishing compound according to the manufacturer’s instructions.
- Keep in a stable environment: Maintain a stable environment for your sculpture, free from excessive humidity or drastic temperature changes. Fluctuations in environmental conditions can cause the resin to expand or contract, leading to cracks or other forms of damage.
- Regular inspections: Periodically inspect your sculpture for any signs of damage, such as cracks, chips, or discoloration. Address any issues promptly to prevent further damage and deterioration.
By following these maintenance and care tips, you can preserve the beauty and integrity of your resin sculpture for years to come. Treat your sculpture with care, keep it in a suitable environment, and perform regular upkeep to ensure its longevity and retain its stunning appearance.
Now that you have the knowledge and guidance to maintain your resin sculpture, you can continue to enjoy and showcase your artwork with confidence.