
Materials and Tools Needed
Creating a corner floating shelf requires a few essential materials and tools. Before getting started, ensure that you have the following items on hand:
- 1. Wood: Choose a sturdy, high-quality wood that matches your desired style and fits well in the corner space. Consider using pine, oak, or plywood for the shelf.
- 2. Saw: A saw is necessary for cutting the wood into the appropriate sizes and shapes. A circular saw or miter saw would work well for this project.
- 3. Sandpaper: To achieve a smooth and polished finish, you’ll need sandpaper in various grits. Start with a coarse grit to shape and smooth the wood, and gradually move to finer grits for a finer finish.
- 4. Measuring Tape: Accurate measurements are crucial for a perfectly fitting shelf. Use a measuring tape to measure the dimensions of your corner space and the desired size of the shelf.
- 5. Drill: A drill will be needed to create pilot holes for screws and to attach the shelf to the wall securely. Make sure to have the appropriate drill bits for your chosen screws.
- 6. Level: Ensuring that your shelf is level is essential for both its stability and aesthetics. Use a level tool to ensure straight and even installation.
- 7. Screws: Choose screws that are appropriate for the thickness of your wood and the type of wall you’re attaching the shelf to.
- 8. Paint or Stain: If you prefer a finished look, choose your preferred paint or wood stain to give your shelf a personal touch. Make sure to have brushes or foam applicators for the finish.
- 9. Screwdriver or Drill Driver: A screwdriver or drill driver will be needed to drive the screws into the wood and the wall. Ensure you have the appropriate size and type for your screws.
- 10. Safety Gear: To protect yourself during the cutting and sanding process, wear safety goggles, a dust mask, and ear protection.
Having these materials and tools in place will make the process of creating your corner floating shelf much easier and more efficient.
Step 1: Measure and Determine Placement
The first step in creating a corner floating shelf is to measure the space and determine the ideal placement for the shelf. Follow these steps to ensure a proper fit:
- Begin by measuring the height, width, and depth of the corner space where you want to install the shelf. Take accurate measurements using a tape measure to ensure a precise fit.
- Consider the weight-bearing capacity of the wall and the materials you plan to use for the shelf. It is important to choose a corner that can support the weight of the shelf and any items you intend to place on it.
- Think about the overall aesthetic and functionality of the shelf. Consider how it will complement the room’s design and what purpose it will serve. Will it be a decorative display or a functional storage space?
- Take into account any obstacles or obstructions that may affect the placement of the shelf, such as light switches, outlets, or other fixtures. Ensure that the shelf does not interfere with these elements.
- Based on your measurements and considerations, determine the dimensions of the shelf that will fit perfectly in the corner space. Make note of the height, width, and depth of the shelf.
By measuring the space accurately and carefully considering the placement, you can ensure that your corner floating shelf fits seamlessly and enhances the overall look of the room.
Step 2: Cut the Wood Pieces
Once you have determined the measurements and placement for your corner floating shelf, it’s time to cut the wood pieces to the appropriate sizes. Follow these steps to cut the wood accurately:
- Using the measurements you noted in the previous step, mark the dimensions on the wood. Double-check the measurements to ensure accuracy.
- Set up a saw, such as a circular saw or miter saw, with the appropriate blade for cutting wood. Ensure that the saw is securely positioned and follow all safety precautions.
- Place the wood on a stable surface or workbench. Use clamps to secure the wood to prevent it from moving during the cutting process.
- Using the marked measurements, carefully cut the wood pieces according to the desired dimensions. Take your time and make precise cuts.
- If your shelf design includes angled corners to fit the corner space, use a miter saw to create clean and accurate miter cuts.
- After cutting each piece, use sandpaper to smooth any rough edges or surfaces. This step will ensure a polished finish and eliminate any potential splinters.
Remember to wear appropriate safety gear, such as safety goggles and gloves, to protect yourself during the cutting and sanding process. Take extra care when using power tools and follow all manufacturer’s instructions.
By properly cutting the wood pieces, you will ensure that your corner floating shelf fits perfectly in the designated space and creates a visually appealing result.
Step 3: Sand the Wood
After cutting the wood pieces for your corner floating shelf, the next step is to sand the wood to achieve a smooth and polished finish. Follow these steps to sand the wood effectively:
- Start with coarse-grit sandpaper (around 80 grit) to remove any rough surfaces, uneven edges, or imperfections. Sand the entire surface of each wood piece, paying attention to the corners and edges.
- Move to a medium-grit sandpaper (around 120 grit) and continue sanding the wood. This step will further refine the surface, smoothing out any remaining roughness.
- Finally, use a fine-grit sandpaper (around 220 grit) to achieve a smooth and polished finish. Sand the wood in the direction of the grain to avoid causing scratches.
- After sanding with the fine-grit sandpaper, wipe off any dust or debris from the wood using a clean cloth or tack cloth.
- Inspect the wood carefully to ensure that it is smooth and free from any imperfections. If necessary, repeat the sanding process with finer grit sandpaper for an even smoother finish.
Sanding the wood not only improves its appearance but also prepares it for painting or staining in the next steps. It creates a clean and polished surface that enhances the overall look of your corner floating shelf.
Step 4: Assemble the Shelf
With the wood pieces cut and sanded, it’s time to assemble your corner floating shelf. Follow these steps to properly assemble the shelf:
- Begin by laying out the wood pieces in the desired configuration, ensuring that they fit together snugly. Double-check the measurements and make any necessary adjustments.
- If using screws to join the wood pieces, pre-drill pilot holes to prevent the wood from splitting. Use a drill with an appropriate drill bit, making sure the holes are slightly smaller than the screws.
- Apply a small amount of wood glue along the edges of the wood pieces to provide additional strength and stability to the shelf.
- Align the wood pieces according to the desired configuration and securely fasten them together using screws. Be careful not to overtighten the screws, as this may cause the wood to split.
- Check the shelf for stability and ensure that all joints are secure. Make any necessary adjustments or reinforcements before proceeding.
It is important to note that there are various methods of assembling a corner floating shelf, such as using brackets or hidden supports. Choose the method that best fits your design and follow the specific instructions accordingly.
By assembling the shelf with care and using proper techniques, you will create a sturdy and visually appealing corner floating shelf that will enhance the functionality and aesthetics of your space.
Step 5: Attach the Shelf to the Wall
Once the corner floating shelf has been assembled, the next step is to securely attach it to the wall. Follow these steps to properly mount the shelf:
- Hold the assembled corner floating shelf in the desired position on the wall, ensuring that it is level and fits snugly in the corner.
- Using a pencil, mark the placement of the shelf on the wall. Make sure to mark the spots where the support brackets or screws will be attached.
- If using support brackets, position them on the wall according to the marked spots. Use a level to ensure they are straight and level.
- Pre-drill pilot holes for the support brackets or screws using a drill with an appropriate drill bit. The size of the drill bit should match the size of the brackets or screws.
- Securely attach the support brackets or screws to the wall using a screwdriver or drill driver. Make sure they are firmly anchored in place.
- Carefully place the assembled shelf onto the support brackets, ensuring a snug fit. If using screws, attach the shelf directly to the pre-drilled pilot holes.
- Double-check that the shelf is level and secure on the wall. Make any necessary adjustments or tightening as needed.
It is crucial to ensure that the shelf is securely mounted to the wall to avoid any accidents or instability. If you are unsure about the installation process, it is recommended to consult a professional or seek assistance from an experienced individual.
By properly attaching the corner floating shelf to the wall, you can enjoy a functional and visually appealing storage solution that enhances your space.
Step 6: Paint or Stain the Shelf
Once the corner floating shelf is securely attached to the wall, you have the option to paint or stain it to achieve the desired finish. Follow these steps to paint or stain your shelf:
- If you choose to paint the shelf, start by applying a coat of primer. This will help the paint adhere to the wood surface and prevent any discoloration. Allow the primer to dry completely according to the manufacturer’s instructions.
- After the primer is dry, apply a thin and even coat of paint using a brush or foam applicator. Work in the direction of the wood grain for a smooth finish. Allow the first coat to dry completely before applying additional coats, if needed.
- If you prefer a stained finish, start by applying the stain using a brush or cloth, following the grain of the wood. Allow the stain to penetrate the wood for the recommended duration specified by the stain manufacturer.
- After the recommended duration, remove any excess stain using a clean cloth. Allow the first coat of stain to dry completely before applying additional coats to achieve the desired color and depth.
- If desired, sand lightly between coats of paint or stain to create a smooth and even finish. Always wipe away any dust before applying the next coat.
- Once you are satisfied with the color and finish, apply a clear topcoat for added protection and durability. Choose a topcoat that is compatible with the type of paint or stain you used, following the manufacturer’s instructions.
Remember to work in a well-ventilated area and follow all safety instructions when working with paint or stain. It is always a good idea to test the paint or stain on a small, inconspicuous area of the wood to ensure you achieve the desired result.
By painting or staining the corner floating shelf, you can customize its appearance to match your décor and personal style, creating a cohesive and visually appealing addition to your space.
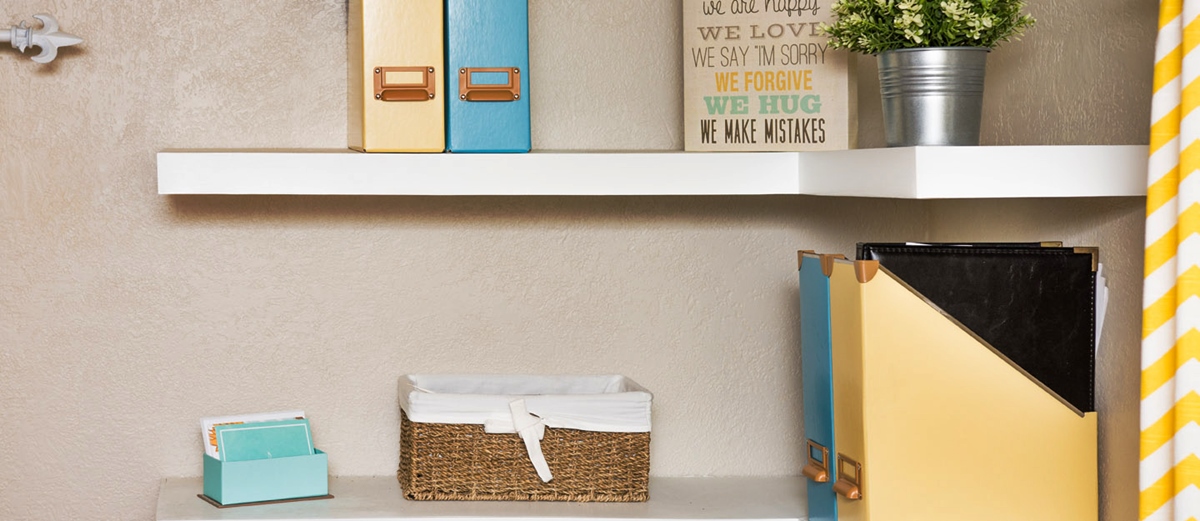
Step 7: Decorate and Organize
With the corner floating shelf fully assembled and finished, it’s time to add the final touches by decorating and organizing the shelf. Follow these steps to make the most of your new storage space:
- Clean the shelf and remove any dust or debris from the surface.
- Consider the purpose of the shelf and decide what items you want to display or store on it. This could include decorative objects, books, plants, or personal mementos.
- Arrange your items on the shelf, taking into account their size, shape, and visual appeal. Play with different arrangements until you find the most pleasing and functional arrangement.
- Use decorative containers, baskets, or organizers to keep smaller items neatly organized on the shelf.
- Consider adding additional decorative elements such as picture frames, candles, or artwork to personalize the shelf and enhance its visual appeal.
- Step back and assess the overall look of the decorated shelf. Make any adjustments or changes as needed to achieve the desired aesthetic.
Remember that the corner floating shelf is not only a functional storage space but also an opportunity to showcase your personal style and add a touch of personality to your room. Be creative and have fun with the decoration and organization process.
By taking the time to carefully decorate and organize your corner floating shelf, you can transform it into a visually pleasing and functional focal point that adds charm and utility to your space.