
Choosing the Right Clay
Choosing the right clay is crucial when making a clay sculpture. Different types of clay have different properties and characteristics, so it’s important to select one that suits your needs and artistic vision. Here are some factors to consider when choosing clay for your sculpture:
- Clay Type: There are various types of clay available, such as earthenware, stoneware, and porcelain. Earthenware is a popular choice for beginners due to its lower firing temperature and affordability. Stoneware is known for its durability and versatility, while porcelain offers a smooth, translucent finish.
- Working Properties: Consider the working properties of the clay, such as its plasticity, hardness, and shrinkage rate. Plasticity refers to how easily the clay can be molded and shaped, while hardness determines how well the finished sculpture will hold its shape. Shrinkage rate is important to consider, as some clays shrink more during the drying and firing process.
- Firing Temperature: Different clays have different optimal firing temperatures. It’s essential to choose a clay that can withstand the firing temperature of your kiln or firing method. Ensure that the chosen clay and firing temperature are compatible to prevent warping or cracking.
- Texture and Color: Consider the texture and color that you want to achieve in your sculpture. Some clays have naturally occurring speckles or variations in color, which can add visual interest to your piece. You can also experiment with different surface treatments or glazes to enhance the texture and color of your sculpture.
- Budget: Clay can vary in cost, so it’s important to consider your budget when making a selection. Keep in mind that investing in high-quality clay can contribute to the overall success and longevity of your sculpture.
Ultimately, the choice of clay will depend on your personal preference, the specific requirements of your sculpture, and the techniques you plan to use. It’s a good idea to experiment with different clay types and brands to find the one that best suits your artistic style and vision. By carefully considering the characteristics and properties of the clay, you can ensure that your sculpture turns out as intended.
Gathering the Necessary Tools and Materials
Before you start creating your clay sculpture, it’s essential to gather all the necessary tools and materials. Having the right equipment at hand will make the sculpting process smoother and more enjoyable. Here are some essential tools and materials you’ll need:
- Sculpting Clay: Depending on the type of sculpture you plan to create, choose the appropriate clay that aligns with your artistic vision. Ensure you have enough clay to complete your project without running out.
- Sculpting Tools: A variety of sculpting tools will come in handy for shaping and detailing your sculpture. These can include wire sculpting tools, wooden modeling tools, metal tools for cutting and carving, brushes, and smooth finishing tools.
- Armature: An armature is a supportive framework that helps provide structure and stability to your sculpture. It can be made from wire, aluminum foil, or other materials, depending on the size and complexity of your sculpture.
- Work Surface: Prepare a clean and sturdy work surface to prevent any damage or distortion to your sculpture. A plastic tablecloth or a non-stick mat can be useful to keep your workspace clean and make it easier to handle the clay.
- Water and Spray Bottle: Keep a container of water nearby to moisten your hands and tools when working with the clay. Additionally, a spray bottle can help keep the clay moist and prevent drying out during the sculpting process.
- Safety Equipment: Depending on the clay you’re using, it may be necessary to wear safety equipment such as gloves or a dust mask to protect yourself from any potential hazards.
- Reference Materials: If you’re sculpting a specific subject or object, having reference materials such as photographs, sketches, or 3D models can be very helpful for capturing accurate proportions and details.
Ensure that you have all the necessary tools and materials organized and easily accessible before you begin your sculpture. This will save you time and frustration during the creative process, allowing you to focus on bringing your artistic vision to life.
Preparing the Clay
Before you can start sculpting with clay, it’s important to properly prepare the clay to ensure its workability and prevent any potential issues throughout the sculpting process. Here are the steps to prepare the clay:
- Conditioning the Clay: Start by kneading the clay to make it more pliable and remove any air bubbles. If the clay is too hard, you can soften it by adding a small amount of water and kneading it until it reaches a workable consistency.
- Keeping the Clay Moist: Clay can dry out quickly, so it’s important to keep it moist while sculpting. If the clay starts to dry out, mist it with water or cover it with a damp cloth to prevent it from becoming too stiff or cracking.
- Dividing the Clay: If you’re working with a large lump of clay, consider dividing it into smaller sections. This can make it easier to manage and allow you to focus on specific areas of your sculpture without the entire piece drying out too quickly.
- Using Clay Tools: Depending on your sculpting technique, you may need to use clay tools to shape and manipulate the clay. Make sure your tools are clean and free of any previous clay residue before using them on your fresh clay.
- Creating Test Pieces: Before diving into your final sculpture, creating test pieces can be beneficial. Use these test pieces to experiment with different techniques, finishes, or textures, allowing you to gain confidence and make any necessary adjustments before working on your main sculpture.
- Storing the Clay: When you’re not actively working on your sculpture, it’s important to properly store the clay to prevent it from drying out or collecting dust. Seal the clay in a plastic bag or wrap it in plastic wrap to retain moisture and keep it pliable until your next sculpting session.
By following these steps to prepare your clay, you’ll ensure that it remains workable and in good condition throughout the sculpting process. Properly preparing the clay sets the foundation for a successful and enjoyable clay sculpture experience.
Creating a Solid Base
Creating a solid base for your clay sculpture is essential to provide stability and support for the rest of the sculpting process. The base serves as a foundation on which the sculpture will be built, ensuring that it stands strong and remains balanced. Here are the steps to create a solid base:
- Selecting a Base Material: Begin by selecting a base material that will support the weight of your sculpture. Options include wood, metal, or a sturdy plastic base. Choose a material that is appropriate for the size and weight of your sculpture.
- Preparing the Base: Prepare the base by ensuring it is clean and free from any debris. If necessary, sand the surface to create a smooth and even foundation for your sculpture.
- Attaching Armature to the Base: If your sculpture requires an armature, securely attach it to the base. Use epoxy, screws, or any other suitable method to ensure stability. The armature will provide the structural support for your sculpting material.
- Securing the Armature: Once the armature is attached, make sure it is firmly secured to the base. This will prevent any movement while you work on your sculpture.
- Building the Armature: If you’re creating a larger or more complex sculpture, you may need to build up the armature with additional materials. This can include wire, aluminum foil, or foam to give the sculpture a basic shape and structure.
- Stabilizing the Base: Place the base on a stable surface to ensure that it remains steady throughout the sculpting process. You may consider using non-slip pads or clamps to hold the base securely in place.
- Checking Stability: Once the base and armature are in place, double-check the stability of your setup. Wiggle the armature slightly to ensure it is properly secured and doesn’t move or shift on the base.
By creating a solid and stable base, you’ll have a strong foundation to work on your clay sculpture. This base will provide the necessary support for the rest of the sculpting process, allowing you to focus on shaping and detailing your artwork with confidence.
Building the Basic Shape
Building the basic shape of your clay sculpture is the initial step in bringing your artistic vision to life. This stage involves forming the general outline and overall structure of your sculpture. Here are the steps to building the basic shape:
- Kneading the Clay: Start by kneading the clay to make it pliable and remove any air bubbles or inconsistencies. This process helps ensure that the clay will be easier to work with and allows for better manipulation.
- Begin with a Base Form: Take a portion of the clay and shape it into a basic form that resembles the overall shape of your sculpture. Use your hands or sculpting tools to mold the clay into the desired shape, keeping in mind the proportions and dimensions you want to achieve.
- Refine the Shape: As you build the basic shape, pay attention to the details and contours. Continuously assess and refine the shape, adjusting as necessary to capture the essence of your subject or concept.
- Work from General to Specific: Focus on capturing the larger forms and masses before diving into intricate details. By establishing a solid foundation through the basic shape, you create a framework to guide the rest of your sculpting process.
- Use Different Techniques: Employ various sculpting techniques to shape the clay and create the desired forms. This may include pinching, smoothing, carving, or adding small pieces of clay to build up areas that require more volume.
- Regularly Step Back and Assess: Throughout the process of building the basic shape, step back and take a look at your sculpture from different angles. This helps you to evaluate the overall balance, proportion, and composition, making adjustments as needed.
- Refine Transitions: Pay close attention to the transitions and connections between different parts of your sculpture. Smooth out any harsh edges or seams between the clay elements to create a seamless and cohesive overall shape.
Building the basic shape is an essential step in the sculpting process. It lays the groundwork for the more intricate detailing and refinement that will come later. Take your time and be patient with this stage, as it sets the stage for the true artistry that will unfold as you continue to work on your clay sculpture.
Sculpting the Details
Once you have established the basic shape of your clay sculpture, it’s time to move on to sculpting the details. This stage is where you bring your artwork to life by adding intricate features, textures, and fine-tuning the overall expression of your sculpture. Here are the steps to sculpting the details:
- Observation: Take time to observe and study the subject or reference materials closely. Notice the subtle nuances, small features, and intricate details that give the subject its unique characteristics.
- Planning: Determine which areas of your sculpture require the most attention to detail. Identify the key features that will enhance the resemblance or expression of your subject.
- Gradual Approach: Begin by adding general details and gradually work your way towards more specific elements. This step-by-step approach allows you to maintain a balance in proportion and ensures that you don’t get overwhelmed with intricate detailing too soon.
- Use Appropriate Tools: Select the appropriate sculpting tools for each specific detail. Different tools, such as wire loops, small brushes, or carving tools, can help you achieve the desired texture, definition, and precision.
- Layering and Building Up: Add layers of clay or gradually build up small portions to create three-dimensional details. This method allows you to add depth and texture to your sculpture, enhancing realism or creating desired visual effects.
- Focus on Proportions: Continuously refer back to your subject or reference materials to ensure that the proportions of the detailed elements align with the overall sculpture. Pay attention to the relationship between different features and maintain accuracy to capture the essence of your subject.
- Refining and Smoothing: Regularly refine and smooth the details to create a polished and cohesive look. Use your sculpting tools and gentle strokes to blend the details seamlessly into the rest of the sculpture. Smooth transitions and harmonious surfaces contribute to the overall aesthetic appeal of your artwork.
- Add Expressive Features: If your sculpture portrays a character or an emotion, highlight expressive features such as eyes, mouth, or body language to convey the desired mood or narrative. Pay attention to how these details affect the overall expression and storytelling of your sculpture.
Sculpting the details is an intricate and meticulous process that requires patience and focus. Take your time to ensure that each individual detail contributes to the overall quality and impact of your clay sculpture. Remember to step back, evaluate your progress, and make necessary adjustments as you sculpt the intricate features that will bring your work to life.
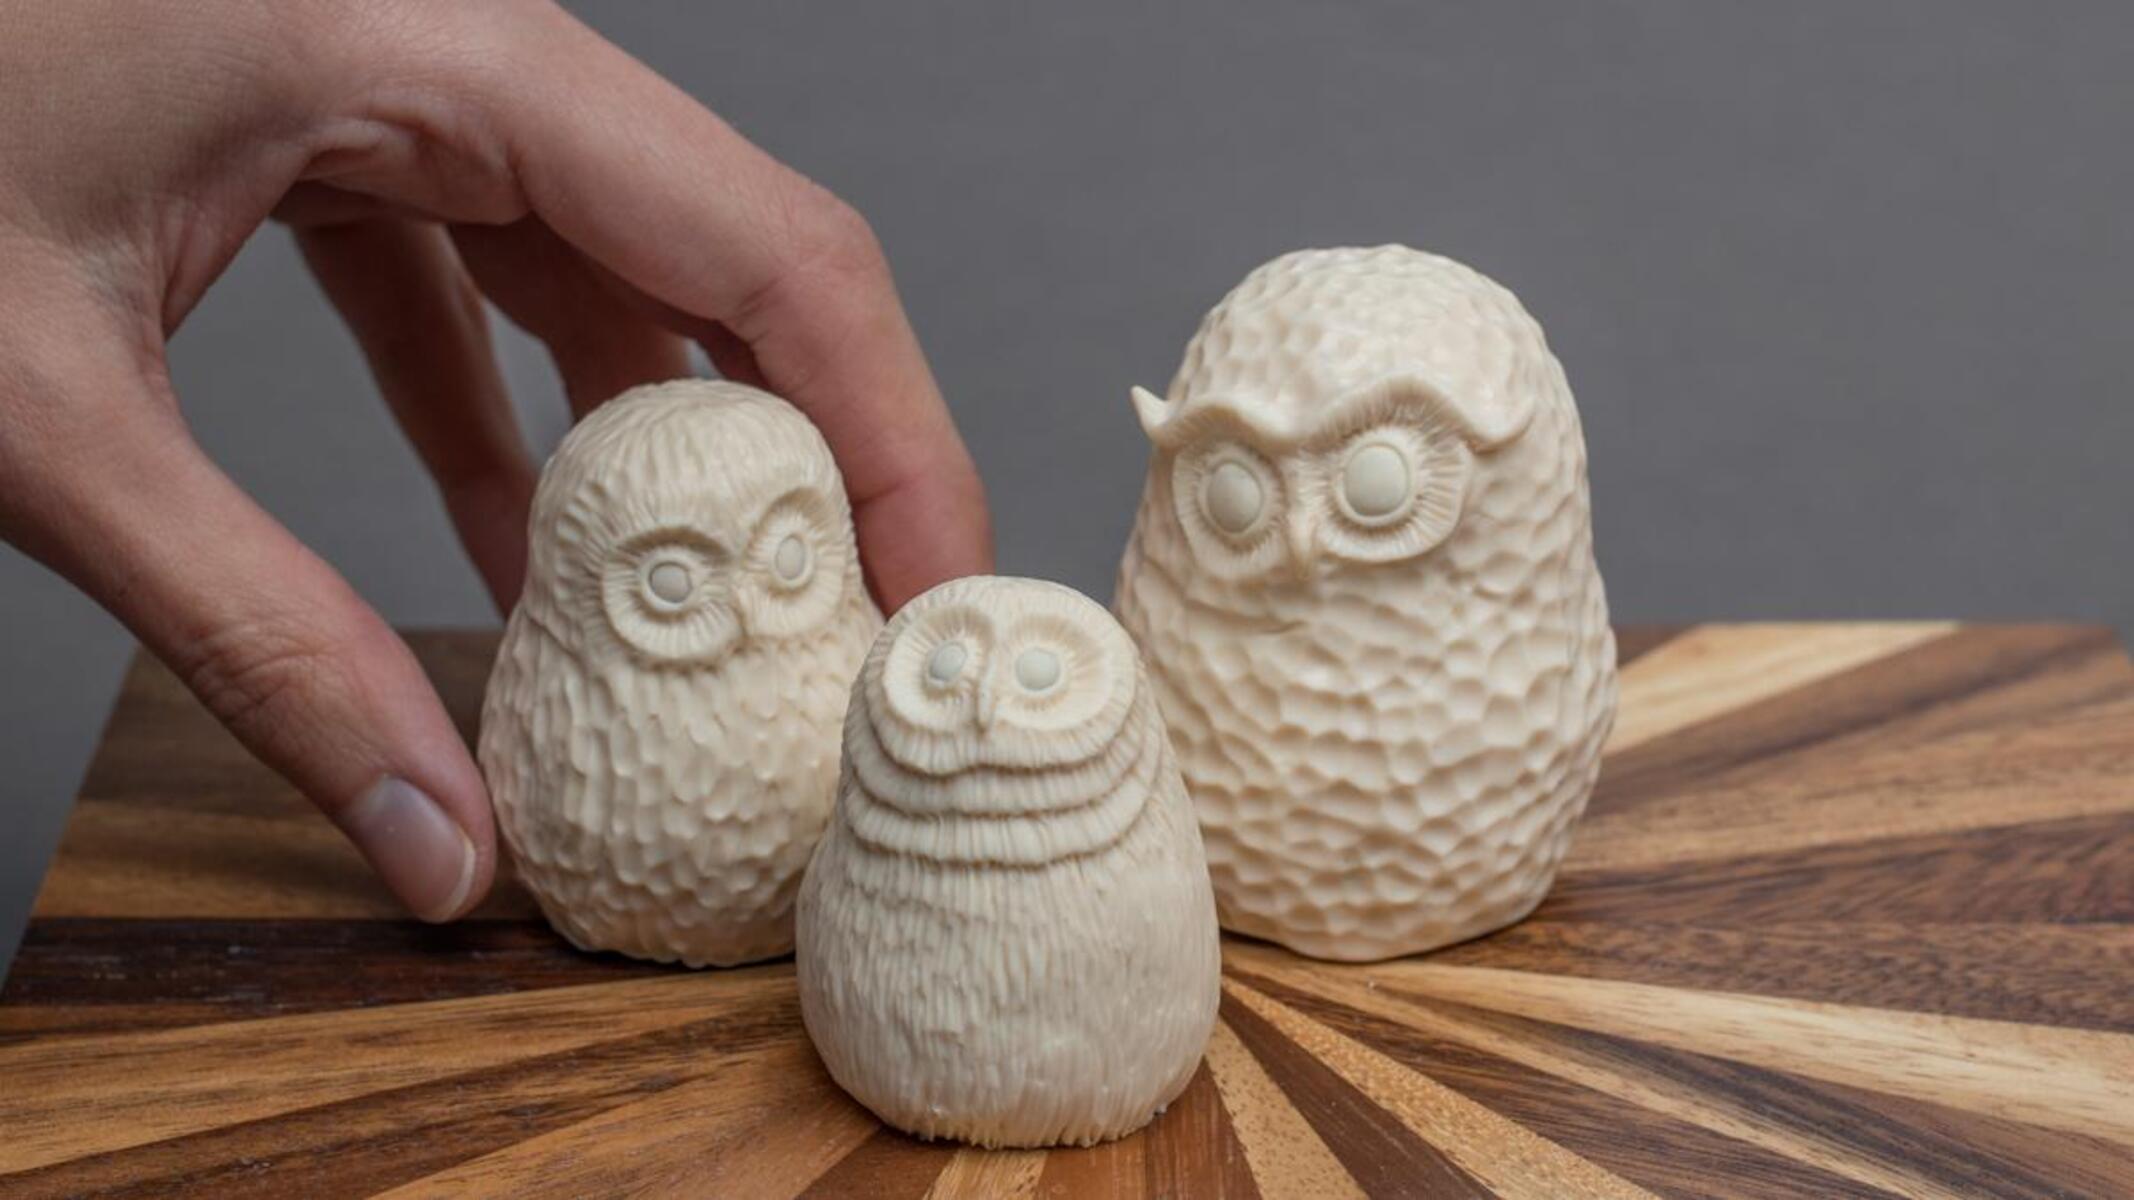
Adding Texture and Surface Finish
Adding texture and surface finish to your clay sculpture is an important step that adds visual interest and enhances the overall aesthetic appeal of your artwork. Texture can breathe life into your sculpture, providing depth, character, and a sense of realism. Here are the steps to adding texture and surface finish to your clay sculpture:
- Consider the Desired Effect: Determine the type of texture or surface finish that aligns with your artistic vision. Think about the subject matter and the mood you want to convey through your sculpture.
- Experiment and Practice: Before applying texture to your final sculpture, it’s a good idea to practice different techniques and textures on test pieces of clay. This allows you to gain confidence and refine your skills before working on the main sculpture.
- Use Various Tools and Techniques: Explore different tools and techniques to create texture. Sculpting tools, brushes, stamps, or even everyday objects can be used to imprint patterns, lines, or shapes into the clay. Experiment and find what works best for the desired effect.
- Consider Proportions and Placement: Pay attention to the size, scale, and placement of the texture on your sculpture. Ensure that the texture complements the overall composition and doesn’t overpower the main elements or distract from the focal point.
- Layering and Building Texture: Build up texture gradually by layering different textures or utilizing a combination of techniques. This creates complexity and depth in the overall surface finish, adding visual interest to your sculpture.
- Personalize with Signature Techniques: Develop your own signature techniques or incorporate unique personal touches that make your sculpture distinct. These can be specific methods or patterns that you have perfected over time and that add a personal touch to your artwork.
- Consider the Overall Composition: Evaluate the texture you have added in relation to the rest of the sculpture. Step back and assess the visual impact from different perspectives to ensure that the texture complements the overall composition and enhances the desired effect.
- Experiment with Surface Finishes: Once you are satisfied with the texture, consider applying surface finishes such as underglazes, stains, washes, or glazes to further enhance the texture and bring out its full potential. These finishes can also add depth and richness to your sculpture.
Adding texture and surface finish to your clay sculpture is a creative and expressive process. It allows you to add another dimension to your artwork, inviting viewers to explore and engage with the tactile qualities of your piece. Take the time to experiment, develop your own style, and enjoy the process of bringing your sculpture to life through texture.
Refining and Smoothing the Sculpture
Refining and smoothing your clay sculpture is a crucial step that helps achieve a polished and professional finish. This stage focuses on eliminating imperfections, refining the overall form, and ensuring a seamless transition between different elements of your sculpture. Here are the steps to refining and smoothing your clay sculpture:
- Evaluate the Sculpture: Take a step back and evaluate your sculpture from different angles. Identify any areas that require refinement, adjustments, or further smoothing.
- Remove Unwanted Imperfections: Use your sculpting tools to carefully remove any unwanted bumps, rough edges, or excess clay. Take your time to ensure smooth transitions and a clean appearance.
- Blend Seams and Joints: Pay attention to areas where different parts of the sculpture meet or seam together. Use your fingers or sculpting tools to blend these areas, creating seamless transitions and a cohesive overall look.
- Gradual Smoothing: Smooth the surface of your sculpture using gentle and controlled strokes. Work gradually, starting from larger areas and moving towards smaller details. This helps maintain the integrity of the form and avoids accidentally distorting or damaging delicate features.
- Use Moisture for Smoothness: Moisten your fingers or sculpting tools with water to aid in smoothing the clay. This adds a thin layer of moisture to the clay surface, helping reduce friction and achieving a smoother finish.
- Pay Attention to Details: Focus on refining smaller details, such as facial features, intricate textures, or fine lines. Use precise movements and take your time to ensure accuracy and precision in these areas.
- Regularly Assess and Adjust: Continuously step back to evaluate your progress and make any necessary adjustments. This allows you to maintain consistency and ensure that the overall sculpture is visually appealing from all angles.
- Multiple Iterations: It may be necessary to go through multiple iterations of refining and smoothing to achieve the desired result. Don’t rush this process – take breaks, step away, and come back with fresh eyes to ensure your sculpture is truly refined.
- Consistency in Texture: Ensure that the texture and smoothness of your sculpture are consistent throughout. The transitions between different areas should flow seamlessly, creating a unified and professional appearance.
Refining and smoothing your clay sculpture is a meticulous process that requires attention to detail and patience. It is in this stage that your sculpture truly comes to life, with clean lines, precise details, and a polished finish. Take your time and enjoy the process, allowing your artistic vision to shine through in the refined and smooth appearance of your sculpture.
Drying the Clay
Once you have finished sculpting and refining your clay sculpture, the next step is to dry the clay. Drying is crucial to remove moisture from the clay, allowing it to harden and prepare for the firing process. Proper drying helps prevent cracking, warping, and other issues that may occur during the firing stage. Here are the steps to effectively dry your clay sculpture:
- Air Drying: Place your clay sculpture in a well-ventilated area with low humidity. Choose a location away from direct sunlight or drafts, as these can cause uneven drying and potentially damage or crack your sculpture.
- Slow and Even Drying: Ensure a slow and even drying process to minimize the risk of cracking or warping. Large sculptures may need additional support or armatures to help maintain their shape during drying.
- Patiently Wait: Allow sufficient time for the clay to dry naturally. The drying time can vary depending on the size, thickness, and type of clay used. Typically, it may take several days to a few weeks for the sculpture to completely dry.
- Check for Dryness: Test the dryness of your sculpture by touching it gently. The clay should feel cool to the touch and no longer soft or moist. Avoid rushing the drying process as premature handling or firing can result in damage.
- Avoid Rapid Drying: Rapid drying can cause the clay to crack due to the unequal moisture content within the sculpture. If needed, cover your sculpture loosely with a plastic bag, allowing for a slower and more controlled drying process.
- Repairing Cracks: If you notice any small cracks during the drying process, you can gently moisten the area and smooth it over with a damp sponge or tool. This can help prevent further cracking or separation.
- Patience is Key: Be patient during the drying stage and resist the temptation to handle or move the sculpture prematurely. Allowing adequate drying time ensures a higher chance of successful firing and a durable end result.
- Monitor the Environment: Keep an eye on the ambient conditions during the drying process. Adjust the drying location or use dehumidifiers if necessary to maintain a stable environment and prevent excessive moisture or dryness.
Properly drying your clay sculpture is essential to prevent damage and prepare it for the firing process. Take your time, be patient, and provide the optimal environmental conditions to ensure a smooth and successful transition from clay to a hardened, ready-to-fire sculpture.
Firing the Sculpture
Once your clay sculpture is completely dry, it’s time to fire the clay in a kiln. Firing is a crucial step in the ceramic process as it transforms the dry clay into a permanent, hardened form. It strengthens the clay, making it durable and able to withstand the test of time. Here are the steps for firing your clay sculpture:
- Prep the Kiln: Ensure that the kiln is clean and in good working condition. Check for any debris or worn-out elements that may affect the firing process.
- Load the Kiln: Carefully place your sculpture inside the kiln, ensuring that it is secure and won’t shift during firing. Leave some space between the sculptures to allow for proper heat circulation.
- Choose Firing Method: Select the appropriate firing method based on the type of clay used, recommended temperature range, and desired final outcome. The most common methods are bisque firing and glaze firing.
- Bisque Firing: Bisque firing is the first firing stage where the clay is heated to a lower temperature, typically around 1650°F (900°C). This removes any remaining moisture and eliminates organic matter in the clay, making it more porous and ready for glazing.
- Glaze Firing: If you plan to glaze your sculpture, apply glazes of your choice before the glaze firing. Glaze firing involves heating the sculpture to a higher temperature, typically ranging from 1850°F to 2300°F (1010°C to 1260°C), depending on the type of clay and glaze being used.
- Monitor the Firing: Keep a close eye on the firing process, ensuring that the kiln reaches the desired temperature gradually and evenly. Monitor the kiln’s temperature and follow the recommended firing schedule for the specific clay and glazes being used.
- Cooling Down: Once the firing is complete, allow the kiln to cool down slowly. Rapid cooling can cause thermal shock and potentially crack or damage your sculpture. Let the kiln cool to room temperature before opening it.
- Inspect and Finish: Carefully remove your sculpture from the kiln once it has cooled. Inspect it for any imperfections, cracks, or glaze defects. If desired, you can add additional finishes such as waxing or polishing to enhance the appearance of your sculpture.
- Enjoy and Display: Your fired clay sculpture is now complete and ready to be enjoyed or displayed. Find a suitable location to showcase your artwork and celebrate the culmination of your creative journey.
Firing is an essential step in the ceramic process that turns your clay sculpture into a permanent work of art. Pay attention to the temperature, firing method, and cooling process to ensure the best results and preserve the integrity of your sculpture.
Painting and Finishing Touches
Once your clay sculpture has been fired and cooled, you have the opportunity to add the final touches through painting and other finishing techniques. This stage allows you to enhance the appearance of your sculpture, add color, depth, and refine the details. Here are the steps to painting and applying finishing touches to your clay sculpture:
- Prepare the Surface: Ensure that the surface of your sculpture is clean and free from any dust or debris. Use a soft brush or cloth to gently remove any particles that may affect the painting process.
- Choose the Right Paints: Select paints that are compatible with ceramics or pottery. Ceramic glazes, underglazes, acrylic paints, or oil-based paints are commonly used for painting sculptures. Consider the desired effect, such as matte, glossy, or metallic finishes, when choosing your paints.
- Plan the Color Scheme: Decide on a color scheme that complements your sculpture’s aesthetic and overall design. Consider the subject matter, mood, and personal artistic preference when selecting colors for different elements and details of your sculpture.
- Apply Base Coats: Start with applying base coats of paint to cover large areas or the entire sculpture if desired. Use broad brushes to achieve an even and smooth application of paint. Allow the base coats to dry thoroughly before proceeding to add details.
- Add Details and Highlights: Use finer brushes to add intricate details and highlights to your sculpture. This may include facial features, textures, or any other elements that require emphasis. Take your time and work patiently to achieve the desired level of precision.
- Layering and Blending: Apply multiple layers of paint to create depth and dimension. Gradually build up color and shading to achieve a realistic or desired artistic effect. Blend colors seamlessly for a smooth transition between different shades or areas.
- Consider Texture and Surface Finish: Use different techniques to add texture or surface finish to your painting. This can include dry brushing, stippling, or sponging to create interesting textures or visual effects. Experiment with different tools and techniques to achieve your desired result.
- Protect with Varnish or Sealant: Once the paint is dry, consider applying a varnish or sealant to protect the surface and enhance the longevity of your painting. Follow the instructions provided by the manufacturer for the specific product you are using.
- Consider Additional Finishing Touches: Explore other finishing touches to further enhance your sculpture. This may include adding patina, metallic accents, or applying a final layer of wax or polish for a smooth and lustrous finish.
- Regularly Inspect and Maintain: Periodically inspect your painted sculpture for any signs of damage, fading, or wear. Address any necessary touch-ups or repairs promptly to maintain the beauty and integrity of your artwork.
Painting and applying finishing touches to your clay sculpture allows you to add your personal artistic flair and bring the sculpture to its full potential. Be mindful of your creative choices, work patiently, and enjoy the process of adding color, depth, and the final details to your unique piece of art.