
Why Do Rugs Get Bumps?
Have you recently purchased a beautiful new rug, only to find unsightly bumps and waves marring its surface? Don’t worry – this is a common issue that many people encounter when they bring home a new rug. Understanding why rugs develop these bumps can help you take the necessary steps to smooth them out and restore your rug’s pristine appearance.
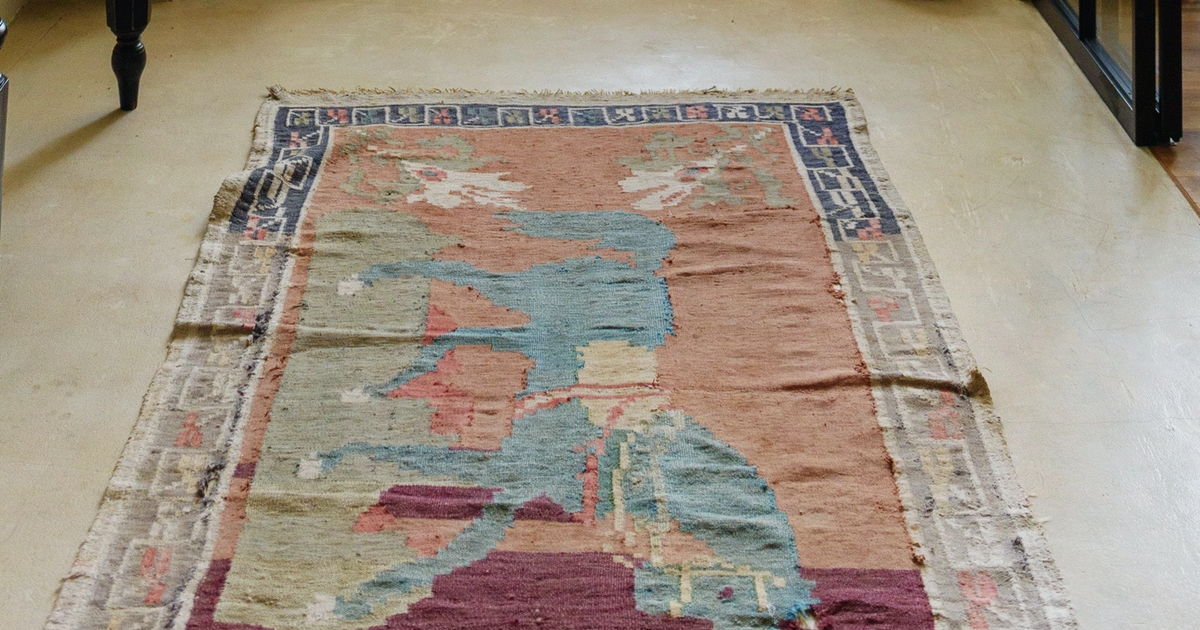
One of the primary reasons rugs develop bumps is due to the way they are stored and transported. During the manufacturing and shipping processes, rugs are often tightly rolled or folded, which can cause creases and wrinkles to form. When you unroll the rug in your home, these creases can create bumps and uneven areas.
Additionally, changes in temperature and humidity can also contribute to rug bumps. Natural fibers, such as wool or cotton, are known to expand and contract with fluctuations in moisture and temperature. This can cause the rug to stretch or shrink unevenly, resulting in bumps and waves.
Another factor that may lead to rug bumps is improper installation or placement. If a rug is not laid flat and evenly on the floor, it can develop lumps and uneven areas. This is especially common with larger, heavier rugs that may require more effort to properly position.
In some cases, the rug’s backing or padding may be the culprit. If the padding underneath the rug is not evenly distributed or properly secured, it can cause the rug to bunch up and form bumps.
Lastly, the rug’s quality and construction can also play a role in the development of bumps. If a rug is made with low-quality materials or inadequate weaving techniques, it may be more prone to developing bumps and uneven areas over time.
Now that you understand why rugs get bumps, you can take appropriate measures to eliminate them and restore your rug’s smooth and flawless appearance. The following steps will guide you through the process, providing effective solutions to get rid of those bothersome bumps and waves, allowing you to enjoy your rug’s beauty to the fullest.
Materials and Tools You’ll Need
Before you begin the process of getting bumps out of your new rug, gather the following materials and tools:
- A clean and clear space to work in
- A sturdy surface, such as a table or floor, to unroll the rug
- Heavy books or weights
- A rug gripper or non-slip pad
- A steamer or iron
- A vacuum cleaner with attachments
- A soft-bristle brush or comb
- A gentle upholstery cleaner or mild detergent
- A clean, lint-free cloth
The clean and clear space will provide you with enough room to unroll and work on the rug without any obstructions. Clear away any furniture or objects that may hinder your movement.
A sturdy surface, such as a table or floor, will ensure that the rug lays flat and allows you to apply pressure evenly on the bumps. Make sure the surface is clean and free from any dust or debris that may transfer onto the rug.
Heavy books or weights are essential for applying pressure on the bumps. Placing them strategically on the raised areas of the rug will help flatten them out gradually over time. Choose books or weights that are heavy enough to provide substantial pressure but won’t cause any damage to the rug fibers.
A rug gripper or non-slip pad is necessary to prevent the rug from sliding or shifting during the process. It will help maintain the rug’s position and stability, allowing you to work on it with ease.
A steamer or iron can be used to remove stubborn wrinkles and creases from the rug. The hot steam or gentle heat from the iron will help relax the fibers, making it easier to smooth out the bumps. Make sure to test the steamer or iron on a small, inconspicuous area of the rug first to prevent any damage.
A vacuum cleaner with attachments will come in handy for removing any loose debris or dirt from the rug before and after the process. It will ensure that the rug is clean and free from any particles that may contribute to the formation of bumps.
A soft-bristle brush or comb can be used to groom and fluff the rug fibers after removing the bumps. It will help restore the rug’s texture and appearance, giving it a fresh and vibrant look.
A gentle upholstery cleaner or mild detergent can be used for spot cleaning any stains or spills on the rug. Make sure to follow the manufacturer’s instructions and test the cleaner on a small, hidden area to avoid any discoloration or damage.
A clean, lint-free cloth is essential for blotting up any excess moisture or cleaning solution during spot cleaning. It will help absorb liquid without leaving behind lint or fibers on the rug.
With these materials and tools at hand, you’re ready to embark on the journey of getting rid of those bothersome bumps and enjoying the smooth, flawless surface of your new rug.
Step 1: Unroll and Inspect Your Rug
The first step in getting bumps out of your new rug is to carefully unroll it and inspect its condition. Follow these steps to ensure a thorough inspection:
- Lay the rug on a clean and clear surface: Find a spacious area where you can unroll the rug completely. Remove any furniture or objects that may obstruct your view and movement.
- Gently unroll the rug: Roll the rug out slowly, taking care not to exert too much force or yank it abruptly. This gradual unrolling will help minimize any additional creases or wrinkles.
- Smooth out any obvious bumps: As you unroll the rug, look for any noticeable bumps or waves. If you spot any, gently press them down with your hands to flatten them slightly. This initial step will make it easier to address these problem areas later on.
- Inspect the entire rug: Take your time to thoroughly examine the entire rug. Look for any visible creases, wrinkles, or uneven areas. Pay close attention to the edges and corners as these areas are more prone to developing bumps.
- Check for any damage: While inspecting the rug, keep an eye out for any tears, frayed edges, or loose threads. These signs of damage may require additional repairs before addressing the bumps. Make note of any areas that need attention.
- Take measurements if necessary: If you plan to use a non-slip pad or rug gripper, measure the dimensions of the rug to ensure a proper fit. This step will help you select the right size of grip or pad for your rug.
By unrolling and inspecting your rug carefully, you will get a clear understanding of the extent and location of any bumps or other issues. This inspection will serve as a guide for the subsequent steps in the process, allowing you to effectively tackle each area of concern.
Step 2: Apply Weight on the Bumps
After inspecting your rug, it’s time to address those unsightly bumps and waves. Applying weight on the bumps will help flatten them out gradually. Follow these steps to effectively eliminate the bumps:
- Identify the areas with bumps: Using your inspection as a guide, pinpoint the specific areas of the rug where the bumps are most prominent. This step will help you focus your efforts and ensure that all the problem areas are addressed.
- Place heavy books or weights on the bumps: Take heavy books or weights and position them strategically on top of the raised areas. Apply even pressure by distributing the weights evenly across the bumps. This pressure will help flatten out the rug over time.
- Leave the weights on for a few days: Allow the weights to sit on the bumps for a few days or even a week. The longer you leave the weights on, the more time the rug fibers have to relax and reshape themselves. Be patient, as this process may take some time.
- Check progress periodically: During this time, regularly check the rug to see how the bumps are progressing. You may notice improvements as time passes, with the rug gradually flattening out. However, bear in mind that some bumps may take longer to completely disappear.
- Adjust the weights if necessary: If you find that certain areas are not responding well to the initial weights, readjust their placement. Experiment with different positions to ensure even pressure is applied across the entire bump.
By applying weight on the bumps, you are encouraging the rug fibers to realign and flatten out. This method works best for less stubborn bumps and may not completely eliminate deep or severe wrinkles. However, it is an effective measure to reduce and minimize the appearance of bumps on your new rug.
Remember to be patient throughout this process, as it may take time for the rug to fully regain its smooth and even surface. In the next step, we’ll discuss using a rug gripper or non-slip pad to further enhance the stability and appearance of your rug.
Step 3: Use a Rug Gripper or Non-Slip Pad
For added stability and to prevent future bumps, using a rug gripper or non-slip pad is highly recommended. These accessories help secure the rug in place and minimize movement, reducing the chances of developing new bumps. Follow these steps to effectively use a rug gripper or non-slip pad:
- Select the appropriate size: Measure the dimensions of your rug and choose a rug gripper or non-slip pad that matches or slightly exceeds the size of the rug. Having the right size ensures maximum coverage and effectiveness.
- Clean the floor: Before applying the rug gripper or non-slip pad, make sure the floor is clean and free from dust or debris. This step will ensure a secure and smooth attachment.
- Position the rug on the floor: Lay the rug in its desired location on the floor, ensuring that it is properly aligned and centered.
- Place the rug gripper or non-slip pad underneath: Carefully lift the rug corners and edges and slide the rug gripper or non-slip pad underneath. Make sure it covers the entire surface area of the rug, providing a firm grip.
- Smooth out the rug: Once the rug gripper or non-slip pad is in place, gently press down on the rug to ensure that it adheres well to the gripper or pad. Smooth out any wrinkles or folds on the rug’s surface.
- Secure the edges: If the rug has curled edges or corners, use double-sided carpet tape or adhesive strips to secure them. This step will prevent the edges from curling up and causing future bumps.
Using a rug gripper or non-slip pad not only helps to keep the rug in place, but it also reduces friction, which can lead to bumps and wrinkles. This added stability will protect your rug from moving and shifting, ensuring that it remains flat and smooth.
By following this step, you are taking preventative measures to avoid future bumps and maintain the overall appearance of your rug. The next step will address using steam or heat to further relax and flatten out the rug fibers.
Step 4: Steam or Iron the Rug
To further relax the fibers and remove stubborn wrinkles, using steam or an iron can be an effective method. Follow these steps to safely steam or iron your rug and achieve a smooth, bump-free surface:
- Read the manufacturer’s instructions: Before applying steam or heat to your rug, it’s important to check the manufacturer’s instructions. Some rugs may have specific care guidelines or restrictions, so it’s crucial to follow them to avoid any damage.
- Test in an inconspicuous area: Choose a small, hidden section of the rug and test the steam or iron on it. This will help you determine the level of heat that is safe for your rug and ensure that it does not cause any discoloration, shrinkage, or damage.
- Set up the steamer or iron: Fill the steamer with water or adjust the iron to the appropriate heat setting recommended by the manufacturer. Allow the steamer or iron to heat up before proceeding.
- Hover the steamer or iron over the bumps: Hold the steamer or iron slightly above the bumps, allowing the steam or heat to penetrate the rug fibers. Do not press the steamer or iron directly onto the rug, as it may cause scorching or burning.
- Gently smooth out the bumps: As you hover the steamer or iron over the bumps, use your free hand to gently smooth out the rug. Applying light pressure, move your hand in the direction of the rug’s pile to encourage the fibers to relax and straighten.
- Repeat the process as needed: For more stubborn bumps, you may need to repeat the steaming or ironing process several times before achieving the desired results. Be patient and avoid rushing, as excessive heat can damage the rug.
Steaming or ironing your rug can be an effective method for getting rid of deep wrinkles and stubborn bumps. However, it’s important to exercise caution and test the heat level before proceeding to ensure the safety of your rug.
Remember to always follow the manufacturer’s instructions and be mindful of the rug’s fibers and construction. Using steam or heat in moderation, along with the previous steps, will help gradually relax the rug and restore its smooth, flawless appearance.
The next step will cover how to properly vacuum your rug to remove any loose dirt or debris.
Step 5: Vacuum Your Rug
Vacuuming your rug is an essential step to remove any loose dirt, debris, and fibers that may have accumulated during the process of getting rid of bumps. Follow these steps to effectively vacuum your rug:
- Prepare the vacuum cleaner: Ensure that your vacuum cleaner is in good working condition and that the appropriate attachments or settings are selected for cleaning rugs.
- Clear the area around the rug: Move any furniture or objects that may obstruct your access to the entire rug surface. Clearing the surrounding area will allow you to vacuum the rug without any hindrances.
- Start from the edges: Begin vacuuming the edges of the rug, as they tend to accumulate more dust and debris. Use the edge-cleaning attachment or a nozzle to effectively clean along the sides.
- Vacuum in the direction of the pile: Vacuum the rug in the direction of the pile to avoid pulling or damaging the fibers. Gentle, overlapping strokes will help ensure that the vacuum effectively captures dirt and dust.
- Pay extra attention to the bumps: Give extra attention to the areas where bumps were previously present. Move the vacuum nozzle or attachment back and forth over these areas to remove any loose fibers or debris that may have been displaced during the previous steps.
- Repeat the process if necessary: Depending on the condition and size of your rug, you may need to repeat the vacuuming process multiple times to thoroughly clean the entire surface.
Vacuuming the rug not only helps in maintaining cleanliness but also helps in grooming the fibers, making the rug appear more uniform and smooth. By removing loose particles, vacuuming ensures that the rug’s surface remains free from debris that can contribute to the development of bumps over time.
However, be gentle while vacuuming delicate or antique rugs to avoid causing any damage. If you’re unsure about the appropriate method for vacuuming a specific type of rug, consult the rug manufacturer or a professional cleaner for guidance.
The next step will cover how to groom the rug fibers to further enhance its appearance and eliminate any remaining bumps.
Step 6: Brush and Groom the Rug Fibers
After vacuuming your rug, the next step is to brush and groom the rug fibers. This process helps to restore the rug’s texture, eliminate any remaining bumps, and give it a fresh, polished look. Follow these steps to effectively brush and groom your rug:
- Select an appropriate brush: Choose a soft-bristle brush or a wide-toothed comb that is suitable for the type of rug fibers you have. Avoid using brushes with stiff bristles, as they may damage or pull on the rug fibers.
- Start from one corner: Begin brushing or combing the rug gently from one corner, moving in the direction of the rug’s pile. Use light, sweeping motions to avoid tugging or distorting the fibers.
- Focus on the bumped areas: Pay particular attention to the areas where bumps were previously present. Spend more time gently brushing or combing these areas, as they may require additional grooming to fully eliminate any remaining unevenness.
- Repeat the brushing process: If necessary, repeat the brushing process in different directions, such as against the pile or diagonally, to further groom the rug fibers and even out the surface.
- Gently shake the rug: If your rug is small enough, you can gently shake it outdoors to help loosen any remaining dirt or debris that might be trapped within the fibers. This step can be beneficial before giving the rug a final brush or groom.
Brushing and grooming the rug fibers not only helps to eliminate bumps and unevenness, but it also allows the fibers to stand upright, giving the rug a fuller and more vibrant appearance. This step is particularly useful for rugs with longer or shaggier pile, as it helps to fluff up the fibers and restore their natural texture.
Remember to be gentle while brushing or combing the rug to avoid causing any damage. If you encounter any resistance or difficulty, adjust the pressure or consider using a different tool to prevent unnecessary strain on the rug fibers.
The final step will explain the importance of repeating the process if necessary, and wrap up the guide to getting bumps out of your new rug.
Step 7: Repeat if Necessary
After completing the previous steps, it’s time to assess the results and determine if any additional action is required. Depending on the severity of the bumps and the material of your rug, you may need to repeat some or all of the previous steps to achieve the desired outcome. Follow these guidelines to decide whether to repeat the process:
Evaluate the rug’s appearance: Take a step back and examine the overall appearance of the rug. Check for any remaining bumps or unevenness that may require further attention. Look for subtle wrinkles or creases that may not be immediately noticeable.
Assess the effectiveness of previous steps: Consider the impact of the previous steps you have taken, such as applying weight, using a rug gripper, steaming or ironing, vacuuming, and brushing the rug fibers. Determine whether these steps have significantly improved the rug’s condition or if additional measures are necessary.
Focus on specific problem areas: Identify any specific areas of the rug that may still have bumps or waves. These areas may require targeted treatment or additional time and effort compared to the rest of the rug.
Consider the time frame: Keep in mind that it may take some time for the rug to completely flatten out. Some bumps, particularly deep or stubborn ones, may require repeated efforts over the course of several days or weeks to see noticeable improvement.
Be patient and repeat the necessary steps: If you find that there are still bumps or unevenness on your rug, don’t be discouraged. Simply repeat the steps that have proved effective so far. Apply weight, use a rug gripper, steam or iron, vacuum, and brush the rug fibers as needed, focusing on the problem areas.
By repeating the process if necessary, you are allowing the rug more time to adjust and reshape. Persistence and patience are key to achieving a smooth, bump-free surface.
Once you are satisfied with the results and the rug appears flat and even, you can proceed to enjoy the beauty and comfort of your newly revamped rug.