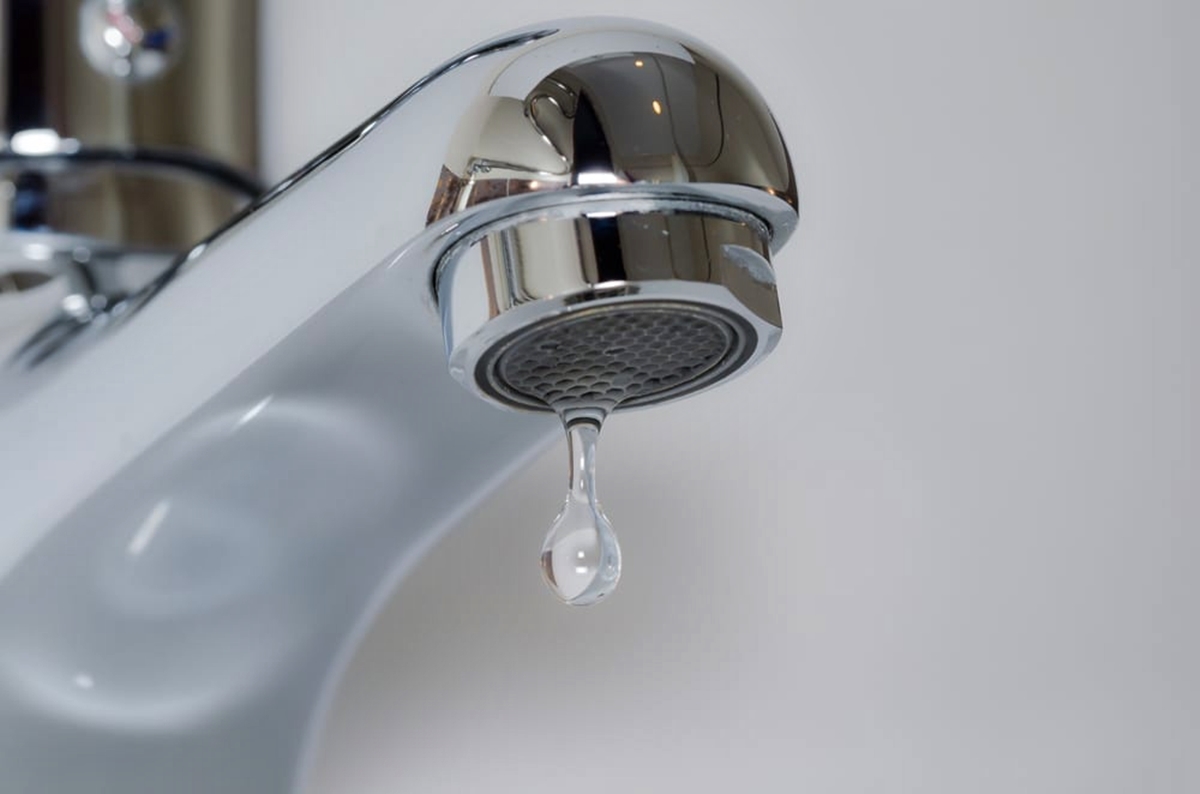
Common Causes of a Dripping Water Filter Tap
A dripping water filter tap can be an annoying and wasteful problem to deal with. Not only does it lead to a constant dripping sound, but it can also result in wasted water and increased utility bills. Understanding the common causes of a dripping water filter tap is crucial in rectifying the issue effectively. Here are some of the main culprits:
- Worn Out O-Rings: The O-rings, which provide a watertight seal, can deteriorate over time due to constant use and exposure to water and minerals.
- Faulty Faucet Cartridge: The faucet cartridge controls the flow of water. If it becomes damaged or worn out, it can cause leaks.
- Loose Water Supply Connections: If the water supply connections to the tap are not properly tightened, it can result in leaks around the base of the tap.
- Calcium and Mineral Build-Up: Over time, minerals present in the water can accumulate and obstruct the flow of water, leading to leaks and drips.
- Leaking Tap Handle: A faulty or worn out tap handle can cause water to leak from the handle area.
Identifying the underlying cause of the dripping water filter tap is essential for effective and lasting repairs. In the following sections, we will explore step-by-step instructions to tackle each of these common issues. By following these methods, you can fix your dripping water filter tap and prevent further water wastage and potential damage to your plumbing system.
Tools and Materials Needed for the Job
Before you begin fixing your dripping water filter tap, it’s important to gather the necessary tools and materials. Having these items on hand will ensure a smooth and efficient repair process. Here are the main things you’ll need:
- Adjustable wrench: This tool will help you loosen and tighten various connections.
- Screwdriver: You’ll need a screwdriver to remove and replace screws in the faucet assembly.
- Plumber’s tape: Also known as Teflon tape, this will be used to create a watertight seal on threaded connections.
- Replacement O-rings: Depending on the type of tap, you may need specific-sized O-rings to replace worn-out ones.
- Faucet cartridge: If the cartridge is faulty, you may need to replace it. Make sure to get the correct replacement cartridge for your specific tap model.
- Calcium and mineral deposit cleaner: If mineral build-up is causing the leaking, you’ll need a cleaner specifically formulated to remove these deposits.
- Rag or towel: Use a rag or towel to catch any water and protect your work area from spills.
Having these tools and materials ready will save you time and make the repair process more efficient. It’s also a good idea to familiarize yourself with the specific make and model of your water filter tap, as different taps may have unique requirements or components. Now that you have everything you need, let’s move on to the step-by-step guide for fixing your dripping water filter tap.
Step-by-Step Guide to Fixing a Dripping Water Filter Tap
If you’re tired of the constant dripping from your water filter tap, follow these step-by-step instructions to fix the issue:
- Turn off the water supply: Before starting any repair work, shut off the water supply to the tap. Look for the shut-off valves under the sink and turn them clockwise.
- Remove the tap handle: Use a screwdriver to remove the screws securing the tap handle. Once the screws are removed, gently pull off the handle.
- Check and replace the O-rings: Inspect the O-rings located around the base of the tap body. If they are worn out or damaged, carefully remove them using a small flat-head screwdriver. Replace them with new O-rings of the same size.
- Clean and lubricate the faucet cartridge: Remove the faucet cartridge by turning it counterclockwise. Use a rag or brush to clean any debris or mineral deposits from the cartridge. Apply a thin layer of faucet grease or silicone lubricant to promote smooth movement.
- Check and tighten water supply connections: Examine the connections where the water supply lines meet the tap. If any connections are loose, use an adjustable wrench to tighten them. Make sure not to overtighten as it may cause damage.
- Replace the faucet cartridge: If the faucet cartridge is damaged beyond repair or shows signs of wear, remove it and replace it with a new one. Follow the manufacturer’s instructions for your specific tap model.
- Fixing a leaking tap handle: If the tap handle itself is leaking, it may need to be replaced. Check the handle for cracks or damage. If necessary, purchase a new handle and install it according to the manufacturer’s instructions.
- Turn on the water supply: Once all the repairs are complete, slowly turn on the water supply at the shut-off valves. Check for any leaks and ensure that the tap is functioning properly.
Following these steps will help you fix a dripping water filter tap and restore its functionality. Remember to take your time and be gentle during the process to avoid causing further damage. If you’re unsure or uncomfortable performing the repairs yourself, it’s always best to seek professional assistance.
Check and Replace the O-Rings
The O-rings located around the base of the tap body play a crucial role in creating a watertight seal. Over time, these O-rings can deteriorate, resulting in leaks and a dripping water filter tap. Here’s a step-by-step guide to checking and replacing the O-rings:
- Turn off the water supply: Before you begin any repair work, ensure that the water supply to the tap is turned off. Look for the shut-off valves under the sink and turn them clockwise.
- Remove the tap handle: Use a screwdriver to remove the screws securing the tap handle. Set the screws aside and gently pull off the handle.
- Inspect the O-rings: Once the handle is removed, you’ll see the O-rings located around the base of the tap body. Carefully examine them for signs of wear, cracks, or damage.
- Remove the old O-rings: If the O-rings are worn out or damaged, use a small flat-head screwdriver to pry them off. Take note of the size and shape of the O-rings for easy replacement.
- Install the new O-rings: Take the new O-rings that match the size and shape of the old ones and slide them into place. Ensure they are seated properly and fit snugly.
- Reattach the tap handle: Carefully place the tap handle back onto the tap body and secure it with the screws you removed earlier. Make sure the handle is aligned properly.
- Turn on the water supply: Once the O-rings are replaced and the tap handle is securely attached, you can turn on the water supply at the shut-off valves. Slowly turn the valves counterclockwise to allow water flow.
- Check for leaks: After turning on the water supply, check for any leaks around the base of the tap. If the O-rings have been properly installed, there should be no leaks, and your water filter tap should no longer drip.
Replacing the O-rings is a common solution to fixing a dripping water filter tap. However, if the issue persists after replacing the O-rings, you may need to explore other potential causes such as a faulty faucet cartridge or loose water supply connections.
Clean and Lubricate the Faucet Cartridge
The faucet cartridge is a crucial component that controls the flow of water in your water filter tap. Over time, mineral deposits, debris, and wear can cause the cartridge to malfunction, leading to leaks and a dripping tap. Here’s a step-by-step guide on how to clean and lubricate the faucet cartridge:
- Turn off the water supply: Before you begin any repair work, make sure to turn off the water supply to the tap. Locate the shut-off valves under the sink and turn them clockwise to shut off the water.
- Remove the tap handle: Use a screwdriver to remove the screws securing the tap handle. Set the screws aside and carefully pull off the handle to expose the faucet cartridge.
- Inspect the faucet cartridge: Take a close look at the faucet cartridge for any signs of damage, such as cracks or corrosion. Also, check for mineral deposits or debris that may be obstructing the cartridge.
- Clean the cartridge: Use a rag or brush to clean the faucet cartridge, removing any mineral deposits or debris. You can also soak the cartridge in a vinegar solution for a thorough cleaning, especially if there are stubborn deposits.
- Apply lubricant: Once the cartridge is clean and dry, apply a thin layer of faucet grease or silicone lubricant to the O-rings and other moving parts of the cartridge. This will help ensure smooth operation and prevent future leaks.
- Reattach the tap handle: Carefully place the tap handle back onto the tap body and securely fasten it with the screws you removed earlier. Ensure that the handle is properly aligned.
- Turn on the water supply: With the faucet cartridge cleaned and lubricated, turn on the water supply at the shut-off valves. Slowly turn the valves counterclockwise to allow water flow.
- Test for leaks: After turning on the water supply, test your water filter tap for any leaks. Ensure that the tap handle operates smoothly and that there are no drips or leaks around the faucet cartridge.
Cleaning and lubricating the faucet cartridge can help restore its functionality and address leaks in your water filter tap. However, if the dripping persists, it may be necessary to consider replacing the faucet cartridge altogether.
Check and Tighten Water Supply Connections
Loose water supply connections can be a common cause of leaks and dripping in a water filter tap. To prevent this issue, it’s important to regularly check and tighten the water supply connections. Here’s a step-by-step guide on how to do it:
- Turn off the water supply: Before you begin, turn off the water supply to the tap by locating the shut-off valves under the sink and turning them clockwise.
- Access the water supply connections: Find the water supply lines that connect to the tap. These are usually located under the sink and may be covered by a panel or protective cap.
- Check for loose connections: Inspect the connections where the water supply lines meet the tap. Look for any signs of looseness or movement in the connections.
- Tighten the connections: Using an adjustable wrench, gently tighten the connections to ensure they are secure. Remember not to overtighten, as it may damage the connections or cause leaks.
- Turn on the water supply: Once the connections are tightened, turn on the water supply at the shut-off valves. Slowly turn the valves counterclockwise to allow water flow.
- Check for leaks: After turning on the water supply, carefully observe the connections for any signs of leaks. If there are no leaks and the water filter tap is functioning properly, you have successfully addressed the loose water supply connections.
Regularly checking and tightening the water supply connections is an important maintenance task to ensure the integrity of your water filter tap. Loose connections can lead to water leaks, wasted water, and potential damage to your plumbing system. By following these steps, you can mitigate the risk of leaks and enjoy a fully functional and drip-free water filter tap.
Replace the Faucet Cartridge
If cleaning and lubricating the faucet cartridge did not resolve the dripping issue in your water filter tap, it may be necessary to replace the cartridge altogether. Here’s a step-by-step guide to help you replace the faucet cartridge:
- Turn off the water supply: Before starting the replacement process, turn off the water supply to the tap. Locate the shut-off valves under the sink and turn them clockwise to shut off the water.
- Remove the tap handle: Use a screwdriver to remove the screws securing the tap handle. Set the screws aside and carefully pull off the handle to expose the faucet cartridge.
- Identify the type of faucet cartridge: Different tap models require different types of faucet cartridges. Determine the specific cartridge needed for your tap by consulting the manufacturer’s instructions or researching the make and model of your tap.
- Remove the old faucet cartridge: Depending on your tap design, you may need to unscrew or twist the cartridge to release it. Follow the manufacturer’s instructions to safely remove the old cartridge.
- Insert the new faucet cartridge: Take the new faucet cartridge designed for your tap model and carefully insert it into the designated slot. Make sure it is properly aligned and fully inserted.
- Reattach the tap handle: Once the new cartridge is in place, reattach the tap handle by securing it with the screws you removed earlier. Ensure that the handle is aligned correctly.
- Turn on the water supply: With the new faucet cartridge installed, turn on the water supply at the shut-off valves. Slowly turn the valves counterclockwise to allow the water to flow.
- Check for leaks: After turning on the water supply, carefully inspect the tap for any leaks. Test the handle and ensure that there are no drips or leaks around the faucet cartridge.
Replacing the faucet cartridge can effectively resolve persistent dripping in your water filter tap. However, it’s essential to use the correct type of cartridge for your specific tap model. If you’re unsure about the replacement process, it’s recommended to consult the manufacturer’s instructions or seek professional assistance.
Fixing a Leaking Tap Handle
A leaking tap handle can be frustrating and lead to water waste. If you notice water dripping from the handle area of your water filter tap, it’s important to address the issue promptly. Here’s a step-by-step guide on how to fix a leaking tap handle:
- Turn off the water supply: Before you begin any repair work, shut off the water supply to the tap. Locate the shut-off valves under the sink and turn them clockwise to stop the water flow.
- Remove the tap handle: Use a screwdriver to remove the screws securing the tap handle. Gently pull off the handle to expose the inner components.
- Inspect the handle: Take a close look at the tap handle for any cracks, excessive wear, or damage. These issues can be the cause of the leak.
- Replace damaged parts: If the tap handle shows signs of damage, consider replacing it with a new one. Purchase a replacement handle that matches the make and model of your water filter tap.
- Tighten handle components: If the handle itself is in good condition, check the components inside the handle for any looseness. Using an adjustable wrench, gently tighten any loose screws or fittings.
- Reattach the tap handle: Once you have replaced any damaged parts or tightened the components, carefully reattach the tap handle. Secure it with the screws you removed earlier, making sure it is aligned properly.
- Turn on the water supply: With the tap handle securely reattached, turn on the water supply at the shut-off valves. Slowly turn the valves counterclockwise to allow water flow.
- Check for leaks: After turning on the water supply, closely inspect the tap handle and the surrounding area for any signs of leaks. Test the handle’s functionality and ensure there are no drips or leaks present.
Fixing a leaking tap handle is vital to prevent water wastage and potential damage to your water filter tap. If the issue persists after following these steps, it’s advisable to seek professional assistance to avoid further complications.
Final Thoughts
Fixing a dripping water filter tap is a task that many homeowners can tackle on their own with the right knowledge and tools. By identifying and addressing common causes such as worn-out O-rings, faulty faucet cartridges, loose water supply connections, mineral build-up, and leaking tap handles, you can resolve the issue and restore your tap’s functionality.
Regular maintenance and timely repairs of your water filter tap are essential to prevent water wastage and potential damage to your plumbing system. It’s important to gather the necessary tools and materials beforehand, including an adjustable wrench, screwdriver, plumber’s tape, replacement O-rings, faucet cartridge, calcium and mineral deposit cleaner, and a rag or towel.
Following a step-by-step guide will help you navigate the repair process effectively. Whether it’s checking and replacing the O-rings, cleaning and lubricating the faucet cartridge, tightening water supply connections, replacing the cartridge, or fixing a leaking tap handle, each step is crucial in resolving the dripping issue.
However, if you’re unsure or uncomfortable performing the repairs yourself, it’s always best to seek professional assistance. A licensed plumber can quickly diagnose the problem and provide expert solutions to fix your dripping water filter tap.
Remember, maintaining a drip-free tap not only saves water and money but also contributes to a more sustainable and environmentally friendly household. By addressing these common issues and keeping your water filter tap in good condition, you can enjoy a reliable and efficient water supply for years to come.