
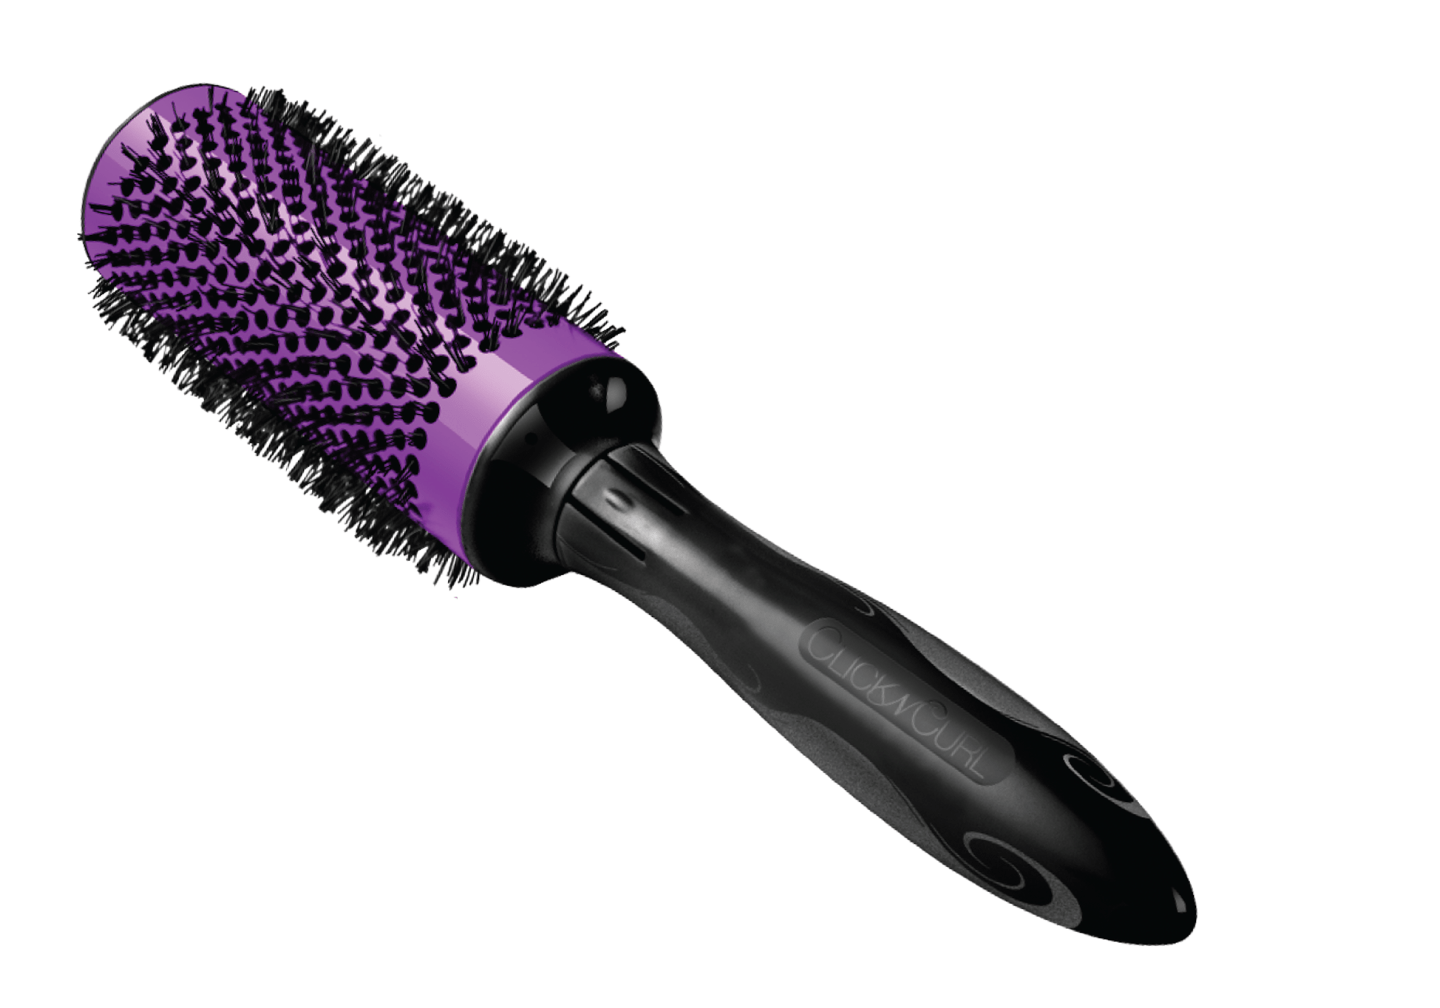
Choosing the Right Brush
When it comes to curling your hair with a brush, selecting the right one is key to achieving your desired look. With the wide range of options available, it can be overwhelming to know which brush will work best for your hair type and desired style. Here are some tips to help you choose the right brush for your curling needs.
Consider Your Hair Type: Different hair types require different brushes. If you have fine or thin hair, a smaller brush with softer bristles may be more suitable to prevent excessive heat exposure. For thick or coarse hair, a larger brush with stiffer bristles will help to tame and shape the curls more effectively.
Barrel Size: The size of the brush barrel determines the tightness of the curls. For looser, natural-looking curls, opt for a larger barrel brush. If you prefer tight, defined curls, a smaller barrel brush will be more suitable. Additionally, consider the length of your hair when selecting the barrel size. Longer hair may require a larger barrel to achieve the desired effect.
Bristle Type: The bristle type is crucial for achieving smooth and shiny curls. For fine or damaged hair, choose a brush with natural bristles, such as boar bristles, as they are gentle and help distribute natural oils evenly. For thicker or coarser hair, a brush with nylon or ceramic bristles can help with control and create a polished finish.
Heat Resistance: It’s essential to select a brush that is heat-resistant, especially if you plan to use it with a styling tool like a hairdryer or curling iron. Look for brushes made with high-quality materials that can withstand high temperatures without melting or warping.
Handle Comfort: Consider the comfort and grip of the brush handle. Look for a brush with an ergonomic design that allows for easy maneuverability and reduces strain on your hand and wrist. Rubberized or textured handles can provide a better grip, making it easier to control the brush while curling.
By taking into account your hair type, desired curl style, and the features of the brush, you can select the perfect tool to achieve fabulous curls. Remember, different brushes may produce different results, so don’t be afraid to experiment to find the brush that works best for you.
Prepping Your Hair
Before you start curling your hair with a brush, it’s important to properly prepare your locks to ensure the best results. Taking a few extra steps in prepping your hair can make a significant difference in the longevity and quality of your curls. Here are some essential tips to help you get your hair ready for styling.
Start with Clean, Dry Hair: It’s best to start with freshly washed and completely dry hair. Clean hair provides a better canvas for styling, as it allows the curls to hold and last longer. If you don’t have time to wash your hair, you can use a dry shampoo to remove excess oil and refresh your roots before styling.
Apply a Heat Protectant: To safeguard your hair from excessive heat damage, apply a heat protectant spray or serum throughout your hair. This will create a barrier between your hair and the hot tool, reducing the risk of heat-related damage, such as breakage and dryness.
Detangle Your Hair: Before you start curling, make sure your hair is free from tangles and knots. Use a wide-toothed comb or a detangling brush to gently remove any knots, starting from the ends and working your way up to the roots.
Use a Styling Primer: If you struggle with keeping your curls intact, consider applying a styling primer or mousse before curling your hair. This product will help to create a better foundation for the curls, making them last longer and appear more defined.
Divide Your Hair into Sections: To make the curling process more manageable, divide your hair into smaller sections. Start by parting your hair down the middle, from the front to the back, and secure each section with hair clips or elastics. This will allow you to work on one section at a time, ensuring that each strand receives the attention it needs.
Apply a Volumizing Product (Optional): If you want to add extra volume to your curls, consider using a volumizing product before styling. Apply a volumizing mousse or spray directly to the roots, focusing on the crown area, and then massage it in with your fingertips. This will help to lift your hair at the roots, giving your curls a fuller and more voluminous look.
By following these prepping steps, your hair will be ready to take on the curling process. Investing a little bit of time and effort into preparing your hair will ensure that your curls last longer, look more polished, and are less prone to heat damage.
Applying Heat Protectant
When it comes to curling your hair with a brush, applying a heat protectant is a crucial step to minimize heat damage and keep your locks healthy. Heat protectant products create a barrier between your hair and the hot styling tools, reducing the risk of dryness, breakage, and split ends. Here’s how to properly apply a heat protectant before curling your hair.
Choose the Right Product: Look for heat protectant products specifically formulated for use with heat styling tools like curling irons and hairdryers. These products are designed to withstand high temperatures and offer optimal protection for your hair.
Shake the Bottle: Before applying the heat protectant, give the bottle a good shake to ensure that the product is evenly distributed. This will help to activate any ingredients that may have settled at the bottom of the bottle.
Spray Evenly: Hold the bottle of heat protectant approximately 6-8 inches away from your hair. Start by spraying a small amount onto the palm of your hand, then run your fingers through your hair from roots to ends, evenly distributing the product. Alternatively, you can spray the protectant directly onto your hair, making sure to cover all sections.
Focusing on the Ends: The ends of your hair are the most vulnerable to heat damage, so make sure to pay extra attention to this area when applying the protectant. Apply a little more product to the ends, gently massaging it in to ensure thorough coverage.
Comb Through: After applying the heat protectant, use a wide-toothed comb or your fingers to comb through your hair. This will help distribute the product evenly and ensure that every strand is protected.
Allow Absorption Time: Give the heat protectant a few minutes to fully absorb into your hair before using any heat styling tools. This will ensure maximum protection and help the product create a barrier against the heat.
Reapply as Needed: If you’re curling your hair in sections or if you’re taking a break between sections, remember to reapply the heat protectant before each section. This will provide consistent protection throughout the entire curling process.
Remember, heat protectant is an essential step in preventing heat damage and keeping your hair healthy. By applying it correctly and evenly, you can enjoy beautiful, styled curls without compromising the health of your precious locks.
Sectioning Your Hair
Properly sectioning your hair is a crucial step when curling with a brush as it helps create a more organized and efficient styling process. By dividing your hair into smaller sections, you can ensure that each strand is adequately styled, resulting in more consistent and beautiful curls. Here’s how to section your hair for a flawless curling experience.
Start with a Part: Begin by creating a part in your hair. You can choose to do a center part or a side part, depending on your preference. Use a comb or your fingers to create a straight line down the middle or off to the side, separating your hair into two equal sections.
Clip Up the Top Section: To make the curling process more manageable, clip up the top half of your hair using hair clips or hair ties. This will allow you to work on the bottom section first and avoid tangling or mixing up the curls as you go along.
Divide the Bottom Section: Take the bottom section of your hair and divide it into smaller, more manageable sections. The number of sections will depend on the thickness and length of your hair. For thin or shorter hair, two to three sections may be sufficient. For thicker or longer hair, you may need to divide it into four or more sections.
Secure with Hair Clips: Once you have divided the bottom section into smaller sections, secure each one with hair clips or hair ties. This will prevent the other sections from getting in the way while you work on a specific section, allowing you to focus on curling one section at a time.
Release the Top Section: Once you have finished curling the bottom section, unclip or untie the top section and let it down. This will expose the next layer of hair for you to work on. Repeat the process of dividing and securing the hair into smaller sections until all sections are curled.
Consider Your Hair Length: If you have shorter hair or are working with bangs, you may need to create additional sections or handle them separately. Pay attention to the specific needs of your hair length and style to ensure a smooth and seamless curling process.
Properly sectioning your hair is essential for achieving consistent and well-defined curls throughout your entire head. By following these steps, you can ensure that each section of your hair receives the attention it deserves and that you avoid any tangled mess or uneven curling along the way.
Choosing the Right Heat Setting
When curling your hair with a brush, it’s crucial to choose the right heat setting on your styling tool. The heat setting determines how much heat is applied to your hair, which can greatly affect the outcome of your curls. Selecting the appropriate heat setting based on your hair type and the desired result will help you achieve beautiful, long-lasting curls without causing unnecessary damage. Here’s how to choose the right heat setting for your curling needs.
Consider Your Hair Type: Different hair types have different tolerance levels to heat. If you have fine or delicate hair, it’s best to start with a lower heat setting to prevent excessive heat exposure and potential damage. For thick or coarse hair, a higher heat setting may be necessary to effectively curl the hair strands.
Know Your Styling Tool: Different styling tools, such as curling irons or hot brushes, may have different heat settings available. Familiarize yourself with the temperature range of your specific tool to make informed decisions about the heat setting.
Start Low and Increase Gradually: It’s always better to start with a lower heat setting and gradually increase the temperature as needed. This allows you to gauge how your hair responds to the heat and prevents you from accidentally applying excessive heat from the start.
Trial and Error: Finding the perfect heat setting for your hair may require some trial and error. Start with a low or medium heat setting and observe the results. If the curls are not holding or you’re not achieving the desired effect, gradually increase the heat until you find the ideal temperature for your hair.
Use Heat Protectant: Applying a heat protectant spray or serum before curling your hair can minimize heat damage, allowing you to use slightly higher heat settings while protecting your hair from excessive heat exposure.
Consider Your Desired Curls: The type and texture of curls you want to achieve also play a role in selecting the heat setting. If you’re aiming for loose and natural-looking curls, a lower heat setting may be sufficient. For tighter, more defined curls, you may need a higher heat setting to achieve the desired effect.
Listen to Your Hair: Pay attention to your hair’s response during the curling process. If you notice any unusual smells or excessive sizzling sounds, it may be a sign that the heat setting is too high, and you should lower it immediately to avoid damage.
Choosing the right heat setting is crucial for achieving the perfect curls while protecting your hair from excessive heat damage. By considering your hair type, knowing your styling tool, and taking the time to experiment with different settings, you’ll be able to find the optimal heat setting that works best for you.
The Brushing Technique
The brushing technique is a key component of curling your hair with a brush. It involves using the brush to wrap and shape your hair around it, creating beautiful curls. Mastering the correct brushing technique will help you achieve the desired curls and ensure that they last throughout the day. Here’s how to perfect your brushing technique for flawless curls.
Start at the Roots: Begin by holding the brush at the roots of a small section of hair. Tilt the brush slightly upward to add volume and lift to the roots. This will help create a more natural-looking curl and prevent the curls from falling flat.
Wrap the Hair: Take a small section of hair and wrap it around the brush barrel away from your face. Hold the brush horizontally to help you achieve nicely shaped curls. Start from the mid-lengths and twist the brush downward as you work your way to the ends. The twisting motion will create a defined curl.
Apply Gentle Tension: As you wrap the hair around the brush, apply gentle tension to smooth the hair and create a sleek, uniform curl. Avoid pulling too tightly, as this can cause stress on the hair and make it prone to breakage.
Hold and Release: Once the hair is wrapped around the brush, hold it in place for a few seconds to allow the heat to set the curl. Gently release the hair from the brush, letting the curl fall naturally. Avoid pulling or tugging on the brush, as this can disrupt the curl pattern.
Repeat the Process: Continue working in small sections, repeating the wrapping and releasing process until all of your hair is curled. It’s important to work systematically and ensure that each section is evenly curled for a cohesive and polished look.
Combining Brush Sizes: To create a more textured and natural-looking style, you can use brushes of different sizes. Alternate between larger and smaller brushes to give your hair more dimension and variation in curl size.
Hold the Brush Vertically: For a different curling effect, try holding the brush vertically instead of horizontally. This can create more spiral-like curls or waves, depending on how you wrap the hair around the brush.
Mastering the brushing technique is a process that may take some practice. Remember to be patient and experiment with different techniques to find what works best for you and your hair type. With time and experience, you’ll develop the skills to create stunning, long-lasting curls that will turn heads wherever you go.
Incorporating Bangs
Incorporating bangs into your curled hairstyle can add depth, dimension, and a touch of sophistication. Whether you have blunt bangs, side-swept bangs, or wispy fringe, there are various ways to style them to beautifully complement your curled hair. Here are some tips on how to incorporate bangs into your curled hairstyle.
Preparation: Before curling your hair, make sure your bangs are properly prepped. Ensure they are clean, dry, and free from any styling products that may weigh them down or make them greasy. Use a fine-toothed comb or a small round brush to gently comb or blow-dry your bangs, giving them a sleek and smooth appearance.
Sectioning: Divide your bangs from the rest of your hair by sectioning them off. Clip the remaining hair out of the way using hair clips or hair ties to keep your bangs separate and easily accessible for styling.
Curling Technique: When curling your bangs, the technique will depend on the desired look you want to achieve.
– For a soft, natural look, use a curling iron with a larger barrel size. Start at the roots of your bangs and wrap them around the curling iron away from your face. Hold for a few seconds to set the curl, and then gently release the curl from the iron. Repeat this process for all sections of your bangs.
– For a more defined or structured look, use a smaller barrel curling iron or a hot brush. Wrap small sections of your bangs tightly around the iron or brush, holding for a few seconds to create a tighter curl. Release the curl and repeat until all sections of your bangs are curled.
Styling Options: Depending on your preference, you can style your bangs in different ways to complement your curled hair.
– For a cohesive look, curl your bangs in the same direction as the rest of your hair. This will create a seamless blend between your bangs and the curls, resulting in a polished and unified hairstyle.
– If you prefer a more dramatic or contrasting effect, curl your bangs in the opposite direction of the rest of your hair. This will add dimension and visual interest to your hairstyle, giving it a unique and eye-catching look.
Finishing Touches: Once your bangs are curled, you can use your fingers or a wide-toothed comb to gently separate and tousle the curls for a more voluminous or relaxed appearance. Use a light-hold hairspray to set the curls and keep them in place throughout the day.
Remember to adjust the curling technique and styling options based on the length and thickness of your bangs. Experiment with different curling techniques to find the one that suits your style and desired look the best. Incorporating bangs into your curled hairstyle can elevate your overall look, adding a touch of charm and sophistication to your hairdo.
Creating Loose Curls
Loose curls are a versatile and effortlessly chic hairstyle that can be achieved with a brush. Whether you’re aiming for a casual, everyday look or an elegant, red carpet-worthy style, creating loose curls with a brush is a simple yet effective method. Here’s how to achieve beautiful loose curls with your brush.
Prep Your Hair: Start by preparing your hair to ensure optimal results. Wash and condition your hair prior to styling and apply a heat protectant spray or serum to shield your locks from heat damage. It’s also helpful to lightly mist your hair with water or a texturizing spray to provide some grip and hold to the curls.
Section Your Hair: Divide your hair into manageable sections. For loose curls, smaller sections will create more defined curls, while larger sections will result in looser, beachy waves. Clip away the sections you’re not working on to keep them separate.
Brush and Wrap: Start with a section of hair and hold a brush horizontally. Take a small section of hair and wrap it around the brush, away from your face. Gently glide the brush down towards the ends, maintaining a slight tension on the hair. Continue wrapping the section of hair until you reach the ends. Hold for a few seconds to allow the heat to set the curl, then carefully release the hair from the brush.
Alternate Directions: To create a more natural look, alternate the direction in which you wrap the hair around the brush. For example, wrap one section away from your face, then the next section towards your face. This technique adds dimension and prevents the curls from clumping together too perfectly.
Vary the Brush Size: Experiment with different brush sizes to achieve the desired curl. A larger brush barrel will create looser, more relaxed curls, while a smaller brush barrel will result in tighter, defined curls. Mixing different brush sizes can also add texture and variation to your hairstyle.
Allow Curls to Cool: After releasing each curl from the brush, allow it to cool down before touching or styling it further. This helps to set the curl and ensure it lasts longer. You can gently cup the cooled curl in your hand or clip it to your scalp using a bobby pin to maintain its shape.
Finishing Touches: Once all your curls have cooled down, you can gently run your fingers through them to break them up slightly and create a more effortless look. If desired, use a texturizing spray or hairspray to provide hold and add a touch of texture to your loose curls.
Creating loose curls with a brush is a versatile styling option that can be adapted to suit various occasions and personal preferences. By following these steps and adding your personal touch, you can achieve gorgeous loose curls that will enhance your overall look and leave you feeling confident and ready to take on the day.
Creating Tight Curls
Tight curls can add a touch of glamour and sophistication to your look, and achieving them with a brush is easier than you might think. Whether you’re attending a special event or simply want to switch up your hairstyle, creating tight curls with a brush can help you achieve a stunning and polished look. Here’s how to create tight curls using a brush.
Prep Your Hair: Start by preparing your hair for styling. Cleanse and condition your hair to ensure a smooth base. Apply a heat protectant product to shield your hair from the heat of the styling tools, preventing damage. For added hold and texture, you can also apply a small amount of mousse or styling gel to your hair.
Section Your Hair: Divide your hair into small sections. The smaller the section, the tighter the curl will be. Use hair clips or hair ties to secure the sections you are not working on, keeping the hair organized and manageable.
Wrap and Roll: Take a section of hair and wrap it around the brush tightly, starting from the roots and working your way down to the ends. Use the brush to gently roll the hair as you continue to wrap it around. The tighter you roll, the tighter the curl will be. Secure the ends of the hair by tucking them into the brush or using a small hair clip or bobby pin.
Apply Heat: Hold a blow dryer or heat styling tool close to the wrapped hair, directing the heat towards it. Be sure to use a low to medium heat setting to minimize the risk of heat damage. Keep the heat focused on the section for a few seconds to allow the curl to set.
Cool and Release: After applying heat to the section, gently release the hair from the brush and allow it to cool in its curled position. This will help set the curl and make it last longer. Repeat this process for each section of hair, working your way around your head until all the hair is curled.
Final Touches: Once all the curls have cooled down, you can use your fingers or a wide-toothed comb to gently separate and define the curls. For added hold and longevity, mist your hair with a light-hold hairspray. You can also run your fingers through your curls to create a more relaxed and tousled look, or keep them intact for a more defined and polished appearance.
Creating tight curls with a brush is a fantastic way to change up your hairstyle and achieve a glamorous look. By following these steps and adjusting the size of the sections and the tightness of the curls, you can tailor the style to your preference. Embrace the versatility of tight curls and enjoy experimenting with this stunning hairstyle.
Setting the Curls
Once you have finished curling your hair with a brush, it’s important to set the curls to ensure they last throughout the day or evening. Properly setting the curls helps to maintain their shape and prevents them from falling flat. Here are some effective ways to set your curls after using a brush.
Cool Down Time: Allow your curls to cool down completely before setting them. This can help the curls become more defined and longer-lasting. Giving the hair time to cool will help the curl pattern set, resulting in stronger, more resilient curls.
Hairspray: Apply a light-hold hairspray to your curls to set them. Hold the hairspray about 10 to 12 inches away from your head and mist lightly over the curls. Be careful not to overspray, as too much product can weigh down the curls and make them lose their shape.
Pin Curl Method: Another effective way to set curls is by using pin curls. Take a section of curled hair and twist it tightly into a coil. Secure the coil against your scalp using bobby pins or hair clips. Repeat this process for all of your curls. Allow the pins to remain in your hair for about 10-15 minutes or until the curls have cooled down. Remove the pins carefully, and you’ll have beautifully set curls that will last longer.
Cool Shot Button: If you’re using a blow dryer with a cool shot button, use it to blast cool air onto your curls after curling each section. The cool air helps to seal the hair cuticles, setting the curls and making them last longer.
Finger Twirling: After applying hairspray or using the cool shot button, you can enhance the shape and longevity of your curls by gently twirling them around your finger while they’re still warm. This helps the curls hold their shape and gives them a more defined and polished appearance.
Avoid Touching: Once you have set your curls, try to avoid touching them excessively. Constantly running your fingers through the curls can cause the curls to loosen and lose their shape. If you need to adjust or reshape any curls, use a wide-toothed comb or your fingers to gently separate or arrange them.
Sleeping with Curls: To maintain your curls overnight, you can tie your hair into a loose bun or use a silk or satin pillowcase to prevent friction and minimize frizz. In the morning, you may need to touch up a few curls or refresh them with a light mist of water and some hairspray.
By setting your curls properly after using a brush, you can ensure they stay intact and beautiful for an extended period. Experiment with different setting techniques and find the one that works best for your hair type and desired look. With a little extra care, your curls will last throughout the day and keep you looking fabulous!