
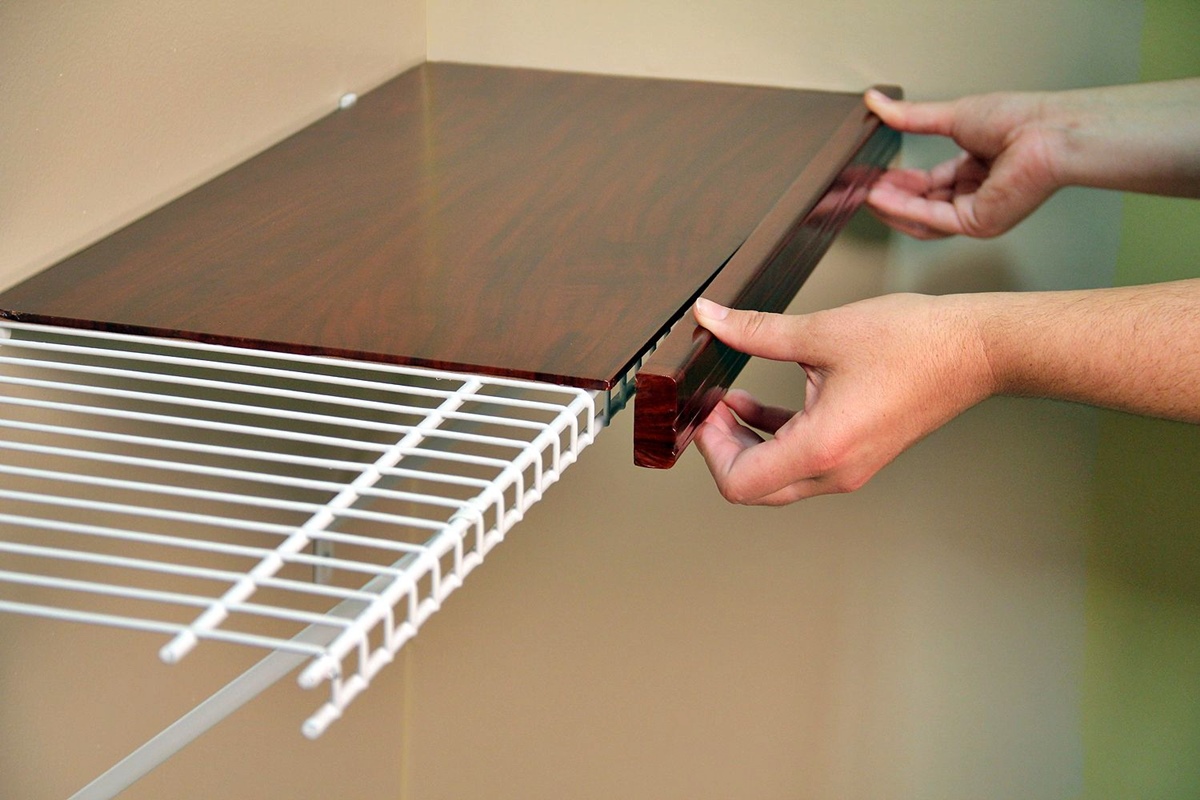
Types of Shelf Covers
When it comes to covering shelves, there are several options to choose from. The type of cover you select will depend on your specific needs and preferences. Here are some common types of shelf covers to consider:
- Vinyl Shelf Liner: Vinyl shelf liners are a popular choice for their durability and versatility. They are waterproof and easy to clean, making them ideal for use in kitchens or bathrooms. Vinyl liners also come in a wide range of colors and patterns, allowing you to add a touch of style to your shelves.
- Contact Paper: Contact paper is a self-adhesive shelf cover that is available in different designs and textures. It is easy to apply and can instantly transform the look of your shelves. Contact paper is a great option for those looking for a temporary or budget-friendly solution.
- Wood Veneer: If you prefer a more natural look, wood veneer is a fantastic choice. It is made from thin slices of real wood and can be applied to shelves using adhesive. Wood veneer adds a touch of elegance and warmth to any space.
- Acrylic Shelf Liner: Acrylic liners are transparent and provide a sleek and modern look. They are highly durable and protect your shelves from scratches and stains. Acrylic liners are commonly used in retail or display shelves to showcase products.
- Fabric Shelf Liner: For a softer and more decorative touch, fabric shelf liners are a great option. They come in various patterns and colors, allowing you to customize the look of your shelves to match your decor. Fabric liners are typically easy to cut and can be secured to shelves with double-sided tape or adhesive.
Each type of shelf cover has its own advantages, so consider factors such as durability, ease of installation, and aesthetic appeal when choosing the right one for your shelves. Remember to measure your shelf accurately to ensure a proper fit and follow the manufacturer’s instructions for installation.
Choosing the Right Materials
When selecting the materials for your shelf cover, it’s crucial to consider both functionality and aesthetics. Here are some key factors to keep in mind when choosing the right materials:
- Durability: Look for materials that are durable and can withstand the weight of items placed on the shelves. Consider the level of traffic the shelves will experience and choose materials that can handle daily wear and tear.
- Waterproof: If you’re covering shelves in areas prone to moisture, such as the kitchen or bathroom, opt for waterproof materials. Vinyl shelf liners and acrylic liners are excellent choices as they resist water damage and are easy to clean.
- Style: Determine the desired aesthetic for your space. Consider the overall theme and ambiance you want to create. Whether you prefer a modern, rustic, or minimalistic look, choose a material that complements your desired style.
- Installation Method: Different materials have varying installation methods. Some may require adhesive, while others may be self-adhesive. Consider your comfort level with installation and select a material that suits your skillset.
- Maintenance: Think about the level of maintenance required for the materials you’re considering. Some covers may be easy to clean with a quick wipe, while others may require more frequent care. Assess your willingness to maintain the shelf covers accordingly.
- Budget: Set a budget for your shelf cover project and choose materials that fall within your price range. There are options available for every budget, so explore different materials and compare prices to find an affordable yet high-quality choice.
By taking these factors into account, you can select the materials that best match your needs and preferences. Remember to consider the specific requirements of the space where the shelves are located and choose materials that will enhance the functionality and style of your shelves.
Measuring Your Shelf
Before you begin covering your shelf, it’s essential to take accurate measurements to ensure a perfect fit for your chosen material. Here’s a step-by-step guide on how to measure your shelf:
- Clear off your shelf: Remove all items from the shelf to get a clear and unobstructed surface for measuring.
- Measure the length: Use a measuring tape to determine the length of the shelf from one end to the other. Measure along the back edge for the most accurate measurement.
- Measure the width: Next, measure the width of the shelf from side to side. Again, measure along the back edge to ensure accuracy.
- Consider any irregularities: Take note of any irregularities on the shelf, such as curves, corners, or cutouts. Measure these areas separately to ensure your cover material can accommodate these features.
- Record your measurements: Write down the length and width of the shelf, as well as any additional measurements for irregular areas.
- Double-check: Before proceeding, verify that your measurements are accurate. Take a second look to ensure there are no errors that could lead to ill-fitting covers.
By following these steps and accurately measuring your shelf, you’ll be able to choose the right-sized cover material and avoid any unnecessary adjustments or waste. Remember, it’s always better to measure twice than to cut once.
Removing Existing Covers
If your shelf already has a cover on it that you want to replace, you’ll need to remove it before applying the new cover. Here’s a step-by-step guide on how to remove existing shelf covers:
- Clear off the shelf: Remove all items from the shelf to have a clear workspace.
- Assess the cover: Evaluate the type of cover currently on the shelf. Different covers may have different removal methods.
- Peel off self-adhesive covers: If the existing cover is self-adhesive, start at one corner and slowly peel it off, applying gentle pressure as you go. Be cautious not to damage the surface of the shelf while removing the cover.
- Use heat for stubborn adhesives: For adhesive covers that are difficult to remove, you can use a hairdryer or heat gun to soften the adhesive. Apply heat to the cover, maintaining a safe distance to avoid damaging the shelf. Once the adhesive softens, peel off the cover carefully.
- Remove glue residue: If there is glue residue left on the shelf after removing the cover, use a suitable adhesive remover or a mixture of warm water and mild soap. Apply the solution to a cloth and gently rub the residue until it comes off.
- Clean the shelf: Once the old cover and residue have been removed, wipe down the shelf with a clean cloth or sponge to remove any remaining dirt or debris.
It’s essential to remove the existing cover properly to ensure a smooth surface for the new cover to adhere to. Take your time and be cautious during the removal process to avoid any damage to the shelf. Once the old cover is completely removed and the shelf is clean, you’ll be ready to apply the new cover material.
Cleaning and Preparing the Shelf
Prior to applying a new shelf cover, it’s important to clean and prepare the surface for optimal adhesion and a professional finish. Follow these steps to ensure your shelf is clean and ready for the new cover:
- Remove any remaining residue: If there are any remnants of the old cover or adhesive on the shelf, gently scrape them off using a plastic scraper or a credit card. Avoid using sharp objects that could damage the surface.
- Wipe down the shelf: Use a damp cloth or sponge to wipe down the surface of the shelf. This will remove any dust, dirt, or grease that may interfere with the adhesion of the new cover.
- Clean with mild soap solution: For stubborn stains or sticky residue, create a mild solution of warm water and a gentle dish soap. Dip a cloth into the soapy water and gently scrub the affected areas. Rinse the cloth and wipe down the shelf again to remove any soap residue.
- Dry the shelf thoroughly: Allow the shelf to air dry completely or use a clean cloth to dry it. Make sure there is no moisture remaining on the surface before proceeding.
- Inspect for imperfections: Take a close look at the shelf for any bumps, dents, or imperfections. Sand down any rough spots and fill in any gaps or holes with wood filler. Smooth out the surface with sandpaper to create an even and uniform base.
- Remove dust particles: Before applying the new cover, use a lint roller or a clean cloth to remove any remaining dust particles. This will ensure a clean surface for the adhesive to bond to.
By thoroughly cleaning and preparing the shelf, you’ll create an optimal surface for the new cover to adhere to. This will help ensure a smooth application and a professional finish. Taking the time to properly prepare the shelf will contribute to the longevity and effectiveness of the cover.
Applying Adhesive
Applying adhesive is a crucial step in securing your new shelf cover and ensuring it stays in place. The type of adhesive you use will depend on the material of your shelf cover and the manufacturer’s recommendations. Here’s a step-by-step guide on how to apply adhesive for your shelf cover:
- Read the instructions: Start by carefully reading the instructions provided by the manufacturer of your shelf cover. This will guide you on the specific adhesive recommended and any application techniques.
- Choose the right adhesive: Select an adhesive that is suitable for your shelf cover material. There are different types of adhesives available, such as double-sided tape, spray adhesive, or contact cement. Make sure it is compatible with both the shelf cover and the shelf material.
- Cut adhesive strips or apply as directed: If using double-sided tape or adhesive strips, cut them to the appropriate length and adhere them along the edges and corners of the shelf. Alternatively, if using spray adhesive or contact cement, follow the specific instructions provided on how to apply the adhesive to the shelf surface.
- Apply adhesive in a thin, even layer: When using spray adhesive or contact cement, ensure you apply the adhesive in a thin and even layer on the entire surface of the shelf. Use a brush or roller to achieve a smooth application. Be careful not to use too much adhesive, as it can cause the cover to bubble or warp.
- Allow the adhesive to dry or become tacky: Depending on the adhesive used, you may need to wait for it to dry or become tacky before applying the shelf cover. Follow the recommended drying or waiting time provided by the adhesive manufacturer.
- Position the shelf cover: Carefully align the shelf cover with the edges of the shelf and slowly press it down, starting from one edge and working your way across the entire shelf. Smooth out any air bubbles or wrinkles using a clean cloth or a plastic squeegee.
Properly applying adhesive is essential for ensuring your shelf cover remains securely in place. Be sure to follow the adhesive manufacturer’s instructions and take your time to achieve a smooth and precise application. This will help your shelf cover adhere effectively and provide long-lasting results.
Cutting the Cover Material
Once you have prepared your shelf and applied the adhesive, it’s time to cut the cover material to the appropriate size. Cutting the cover material accurately is crucial for a seamless and professional-looking finish. Here’s a step-by-step guide on how to cut the cover material for your shelf:
- Measure your shelf: Use the measurements you took earlier to determine the dimensions of the cover material needed. Ensure that you account for any irregularities or additional space required for wrapping the material around the edges.
- Mark the measurements: Using a pencil or a marker, carefully mark the measurements on the backside of the cover material. Double-check your markings to ensure accuracy before cutting.
- Use a straight edge: Place a straight edge, such as a ruler or a carpenter’s square, along the marked lines. This will serve as a guide and help you achieve clean and straight cuts.
- Cut along the lines: Using a sharp utility knife or scissors, carefully cut along the marked lines. Apply steady and even pressure to ensure clean cuts. For thicker materials, you may need to make multiple passes to fully cut through.
- Check the fit: Once the cover material is cut to size, place it on the shelf to check the fit. Make any necessary adjustments or trims if it’s too large or doesn’t align properly.
- Trim excess material: If there is excess material that extends beyond the edges of the shelf, use a pair of scissors or a utility knife to trim it off. Ensure that the edges are clean and aligned with the edges of the shelf.
It’s important to approach the cutting process with precision and accuracy. Take your time and be mindful of the measurements and markings to achieve a clean and tailored fit for your shelf cover. Remember, you can always trim more material if needed, but you cannot add it back once it’s cut.
Applying the Cover to the Shelf
Now that you have prepared the shelf and cut the cover material to size, it’s time to apply the cover to the shelf. This step requires careful attention to detail to ensure a smooth and professional installation. Follow these steps to apply the cover to your shelf:
- Position the cover material: Carefully align the cut cover material with the edges of the shelf, ensuring that it covers the entire surface.
- Start from one edge: Begin by peeling off a small section of the backing or protective layer from the adhesive side of the cover material. Starting from one edge, press the exposed adhesive side onto the corresponding edge of the shelf.
- Smooth out air bubbles: As you continue to peel off the backing or protective layer, press the cover material onto the surface of the shelf, smoothing it out as you go. Use a clean cloth or a plastic squeegee to eliminate any air bubbles or wrinkles.
- Apply firm pressure: Once the cover material is positioned, apply firm and even pressure across the entire surface to ensure proper adhesion. This will help the cover material adhere securely to the shelf.
- Wrap edges, if necessary: If your cover material allows for it, wrap the excess material around the edges of the shelf for a neat and finished look. Use a utility knife or scissors to trim excess material if needed.
- Double-check the alignment: Take a step back and check the alignment and appearance of the cover material. Make any minor adjustments if necessary.
It’s important to take your time and work carefully to achieve a seamless and professional result. Pay attention to smoothing out any air bubbles or wrinkles as you go and ensure that the cover material is securely adhered to the shelf. By following these steps, you’ll have a beautifully covered shelf that enhances the look and functionality of your space.
Trimming and Finishing Touches
After applying the cover material to your shelf, it’s time to focus on trimming any excess material and adding the finishing touches. This final step will help give your shelf a polished and professional appearance. Here’s what you should do:
- Trim excess material: Using a utility knife or scissors, carefully trim any excess cover material that extends beyond the edges of the shelf. Make clean and precise cuts to ensure a neat and tidy finish.
- Smooth out edges: After trimming the excess material, smooth out the edges of the cover by running your fingers or a clean cloth along the edges. This will help create a seamless transition between the cover and the shelf.
- Check for any loose areas: Inspect the cover material for any areas that may not be securely adhered to the shelf. If you notice any loose spots or edges, apply gentle pressure and additional adhesive, if necessary, to ensure a snug fit.
- Clean up any adhesive residue: If there are any adhesive residue or smudges on the cover material or the shelf’s surface, use a mild adhesive remover or warm soapy water to clean it off. Wipe away any remaining residue with a clean cloth.
- Add decorative elements (optional): If desired, you can add decorative elements to further enhance the appearance of your covered shelf. Consider using trim, molding, or decorative stickers to create a personalized touch.
- Step back and admire your work: Finally, step back and admire your newly covered shelf. Appreciate the effort you put into achieving a clean and professional look. Your shelf is now ready to be used and showcased.
Remember, the trimming and finishing touches are essential for achieving a refined and visually appealing result. Take your time to ensure all edges are smooth, corners are neatly trimmed, and any loose areas are secured. By following these steps, you’ll have a beautifully finished shelf cover that adds both functionality and style to your space.
Maintaining Your Shelf Cover
Once you have covered your shelf, it’s important to maintain the cover to ensure its longevity and keep it looking its best. By following a few simple maintenance tips, you can keep your shelf cover in excellent condition. Here’s how to effectively maintain your shelf cover:
- Regular cleaning: Clean the shelf cover regularly to remove any dust, food particles, or stains. Use a gentle cleaning solution appropriate for the cover material, along with a soft cloth or sponge. Avoid using abrasive cleaners or harsh chemicals that could damage the cover.
- Wipe spills immediately: If any spills occur on the shelf cover, wipe them up promptly to prevent stains or damage. Use a damp cloth or sponge and gently blot the affected area. Avoid rubbing as it may spread the spill or cause it to penetrate the cover.
- Avoid sharp objects: Be careful when placing or moving sharp objects on the shelf to prevent puncturing or scratching the cover. Use mats or coasters for protection if necessary.
- Avoid excessive weight: Do not overload the shelf with heavy items beyond its weight capacity. Excessive weight can cause the cover to buckle or warp over time.
- Check for wear and tear: Regularly inspect the shelf cover for any signs of wear and tear, such as peeling corners or frayed edges. Address any issues promptly by reapplying adhesive or replacing the cover if necessary.
- Avoid direct sunlight: If your shelf is exposed to direct sunlight, consider using a cover material that is UV-resistant. Prolonged exposure to sunlight can cause fading or discoloration over time.
- Rotate displayed items: If you use your shelf for displaying items, periodically rotate them to prevent uneven fading or wear on the cover material.
- Follow manufacturer’s instructions: Always refer to the manufacturer’s instructions for specific maintenance recommendations. Different cover materials may have different care requirements, so it’s important to follow their guidelines.
By following these maintenance practices, you can extend the lifespan of your shelf cover and keep it looking fresh and appealing. Regular cleaning, prompt spill management, and avoiding excessive weight or sharp objects will help preserve the integrity and appearance of the cover. With proper care, your shelf cover will continue to enhance the functionality and aesthetics of your space for a long time.