
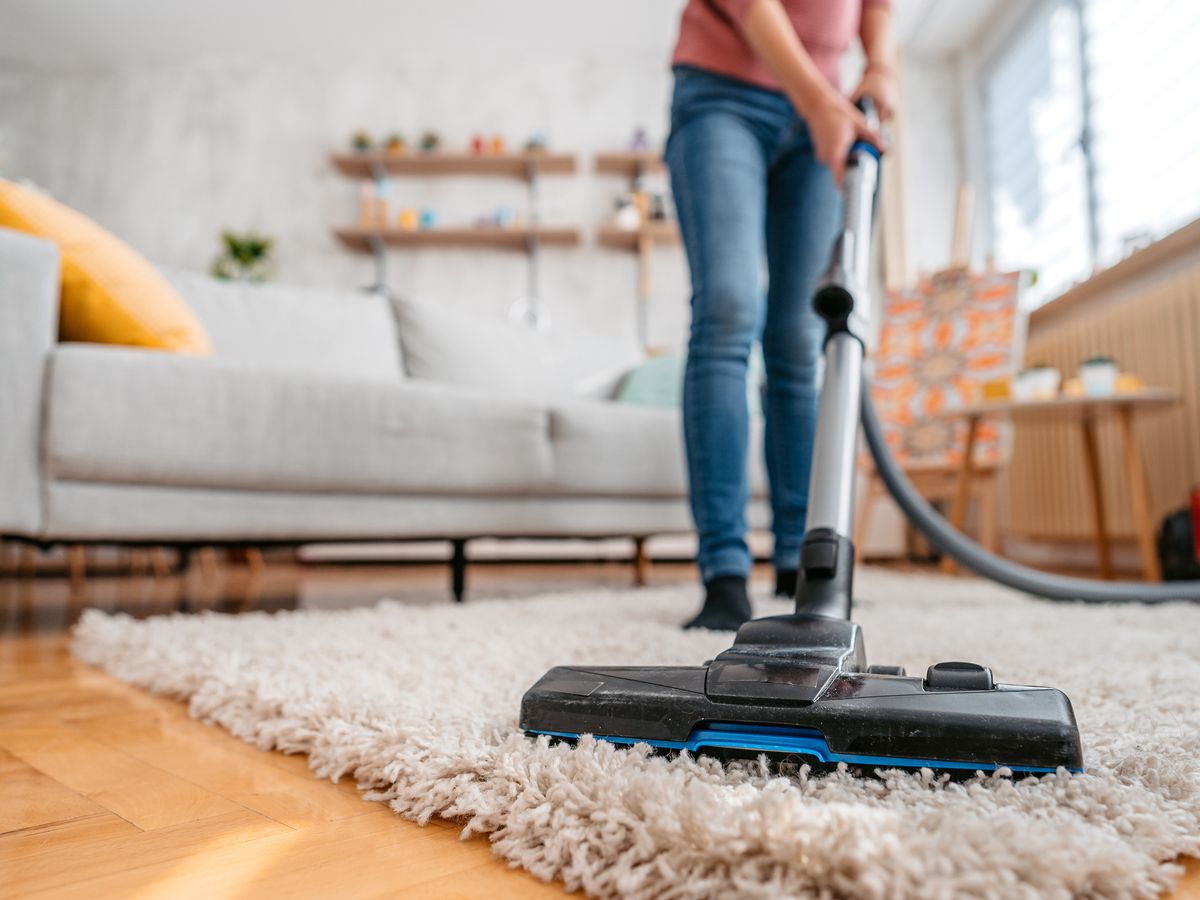
Why do you need to clean your vacuum brush?
Cleaning your vacuum brush regularly is essential for maintaining the effectiveness and efficiency of your vacuum cleaner. Over time, the brush accumulates hair, dust, and debris, which can hinder its performance and lead to several issues. Here are some reasons why cleaning your vacuum brush is crucial:
- Improved suction power: A clean brush allows the vacuum cleaner to pick up dirt and debris more effectively. When the brush is clogged with hair and debris, it restricts proper airflow, reducing the suction power of the vacuum.
- Prevention of brush roll damage: Excessive hair and debris buildup can cause the brush bristles to become tangled or worn out. This can lead to damage to the brush roll, affecting its ability to rotate smoothly and efficiently.
- Prevention of unpleasant odors: When hair, dirt, and dust accumulate on the brush, they can start to emit unpleasant odors. Cleaning the brush removes these odor-causing particles, leaving your vacuum cleaner smelling fresh and clean.
- Reduction of allergens: If you or anyone in your household suffers from allergies or respiratory issues, a dirty vacuum brush can exacerbate the problem. Cleaning the brush regularly helps minimize the presence of allergens, such as dust mites and pet dander, ensuring a healthier living environment.
- Extended lifespan of your vacuum cleaner: Regularly cleaning the brush and maintaining proper care of your vacuum cleaner can greatly extend its lifespan. By removing debris and preventing mechanical issues, you can avoid costly repairs or the need for a premature replacement.
By taking the time to clean your vacuum brush on a regular basis, you can experience improved performance, prevent damage, and ensure a cleaner home. It is a simple yet important maintenance task that should not be overlooked. Now, let’s move on to the tools you will need to clean your vacuum brush.
Tools you will need
Before you begin cleaning your vacuum brush, gather the following tools:
- Scissors: A pair of scissors will be handy for cutting through tangled hair or removing stubborn debris from the brush.
- Tweezers: Tweezers can help you to gently pull out any lodged hair or debris that is hard to reach with your fingers.
- Compressed air canister: Compressed air canisters are useful for blowing away loose dirt and particles that may be trapped in the brush.
- Soft cloth or brush: Having a soft cloth or brush on hand will allow you to wipe away any remaining dirt or dust from the brush and its housing.
- Dish soap or mild detergent: In case the brush bristles are particularly dirty or greasy, having some dish soap or mild detergent can help you to remove stubborn stains and residue.
- Bowl of warm water: Warm water can be used to soak the brush bristles and loosen any stubborn dirt or debris.
Having these tools prepared before you start cleaning will make the process much more efficient and ensure that you have everything you need at your fingertips. Now that you have gathered the necessary tools, let’s move on to the step-by-step process of cleaning your vacuum brush.
Step 1: Unplug the vacuum cleaner
Before beginning the cleaning process, it is essential to unplug the vacuum cleaner from the power source. This step is crucial for ensuring your safety and preventing any mishaps during the cleaning process.
Unplugging the vacuum cleaner eliminates the risk of accidental activation while you are working on the brush. It also prevents any potential electrical hazards that could arise from handling the brush or removing the brush roll.
Make sure that the vacuum cleaner is completely turned off and disconnected from the power source. Double-check that the cord is fully removed from the outlet to avoid any potential electrical shocks.
By taking the time to unplug the vacuum cleaner, you can work on cleaning the brush with peace of mind, knowing that you are in a safe environment. Now that you have disconnected the vacuum cleaner, let’s move on to the next step of removing the brush roll.
Step 2: Remove the brush roll
Once the vacuum cleaner is safely unplugged, it’s time to remove the brush roll. The brush roll is usually located on the underside of the vacuum cleaner and is responsible for agitating and loosening dirt and debris from the floor.
Start by flipping the vacuum cleaner over so that the underside is facing upward. Look for screws or latches that secure the brush roll in place. These may vary depending on the make and model of your vacuum cleaner.
Using the appropriate tools, carefully remove the screws or release the latches that hold the brush roll in position. It’s a good idea to place the screws or any small components in a safe location to prevent them from getting lost.
Once the brush roll is released, gently pull it out of the vacuum cleaner. Be cautious not to damage the bristles or any other parts of the brush roll during this process.
If the brush roll appears to be tangled with hair or debris, use scissors or tweezers to carefully remove any obstructions. Take your time and be patient to avoid damaging the brush roll.
With the brush roll removed, you can now proceed to the next step of removing hair and debris from the brush.
Step 3: Remove hair and debris
Now that the brush roll is removed from the vacuum cleaner, it’s time to focus on removing the accumulated hair and debris from the brush. Over time, these particles can become tangled and hinder the brush’s effectiveness.
Start by examining the brush roll closely for any visible hair or debris. Using your fingers, gently pull out any loose hair or large pieces of debris that you see on the brush. Be careful not to apply too much force to avoid damaging the bristles.
If the hair is tightly wound around the brush, you may need to use a pair of scissors or tweezers to carefully cut and remove it. Work slowly and patiently to avoid accidentally damaging the bristles or cutting too close to the brush roll.
While removing the hair and debris, it can be helpful to have a garbage bag or container nearby to collect the removed particles. This will prevent the hair and debris from scattering around the area and make cleaning up easier later.
Continue removing hair and debris until the brush roll is free from any significant build-up. Take your time to ensure that all tangles are removed, as this will lead to optimal performance once the brush is reinstalled.
Once you are satisfied with the removal of hair and debris, you can proceed to the next step of cleaning the brush bristles.
Step 4: Clean the brush bristles
After removing the hair and debris from the brush roll, it’s important to thoroughly clean the brush bristles. This step ensures that the bristles are free from any residue and can effectively agitate dirt and debris.
Start by filling a bowl with warm water and adding a small amount of dish soap or mild detergent. Swirl the water gently to create a soapy solution.
Next, submerge the brush bristles in the soapy water. Use your hands to agitate the bristles and help dislodge any remaining dirt or debris. Pay extra attention to areas where the bristles are tightly packed together.
If there are any stubborn stains or residue on the bristles, use a soft brush or cloth to gently scrub those areas. Avoid using abrasive materials or harsh chemicals, as they can damage the bristles.
After thoroughly cleaning the bristles, rinse them under running water to remove the soap and dirt. Continue rinsing until the water runs clear, indicating that the bristles are clean.
Once the bristles are clean and free of any dirt or soap, gently shake off any excess water. Use a clean cloth or towel to pat the bristles dry. Ensure that the bristles are completely dry before proceeding to the next step.
Cleaning the brush bristles not only helps to maintain the efficiency of your vacuum cleaner but also ensures that dirt and debris are not spread around during future use. Now that the bristles are clean, let’s move on to the next step of cleaning the roller housing.
Step 5: Clean the roller housing
Cleaning the roller housing is an important step in maintaining the overall cleanliness and functionality of your vacuum cleaner. Over time, dirt and debris can accumulate in the roller housing, affecting the smooth rotation of the brush roll.
Start by inspecting the roller housing for any visible dirt, dust, or debris. Use a soft brush or cloth to wipe away any loose particles. Be thorough in your cleaning to ensure that all areas of the roller housing are covered.
If you notice stubborn stains or grease buildup in the roller housing, dampen a cloth with a mild detergent solution and gently scrub those areas. Take care not to use excessive force, as this can damage the housing.
For hard-to-reach areas or crevices in the roller housing, you can use a cotton swab or small brush to dislodge any trapped dirt or debris. Be gentle and patient to avoid scratching or damaging the housing.
After cleaning, rinse the roller housing under running water to remove any remaining detergent or debris. Ensure that all cleaning agents are thoroughly removed from the housing before proceeding.
Once you have cleaned and rinsed the roller housing, use a clean cloth or towel to dry it completely. Make sure there is no moisture left behind, as this can lead to mold or unpleasant odors.
Cleaning the roller housing will help ensure that the brush roll rotates smoothly and efficiently, maximizing the performance of your vacuum cleaner. Now that the roller housing is clean, we can move on to the next step of reassembling the brush roll.
Step 6: Reassemble the brush roll
Now that you have cleaned the brush bristles and roller housing, it’s time to reassemble the brush roll and prepare it for use in your vacuum cleaner.
First, take the clean brush roll and carefully insert it back into the roller housing. Make sure that it is aligned properly and securely fits into place. Refer to the instructions or diagram provided by your vacuum cleaner manufacturer if needed.
Check for any screws or latches that secure the brush roll in position. Use the appropriate tools to fasten them back into place. Make sure they are tightened but be careful not to overtighten, as this can cause damage to the brush roll or housing.
Once the brush roll is securely assembled, give it a gentle spin to ensure it rotates smoothly without any obstructions. If you feel any resistance or hear unusual noises, double-check the alignment and make any necessary adjustments.
Take a moment to visually inspect the brush roll and roller housing to ensure that there are no loose bristles, hair, or debris. If you notice any remaining particles, remove them using tweezers or a soft brush.
With the brush roll successfully reassembled, you can now proceed to the final step of testing the brush roll to ensure it’s functioning properly.
Remember, a properly reassembled brush roll is crucial for optimal performance and efficient cleaning. Now that the brush roll is in place, let’s move on to the last step of testing the brush roll.
Step 7: Test the brush roll
After cleaning and reassembling the brush roll, it is important to test its functionality before using your vacuum cleaner on your floors. This step ensures that the brush roll is spinning properly and that there are no issues or obstructions.
Start by plugging in the vacuum cleaner and turning it on. Adjust the settings to the appropriate floor type, whether it’s carpet or hard flooring. Ensure that the brush roll is engaged and ready to rotate.
While the vacuum cleaner is powered on, carefully observe the brush roll as it rotates. Take note of any unusual noises, excessive vibrations, or signs of friction. These could indicate that there is still debris or hair caught in the brush roll.
Move the vacuum cleaner back and forth over a small test area of your floor. Pay attention to the suction power and the brush roll’s ability to agitate the surface. If the brush roll stops spinning or the suction power seems weak, immediately turn off the vacuum cleaner and inspect the brush roll for any obstructions.
If the brush roll is functioning properly without any issues, congratulations! You have successfully cleaned and tested the brush roll. Your vacuum cleaner is now ready to tackle the cleaning tasks ahead.
However, if you encounter any problems during the test, repeat the cleaning steps to ensure that all debris and hair are removed. It may also be helpful to check the manufacturer’s manual or seek assistance from a professional if the issue persists.
Regularly testing the brush roll ensures that your vacuum cleaner is operating at its best, effectively picking up dirt and debris from your floors. With the brush roll successfully tested, you can now move on to the final section and learn some tips for maintaining a clean brush roll.
Tips for maintaining a clean brush roll
Ongoing maintenance is key to keeping your brush roll clean and functioning optimally. Here are some helpful tips to ensure its longevity and effectiveness:
- Regular cleaning: Make it a habit to clean the brush roll after every few uses or as needed. This will prevent the accumulation of hair, dirt, and debris, minimizing the risk of clogging and maintaining the brush roll’s effectiveness.
- Remove hair and debris promptly: Whenever you notice hair or debris tangled around the brush roll, remove it promptly to prevent further build-up. Neglecting to remove these obstructions can lead to decreased performance and potential damage to the brush roll.
- Check the brush roll periodically: Routinely inspect the brush roll for any signs of damage, loose bristles, or wear and tear. If you notice any issues, consider replacing the brush roll to ensure optimal performance.
- Clear the brush roll housing: Along with cleaning the brush roll, regularly inspect and clear any dirt or debris that may have accumulated in the roller housing. This will help maintain proper airflow and prevent clogging.
- Trim long hair: If you have long hair or pet hair that tends to wrap around the brush roll frequently, consider trimming it shorter to minimize tangling. This simple step can greatly reduce the time and effort required for cleaning the brush roll.
- Avoid vacuuming large debris: While your vacuum cleaner may be designed to handle some small debris, avoid vacuuming large pieces of debris that can potentially damage the brush roll. Pick up larger items manually before vacuuming to prevent unnecessary wear and tear on the brush roll.
- Follow manufacturer’s instructions: Always refer to your vacuum cleaner’s manual for specific maintenance guidelines and recommendations. Different models may have unique features or requirements that can help you maintain a clean brush roll.
By following these tips, you can ensure that your brush roll stays clean and functions effectively for a long time. Regular maintenance and care will contribute to a better cleaning experience and prolong the lifespan of your vacuum cleaner.
With these tips in mind, you are now equipped to maintain a clean brush roll and enjoy the benefits of a well-functioning vacuum cleaner. Happy cleaning!