
Why you need to clean your Rust-Oleum brushes
Cleaning your brushes after using Rust-Oleum paint is essential for maintaining their longevity and performance. Rust-Oleum is known for its durable and long-lasting finishes, but its heavy-duty nature can leave residue on brushes if not properly cleaned. Failing to clean your brushes can result in stiff bristles, clumped paint, and reduced brush lifespan. So, why is it important to clean your Rust-Oleum brushes? Let’s find out.
Prolonged brush lifespan: Cleaning your Rust-Oleum brushes ensures that they remain in excellent condition for future use. When paint residue is left to dry and harden on the bristles, it can lead to the bristles becoming stiff, making them less effective for future painting projects. Regular cleaning helps maintain the flexibility and shape of the bristles, ensuring they will be ready for use when you need them.
Optimal paint application: Properly cleaned brushes provide better paint application results. When paint residue remains on the brush, it can mix with new paint and create clumps or streaks on the painted surface. Cleaning your brushes thoroughly ensures that fresh paint can be applied evenly and smoothly, resulting in a professional-looking finish.
Prevent cross-contamination: If you use different colors or types of Rust-Oleum paint with the same brush without cleaning it in between, you risk cross-contamination. This can lead to tints or unwanted color blends, compromising the quality of your work. Cleaning your brushes after each use eliminates the risk of contamination and allows for accurate color application.
Save time and money: Regularly cleaning your Rust-Oleum brushes can save you time and money in the long run. When brushes are properly cleaned, they are easier to use for future projects and require less time for preparation. Additionally, cleaning prolongs the lifespan of your brushes, reducing the need for frequent replacement.
Prevent rust formation: Rust-Oleum paints are designed to protect surfaces from rust and corrosion. However, if paint residue is left on your brushes, it can lead to the formation of rust on the metal ferrule and bristles. Regular cleaning removes any trace of paint, preventing rust formation and ensuring that your brushes remain in optimal condition.
In summary, cleaning your Rust-Oleum brushes is essential for maintaining their performance, prolonging their lifespan, and ensuring optimal paint application. By incorporating a regular cleaning routine into your painting process, you can prevent cross-contamination, save time and money, and prevent rust formation. So, be sure to clean your Rust-Oleum brushes after each use to keep them in excellent condition for future painting projects.
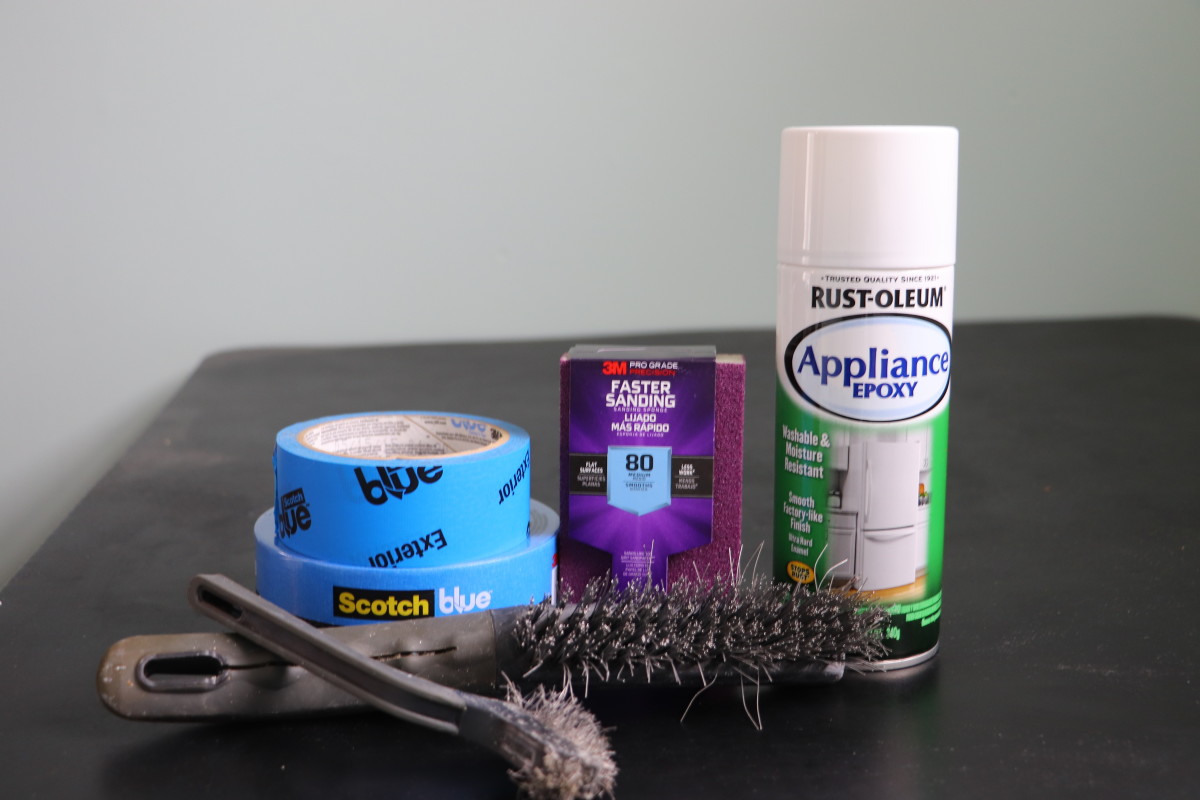
Materials you will need
To effectively clean Rust-Oleum off your brushes, you will need a few essential materials. Having the right tools makes the process easier and ensures thorough cleaning. Here are the materials you will need:
1. Mineral spirits: Mineral spirits, also known as white spirits or paint thinner, is a solvent commonly used for cleaning oil-based paints. It is effective in breaking down and removing dried Rust-Oleum paint from brushes.
2. Paint thinner: Paint thinner is another solvent option for cleaning Rust-Oleum off your brushes. It is particularly useful for cleaning brushes that have been used with enamel-based Rust-Oleum paint.
3. Acetone: Acetone is a powerful solvent that can dissolve and remove Rust-Oleum paint from brushes. It is especially effective for cleaning brushes that have been used with spray-on or aerosol Rust-Oleum paints.
4. Vinegar: Vinegar is a natural and environmentally friendly option for cleaning Rust-Oleum off your brushes. It can break down the paint and remove any residue, making it suitable for water-based Rust-Oleum paints.
5. Cleaning container: A small container or jar will be needed to hold the cleaning solution while you soak the brushes. Choose a container that is big enough to fully submerge the bristles of your brushes.
6. Cleaning gloves: It is advisable to wear protective gloves while cleaning your brushes. This will prevent your skin from coming into direct contact with the solvents or cleaning solutions, which may be harsh or irritate your skin.
7. Brush comb or toothbrush: A brush comb or an old toothbrush can be useful for gently scrubbing the bristles and removing any stubborn paint residue.
8. Paper towels or rags: Have some paper towels or rags handy to wipe off excess paint and to dry your brushes after cleaning.
Remember to follow safety guidelines and manufacturer instructions when working with solvents to ensure your safety and obtain the best results. With these materials on hand, you’ll be prepared to effectively clean your Rust-Oleum brushes and keep them in excellent condition for future painting projects.
Step-by-step guide to cleaning Rust-Oleum off your brush
Cleaning Rust-Oleum off your brush may seem like a daunting task, but with the right technique, it can be a straightforward process. Follow these step-by-step instructions to effectively clean your brush and maintain its quality for future use:
- Step 1: Gather your materials: Before you begin, make sure you have all the materials mentioned earlier, such as mineral spirits, paint thinner, acetone, vinegar, a cleaning container, gloves, a brush comb or toothbrush, and paper towels or rags.
- Step 2: Remove excess paint: Wipe off as much excess Rust-Oleum paint as possible from the brush using paper towels or rags. This will help prevent excessive paint buildup in the cleaning solution.
- Step 3: Choose the cleaning method: Select the appropriate cleaning method based on the type of Rust-Oleum paint you used. If you used an oil-based paint, mineral spirits or paint thinner will work best. For enamel-based paints, paint thinner is recommended. Acetone is suitable for spray-on or aerosol paints, while vinegar is ideal for water-based Rust-Oleum paints.
- Step 4: Prepare the cleaning solution: Pour the chosen cleaning solution into the cleaning container, ensuring it is deep enough to fully submerge the bristles of your brush.
- Step 5: Soak the brush: Submerge the brush bristles into the cleaning solution and let them soak for about 15-20 minutes. This will loosen the paint and make it easier to remove.
- Step 6: Clean the bristles: After soaking, take the brush out of the cleaning solution and gently scrub the bristles using a brush comb or an old toothbrush. Work the bristles back and forth to remove any stubborn paint residue.
- Step 7: Rinse and repeat: If necessary, rinse the brush under warm running water to remove any remaining paint or cleaning solution. Repeat the soaking and scrubbing process if needed until the bristles are clean and free from paint.
- Step 8: Dry the brush: Once the brush is clean, shake off any excess water and use paper towels or a clean cloth to blot the bristles. Reshape the bristles to their original form and lay the brush flat or hang it upside down to air dry completely.
By following these step-by-step instructions, you can effectively clean Rust-Oleum off your brush and ensure its optimal performance for future painting projects. Remember to always use proper ventilation and dispose of any solvents or cleaning solutions according to local regulations.
Method 1: Cleaning with mineral spirits
Cleaning Rust-Oleum off your brush using mineral spirits is an effective method for removing dried paint residue. Mineral spirits, also known as white spirits or paint thinner, is a solvent commonly used for cleaning oil-based paints. Follow these steps to clean your Rust-Oleum brush with mineral spirits:
- Step 1: Prepare your materials: Gather all the materials you will need, including mineral spirits, a cleaning container, gloves, a brush comb or toothbrush, and paper towels or rags.
- Step 2: Remove excess paint: Use paper towels or rags to wipe off any excess Rust-Oleum paint from the bristles of the brush.
- Step 3: Pour mineral spirits: Pour an ample amount of mineral spirits into the cleaning container, ensuring it is deep enough to fully submerge the bristles of your brush.
- Step 4: Soak the brush: Submerge the brush bristles into the mineral spirits, making sure they are fully immersed. Let the brush soak for about 15-20 minutes. This will allow the mineral spirits to penetrate and break down the dried paint.
- Step 5: Scrub the bristles: After soaking, remove the brush from the mineral spirits and gently scrub the bristles using a brush comb or an old toothbrush. Work the bristles back and forth to loosen and remove any remaining paint residue.
- Step 6: Rinse and repeat: If necessary, rinse the brush under warm running water to remove any leftover paint or mineral spirits. Repeat the soaking and scrubbing process if needed until the bristles are clean and free from paint.
- Step 7: Dry the brush: Shake off any excess water and use paper towels or a clean cloth to blot the bristles. Reshape the bristles to their original form and let the brush air dry completely, either by laying it flat or hanging it upside down.
Cleaning your Rust-Oleum brush with mineral spirits helps remove stubborn paint residue and ensures that your brush remains in excellent condition for future use. Remember to follow safety guidelines and dispose of any used mineral spirits according to local regulations.
Method 2: Cleaning with paint thinner
Cleaning Rust-Oleum off your brush using paint thinner is a suitable method for removing dried enamel-based paint. Paint thinner is a solvent commonly used to clean and thin oil-based paints. Follow these steps to clean your Rust-Oleum brush with paint thinner:
- Step 1: Gather your materials: Collect all the necessary materials, including paint thinner, a cleaning container, gloves, a brush comb or toothbrush, and paper towels or rags.
- Step 2: Remove excess paint: Use paper towels or rags to wipe off any excess Rust-Oleum paint from the bristles of the brush.
- Step 3: Pour paint thinner: Pour a sufficient amount of paint thinner into the cleaning container. Ensure that the container is deep enough to fully submerge the bristles of the brush.
- Step 4: Soak the brush: Submerge the brush bristles into the paint thinner, ensuring they are fully immersed. Allow the brush to soak for approximately 15-20 minutes. This allows the paint thinner to dissolve and loosen the dried paint.
- Step 5: Scrub the bristles: After soaking, remove the brush from the paint thinner and gently scrub the bristles using a brush comb or an old toothbrush. Move the bristles back and forth to dislodge and eliminate any stubborn paint residue.
- Step 6: Rinse and repeat: Rinse the brush under warm running water to remove any remaining paint or paint thinner. If necessary, repeat the soaking and scrubbing process until the bristles are completely clean and free from paint.
- Step 7: Dry the brush: Shake off any excess water from the bristles and use paper towels or a clean cloth to gently blot them. Reshape the bristles into their original form, and allow the brush to air dry completely, either by laying it flat or hanging it upside down.
By following these steps, you can effectively clean Rust-Oleum off your brush using paint thinner. Always ensure proper ventilation when working with paint thinner, and dispose of used paint thinner according to local regulations.
Method 3: Cleaning with acetone
Cleaning Rust-Oleum off your brush using acetone is a suitable method, especially for removing spray-on or aerosol Rust-Oleum paints. Acetone is a powerful solvent that can dissolve and remove paint effectively. Follow these steps to clean your Rust-Oleum brush with acetone:
- Step 1: Gather your materials: Collect all the necessary materials, including acetone, a cleaning container, gloves, a brush comb or toothbrush, and paper towels or rags.
- Step 2: Remove excess paint: Use paper towels or rags to wipe off any excess Rust-Oleum paint from the bristles of the brush.
- Step 3: Pour acetone: Pour a sufficient amount of acetone into the cleaning container. Ensure that the container is deep enough to fully submerge the bristles of the brush.
- Step 4: Soak the brush: Submerge the brush bristles into the acetone, ensuring they are fully immersed. Allow the brush to soak for approximately 15-20 minutes. This gives the acetone time to dissolve and loosen the dried paint.
- Step 5: Scrub the bristles: After soaking, remove the brush from the acetone and gently scrub the bristles using a brush comb or an old toothbrush. Move the bristles back and forth to dislodge and eliminate any stubborn paint residue.
- Step 6: Rinse and repeat: Rinse the brush under warm running water to remove any remaining paint or acetone. If necessary, repeat the soaking and scrubbing process until the bristles are completely clean and free from paint.
- Step 7: Dry the brush: Shake off any excess water from the bristles and use paper towels or a clean cloth to gently blot them. Reshape the bristles into their original form, and allow the brush to air dry completely, either by laying it flat or hanging it upside down.
Acetone is a potent solvent, so be sure to handle it with care and use it in a well-ventilated area. Also, dispose of the used acetone properly according to local regulations. By following these steps, you can effectively clean Rust-Oleum off your brush using acetone and keep your brush in optimal condition for future painting projects.
Method 4: Cleaning with vinegar
Cleaning Rust-Oleum off your brush using vinegar is a natural and environmentally friendly method, particularly suitable for water-based Rust-Oleum paints. Vinegar is an acidic solution that can break down and remove paint residue effectively. Follow these steps to clean your Rust-Oleum brush with vinegar:
- Step 1: Gather your materials: Collect all the necessary materials, including vinegar, a cleaning container, gloves, a brush comb or toothbrush, and paper towels or rags.
- Step 2: Remove excess paint: Use paper towels or rags to wipe off any excess Rust-Oleum paint from the bristles of the brush.
- Step 3: Pour vinegar: Pour enough vinegar into the cleaning container to fully submerge the brush bristles.
- Step 4: Soak the brush: Submerge the brush bristles entirely into the vinegar and allow them to soak for about 15-20 minutes. The vinegar will help break down and dissolve the dried paint.
- Step 5: Scrub the bristles: After soaking, remove the brush from the vinegar and use a brush comb or an old toothbrush to gently scrub the bristles. Move the bristles back and forth to loosen and remove any remaining paint residue.
- Step 6: Rinse and repeat: Rinse the brush under warm running water to remove any leftover paint or vinegar. If necessary, repeat the soaking and scrubbing process until the bristles are clean and free from paint.
- Step 7: Dry the brush: Shake off any excess water from the bristles and use paper towels or a clean cloth to gently blot them. Reshape the bristles into their original form and let the brush air dry completely, either by laying it flat or hanging it upside down.
Using vinegar as a cleaning solution is an eco-friendly and cost-effective way to remove Rust-Oleum paint from your brush. It is important to note that vinegar works best for water-based paints, and for oil-based or enamel-based paints, other methods may be more effective. By following these steps, you can successfully clean Rust-Oleum off your brush using vinegar and maintain its quality for future painting projects.
Tips and tricks for effective brush cleaning
Cleaning your brushes effectively is essential for maintaining their performance and prolonging their lifespan. Here are some helpful tips and tricks to ensure you achieve optimal results when cleaning your brushes:
- Rinse brushes immediately after use: Whenever possible, rinse your brushes under running water immediately after use. This helps prevent paint from drying and minimizes the amount of cleaning required later.
- Use the right cleaning method: Different types of Rust-Oleum paints require different cleaning methods. Use the appropriate solvents or cleaning solutions according to the type of paint you used.
- Don’t let brushes sit in solvent for too long: While it is important to soak your brushes to loosen paint, avoid leaving them in solvents or cleaning solutions for extended periods. This can damage the bristles and affect the brush’s performance.
- Gently comb or brush the bristles: Use a brush comb or an old toothbrush to gently comb or brush the bristles during the cleaning process. This helps remove stubborn paint residue and restores the shape of the bristles.
- Avoid using harsh cleaners: While strong solvents can be effective in removing paint, they can also be harsh on the bristles. Whenever possible, choose milder cleaning options to preserve the quality of your brushes.
- Dispose of cleaning solutions properly: Dispose of any used solvents or cleaning solutions according to local regulations. Never pour them down the sink or drain as they can be harmful to the environment.
- Allow brushes to dry fully: After cleaning, make sure your brushes are completely dry before storing them. Damp bristles can promote the growth of mold or mildew, which can damage the brushes.
- Store brushes properly: Store your brushes flat or hang them upside down to maintain their shape. Avoid storing them with the bristles facing down, as this can deform the shape of the bristles over time.
By following these tips and tricks, you can ensure effective brush cleaning and prolong the lifespan of your Rust-Oleum brushes. Implementing good cleaning practices will help maintain the performance of your brushes and ensure they are ready for your next painting project.
Preventing rust on your brushes
Rust on your brushes can significantly affect their performance and lifespan. To prevent rust formation and keep your brushes in optimal condition, consider the following tips and practices:
- Clean and dry your brushes thoroughly: After cleaning your brushes, ensure that they are completely dry before storing them. Any moisture left on the bristles can promote rust formation.
- Store brushes in a dry environment: Proper storage is crucial in preventing rust. Store your brushes in a clean, dry place where they are protected from humidity and moisture.
- Avoid storing brushes in plastic bags: Plastic bags can create a humid environment, promoting rust on your brushes. Instead, opt for breathable storage containers or racks that allow air circulation.
- Apply a protective coating: Consider applying a protective coating to the metal ferrule and bristles of your brushes. This can help create a barrier against moisture and prevent rust formation.
- Use rust-resistant brushes: Investing in high-quality brushes with rust-resistant materials can significantly reduce the risk of rust formation. Look for brushes made from stainless steel or coated with protective finishes.
- Clean brushes promptly: Avoid leaving paint on your brushes for extended periods. Promptly clean them after each use to prevent paint residue from hardening and potentially leading to rust formation.
- Avoid leaving brushes submerged in water or solvents: Leaving brushes in water or solvents for prolonged periods can damage the bristles and promote rust formation. Instead, clean, rinse, and dry your brushes promptly after use.
- Inspect brushes regularly: Regularly check your brushes for signs of rust or damage. If you notice any rust spots, clean and dry the affected area immediately to prevent it from spreading.
- Replace severely rusted brushes: If a brush becomes heavily rusted and cleaning doesn’t restore its performance, it may be best to replace it. Using severely rusted brushes can compromise the quality of your work.
By implementing these practices, you can effectively prevent rust formation on your brushes and ensure that they remain in excellent condition for your painting projects. Regular cleaning, proper storage, and using rust-resistant brushes will help maintain the longevity and performance of your valuable painting tools.