
Supplies Needed
To effectively clean an outdoor trash can, you’ll need a few supplies to get the job done right. Here’s a list of items you’ll want to have on hand:
- Broom or brush
- Garden hose with nozzle attachment
- Bucket
- Dish soap or mild detergent
- Scrub brush or sponge
- Bleach or disinfectant cleaner
- Trash bags
- Rubber gloves
- Old towels or rags
- Optional: vinegar or baking soda for deodorizing
Having these supplies ready will make the cleaning process much easier and more efficient. It’s important to make sure you have the proper tools and materials to effectively remove dirt, grime, and odors from your outdoor trash can.
Step 1: Empty the Trash Can
The first step in cleaning an outdoor trash can is to empty its contents. Remove the trash bag or liner and dispose of the garbage properly. If there are any items stuck to the bottom or sides of the trash can, use a gloved hand or a trash grabber to remove them.
It’s important to empty the trash can completely to ensure that all debris and waste are removed. This will make it easier to clean and prevent any leftover residue from causing unpleasant odors or attracting pests.
Before moving on to the next step, take a moment to inspect the inside of the trash can. Look for any signs of damage, such as cracks or holes, that may need to be repaired before continuing with the cleaning process. Addressing these issues early on will help prolong the lifespan of your outdoor trash can.
Once the trash can is empty and inspected, it’s time to move on to the next step and remove any loose debris that may be clinging to the interior or exterior surfaces.
Step 2: Remove Loose Debris
Before you start cleaning your outdoor trash can, it’s important to remove any loose debris that may be stuck in or around it. This includes leaves, dirt, cobwebs, and other unwanted materials.
Begin by using a broom or brush to sweep out any loose debris from the inside of the trash can. Start at the top and work your way down, making sure to reach all corners and edges. If there are any stubborn debris, you can use a gloved hand or a disposable tool, like a small shovel, to scoop them out.
Next, focus on the exterior of the trash can. Carefully inspect the sides, bottom, and lid, and use the broom or brush to remove any dirt or cobwebs that may have accumulated. Pay special attention to areas that are often overlooked, such as the handle and the bottom rim.
Once you have removed the loose debris, it’s time to move on to the next step: rinsing the trash can with water to remove any remaining dirt or residue.
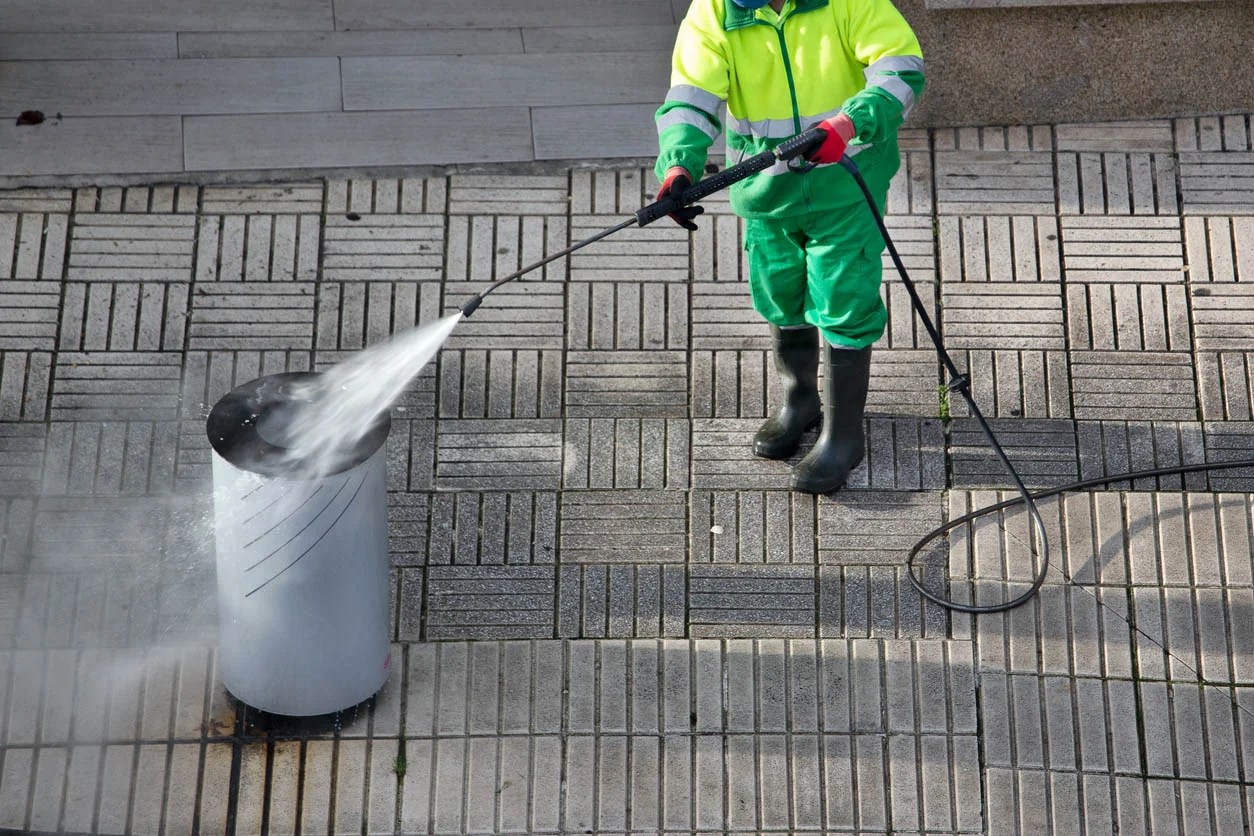
Step 3: Rinse with Water
After removing the loose debris from your outdoor trash can, it’s time to give it a good rinse with water. This step will help remove any remaining dirt, grime, or residue before you start the actual cleaning process.
Start by taking your garden hose with a nozzle attachment, if available, and use a strong stream of water to thoroughly rinse the interior and exterior of the trash can. Make sure to direct the water into all corners and crevices to ensure a thorough cleaning.
If your trash can has a removable lid, be sure to rinse it separately to ensure all areas are cleaned. Additionally, pay attention to the handles and any other hard-to-reach areas that may require extra rinsing to remove any buildup.
During this step, it’s important to use enough water pressure to effectively remove dirt and debris but not too much that it causes splashing or makes the cleaning process messier. Adjust the water pressure accordingly to achieve the desired result.
Once you have finished rinsing the trash can, inspect it for any remaining dirt or residue. If necessary, repeat the rinsing process until the water runs clear and the surfaces look clean.
Now that your trash can is thoroughly rinsed, it’s time to move on to the next step: preparing the cleaning solution to tackle any stubborn stains or odors.
Step 4: Prepare the Cleaning Solution
Once you’ve rinsed your outdoor trash can, it’s time to prepare a cleaning solution that will effectively remove stains, grime, and odors. There are a few different options you can use depending on the materials of your trash can and your personal preference.
One common and effective cleaning solution is a mixture of dish soap or mild detergent and warm water. Fill a bucket with warm water and add a small amount of dish soap or mild detergent. Mix the solution well until it creates a soapy mixture.
If your trash can has stubborn stains or odors, you can also add a small amount of bleach or a disinfectant cleaner to the solution. This can help kill bacteria and eliminate any unpleasant smells. However, be cautious when using bleach and follow the instructions on the label to avoid any potential hazards or damage to the trash can.
If you prefer a more natural cleaning solution, you can substitute vinegar for the dish soap or mild detergent. Vinegar is known for its natural cleaning properties and can help break down tough stains and neutralize odors. Simply mix equal parts vinegar and water in a bucket to create the cleaning solution.
Regardless of the cleaning solution you choose, make sure to mix it well before moving on to the next step. Having the right cleaning solution prepared will ensure effective and efficient cleaning of your outdoor trash can.
With the cleaning solution ready, it’s time to proceed to the next step: scrubbing the trash can to remove dirt and stains.
Step 5: Scrub the Trash Can
Now that you have prepared the cleaning solution, it’s time to start scrubbing your outdoor trash can. This step will help remove any remaining dirt, stains, and grime that may be clinging to the surfaces.
Dip a scrub brush or sponge into the cleaning solution and begin scrubbing the interior and exterior of the trash can. Start from the top and work your way down, applying firm but gentle pressure to effectively remove any stubborn debris. Pay extra attention to areas with visible stains or buildup.
Focus on scrubbing the sides, bottom, lid, handles, and any other surfaces of the trash can. Use circular motions to ensure thorough cleaning and cover all areas. If necessary, you can also use an old toothbrush to scrub hard-to-reach spots and corners.
If there are any particularly tough stains or grime, apply more pressure and let the cleaning solution sit for a few minutes before scrubbing it again. This will give the solution time to penetrate and break down the dirt, making it easier to remove.
Be sure to rinse your scrub brush or sponge periodically in clean water to remove any dirt or residue that may accumulate during the scrubbing process. This will prevent any cross-contamination and help maintain the effectiveness of your cleaning efforts.
Continue scrubbing until you’re satisfied with the cleanliness of your trash can. Once you’ve thoroughly scrubbed all surfaces, it’s time to move on to the next step: rinsing the trash can for the final time.
Step 6: Rinse with Water Again
After scrubbing your outdoor trash can, it’s important to give it a final rinse with water to remove any remaining cleaning solution and residue. This step will ensure that your trash can is thoroughly clean and ready for use.
Using your garden hose with a nozzle attachment, or a bucket of clean water, rinse both the interior and exterior of the trash can. Make sure to flush out all areas, including the corners, crevices, and the lid.
Ensure that the water runs clear and free from any soapy or cleaning solution residue. This will indicate that all the dirt, stains, and cleaning agents have been successfully removed.
Pay close attention to any hard-to-reach areas or spots that may still have lingering residue. Use a brush or sponge to gently scrub them while rinsing to ensure a thorough cleanse.
If you have a removable lid, make sure to rinse it separately to remove any cleaning solution or residue. Also, take the time to rinse off any tools or brushes you used during the cleaning process to prevent cross-contamination.
Once you have finished rinsing, visually inspect the trash can to ensure it is clean and free from any remaining dirt or stains. If necessary, repeat the rinsing process until you are satisfied with the cleanliness of your outdoor trash can.
Now that your trash can is clean and rinsed, it’s time to proceed to the next step: drying it thoroughly before carrying out additional steps.
Step 7: Dry the Trash Can
Once you’ve rinsed your outdoor trash can, it’s crucial to ensure that it is thoroughly dried before proceeding with the next steps. This will help prevent the growth of mold, mildew, and unpleasant odors.
To dry the trash can, start by tipping it over to pour out any remaining water. Give it a gentle shake to remove any excess moisture. If necessary, use a towel or old rag to wipe down the interior and exterior surfaces, absorbing any remaining water.
For faster drying, you can leave the trash can outside in a sunny or well-ventilated area. The sunlight and airflow will help evaporate the moisture and aid in the drying process. Just make sure not to leave it outside for an extended period, especially if there is a chance of rain.
If you’re in a hurry or prefer a more targeted approach, you can use a handheld hairdryer or a portable fan to speed up the drying process. Simply direct the airflow into the trash can, focusing on the corners and crevices where moisture may linger.
Make sure to thoroughly dry the lid, handles, and any other components of the trash can as well. Moisture can accumulate in these areas and lead to mold or mildew growth if not properly dried.
Remember, allowing your trash can to dry completely is essential before moving on to subsequent steps, such as disinfecting and deodorizing.
Once your trash can is dry, you can proceed to the next step: disinfecting it to eliminate any lingering bacteria or germs.
Step 8: Disinfect the Trash Can
Disinfecting your outdoor trash can is an important step to ensure a clean and hygienic environment. This will help eliminate any remaining bacteria, germs, or odors that may be present.
Start by preparing a disinfectant solution. You can use a diluted bleach solution by mixing one part bleach with nine parts water in a bucket. Alternatively, you can use a disinfectant cleaner that is safe for use on the surfaces of your trash can.
With your disinfectant solution ready, wear rubber gloves to protect your hands and start applying the solution to the interior and exterior surfaces of the trash can. Use a sponge or cloth soaked in the solution to wipe down all areas thoroughly.
Pay special attention to the inside of the trash can, where bacteria and germs are likely to accumulate. Ensure that the solution comes into contact with all surfaces, including the corners, bottom, and lid.
Allow the disinfectant solution to sit on the surfaces for a recommended period, typically around 10-15 minutes, to effectively kill any bacteria or germs. This will maximize the effectiveness of the disinfection process.
After the desired contact time, rinse the trash can with clean water to remove the disinfectant solution. This step is crucial to prevent any potential damage to the trash can or residual chemicals.
Once rinsed, ensure that there is no remaining odor from the disinfectant solution. If you still notice a smell, rinse again until the water runs clear and odor-free.
Remember to thoroughly dry the trash can before proceeding with the next steps or placing a new trash bag or liner inside. This will help prevent the growth of mold or mildew and maintain the cleanliness of the trash can.
Now that you have effectively disinfected your outdoor trash can, you can move on to the final step: deodorizing it to keep it smelling fresh and clean.
Step 9: Deodorize the Trash Can
Deodorizing your outdoor trash can is essential to keep it smelling fresh and pleasant, even after regular use. This step will help eliminate any lingering odors and maintain a clean and inviting environment.
There are several effective methods to deodorize your trash can:
- Vinegar: Vinegar is a natural deodorizer that can neutralize odors. Simply fill a spray bottle with equal parts water and vinegar, and spritz the solution inside the trash can. Let it sit for a few minutes before rinsing it out with water.
- Baking Soda: Baking soda is known for its odor-absorbing properties. Sprinkle a generous amount of baking soda inside the trash can and let it sit overnight. The next day, shake out the excess baking soda and rinse the trash can with water.
- Coffee Grounds: Used coffee grounds can help absorb odors. Place a small bowl or container filled with coffee grounds inside the trash can and leave it overnight. The coffee grounds will absorb any unpleasant smells, leaving your trash can smelling fresh.
- Odor Absorbing Products: There are various commercially available odor-absorbing products specifically designed for trash cans. These can come in the form of deodorizing discs, odor-eliminating sprays, or even scented trash bags. Follow the instructions on the product packaging for optimal results.
When deodorizing, make sure to cover all areas of the trash can, including the lid, bottom, and corners. If the odor persists, repeat the deodorizing process until the desired results are achieved.
Remember to rinse out any deodorizing agents after the recommended contact time to prevent the buildup of residue or an overpowering scent.
By deodorizing your outdoor trash can regularly, you can help maintain a pleasant smell and ensure a more enjoyable experience when disposing of waste.
Now that your trash can is clean, disinfected, and deodorized, it’s time to move on to the final step: implementing regular maintenance tips to keep it in optimal condition.
Step 10: Regular Maintenance and Tips
To ensure that your outdoor trash can remains clean and in optimal condition, it’s important to implement regular maintenance practices. Here are some tips to help you maintain a fresh and well-maintained trash can:
- Keep it covered: Always keep the lid securely closed on your trash can to prevent pests from getting inside and to minimize odors from escaping.
- Use trash bags or liners: Line your trash can with a sturdy trash bag or liner to contain the waste and make cleaning easier. Opt for strong and leak-proof bags that are appropriate for outdoor use.
- Clean spills or leaks promptly: If any spills or leaks occur inside the trash can, clean them up as soon as possible to prevent stains and odors from lingering.
- Regularly empty and clean: Empty your trash can regularly, even if it is not completely full, to prevent the buildup of waste and odors. Additionally, give it a thorough cleaning at least once a month or as needed.
- Store in a shaded area: If possible, place your outdoor trash can in a shaded area to minimize exposure to direct sunlight. This will help prevent the plastic from deteriorating and maintain its integrity.
- Inspect for damage: Regularly inspect your trash can for any cracks, holes, or damage. Address any issues promptly by repairing or replacing damaged parts to avoid further deterioration.
- Consider odor control methods: Use odor-absorbing products, such as scented trash bags or deodorizing discs, to help keep your trash can smelling fresh.
- Keep the surrounding area clean: Ensure the area around your trash can is clean and free from debris. This will help reduce the attraction of pests and maintain a tidy outdoor environment.
- Be mindful of what you dispose of: Avoid throwing large or bulky items that may get stuck or cause damage inside the trash can. Also, refrain from disposing of flammable or hazardous materials that could pose a safety risk.
Implementing these regular maintenance practices will not only ensure a cleaner and more hygienic trash can but also help extend its lifespan and keep it functional for years to come.
By following these steps and tips, you can keep your outdoor trash can in optimal condition and maintain a more pleasant and functional outdoor environment.