
The Importance of Regular Rug Cleaning
Keeping your rug clean is vital for maintaining the overall cleanliness and hygiene of your home. While hardwood floors are often praised for their durability and timeless beauty, they can be easily damaged if dirt and debris from a rug are left unchecked. Regular rug cleaning not only enhances the appearance of your rug but also ensures the longevity of your hardwood floor. Here are the key reasons why regular rug cleaning is essential:
- Preserving the Hardwood Floor: Rugs act as a barrier between the floor and foot traffic, preventing scratches, scuffs, and other damages that can occur over time. When dirt and debris accumulate on the rug, they can be ground into the hardwood floor, causing irreversible scratches and dents. Regular cleaning helps maintain a clean rug surface and reduces the risk of damage to the underlying hardwood.
- Eradicating Allergens and Bacteria: Rugs are known to trap allergens such as dust, pet dander, pollen, and mold spores. These allergens can have a detrimental effect on indoor air quality and aggravate respiratory conditions, including asthma and allergies. Regular rug cleaning eliminates trapped allergens and prevents them from becoming airborne, promoting a healthier living environment.
- Preventing Pest Infestations: Rugs that are not cleaned regularly can become a breeding ground for pests like dust mites, fleas, and carpet beetles. These pests can cause damage to both the rug and the hardwood floor below. By keeping your rug clean and free of debris, you significantly reduce the risk of a pest infestation, protecting the integrity of your rug and hardwood floor.
- Enhancing Indoor Air Quality: Dust, dirt, and other particles trapped in the rug fibers can become airborne when disturbed. This can lead to poor indoor air quality and respiratory issues. Regular rug cleaning removes these pollutants, allowing for cleaner and fresher air in your home.
- Preserving the Rug’s Appearance: Over time, dirt, stains, and spills can dim the vibrancy of your rug, making it appear dull and worn out. Regular cleaning helps maintain the rug’s original color and texture, ensuring it continues to enhance the aesthetic appeal of your hardwood floor.
- Investment Protection: Rugs can be a significant investment, and regular cleaning is a simple way to protect and prolong the lifespan of your investment. By removing dirt and debris through regular cleaning, you can prevent premature wear and tear, ensuring that your rug remains in peak condition for years to come.
By recognizing the importance of regular rug cleaning, you can ensure a healthier living environment, preserve the beauty of your hardwood floor, and protect your investment. Incorporating a rug cleaning routine into your household chores is a small effort that reaps significant rewards in the long run.
Gather the Necessary Cleaning Supplies
Before you begin cleaning your rug on a hardwood floor, it’s essential to gather all the necessary cleaning supplies. Having the right tools and products on hand ensures that you can effectively and efficiently clean your rug. Here’s a list of the key cleaning supplies to gather:
- Vacuum Cleaner: A good quality vacuum cleaner with a brush attachment is indispensable for removing loose dirt, dust, and debris from your rug. Ensure that the vacuum cleaner is suitable for use on hardwood floors to prevent any potential damage.
- Broom or Dustpan: If your rug is too large or cumbersome to vacuum, you can use a broom or dustpan to sweep away any loose dirt or debris before cleaning.
- Soft-Bristled Brush: A soft-bristled brush is useful for gently agitating the rug fibers and removing stubborn dirt or stains. Choose a brush with bristles that are suitable for the material of your rug.
- Mild Rug Cleaner: Select a rug cleaner that is specifically designed for the material of your rug. Avoid using harsh chemicals or cleaning agents that could damage the rug or the hardwood floor. Test the cleaner on a small, inconspicuous area of the rug before use.
- Soft Cloth or Sponge: A soft cloth or sponge can be used to apply the cleaner to the rug’s surface and to blot away any excess moisture after cleaning.
- Bucket or Spray Bottle: Depending on the type of rug cleaner you choose, you may need a bucket for mixing the cleaning solution or a spray bottle for convenient application. Follow the instructions on the cleaner’s packaging for proper dilution and usage.
- White Vinegar: White vinegar is a natural and inexpensive alternative to commercial rug cleaners. It can help eliminate odors and remove light stains. Mix one part white vinegar with two parts water for a simple, homemade rug cleaning solution.
- Protective Gloves: To protect your hands from any potential irritation or chemical exposure, consider wearing protective gloves while cleaning the rug.
- Stain Remover (Optional): If you have specific stains on your rug, such as pet stains or wine stains, you may need a specialized stain remover. Choose a stain remover that is suitable for your rug’s material and follow the instructions for effective stain removal.
- Old Towels or Rags: Keep a few old towels or rags handy to blot away excess moisture during the cleaning process and to help the rug dry thoroughly afterward.
By gathering these essential cleaning supplies before you start, you’ll have everything you need to tackle the task of cleaning your rug on a hardwood floor efficiently and effectively. Having the right tools and products at hand ensures that you can maintain the beauty and cleanliness of your rug and hardwood floor for years to come.
Prepare the Hardwood Floor
Before beginning the process of cleaning your rug on a hardwood floor, it’s important to properly prepare the floor to prevent any potential damage. Taking the time to prepare the hardwood floor ensures that the cleaning process goes smoothly and effectively. Here are the essential steps to prepare the hardwood floor:
- Clear the Area: Remove any furniture or objects from the floor area where the rug is located. This allows for better access to the rug and prevents obstruction during the cleaning process.
- Sweep or Vacuum: Use a broom or vacuum cleaner to thoroughly sweep or vacuum the hardwood floor. This step removes any loose dirt, dust, or debris that could potentially scratch the floor during the cleaning process.
- Inspect for Damage: Take the time to inspect the hardwood floor for any signs of damage, such as scratches, cracks, or loose boards. If you notice any significant damage, it’s best to address those issues before proceeding with rug cleaning.
- Protect Baseboards and Furniture: Cover the baseboards along the perimeter of the rug with painter’s tape or protective plastic sheeting. This safeguards them from potential cleaning solutions or moisture that may come into contact with the baseboards during the cleaning process. Additionally, if any furniture legs are in direct contact with the floor, consider placing protective felt pads underneath them to prevent scratches or marks.
- Secure the Rug: If the rug tends to move or slide on the hardwood floor, consider using rug grippers or non-slip rug pads to secure it in place. This prevents any accidents or movement during the cleaning process.
- Test for Colorfastness: Before applying any cleaning solutions to the rug, it’s essential to test for colorfastness. Choose a small, inconspicuous area of the rug and apply a small amount of the cleaning solution. Gently blot the area with a clean cloth and check for any color bleeding or fading. If no issues occur, you can proceed with confidence.
Properly preparing the hardwood floor sets the stage for successful rug cleaning. By taking these necessary steps, you can protect the integrity of the floor and ensure a thorough and effective cleaning process for your rug. Now that the floor is prepared, it’s time to move on to the next step: vacuuming the rug.
Vacuum the Rug
Vacuuming the rug is an essential step in the cleaning process, as it removes loose dirt, dust, and debris from the surface and the fibers of the rug. By vacuuming regularly, you can prevent these particles from settling into the rug and causing damage to the hardwood floor underneath. Follow these steps to effectively vacuum your rug:
- Choose the Right Attachment: Select a vacuum cleaner attachment suitable for use on rugs or hardwood floors. Avoid using a beater brush attachment, as it can agitate the rug fibers and potentially cause damage.
- Adjust the Height: Adjust the height of your vacuum cleaner according to the thickness of your rug. A higher setting is recommended for thicker rugs to ensure effective suction without pulling on the fibers.
- Start with the Edges: Begin vacuuming the edges of the rug first, working your way towards the center. This technique helps prevent any dirt or debris from being pushed onto the hardwood floor.
- Overlap the Strokes: Use slow and deliberate overlapping strokes to cover the entire surface of the rug. This ensures that you thoroughly remove dirt and debris from the rug fibers.
- Paying Attention to Traffic Areas: Give extra attention to high-traffic areas on the rug, such as entryways or hallways. These areas tend to accumulate more dirt and debris, requiring additional vacuuming to keep them clean.
- Vacuum Both Sides: If your rug is reversible, remember to flip it over and vacuum the other side as well. This helps eliminate dirt, dust, and allergens that may have settled on the underside of the rug.
- Remove Vacuum Bag or Empty Canister: After vacuuming, ensure that you remove the vacuum bag or empty the canister to prevent any buildup of dust and debris. This keeps your vacuum functioning optimally for future cleanings.
Vacuuming your rug regularly is an essential step in maintaining its cleanliness and preserving the appearance of your hardwood floor. By effectively removing dirt and debris, you prevent them from causing damage or becoming embedded within the rug fibers. With the rug now vacuumed, let’s move on to spot cleaning any stains that may be present.
Spot Clean Stains
Even with regular maintenance, accidents happen, and stains can occur on your rug. It’s important to spot clean these stains as soon as possible to prevent them from setting in and becoming more challenging to remove. Follow these steps to effectively spot clean stains on your rug:
- Identify the Type of Stain: Determine the nature of the stain on your rug. Different stains may require different cleaning methods and solutions.
- Blot, Don’t Rub: Using a clean, white cloth or sponge, gently blot the stained area of the rug. Avoid rubbing the stain, as this can cause it to spread further into the fibers.
- Test the Cleaning Solution: Before applying any cleaning solution to the stained area, test it on a small, inconspicuous area of the rug to ensure it won’t cause any discoloration or damage. Follow the instructions on the cleaning solution carefully.
- Apply the Cleaning Solution: If the cleaning solution passes the patch test, apply it directly to the stained area. Use a clean cloth or sponge to gently blot the stain, starting from the outer edges and working your way inward. Avoid saturating the rug with excessive moisture.
- Work from the Outside In: Continue blotting the stain with the cleaning solution, working from the outer edges towards the center. This helps prevent the stain from spreading to unaffected areas of the rug.
- Rinse and Blot: After treating the stain, rinse the area with clean water to remove any residue from the cleaning solution. Blot the area with a clean cloth or sponge to remove as much moisture as possible.
- Allow the Rug to Air Dry: Allow the spot-cleaned area of the rug to air dry completely. Avoid stepping on or placing any objects on the rug until it is fully dry to prevent any potential color transfer or damage.
- Repeat if Necessary: For stubborn stains, you may need to repeat the spot cleaning process multiple times. Be patient and persistent, and avoid using excessive force that could damage the rug fibers.
By promptly spot cleaning stains on your rug, you can prevent them from becoming permanent blemishes. It’s important to address stains as soon as possible to achieve the best results. With the stains treated, it’s time to move on to deep cleaning the entire rug, ensuring a thorough and refreshed appearance.
Deep Clean the Rug
Deep cleaning your rug is an essential step to maintain its cleanliness, remove embedded dirt, and revitalize its appearance. While regular vacuuming and spot cleaning help to keep the rug in good condition, deep cleaning is necessary to tackle deeper stains and dirt that have accumulated over time. Follow these steps to effectively deep clean your rug:
- Choose the Right Cleaning Method: Depending on the size, material, and level of dirtiness of your rug, you can choose between different deep cleaning methods. These methods include steam cleaning, dry cleaning, or using a carpet cleaning machine.
- Follow Manufacturer’s Guidelines: Refer to the manufacturer’s guidelines or care instructions for your specific rug. This ensures that you use the appropriate cleaning method and products suitable for your rug’s material.
- Prepare the Cleaning Solution: If using a carpet cleaning machine, prepare the cleaning solution according to the manufacturer’s instructions. If opting for a homemade solution, mix mild rug cleaner or white vinegar with warm water in the recommended ratio.
- Test the Cleaning Solution: Before applying the cleaning solution to the entire rug, test it on a small, inconspicuous area to ensure it won’t cause any discoloration or damage.
- Apply the Cleaning Solution: If the cleaning solution passes the patch test, apply it to the rug using either a sprayer or the carpet cleaning machine. Thoroughly work the solution into the rug fibers, following the machine’s instructions or using a scrub brush.
- Pay Attention to Stained Areas: Give extra attention to any stained areas during the deep cleaning process. Apply the cleaning solution directly to the stains and use a scrub brush or the machine’s attachments to agitate and remove the stains effectively.
- Rinse Thoroughly: After applying the cleaning solution, rinse the rug thoroughly with clean water using the machine or by using a clean sponge or cloth. Ensure you remove all traces of the cleaning solution to prevent any residue from attracting dirt.
- Remove Excess Moisture: Use a wet/dry vacuum or absorbent towels to remove as much moisture as possible from the rug. This speeds up the drying process and prevents mold or mildew growth.
- Allow Sufficient Drying Time: Fully dry the rug before placing it back on the hardwood floor. Air drying in a well-ventilated area is recommended, or you can use fans or open windows to expedite the drying process.
Deep cleaning your rug periodically helps maintain its beauty, remove ground-in dirt, and refresh its appearance. Following these steps and using the appropriate cleaning method for your rug ensures a thorough and effective deep cleaning process. Now that the rug has been deep cleaned, it’s essential to allow it to dry properly before placing it back on the hardwood floor.
Allow the Rug to Dry Properly
After deep cleaning your rug, it’s crucial to allow it to dry thoroughly before placing it back on the hardwood floor. Proper drying prevents mold and mildew growth and ensures that the rug maintains its integrity and appearance. Follow these steps to ensure that your rug dries properly:
- Remove Excess Moisture: Use a wet/dry vacuum or absorbent towels to remove as much moisture from the rug as possible. Press the towels firmly onto the rug, absorbing the water and speeding up the drying process.
- Air Circulation: Place the rug in a well-ventilated area where there is good air circulation. This helps evaporate the moisture from the rug more quickly. Open windows, turn on fans, or use portable air movers if necessary.
- Flip the Rug: To facilitate even drying, flip the rug over after the top side has dried partially. This allows air to circulate on both sides of the rug and ensures that moisture isn’t trapped between the fibers.
- Direct Sunlight: If weather conditions permit, you can also put the rug out in direct sunlight. The sun’s warmth and UV rays can aid in the drying process. However, be cautious with sensitive or delicate rugs, as prolonged exposure to sunlight can cause fading.
- Patience: Drying a rug thoroughly can take time, especially for larger or thicker rugs. Be patient and avoid rushing the process, as a rug that is not fully dry can lead to unpleasant odors or even mold growth.
- Touch Test: To determine if the rug is completely dry, perform a touch test. Gently touch the surface of the rug with the back of your hand. If it feels cool or damp, it still requires more drying time. Wait until the rug feels completely dry to the touch.
- Prevent Moisture Transfer: Before placing the rug back on the hardwood floor, ensure that both the rug and the floor are completely dry. This prevents any moisture transfer that could damage the hardwood floor or cause the rug to develop a musty odor.
By allowing your rug to dry properly, you ensure that it maintains its freshness, prevents mold or mildew growth, and prolongs its lifespan. Take the necessary steps to facilitate the drying process and ensure that both sides of the rug are thoroughly dry before placing it back on the hardwood floor.
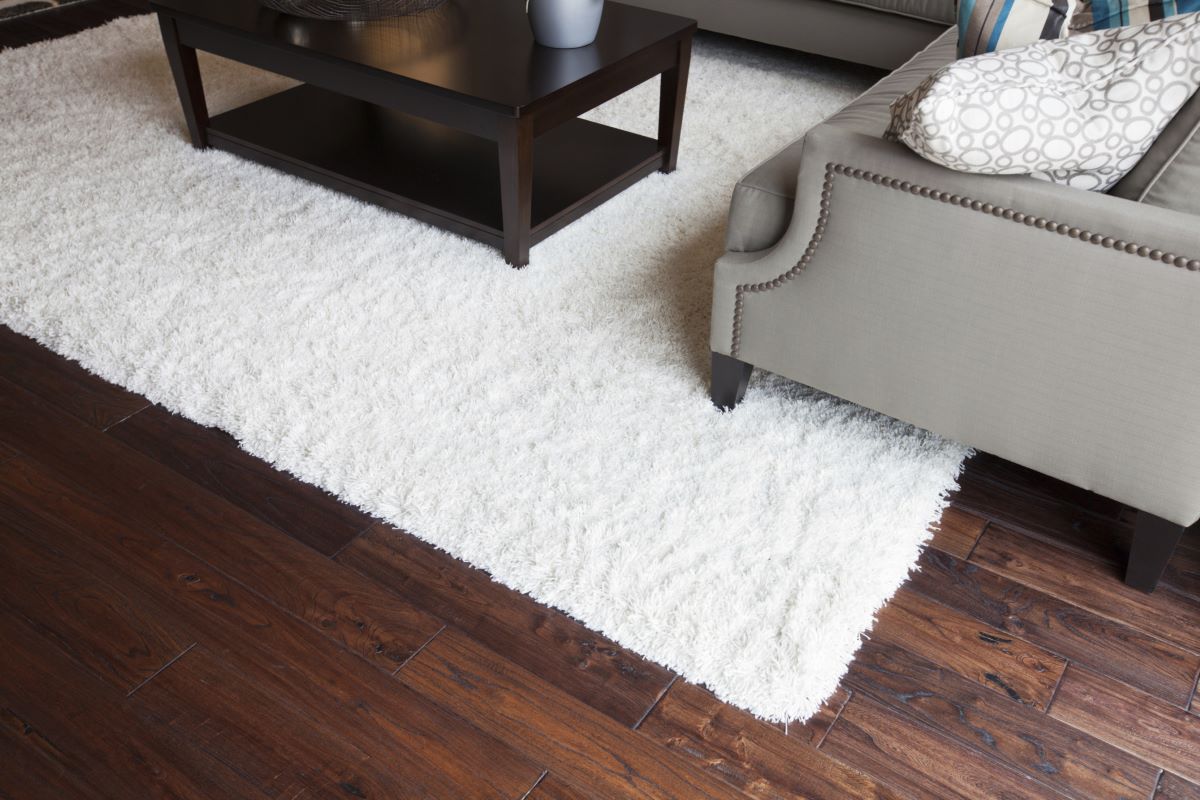
Replace the Rug on the Hardwood Floor
Once your rug has been thoroughly cleaned and properly dried, it’s time to replace it on the hardwood floor. Properly placing the rug back ensures a secure fit and protects both the rug and the floor. Follow these steps to effectively replace the rug:
- Clear the Area: Before placing the rug back, ensure that the area is clear of any furniture or objects. This allows for smooth placement and prevents any obstruction.
- Position the Rug: Align the rug in its desired position on the hardwood floor. Make sure the edges of the rug are straight and aligned with the edges of the floor to achieve a clean and polished look.
- Secure the Rug: If needed, use rug grippers or non-slip rug pads to secure the rug in place. These prevent the rug from shifting or sliding, ensuring safety and stability on the hardwood floor.
- Smooth out Wrinkles or Creases: If the rug has any wrinkles or creases, gently smooth them out by carefully stretching or applying pressure to the affected areas. This restores the rug’s flat and even surface.
- Replace Furniture: Once the rug is properly positioned, gradually replace furniture or objects back onto the rug. Use caution to avoid dragging heavy furniture across the hardwood floor, which can cause scratches or damages.
- Regular Maintenance: To keep the rug and hardwood floor in top condition, continue with regular maintenance practices such as vacuuming, spot cleaning, and periodic deep cleaning as needed.
By properly replacing the rug on the hardwood floor, you maintain the aesthetic appeal, protect the floor from scratches, and ensure the rug remains securely in place. Regular maintenance and cleaning practices will help to prolong the lifespan of both the rug and the hardwood floor, keeping them looking their best for years to come.