
Assess the Musty Rug
Before diving into the cleaning process, it is essential to assess the musty rug to determine the appropriate cleaning method. Musty odors can be caused by various factors, such as dirt accumulation, moisture exposure, or pet accidents. Understanding the underlying cause will help you target the problem effectively.
Start by inspecting the rug for visible signs of dirt, stains, or mold. Take note of any specific areas that require extra attention. If the rug is heavily soiled or has mold growth, it may be necessary to consult a professional cleaner.
Next, identify the materials used in the rug’s construction. Different fibers, such as wool, synthetic, or natural materials like jute or sisal, require specific cleaning techniques. Refer to the manufacturer’s guidelines or consult a rug specialist if you are unsure about the rug’s composition.
Additionally, consider the size and weight of the rug. Smaller rugs can often be cleaned at home, while larger or heavier ones may require assistance or specialized equipment.
Once you have assessed the condition of the rug and determined its material and size, you can proceed with the appropriate cleaning steps. Remember, taking the time to assess the rug beforehand will ensure that you use the most effective cleaning methods and achieve the best results.
Remove Loose Dirt and Debris
The first step in cleaning a musty rug is to remove any loose dirt and debris that may be trapped within the fibers. This initial cleaning will help prevent further soiling and make the subsequent steps more effective.
Start by taking the rug outdoors, if possible, and give it a vigorous shake to dislodge any loose dirt and dust. This simple action can remove a significant amount of debris from the surface.
Next, use a stiff-bristle brush or a broom with firm bristles to gently brush the rug in the direction of the fibers. This will help loosen and lift any remaining dirt or debris that may be embedded within the rug.
If the rug is too large to be taken outdoors or has delicate fibers, you can opt for an alternative method. Lay the rug flat on a clean, dry surface, and use a vacuum cleaner with a handheld attachment or a soft brush attachment to carefully vacuum the top surface. Be gentle to avoid damaging the fibers or causing them to fray.
In addition to using a vacuum cleaner, you can also use a carpet sweeper to remove loose dirt and debris. These manual sweepers are designed to effectively pick up dirt without risking damage to fragile fibers.
Remember to pay extra attention to the corners and edges of the rug, as these areas tend to accumulate more dirt and debris. Use a crevice tool or an attachment with a narrow opening to thoroughly clean these hard-to-reach spots.
By taking the time to remove loose dirt and debris from the rug, you are laying the foundation for a more thorough cleaning. This step ensures that the subsequent cleaning process will be more effective in eliminating musty odors and restoring the rug’s freshness.
Vacuum the Rug Thoroughly
After removing loose dirt and debris, the next step in cleaning a musty rug is to vacuum it thoroughly. Vacuuming not only helps to eliminate remaining dirt and dust, but it also helps to remove allergens and reduce the presence of musty odors.
Start by choosing a vacuum cleaner with a beater bar or rotating brush attachment. This type of attachment is designed to agitate the fibers of the rug, loosening embedded dirt and debris for more effective cleaning.
Before you begin vacuuming, ensure that the vacuum cleaner bag or canister is empty or has enough room to collect the dirt and debris from the rug. A full bag or canister can reduce the vacuum’s suction power, making it less effective in cleaning the rug.
When vacuuming the rug, work in overlapping sections to ensure thorough cleaning. Move the vacuum cleaner back and forth in straight lines, slowly covering the entire surface of the rug.
Pay extra attention to high-traffic areas, as they tend to accumulate more dirt and debris. Move the vacuum cleaner over these areas multiple times to ensure a deep and thorough cleaning.
If your rug has fringed edges, be careful while vacuuming around them to avoid damaging or tangling the fringes. You can use a handheld attachment or gently lift the fringes and vacuum around them to prevent any mishaps.
For rugs with a deep pile or shaggy texture, adjust the vacuum cleaner’s height setting to ensure that the brushes penetrate the fibers for maximum cleaning effectiveness. Conversely, for delicate rugs or those with a low pile, set the height to a higher setting to avoid causing damage.
After vacuuming the rug, check the vacuum cleaner’s bag or canister to see if it contains a significant amount of dirt and debris. Proper disposal of the collected dirt will prevent any lingering odors or allergens from being reintroduced into the environment.
Vacuuming the rug thoroughly is a crucial step in the cleaning process, as it helps to remove fine particles and allergens that may contribute to the musty odor. By effectively eliminating these contaminants, you are one step closer to restoring the rug’s cleanliness and freshness.
Sprinkle Baking Soda on the Rug
Once you have vacuumed the rug, the next step in cleaning a musty rug is to sprinkle baking soda on the surface. Baking soda is a natural deodorizer and can help eliminate musty odors that may be trapped in the fibers.
To begin, ensure that the rug is completely dry before applying the baking soda. Moisture can interfere with the effectiveness of the baking soda and may lead to clumping or discoloration of the rug.
Generously sprinkle baking soda over the entire surface of the rug, paying extra attention to areas that are particularly prone to musty odors. Use a gentle hand to ensure an even distribution of the baking soda without causing any damage to the rug’s fibers.
Once the baking soda is applied, gently work it into the rug using a soft-bristle brush or a clean, dry sponge. This helps to ensure that the baking soda penetrates the fibers and reaches the source of the musty odor.
Let the baking soda sit on the rug for an extended period, preferably overnight. This allows the baking soda sufficient time to absorb and neutralize any lingering odors. Keep in mind that the longer you leave the baking soda on the rug, the more effective it will be in eliminating the musty smell.
While the baking soda is working its magic, keep pets and children away from the rug to prevent accidental ingestion. Baking soda is generally safe, but it is advisable to take precautions to avoid any unnecessary risks.
In addition to deodorizing, baking soda also has mild antimicrobial properties that can help inhibit the growth of mold or mildew. This added benefit is particularly useful if the musty odor is due to moisture exposure.
After allowing the baking soda to sit for a sufficient period, proceed to the next step in the cleaning process, which is vacuuming the rug. Vacuuming will help remove the baking soda along with any odors or dirt that may have been absorbed by it.
Sprinkling baking soda on the rug provides an effective and natural way to eliminate musty odors. It is a simple yet powerful step in the cleaning process that helps to refresh the rug and leave it smelling clean and fresh.
Let Baking Soda Sit on the Rug Overnight
After applying baking soda to the rug, it’s crucial to let it sit undisturbed for an extended period, preferably overnight. Allowing the baking soda to sit overnight enhances its effectiveness in absorbing and neutralizing musty odors.
During this time, the baking soda works by drawing out and trapping odors from the rug’s fibers. It’s important to note that the longer you leave the baking soda on the rug, the better the results are likely to be.
The overnight duration gives the baking soda ample time to penetrate deep into the fibers and bond with odor-causing molecules. As a result, it effectively eliminates the source of the musty smell rather than just masking it temporarily.
It’s essential to ensure that the rug remains undisturbed during the waiting period. Avoid walking or placing any objects on the rug, as this may disrupt the baking soda’s absorption process and reduce its effectiveness.
To safeguard against accidental displacement, you can place a “Do Not Disturb” sign or barrier around the rug, particularly if you have children or pets in the household.
Additionally, keeping the room well-ventilated helps facilitate the odor elimination process. Opening windows or using fans to promote air circulation aids in dispersion of the musty odors as the baking soda absorbs them.
In the morning, once the recommended waiting period has elapsed, proceed to the next step in the cleaning process – vacuuming the rug. Vacuuming will remove the baking soda along with the trapped odors, leaving your rug smelling fresh and clean.
It’s important to note that if the musty smell persists after this step, additional cleaning methods may be required to address the underlying cause of the odor.
Allowing the baking soda to sit on the rug overnight is an important step in the cleaning process. It maximizes the effectiveness of the baking soda in absorbing and neutralizing musty odors, helping to restore the rug’s freshness and eliminate unpleasant odors.
Vacuum the Rug Again
After allowing the baking soda to sit on the rug overnight, it’s time to vacuum the rug again. Vacuuming is essential to remove the baking soda, along with any trapped odors and loosened debris, leaving your rug fresh and clean.
Start by using a vacuum cleaner with a beater bar or rotating brush attachment. This type of attachment is effective in agitating the fibers and ensuring thorough cleaning.
Before you begin, check the vacuum cleaner’s bag or canister and empty it if necessary. A full bag or canister can reduce the suction power, compromising the vacuum’s effectiveness.
When vacuuming, work in overlapping sections to ensure every inch of the rug is cleaned. Move the vacuum cleaner back and forth in straight lines, making slow and deliberate passes across the rug.
Pay extra attention to high-traffic areas, as well as areas where the baking soda was heavily applied. These areas may require multiple passes to ensure that all residues are successfully removed.
If your rug has fringed edges, exercise caution while vacuuming around them to prevent damage. Lift the fringes gently or use a handheld attachment to clean around them, ensuring that they remain intact.
In addition to vacuuming the top surface of the rug, remember to flip it over and vacuum the underside as well. This step helps remove any loose dirt or debris that may have settled on the bottom during the cleaning process.
Check the vacuum cleaner’s bag or canister after vacuuming to ensure that all baking soda and debris have been successfully collected. Properly dispose of the contents to prevent any residual odors from recontaminating the environment.
By vacuuming the rug again, you’re not only removing the baking soda but also lifting any remaining dirt, dust, and allergens. This step is essential in refreshing the rug and restoring its cleanliness.
Remember that vacuuming is a crucial step in the cleaning process, and it should not be overlooked. It prepares the rug for further cleaning and contributes to eliminating musty odors and keeping your rug in optimal condition.
Prepare a Cleaning Solution
Once you have vacuumed the rug thoroughly, the next step in cleaning a musty rug is to prepare a cleaning solution. The choice of cleaning solution will depend on the type of rug fibers and the level of soiling.
For most rugs, a mild detergent solution is suitable. Begin by filling a bucket with warm water, and then add a small amount of gentle liquid detergent. Avoid using strong detergents or bleach, as these can damage the rug fibers.
If you’re unsure about the suitability of a particular detergent, it’s best to test it on a small, inconspicuous area of the rug first to ensure it doesn’t cause any adverse effects, such as color fading or fiber damage.
You can also opt for natural cleaning solutions. For example, vinegar diluted with water can be an effective option for removing odors and disinfecting the rug. Mix equal parts vinegar and water in a spray bottle or bucket.
Another natural option is using a solution of hydrogen peroxide and water. Mix one part hydrogen peroxide with three parts water and use it as a cleaning solution. However, do a spot test before applying it to the entire rug to ensure it doesn’t cause any discoloration.
If you’re dealing with a more stubborn stain or heavily soiled rug, you may consider using a commercial carpet cleaner specifically designed for the type of rug you have. Follow the manufacturer’s instructions carefully to ensure safe and effective use of the product.
Remember that when preparing the cleaning solution, always read and follow the instructions provided by the detergent or cleaner manufacturer. Pay attention to the recommended dilution ratios and any specific precautions or warnings.
It’s also crucial to wear protective gloves and, if necessary, a mask when handling cleaning solutions to protect your skin and respiratory system.
By preparing a suitable cleaning solution, you’re setting the stage for the next step in the cleaning process – actually cleaning the rug. A well-chosen cleaning solution will help remove stains, dirt, and remaining odors, leading to a fresh and revitalized rug.
Test the Cleaning Solution on a Small Area
Before applying the cleaning solution to the entire rug, it’s essential to test it on a small, inconspicuous area of the rug to ensure compatibility and prevent any potential damage. This step is especially crucial if you’re using a new cleaning solution or if the rug has delicate fibers or a sensitive dye.
Choose a small area on the rug that is not easily visible, such as a corner or an edge. Apply a small amount of the cleaning solution onto a clean, white cloth or sponge, and blot it gently onto the test area of the rug.
After applying the cleaning solution, observe the area closely for any signs of color bleeding, fading, or texture alteration. Check for any adverse reactions, such as the formation of stains or discoloration.
If the test area shows no negative effects, such as color changes or texture damage, it’s generally safe to proceed with cleaning the entire rug using the tested solution. However, if you notice any unwanted reactions or changes, it’s best to discontinue use and consider alternative cleaning methods or professional help.
Keep in mind that different rugs have varying levels of sensitivity and different susceptibility to cleaning solutions. Even rugs made from the same type of fiber may react differently to various cleaning agents.
If you’re unsure about the suitability or safety of a cleaning solution, it’s always best to consult a professional rug cleaner who can provide expert advice and guidance.
By testing the cleaning solution on a small area, you’re safeguarding the integrity and appearance of the rug. This precautionary step ensures that the cleaning process does not unintentionally cause any damage or undesirable changes to your beloved rug.
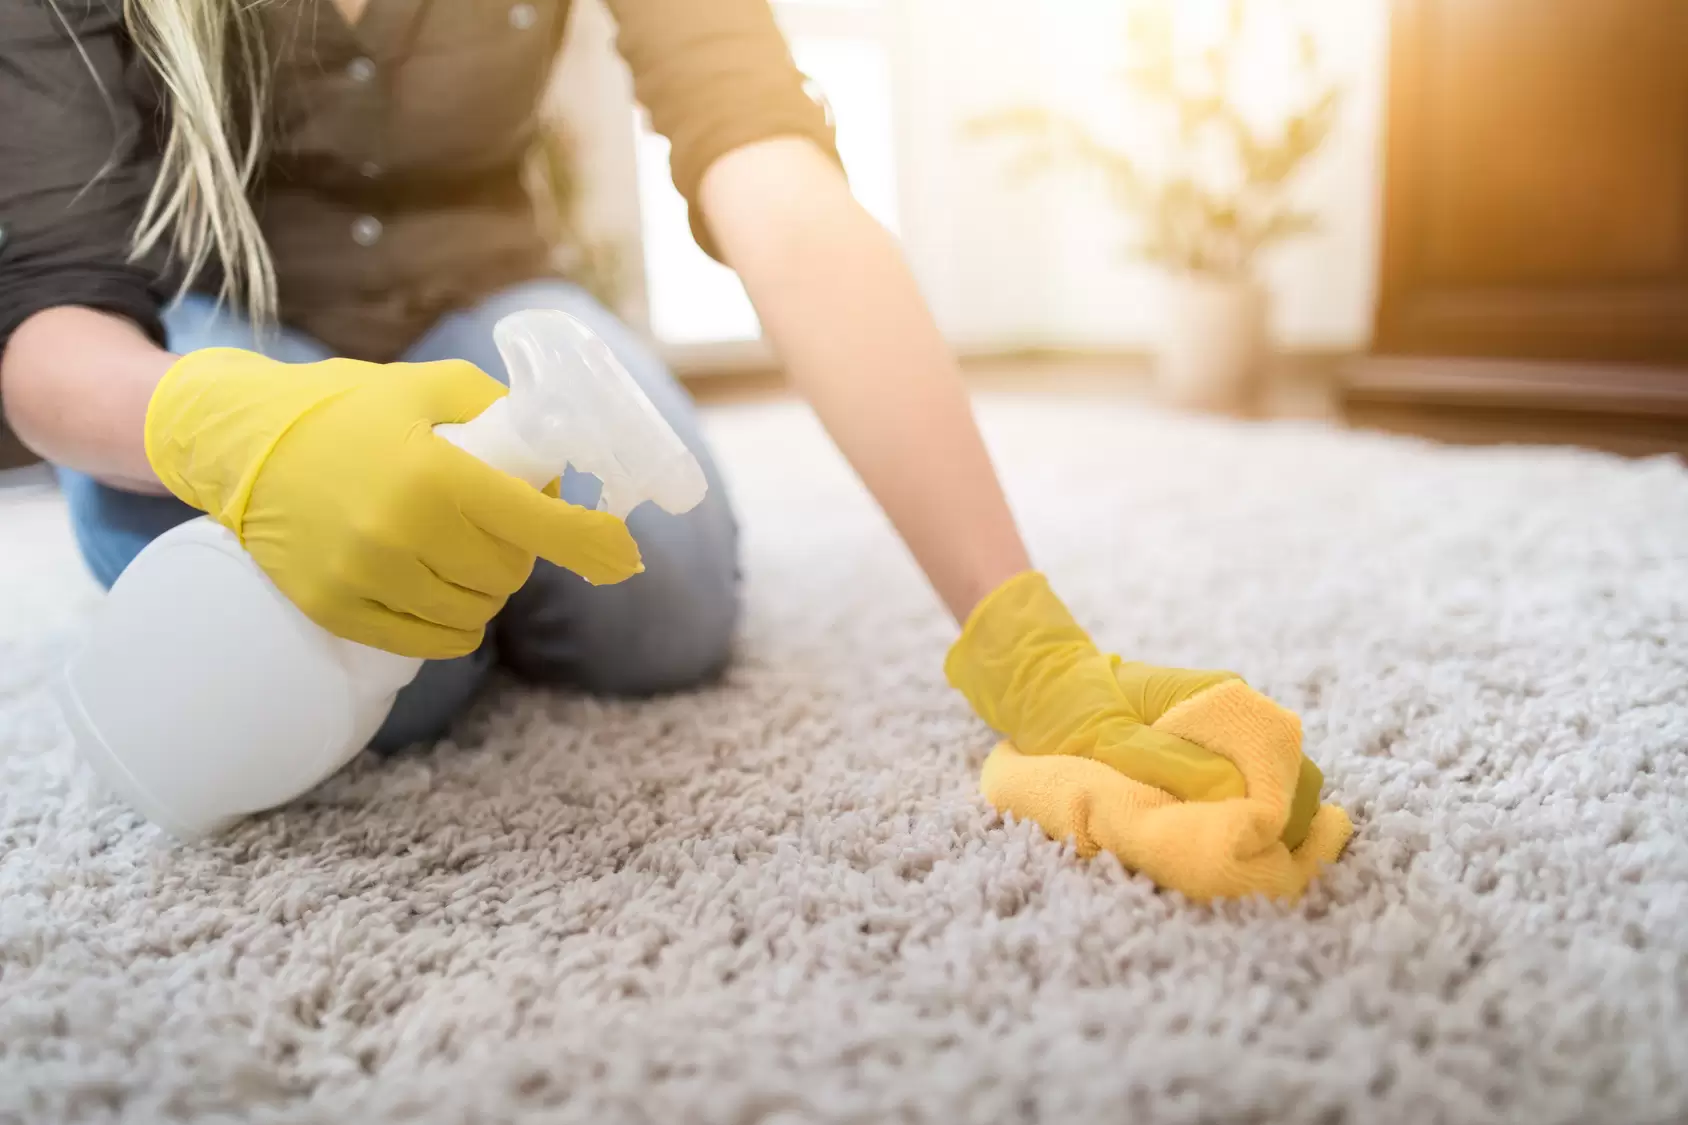
Clean the Entire Rug with the Solution
Once you have tested the cleaning solution on a small area of the rug and determined its compatibility, you can now proceed to clean the entire rug. Cleaning the entire rug with the solution will help remove dirt, stains, and lingering odors, revitalizing its appearance and freshness.
Start by pouring the prepared cleaning solution into a spray bottle or a clean bucket, depending on your preferred method of application. Ensure that the cleaning solution is evenly distributed, as this will ensure consistent cleaning results.
If using a spray bottle, mist the cleaning solution onto the rug, covering the entire surface in a fine, even mist. If using a bucket, dip a clean sponge or cloth into the solution and gently wring out any excess before applying it to the rug.
Once the cleaning solution is applied, work in sections to thoroughly clean the rug. Use a clean sponge, cloth, or a soft-bristle brush to gently scrub the rug in circular motions or following the direction of the rug’s fibers.
Pay attention to any stained or heavily soiled areas. Give these areas a bit more attention, using gentle pressure to lift and loosen the dirt or stains.
Avoid over-saturating the rug with the cleaning solution. Excessive moisture can lead to potential damage, such as mold growth or fiber distortion. Use a measured amount of the solution and ensure it is evenly distributed without leaving the rug overly wet.
Take breaks if needed, especially if it’s a large rug, to prevent the cleaning solution from drying out before you’ve finished cleaning the entire rug. Ensure that the solution remains on the rug for a sufficient amount of time to effectively break down dirt and stains.
After cleaning the rug with the solution, allow it to sit for a few minutes to further penetrate the fibers and target any remaining odors. This step helps ensure that the cleaning solution thoroughly eliminates the musty smell from the rug.
Remember to work in a well-ventilated area, allowing ample air circulation to facilitate the drying process and prevent any potential buildup of odors or mildew.
By cleaning the entire rug with the solution, you’re effectively addressing the dirt, stains, and odors that contribute to the musty smell. This thorough cleaning will help revive your rug’s beauty and leave it looking and smelling fresh.
Rinse the Rug with Clean Water
After cleaning the rug with the solution and allowing it to sit for a few minutes, the next step in the cleaning process is to rinse the rug with clean water. Rinsing helps remove any remaining cleaning solution, dirt, and residue, ensuring a thorough and fresh result.
Start by preparing a separate bucket or container with clean, lukewarm water. Lukewarm water is ideal as it helps to lift away any residues without causing any damage to the rug’s fibers.
Using a clean sponge or cloth, dip it into the water and gently wring out any excess moisture. Then, proceed to dampen the entire rug by lightly dabbing or blotting the surface. Take care not to over-wet the rug as excessive moisture can lead to prolonged drying times or potential damage.
Work in sections to ensure that all areas of the rug receive sufficient rinsing. Rinse the sponge or cloth frequently in the clean water to prevent cross-contamination and to maintain the effectiveness of the rinsing process.
Alternatively, you can use a spray bottle filled with clean water to mist the rug and gently pat it dry with a clean cloth or towel. This method is suitable for smaller rugs or targeted areas that require rinsing.
Continue rinsing the rug until the water runs clear, indicating that all traces of the cleaning solution have been removed.
Once the rinsing is complete, blot the rug gently with a clean, absorbent towel or cloth to remove excess water. Avoid rubbing the rug vigorously, as this can distort the fibers or cause them to become tangled.
Ensure that the rug is not left soaking wet, as this can lead to prolonged drying times and potentially create the ideal conditions for mold or mildew growth. If possible, hang the rug or lay it flat in a well-ventilated area to air dry.
Allow the rug to dry completely before placing it back in its designated location. This may take several hours or even days, depending on the size, thickness, and environmental conditions.
Rinsing the rug with clean water is a crucial step in the cleaning process, as it removes any residual cleaning solution and ensures the rug is left fresh and free from any cleaning product residues. This step helps restore the rug’s cleanliness and prepares it for the final stages of the cleaning process.
Remove Excess Water from the Rug
After rinsing the rug with clean water, it’s important to remove excess water to facilitate the drying process. This step helps prevent potential damage, such as color bleeding, fiber distortion, or the growth of mold or mildew.
Start by gently pressing down on the rug with a clean, absorbent towel or cloth. Apply gentle pressure to absorb as much water as possible. Avoid rubbing or wringing the rug, as this can distort the fibers or cause them to become tangled.
If the rug is still quite wet after blotting, you can use a wet-dry vacuum cleaner or a carpet extractor to extract excess water. These tools are effective in pulling out moisture from the rug, leaving it damp rather than soaking wet.
When using a wet-dry vacuum cleaner or a carpet extractor, follow the manufacturer’s instructions carefully to ensure safe and proper usage. Move the nozzle or attachment across the rug in slow, deliberate motions, allowing it to draw out the water.
If you don’t have access to specialized equipment, you can create a homemade press to remove excess water. Lay the rug flat on a clean, dry surface, and place a thick towel or a clean cloth on top. Then, carefully apply pressure by walking or gently pressing on the towel-covered rug. This action helps absorb the remaining water from the fibers.
If the rug is small enough and it’s a sunny day, you can take advantage of natural sunlight to aid in the drying process. Hang the rug outdoors on a clothesline or over a sturdy railing, ensuring that it is evenly draped. Rotate the rug periodically to ensure even drying and prevent any potential damage from prolonged exposure to the sun’s rays.
It’s important to allow the rug to air dry completely before placing it back in its designated location. This may take several hours or even days, depending on the size, thickness, and environmental conditions. Proper drying is key to prevent mold or mildew growth and to ensure the rug regains its original texture and appearance.
By removing excess water from the rug, you are minimizing the risk of damage and promoting a faster drying process. This step is crucial in maintaining the integrity of the rug and ensuring that it is ready to be enjoyed once again.
Hang the Rug to Air Dry
After removing excess water from the rug, the next step in the cleaning process is to allow it to air dry. Proper drying is crucial in preventing mold, mildew, and odors from developing, and it helps restore the rug’s texture and appearance.
If possible, find a suitable location to hang the rug for optimal drying. Choose an area that is well-ventilated, away from direct sunlight or heat sources, and has sufficient space to accommodate the size of the rug.
Start by ensuring that the rug is properly supported when hanging to prevent stretching or distortion. Use a sturdy clothesline or a drying rack, ensuring that it can adequately bear the weight of the rug without causing damage.
Carefully drape the rug over the clothesline or drying rack, ensuring that it is evenly spread out to facilitate uniform drying. Avoid folding or bunching the rug, as this can lead to moisture retention and potential damage. If necessary, use clothespins or clothes hangers to secure the rug in place.
During the drying process, periodically check the rug to ensure that it is drying evenly and that no excessive moisture is being retained. If you notice any areas that are taking longer to dry or feel damp to the touch, gently blot them with a clean, absorbent towel to aid in the drying process.
It’s important to note that drying times can vary depending on factors such as the rug’s size, thickness, and ambient humidity levels. Be patient and allow the rug sufficient time to air dry completely. This may take several hours or even days.
While the rug is drying, keep the room well-ventilated by opening windows or using fans to promote air circulation. This helps moisture evaporate more quickly, reducing the risk of mold or mildew growth.
Ensure that the rug is completely dry before returning it to its designated space. Check the rug thoroughly to ensure that there are no damp or musty odors present, as these may indicate that the rug requires further drying.
If weather conditions do not permit outdoor or hanging drying, you can lay the rug flat on a clean, dry surface instead. Flip it periodically to ensure even drying on both sides.
By hanging the rug to air dry, you are allowing it to dry naturally without the need for excessive heat sources or mechanical drying methods. This gentle drying process preserves the integrity of the rug and ensures that it is ready to be enjoyed once it has completely dried.
Air Out and Deodorize the Room
After cleaning and drying the rug, the final step in the cleaning process is to air out and deodorize the room where the rug is located. This step helps ensure a fresh and pleasant environment, free from any lingering musty smells.
Start by opening windows and doors to allow fresh air to circulate throughout the room. This helps remove any odors that may have accumulated during the cleaning process and promotes better indoor air quality.
If the weather permits, leave the windows open for an extended period, ideally for several hours or even overnight. The fresh air will help dissipate any remaining odors and provide a clean and invigorating atmosphere.
If the room lacks proper ventilation or if outdoor air quality is poor, you can use fans or air purifiers to encourage air circulation. Place these devices strategically to ensure that the air is being effectively moved around the room.
In addition to airing out the room, you can further deodorize the space by using natural odor absorbers. Baking soda is an excellent deodorizing agent that can help eliminate lingering odors. Simply place bowls filled with baking soda around the room, focusing on areas near the rug.
Charcoal is another natural deodorizer that can absorb musty smells. Place activated charcoal pouches or pieces of charcoal in strategic locations around the room to help neutralize odors.
Leaving a few open containers of vinegar in the room can also be effective in eliminating odors. Vinegar absorbs and neutralizes odors, leaving the air fresh and clean. However, be cautious with this method if you or anyone in the household is sensitive to the smell of vinegar.
Additionally, consider using air fresheners or scented candles to further enhance the room’s freshness. Opt for natural or lightly scented options to avoid overpowering or artificial fragrances.
Regular cleaning and maintenance of the room, including vacuuming carpets, dusting furniture, and removing clutter, also help prevent musty odors from recurring.
By airing out and deodorizing the room, you create a clean and pleasant environment that complements the freshly cleaned rug. This final step completes the cleaning process, leaving your room smelling delightful and inviting.
Brush the Rug to Restore the Pile
After the rug has been cleaned and dried, the final step in the cleaning process is to brush it to restore its pile. Brushing the rug helps fluff up the fibers, creating a softer and more luxurious appearance.
To begin, select a brush that is suitable for the type of rug you have. For rugs with shorter pile, use a stiff bristle brush or a carpet rake. For rugs with longer or shaggy pile, use a brush with softer bristles or a wide-toothed comb.
Start by brushing the rug in the direction of the fibers. Use long, gentle strokes to avoid damaging the fibers or causing them to tangle or mat. If there are any particularly matted or crushed areas, focus on these sections to help restore their fluffiness.
Work section by section, ensuring that all parts of the rug are brushed evenly. Pay extra attention to high-traffic areas or areas that were heavily soiled before cleaning. These areas may require more brushing to revive the pile.
If you have a large rug, you may want to roll it up or fold it to make brushing more manageable. Be cautious when folding the rug to avoid creasing or damaging the fibers.
Take your time and be patient when brushing the rug. This process can be quite therapeutic and enjoyable, allowing you to see the transformation as the fibers regain their volume and depth.
If there are any tassels or fringes on the rug, brush them gently to remove any dirt or debris that may have accumulated. Take care not to pull or tangle the fringes, as they can be delicate and easily damaged.
Regular brushing not only helps restore the rug’s pile but also helps to prevent matting, flattening, and the build-up of dirt and debris. It is recommended to brush your rug periodically to keep it looking its best.
In addition to brushing, turning the rug occasionally can also help prevent uneven wear and maintain its overall appearance. This is especially important for rugs in high-traffic areas.
By brushing the rug to restore the pile, you are rejuvenating its texture and appearance. The final step enhances the overall aesthetic of the rug, leaving it looking fresh, inviting, and beautifully maintained.
Apply Rug Deodorizer or Freshener (Optional)
As an optional step in the cleaning process, you can apply a rug deodorizer or freshener to further enhance the scent of your freshly cleaned rug. This step adds a final touch of freshness and leaves behind a pleasant aroma.
Rug deodorizers or fresheners come in various forms, including powders, sprays, and granules. They are specifically designed to eliminate odors and leave a fresh scent on your rug.
If you choose to use a powder rug deodorizer, sprinkle it evenly over the rug’s surface. Allow it to sit for the recommended amount of time specified on the product’s packaging. This duration typically ranges from a few minutes to an hour.
After the waiting period, thoroughly vacuum the rug to remove the deodorizer powder along with any residual odors. Follow the manufacturer’s instructions on proper usage and disposal of the deodorizer product.
If you prefer a spray freshener, simply mist it lightly over the rug, ensuring even coverage. Take care not to saturate the rug with the spray. Allow the freshener to air dry or absorb into the rug as per the product’s instructions.
Granule-type fresheners can be sprinkled over the rug, following the same process as the powder deodorizer. Leave the granules on the rug for the recommended duration, and then thoroughly vacuum them up.
When selecting a rug deodorizer or freshener, consider choosing a product with a light, pleasant scent that complements your personal preferences. Opt for a deodorizer specifically designed for use on rugs to ensure its effectiveness and safety for your rug’s particular fibers.
Before using any deodorizer or freshener, carefully read the instructions and follow the recommended usage guidelines. Additionally, test a small, inconspicuous area of the rug to ensure that the product does not cause any adverse reactions, such as discoloration or damage to the fibers.
Remember, using a rug deodorizer or freshener is an optional step to enhance the aroma of your rug. It can be particularly beneficial if you want to eliminate any remaining subtle odors or simply enjoy the fresh scent that lingers in the room after cleaning.
However, if you or anyone in your household is sensitive to fragrances or chemicals, it’s best to skip this optional step and focus on maintaining the cleanliness and freshness of your rug through regular cleaning and ventilation.
Repeat the Cleaning Process, if Necessary
After completing the initial cleaning process, it’s essential to evaluate the results and assess whether further cleaning is necessary. Depending on the condition of the rug and the severity of the musty odor, it may be beneficial to repeat the cleaning process to achieve optimal results.
If, after the initial cleaning, you still detect lingering musty odors or notice areas that were not adequately cleaned, it’s a good idea to assess the situation and consider repeating the cleaning process.
Start by examining the rug closely to pinpoint any specific areas that require additional attention. Look for stains, spots, or areas that seem to be more heavily soiled or affected by the musty odor.
In cases where the odor persists, it may indicate that the underlying cause of the musty smell was not completely addressed during the initial cleaning. For example, mold or mildew growth may require specialized treatment or professional assistance.
Consider consulting a professional rug cleaner or an expert in cleaning and restoring musty rugs. They can provide guidance, recommend suitable cleaning methods, or offer specialized treatments to tackle stubborn odors or stains.
If you decide to repeat the cleaning process yourself, be cautious and avoid over-saturating the rug or using harsh chemicals that could damage the fibers. Stick to gentle cleaning solutions and follow the manufacturer’s instructions or any expert advice you may have received.
It’s important to bear in mind that repetitive cleaning may not be always necessary or recommended for all situations. Over-cleaning or using aggressive methods can potentially lead to fiber damage, color fading, or other issues.
Prioritize preventive measures to maintain the freshness of your rug in the long term. This includes regular vacuuming, periodic spot cleaning, prompt handling of spills or accidents, and keeping the rug in a clean and well-ventilated environment.
If you’re uncertain about whether to repeat the cleaning process or have concerns about the rug’s condition, it’s best to seek professional assistance. Experts in the field can assess the rug, provide suitable advice, and ensure that the rug receives the appropriate treatment.
By being mindful of the results of the initial cleaning process and recognizing the need for repetition, if necessary, you can take the appropriate steps to address musty odors and maintain the cleanliness and freshness of your cherished rug.