
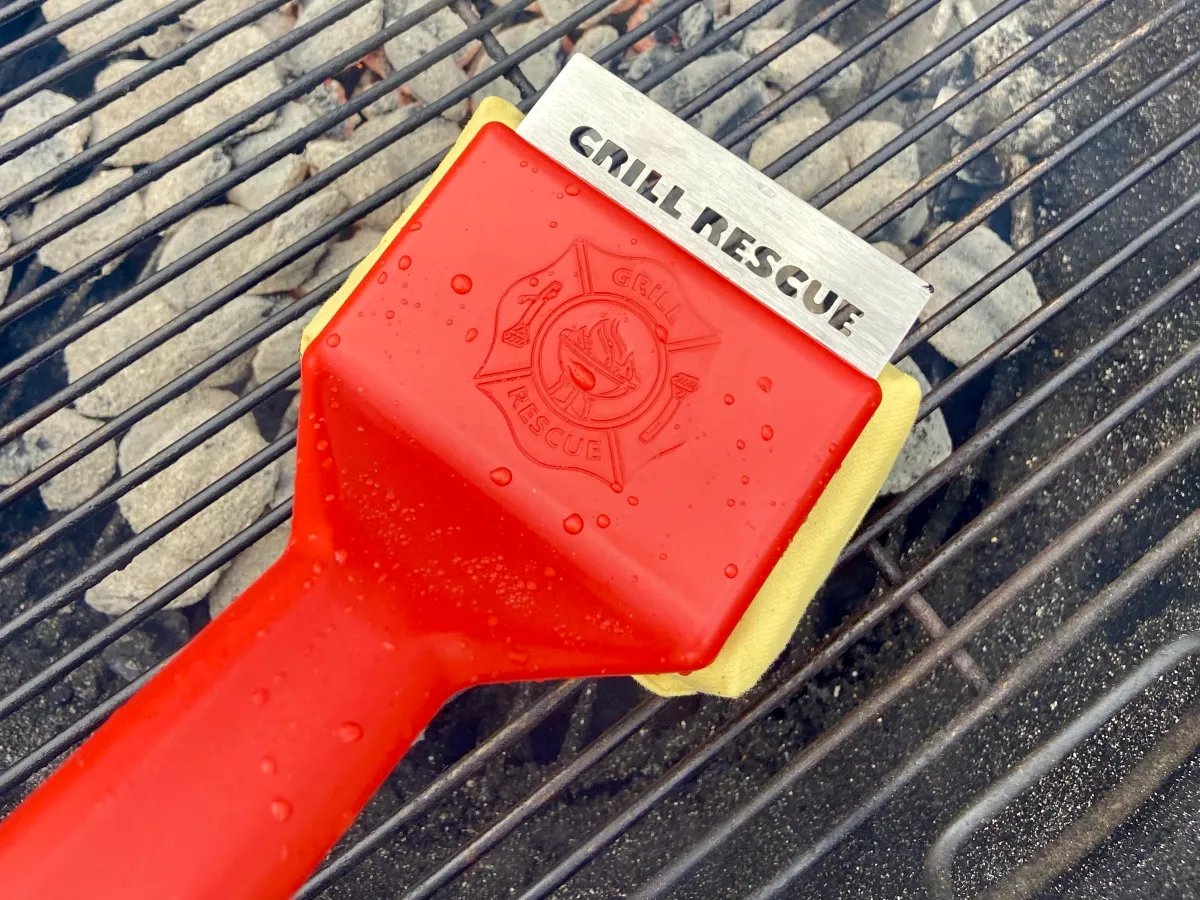
Why Cleaning Your Grill Rescue Brush is Important
Cleaning your Grill Rescue brush is an essential part of maintaining a healthy and efficient grilling experience. Neglecting to clean your brush regularly not only compromises the lifespan of the tool but also poses potential health risks. Here are a few reasons why cleaning your Grill Rescue brush is crucial:
- Preventing Contamination: During grill sessions, food particles, grease, and other debris can accumulate on the bristles of your brush. These remnants can carry bacteria and pathogens, which can contaminate your food during subsequent use if not properly cleaned.
- Improving Performance: As you brush over hot grates, food residues can build up over time, causing the bristles to become clogged and less effective. Regular cleaning ensures that the bristles remain free from obstruction, allowing for optimal cleaning and removing stubborn residue.
- Ensuring Safety: Accumulated grease and food particles on your grill brush can increase the risk of flare-ups and fires during grilling. Regular cleaning mitigates this risk by removing these combustible materials, ensuring a safer grilling environment.
- Maintaining Durability: A clean grill rescue brush is a long-lasting one. By cleaning your brush after each use, you prevent the buildup of burnt-on food and grease, which can deteriorate the bristles over time. Regular maintenance extends the lifespan of your brush, saving you money on constant replacements.
- Promoting Hygiene: With the importance of food safety, keeping your grill rescue brush clean adheres to proper hygiene standards. By maintaining a sanitary cooking environment, you decrease the chances of cross-contamination and foodborne illnesses.
By incorporating the habit of regularly cleaning your Grill Rescue brush, you ensure a safe and enjoyable grilling experience for both you and your guests. Taking a few minutes to clean your brush after each use can make a significant difference in the longevity and effectiveness of this essential grilling tool.
Materials You’ll Need
Before you embark on cleaning your Grill Rescue brush, gather the following materials:
- Warm Water: You’ll need warm water to help loosen any food residues and debris stuck on the brush.
- Mild Dish Soap: A gentle dish soap will aid in removing grease and bacteria from the brush.
- Bowl or Sink: Use a bowl or sink to soak the brush and create the cleaning solution.
- Soft Bristle Brush: Apart from the Grill Rescue brush itself, have a separate soft-bristle brush or toothbrush ready for scrubbing the bristles.
- Towel or Paper Towels: Keep a towel or paper towels nearby for drying the brush after cleaning.
While the above materials are sufficient for cleaning your Grill Rescue brush, you may also consider using additional cleaning agents or tools, such as vinegar or baking soda, to tackle any stubborn stains or odors. However, always refer to the manufacturer’s instructions before using any alternative cleaning methods.
Now that you have all the necessary materials ready, let’s move on to the step-by-step process of cleaning your Grill Rescue brush.
Step 1: Preparing the Grill Rescue Brush for Cleaning
Before you begin cleaning your Grill Rescue brush, it’s important to take a few preparatory steps:
- Ensure Safety: Make sure the grill is turned off and has cooled down before attempting to clean the brush. Additionally, wear protective gloves to safeguard your hands during the cleaning process.
- Inspect the Brush: Before cleaning, carefully examine the brush for any signs of damage. Look for loose bristles, bent bristles, or any other signs of wear and tear. If you notice significant damage, it may be necessary to replace the brush to prevent any safety hazards or ineffective cleaning.
- Create a Cleaning Solution: Fill a bowl or sink with warm water and add a small amount of mild dish soap. Swirl the water to create a soapy solution that will help break down grease and remove debris from the brush.
Once you’ve completed these preparatory steps, you’re ready to move on to the next stage of cleaning your Grill Rescue brush: removing excess food and debris.
Step 2: Removing Excess Food and Debris
Now that you have prepared the Grill Rescue brush, it’s time to remove any excess food and debris that may be clinging to the bristles. Follow these steps:
- Hold the Brush Securely: Grasp the handle of the brush firmly to maintain control and prevent any accidental slippage during cleaning.
- Scrape the Grates: Using the brush, gently scrape the grill grates to dislodge any large food particles or debris. Make sure to cover all areas of the grates to ensure a thorough cleaning.
- Inspect for Remaining Residue: After scraping, closely inspect the bristles to check for any stubborn residue that may still be present. If there are substantial amounts of residue, move on to the soaking step.
It’s important to note that excessive force or aggressive scraping can cause damage to both the brush and the grill grates. Take care to apply gentle pressure while ensuring effective cleaning.
Once you have removed as much excess food and debris as possible, it’s time to move on to the next step: soaking the brush.
Step 3: Soaking the Brush
After removing the excess food and debris, it’s time to give your Grill Rescue brush a thorough soak to further loosen any remaining residue. Follow these steps:
- Submerge the Brush: Place the Grill Rescue brush into the bowl or sink filled with the warm water and dish soap solution. Ensure that the bristles are fully submerged.
- Let It Soak: Allow the brush to soak for about 10-15 minutes. This will help soften any stuck-on residue, making it easier to remove during the cleaning process.
- Agitate the Brush: After the soaking period, take a soft-bristle brush or toothbrush and gently agitate the bristles. This will help dislodge any remaining debris and further break down any stubborn residue.
While the brush is soaking, you can take this time to clean the grill grates, if desired, to ensure a complete cleaning experience.
Once you have finished soaking and agitating the brush, it’s time to move on to the next step: scrubbing the bristles.
Step 4: Scrubbing the Bristles
Now that you have soaked the Grill Rescue brush, it’s time to scrub the bristles to remove any remaining residue. Follow these steps:
- Hold the Brush Properly: Grasp the handle of the brush firmly, ensuring a good grip and control throughout the scrubbing process.
- Scrub the Bristles: Using a soft-bristle brush or toothbrush, gently scrub the bristles of the Grill Rescue brush. Start at the base of the bristles and work your way towards the tip, using circular motions to effectively clean each bristle.
- Pay Attention to Stubborn Areas: If you notice any stubborn residue or debris that is not easily coming off, focus a bit more effort on those particular spots. Continue scrubbing until the bristles are visibly clean and free from any leftover residue.
Ensure that you are applying gentle pressure while scrubbing the bristles to avoid damaging them. Remember, the goal is to clean and maintain the brush, not to aggressively scrub away the bristles.
Once you are satisfied with the cleanliness of the bristles, it’s time to move on to the next step: rinsing and drying the brush.
Step 5: Rinsing and Drying the Brush
After scrubbing the bristles of your Grill Rescue brush, it’s important to thoroughly rinse and dry the brush to remove any remaining residue and prevent the growth of mold or bacteria. Follow these steps:
- Rinse the Brush: Hold the brush under running water to rinse off any lingering soap residue and loosened debris. Ensure that water flows through the bristles, helping to flush out any remaining particles.
- Inspect for Cleanliness: Take a moment to inspect the bristles and ensure they are clean and free from any leftover residue or particles. If necessary, repeat the rinsing process until the bristles are visibly clean.
- Dry the Brush: After rinsing, shake off any excess water from the brush and use a towel or paper towels to gently blot dry the bristles. Avoid rubbing the bristles vigorously, as this could cause damage or distortion to the brush.
It’s crucial to ensure that the brush is completely dry before storing it to prevent the growth of mold or mildew. Allow the brush to air dry in a well-ventilated area, preferably by hanging it or placing it in an upright position. This will help keep the bristles in their original shape and prevent any moisture buildup.
Once the brush is fully dry, you can move on to the final step: storing the Grill Rescue brush.
Step 6: Storing the Grill Rescue Brush
Properly storing your Grill Rescue brush after cleaning is essential to maintain its longevity and functionality. Follow these steps for optimal storage:
- Ensure Complete Dryness: Before storing the brush, make sure it is completely dry. Any leftover moisture can lead to the growth of mold or mildew, compromising the cleanliness of the brush.
- Choose a Suitable Storage Location: Find a clean and dry area where you can store the Grill Rescue brush. Consider a storage hook, container, or designated compartment near your grill for easy access.
- Keep the Bristles Protected: To prevent the bristles from becoming bent or damaged, avoid storing the brush with heavy items on top or in a way that squishes the bristles. Place it in a manner that the bristles can remain upright and retain their original shape.
- Keep it Separate: It’s best to store the grill brush separately from other grilling tools and utensils to prevent cross-contamination and preserve the cleanliness of the brush. A dedicated spot for the brush in your grilling area will ensure it is readily available when needed.
By following these storage guidelines, you can maintain the cleanliness and integrity of your Grill Rescue brush, ensuring it is always ready for your next grilling session.
Now that you’ve completed the cleaning and storage process, you can confidently enjoy your freshly cleaned brush and the delicious meals you’ll create with it on your grill.
Alternative Cleaning Methods
While the previous steps outlined the traditional cleaning process for a Grill Rescue brush, there are a few alternative methods you can explore for a more thorough cleaning. These methods can be especially helpful if you encounter stubborn stains or odors. Here are a few alternative cleaning methods you can try:
- Vinegar Soak: Instead of using a dish soap solution, you can create a vinegar soak by mixing equal parts of white vinegar and warm water. Submerge the Grill Rescue brush in this solution for about 30 minutes to help break down grime, odors, and stains. Rinse thoroughly afterward.
- Baking Soda Paste: For tough stains or built-up residue, you can create a paste by mixing baking soda with a small amount of water. Apply the paste to the bristles and gently scrub with a soft-bristle brush or toothbrush. Rinse thoroughly after cleaning.
- Dishwasher Safe: Check with the manufacturer to determine if your Grill Rescue brush is dishwasher safe. If it is, you can place it in the dishwasher’s utensil compartment for a convenient and effective cleaning. Be sure to remove any loose debris before loading it into the dishwasher.
Remember to always refer to the manufacturer’s guidelines and recommendations for alternative cleaning methods to ensure that you do not damage the brush or compromise its functionality.
By exploring these alternative cleaning methods, you can customize your cleaning routine based on your specific needs and achieve an even more pristine Grill Rescue brush.
Tips for Maintaining a Clean Grill Rescue Brush
Maintaining a clean Grill Rescue brush is essential for optimal performance and longevity. Here are some helpful tips to keep your brush in top condition:
- Clean After Each Use: Make it a habit to clean your Grill Rescue brush after every grilling session. This prevents the buildup of food particles and grease, making the cleaning process easier each time.
- Regular Inspections: Regularly inspect your brush for any signs of damage, such as loose or bent bristles. Replace the brush if significant damage is present to ensure safe and effective cleaning.
- Use Proper Technique: When using the Grill Rescue brush during grilling, employ proper technique and avoid excessive pressure or aggressive motions. This prevents unnecessary wear and tear on the brush.
- Store in a Clean and Dry Area: After cleaning, store your brush in a clean and dry location to prevent the growth of mold or bacteria. Keep it separate from other grilling tools to maintain its cleanliness.
- Consider a Dedicated Brush for Different Foods: If you frequently grill different types of foods, you might want to consider having multiple Grill Rescue brushes. This prevents cross-contamination and ensures the integrity of flavors.
- Replace When Needed: While proper cleaning and maintenance can extend the lifespan of your brush, it’s important to know when it’s time for a replacement. If the bristles are severely worn, damaged, or bent, it may be time to invest in a new brush for optimal effectiveness.
Remember, maintaining a clean Grill Rescue brush not only enhances your grilling experience but also keeps your food safe and delicious. Incorporate these tips into your cleaning routine to ensure the longevity of your brush and the quality of your grilled meals.