
What is a Fisher Paykel water filter?
A Fisher Paykel water filter is a vital component of your Fisher Paykel refrigerator or water dispenser system. It is designed to purify water, removing impurities and contaminants, ensuring that you have clean and safe drinking water.
The water filter works by using a combination of physical and chemical processes to trap and remove harmful substances. It typically consists of a cartridge containing activated carbon, which acts as a powerful absorbent to capture and filter out impurities such as sediment, chlorine, lead, bacteria, and other harmful contaminants.
With regular use, the water filter becomes less effective over time as it gets clogged with impurities. Therefore, it is important to change the filter periodically to maintain its efficiency and ensure the continued delivery of clean and healthy water.
Fisher Paykel water filters are specifically designed for their appliances, ensuring a perfect fit and optimal functionality. They are manufactured to meet high-quality standards, providing you with peace of mind that your drinking water is safe and free from contaminants.
These filters are not only important for your health but also for the longevity of your appliance. By removing impurities, they help prevent the build-up of mineral deposits and scale that could damage your appliance over time, ultimately extending its lifespan.
Regularly changing the water filter is a simple and effective way to maintain the high performance and quality of your Fisher Paykel refrigerator or water dispenser system. It is an essential step in ensuring that you and your family have access to clean and refreshing water at all times.
Why do you need to change the water filter?
Changing the water filter in your Fisher Paykel refrigerator or water dispenser system is important for several reasons.
Firstly, over time, the water filter becomes less effective as it accumulates various contaminants and impurities. These can include sediment, chlorine, bacteria, and other harmful substances. When the filter is clogged, it hinders the flow of water and reduces the filter’s ability to remove impurities, compromising the quality and taste of the water. By changing the water filter regularly, you ensure that your water remains clean, fresh, and safe for consumption.
Secondly, a clogged water filter can put additional strain on your appliance. When the filter is blocked, the water flow is restricted, making the appliance work harder to deliver water. This increased effort can lead to decreased efficiency, higher energy consumption, and potential damage to the appliance over time. By changing the water filter as recommended, you help maintain the optimal performance of your Fisher Paykel appliance and extend its lifespan.
Furthermore, regular filter changes contribute to overall health and well-being. Clean drinking water is essential for hydration and plays a crucial role in maintaining proper bodily functions. By removing impurities and contaminants, the water filter ensures that you and your family consume water that is free from potentially harmful substances. This is particularly important for individuals with compromised immune systems or certain health conditions.
Lastly, many refrigerator models are equipped with filter indicator lights or reminder systems that alert you when it is time to change the water filter. Ignoring these reminders may result in decreased water quality, potential appliance damage, and a compromised user experience. Therefore, it is important to heed these notifications and replace the water filter accordingly.
By understanding the importance of changing the water filter in your Fisher Paykel appliance, you can ensure clean, refreshing, and safe drinking water for you and your family. Remember to follow the manufacturer’s guidelines for filter replacement frequency to maintain optimal performance and efficiency.
How often should you change the Fisher Paykel water filter?
The frequency at which you should change the water filter in your Fisher Paykel refrigerator or water dispenser system depends on several factors, including water usage, water quality, and the specific model of your appliance.
As a general guideline, Fisher Paykel recommends replacing the water filter every six months. This timeframe ensures that the filter continues to effectively remove impurities and maintain the highest standards of water quality.
However, it is important to note that if you have higher-than-average water usage or live in an area with poor water quality, you may need to change the filter more frequently. In such cases, regularly monitoring the filter’s condition and performance can help determine if an early replacement is necessary.
In some Fisher Paykel refrigerator models, the control panel may have a filter indicator light or a digital display that provides a visual reminder when it is time to change the filter. This feature takes the guesswork out of determining the filter’s lifespan and ensures that you don’t miss the recommended replacement timeframe.
In addition to time-based recommendations, certain factors can also indicate the need for a filter change. If you notice a decrease in water flow or a change in water clarity or taste, it may be a sign that your filter is becoming clogged and less effective. In such cases, it is advisable to change the filter even if it has not reached the manufacturer’s recommended replacement interval.
It is essential to follow the manufacturer’s guidelines for filter replacement frequency to ensure optimal performance and water quality. Regularly changing the water filter will help maintain the efficiency of your appliance, extend its lifespan, and provide you with clean and refreshing drinking water.
Step 1: Gather the necessary materials
Before starting the process of changing the water filter in your Fisher Paykel refrigerator or water dispenser system, it is important to gather all the necessary materials. Having the right tools and supplies at hand will help ensure a smooth and hassle-free filter replacement. Here are the materials you will need:
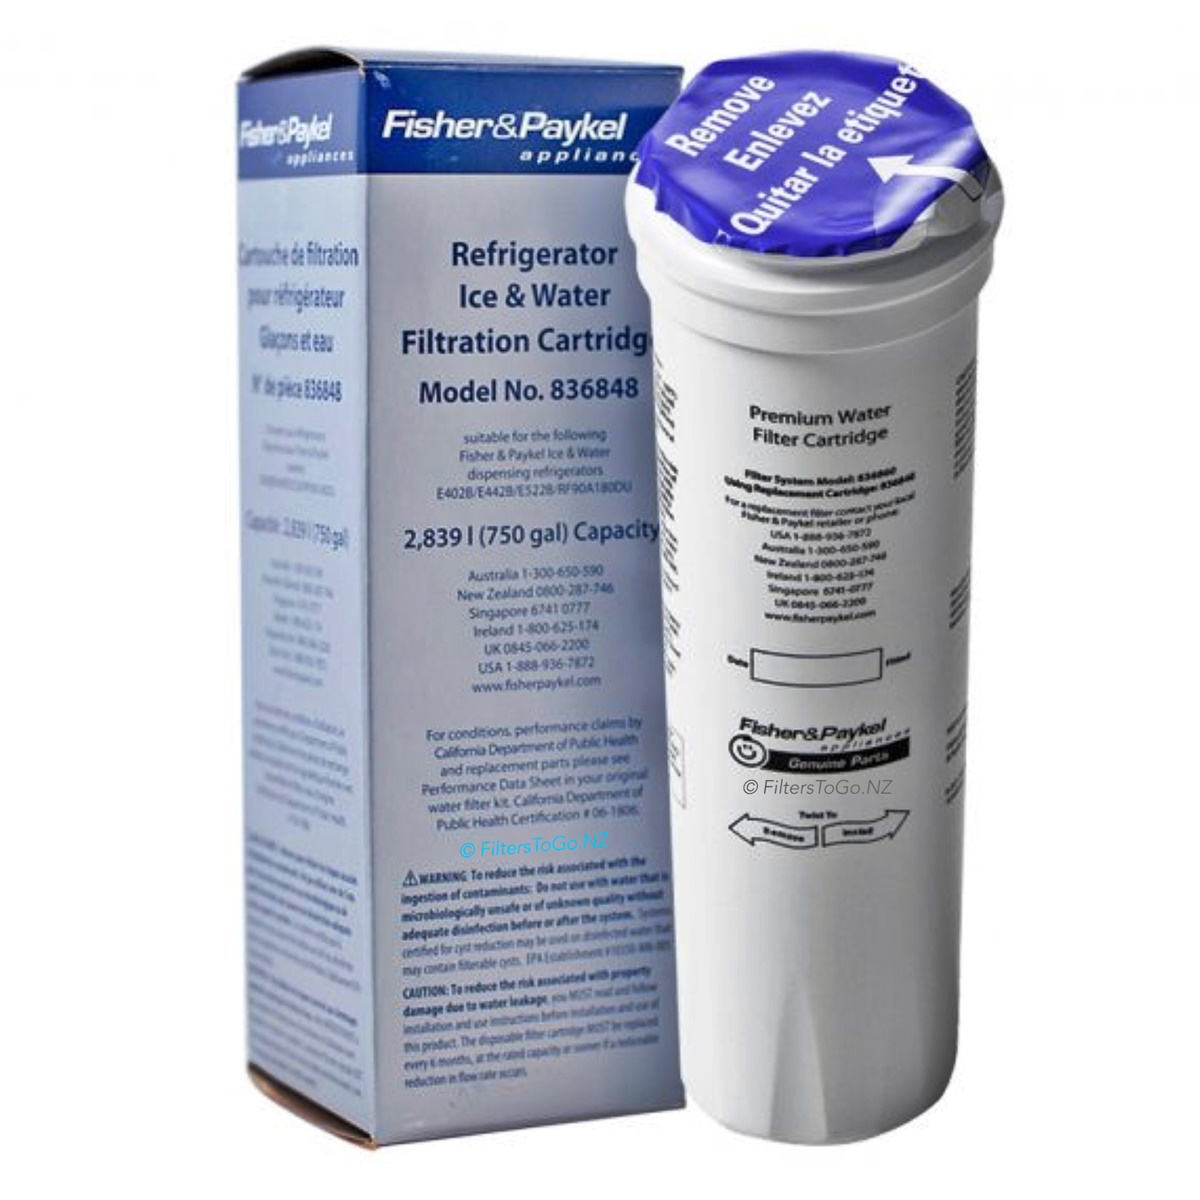
- A new Fisher Paykel water filter: It is important to purchase the correct replacement filter that is compatible with your specific appliance model. Fisher Paykel provides genuine replacement filters that are specifically designed for their appliances, ensuring optimal performance and water quality.
- Gloves: Wearing gloves while handling the water filter helps maintain cleanliness and hygiene.
- A towel or cloth: This will come in handy for wiping any spills or excess water during the filter replacement process.
- A container or bucket: Place a container or bucket near the appliance to catch any water that may spill during the filter removal. This will prevent any mess and save you from having to clean up afterwards.
Gathering these materials beforehand will save you time and ensure a seamless filter replacement experience. Make sure to have them all conveniently located near the refrigerator or water dispenser system before moving on to the next step.
Step 2: Locate the water filter
Once you have gathered all the necessary materials, the next step in changing the water filter in your Fisher Paykel refrigerator or water dispenser system is to locate the position of the water filter. The exact location of the filter may vary depending on the model of your appliance, but it is usually found inside the refrigerator compartment or in the back of the appliance.
If your Fisher Paykel refrigerator has an interior water dispenser, the water filter is typically located in the upper right or left corner of the refrigerator compartment. Look for a filter housing or a filter cover that can be easily removed. Some models may also have arrows or labels indicating the position of the filter.
If your appliance has an external water dispenser, the filter is often located at the back, either behind the kickplate or in the lower grille. Look for a filter housing or a cover that can be accessed easily by removing the appropriate panel.
If you are unsure of the exact location of the water filter in your Fisher Paykel appliance, refer to the user manual or consult the manufacturer’s website for specific instructions. They will provide you with detailed information on how to locate the filter based on your appliance model.
It is important to note that before removing the water filter, make sure to turn off the water supply to your appliance. This prevents any water from leaking or spilling during the filter replacement process.
Once you have located the water filter and turned off the water supply, you are ready to proceed to the next step of removing the old water filter.
Step 3: Turn off the water supply
Before proceeding with the water filter replacement in your Fisher Paykel refrigerator or water dispenser system, it is crucial to turn off the water supply to prevent any leaks or spills during the process. Here’s how to turn off the water supply:
- Locate the water shut-off valve: The shut-off valve is typically found at the back of the appliance, either behind the kickplate or in the lower grille. It may be labeled or have a lever or knob that you can turn to shut off the water.
- Turn off the water supply: Use a clockwise motion to turn the shut-off valve fully, ensuring that it is tightly closed. This will stop the water from flowing into the appliance and allow you to safely replace the water filter.
Turning off the water supply before replacing the filter is essential as it prevents any water leakage or spills during the process. It ensures a clean and efficient filter replacement without any mess or damage to your appliance or surroundings.
Remember to keep a towel or cloth handy to catch any water that may still be in the line after turning off the water supply. This will help prevent any drips or spills when removing the old filter and installing the new one.
With the water supply turned off, you can now proceed to the next step of removing the old water filter from your Fisher Paykel appliance.
Step 4: Remove the old water filter
With the water supply turned off, you can now proceed to remove the old water filter from your Fisher Paykel refrigerator or water dispenser system. Follow these steps to safely remove the filter:
- Open the filter housing: If the filter is located inside the refrigerator compartment, open the filter housing by lifting or pulling the filter cover. If the filter is located at the back of the appliance, remove the appropriate panel or cover to access the filter.
- Release the filter: Depending on the model, the filter may be secured in different ways. Some filters have a twist and lock mechanism, while others may have a push button or release button. Follow the instructions provided in your user manual or on the filter itself to release it from its housing.
- Remove the old filter: Once you have released the filter, gently pull it out of the housing. Be careful not to spill any residual water that may be present in the filter or housing.
- Dispose of the old filter: Properly dispose of the old water filter according to local regulations. Check with your local waste management or recycling center for guidelines on how to dispose of the filter responsibly.
It is important to note that some models may have a filter bypass plug that needs to be inserted if you do not have a replacement filter on hand. This allows the water to bypass the filter temporarily until a new one can be installed. If your appliance has this option, make sure to follow the instructions provided in your user manual to properly insert the bypass plug.
With the old water filter removed, you are now ready to move on to the next step of preparing the new filter for installation.
Step 5: Prepare the new water filter
After removing the old water filter, the next step in changing the filter in your Fisher Paykel refrigerator or water dispenser system is to prepare the new filter for installation. Here’s how to do it:
- Unpack the new filter: Remove the new water filter from its packaging. Be careful not to touch the filter media or any openings to maintain its cleanliness.
- Check for any protective covers: Inspect the new filter for any protective covers or seals. Some filters may come with a cover on the inlet or outlet ports. Remove these covers before installing the filter.
- Check for any filter preparation requirements: Certain water filters may require pre-soaking or flushing before installation. Refer to the instructions provided by the filter manufacturer to determine if any additional preparation steps are necessary. If pre-soaking is required, fill a container with water and submerge the filter for the specified duration.
- Inspect the O-ring: The O-ring is a rubber gasket located on the filter. Ensure that the O-ring is in good condition and properly seated. If the O-ring is damaged or misaligned, it can cause leaks. Replace the O-ring if necessary.
It is crucial to follow the instructions provided by the filter manufacturer for any specific preparation requirements. This will ensure that the new filter is ready for installation and performs optimally in filtering out impurities and contaminants from your water.
By taking the time to properly prepare the new water filter, you are ensuring that it is clean, functional, and ready for installation in your Fisher Paykel appliance.
Step 6: Install the new water filter
Once the new water filter for your Fisher Paykel refrigerator or water dispenser system is prepared, you can proceed with installing it. Follow these steps to properly install the new filter:
- Align the new filter correctly: Take the new water filter and align it with the filter housing. Ensure that the arrow or label on the filter is facing in the right direction. This ensures that the water flows through the filter in the proper direction.
- Insert the new filter into the housing: Push the new filter into the housing until it fully seats and locks into place. You may need to twist or push the filter depending on the mechanism used for your specific appliance. Make sure that the filter is securely in place to prevent any leaks.
- Rotate the filter to lock it: If your filter has a twist and lock mechanism, rotate the filter counterclockwise until it locks into place. This ensures a tight seal and prevents any water from bypassing the filter.
- Check for proper installation: After installing the new filter, inspect it to ensure that it is properly installed. Double-check that it is seated securely, and there are no visible gaps or misalignments.
It is important to follow the manufacturer’s instructions and guidelines for installing the new water filter. This will ensure that the filter is installed correctly, allowing it to function effectively in removing impurities and providing clean and safe drinking water.
Remember to consult your user manual or refer to the manufacturer’s website for any specific instructions related to the installation of the water filter for your particular Fisher Paykel appliance model.
With the new water filter installed, you are now ready to move on to the next step of turning on the water supply for your appliance.
Step 7: Turn on the water supply
After successfully installing the new water filter in your Fisher Paykel refrigerator or water dispenser system, the next step is to turn on the water supply. This will allow water to flow through the filter and ensure proper functioning. Follow these steps to turn on the water supply:
- Locate the water shut-off valve: The shut-off valve is typically found at the back of the appliance, either behind the kickplate or in the lower grille.
- Turn on the water supply: Use a counterclockwise motion to turn the shut-off valve back on and allow water to flow into the appliance.
When turning on the water supply, make sure to do so slowly and carefully. This allows the water to flow gradually and minimizes the risk of any sudden water pressure surges or leaks.
After turning on the water supply, it is normal to hear some water flowing into the appliance as the system fills up. This indicates that the water is properly flowing through the new filter.
With the water supply turned back on, your Fisher Paykel appliance is ready to deliver clean and fresh water. However, before using the water, it is recommended to flush the system to remove any air or residual particles that may have accumulated during the filter replacement process.
To do this, simply dispense and discard a few cups of water from the dispenser or run water from the faucet for a few minutes until it runs clear and free from any air bubbles. This helps ensure that the water you consume from the appliance is of the highest quality.
With the water supply turned on and the system flushed, you can now enjoy clean and refreshing water from your Fisher Paykel refrigerator or water dispenser.
Step 8: Run water through the filter
After turning on the water supply and flushing the system, the next step in the process of changing the water filter in your Fisher Paykel refrigerator or water dispenser system is to run water through the filter. This step helps activate the new filter and clears out any remaining air or particles.
- Select a container: Choose a clean container that can hold enough water to flush the system. It can be a pitcher, glass, or any other suitable container.
- Position the container: Position the container in the appropriate location to collect the water as it is dispensed from the appliance. Ensure that it is placed securely to avoid any spills or accidents.
- Activate the water dispenser: If your Fisher Paykel appliance has a water dispenser, activate it by pressing the dispense button or lever. This will initiate the water flow through the new filter.
- Run water: Allow water to flow continuously for a few minutes. This helps in flushing out any air pockets or particles that may be present in the system.
- Monitor the water quality: During the flushing process, observe the water for any discolouration or unusual odours. If you notice any, continue running water until it appears clear and tastes normal.
By running water through the filter, you ensure that any remaining impurities or air trapped in the system are properly cleared out. This step helps in optimizing the performance of the new filter and ensures that you receive clean and fresh drinking water.
Once the water appears clear and tastes normal, the flushing process is complete. You can now use the water from your Fisher Paykel refrigerator or water dispenser with confidence, knowing that the filter is properly activated and delivering high-quality water.
Step 9: Reset the filter light (if applicable)
Some Fisher Paykel refrigerator models are equipped with a filter indicator light or a digital display that notifies you when it’s time to change the water filter. After replacing the filter, it is important to reset the filter light to ensure accurate monitoring of the filter’s lifespan. Follow these steps to reset the filter light:
- Refer to the user manual: Consult the user manual specific to your Fisher Paykel appliance for instructions on how to reset the filter light. The manual will provide you with the necessary steps and the buttons or controls to use.
- Locate the reset button or controls: Look for a reset button, touchpad, or combination of button presses that will allow you to reset the filter light. The location of these controls may vary depending on your appliance model.
- Press and hold the reset button: Once you have located the reset button or controls, press and hold the button until the filter light or indicator resets. This may take a few seconds or require a certain duration of button press, as indicated in the user manual.
- Verify the reset: After releasing the reset button, check if the filter light or indicator has been successfully reset. The light should no longer be illuminated or show that the filter needs to be replaced.
It is important to note that not all Fisher Paykel appliance models have a filter light or indicator that requires resetting. If your appliance does not have this feature, there is no need to perform this step.
Resetting the filter light ensures that the filter replacement is accurately recorded and tracked by the appliance. This allows you to have a clear indication of when the next filter replacement is due, maintaining the optimal performance and water quality of your Fisher Paykel refrigerator or water dispenser system.
Step 10: Properly dispose of the old water filter
After successfully replacing the water filter in your Fisher Paykel refrigerator or water dispenser system, it is important to properly dispose of the old filter to minimize environmental impact. Follow these guidelines to ensure the proper disposal of the old water filter:
- Check local regulations: Before disposing of the old water filter, familiarize yourself with the local waste management regulations in your area. Different regions may have specific guidelines for disposing of water filters.
- Remove the filter from the housing: Start by carefully removing the old filter from its housing. Be cautious not to spill any residual water that may be present inside the filter or housing.
- Seal the old filter: Once the filter is removed, it is important to seal it in a plastic bag or wrap it in a suitable material to prevent any potential leakage or contamination. This will ensure safe handling and transport.
- Check for recycling options: Many water filters are made of recyclable materials. Check if there are any recycling programs or facilities in your area that accept used water filters. Some filter manufacturers may offer filter recycling programs as well.
- Dispose of the filter responsibly: If recycling is not an option, dispose of the sealed filter in accordance with local waste management guidelines. This may include placing it in the appropriate waste bin or taking it to a designated collection point.
By properly disposing of the old water filter, you contribute to environmental sustainability and minimize the impact on landfills. It is important to follow the recommended disposal methods to ensure that the filter materials are handled and treated appropriately.
Remember, proper disposal of the old water filter is an important step in completing the process of changing the filter in your Fisher Paykel appliance. Take the time to research and implement the appropriate disposal methods to promote responsible waste management.