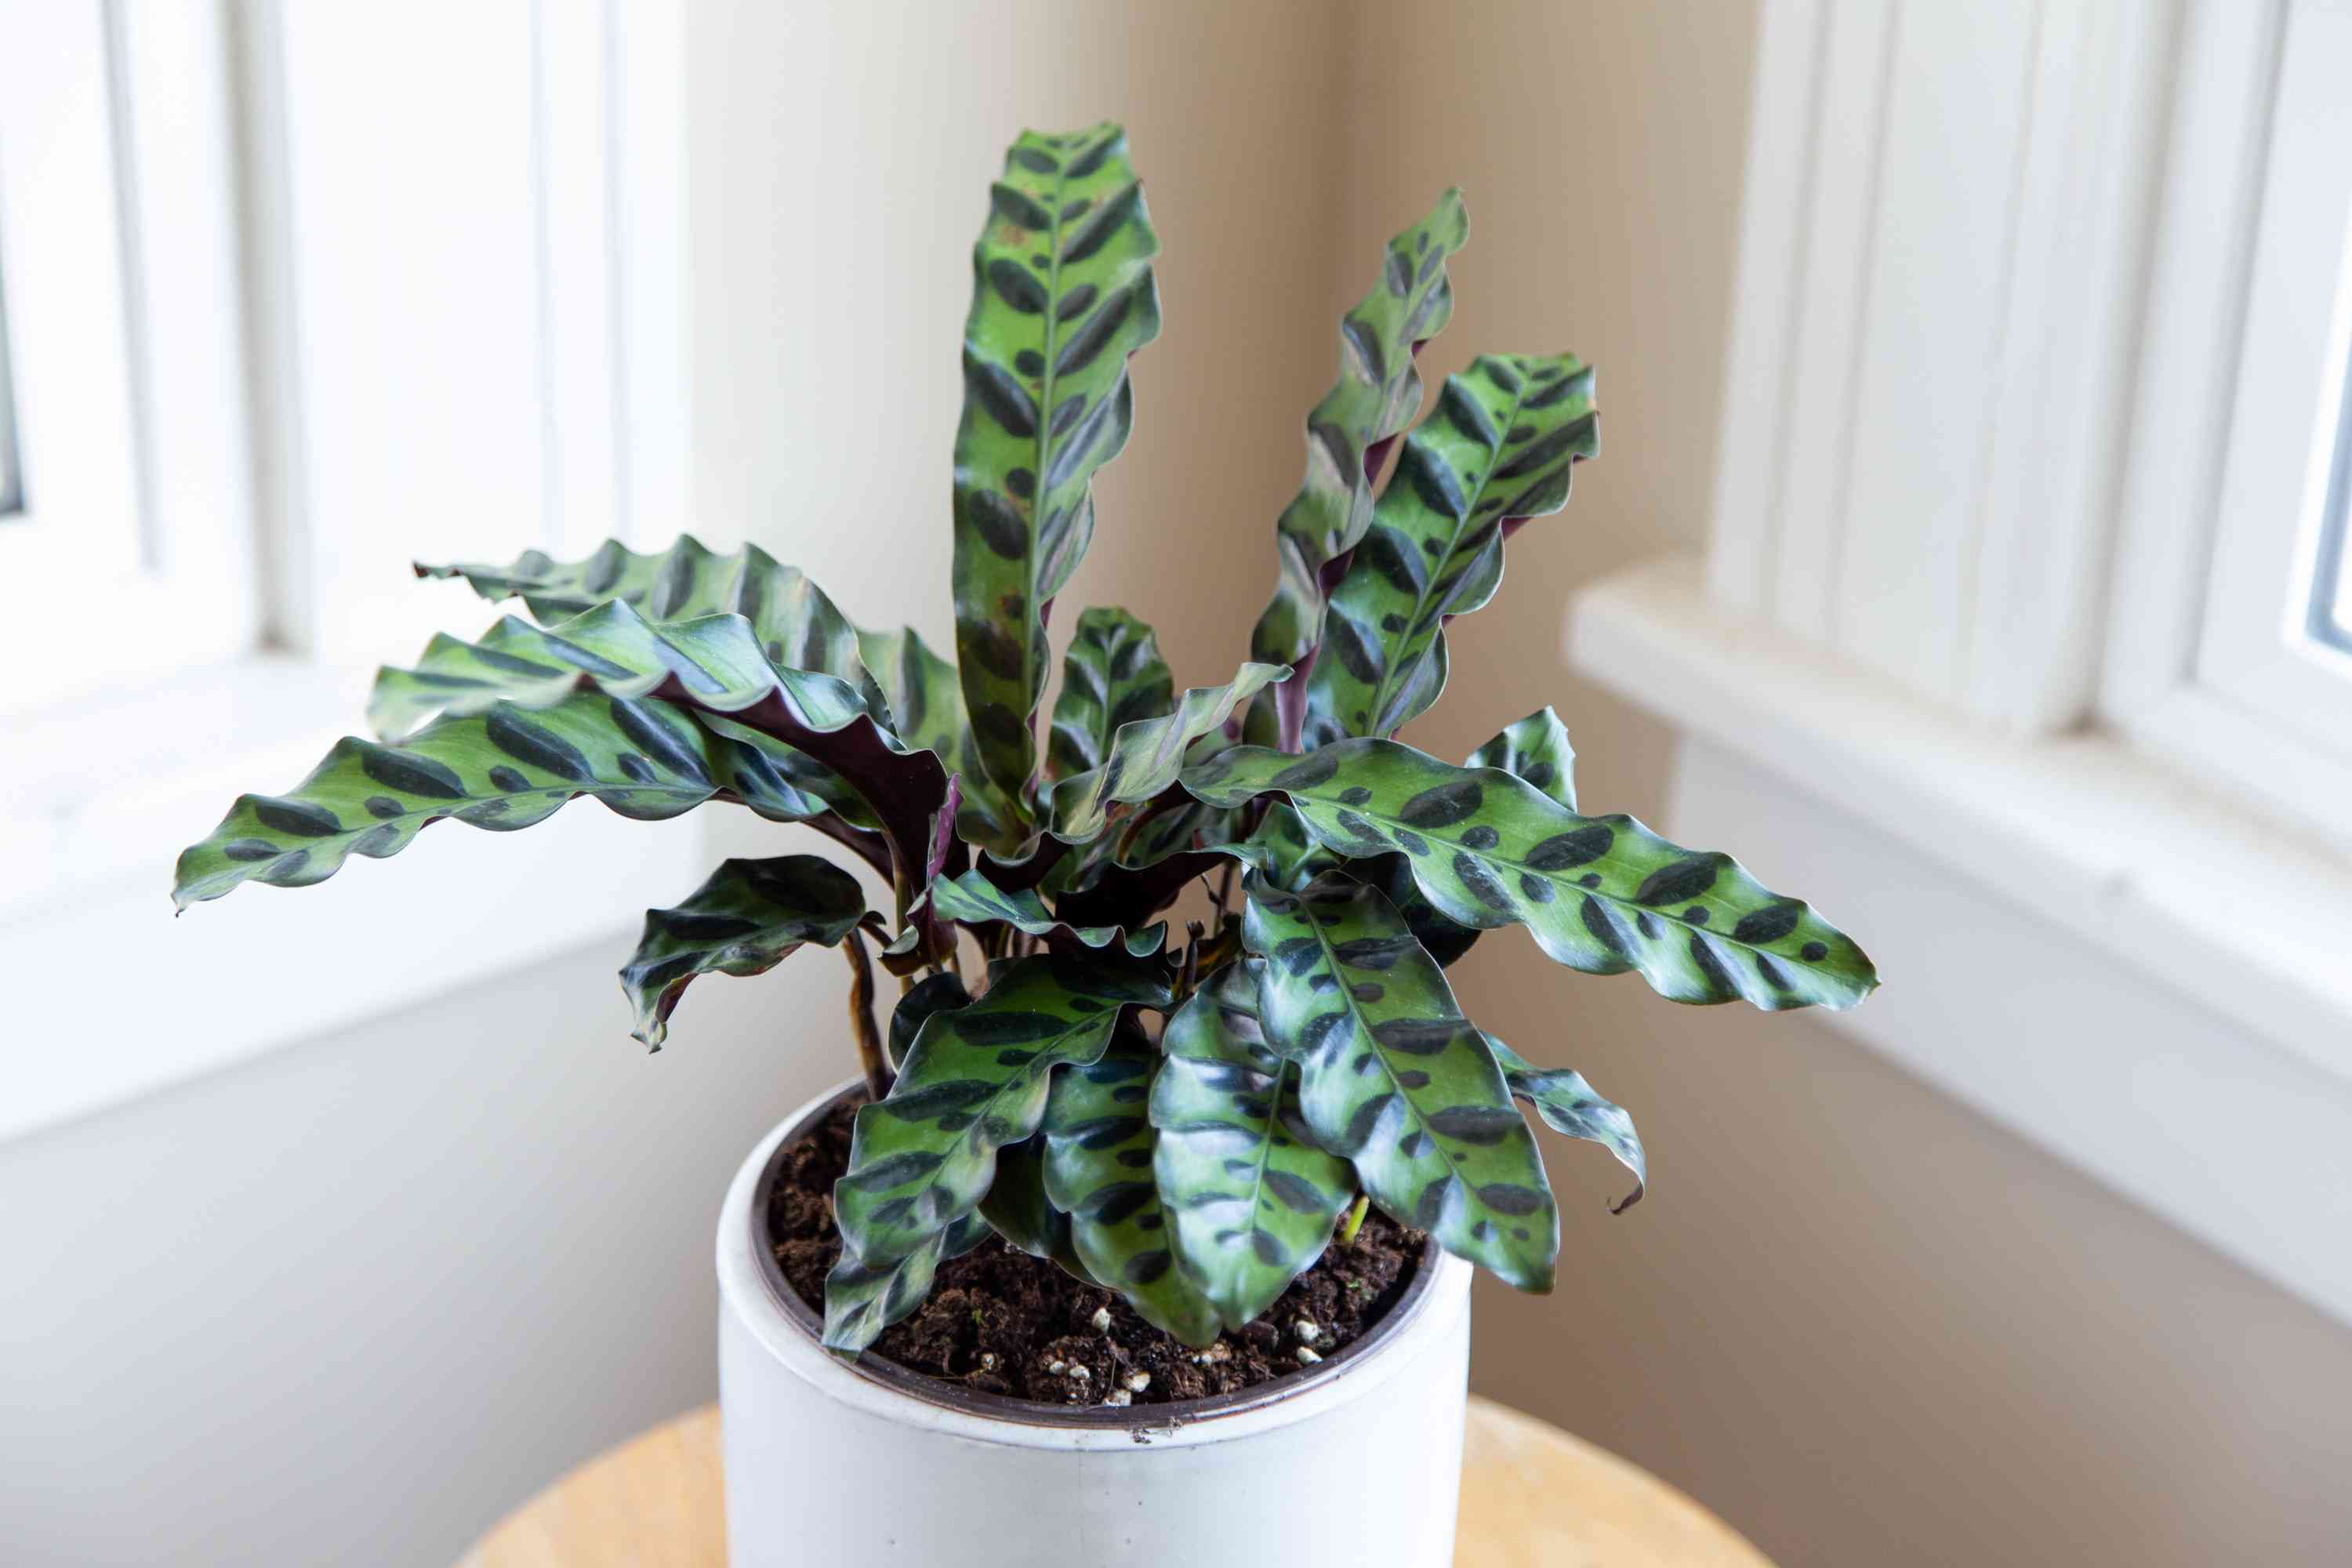
Choosing the Right Location
When it comes to caring for your rattlesnake plant, choosing the right location is crucial to its growth and well-being. This tropical plant thrives in environments that mimic its natural habitat. Here are some important factors to consider when selecting the perfect spot for your rattlesnake plant:
- Indirect Light: Rattlesnake plants prefer bright, indirect light. They don’t tolerate direct sunlight, as it can scorch their delicate leaves. Place your plant near a window with filtered light or in a location with bright, indirect light throughout the day.
- Warm Environment: These plants are native to tropical regions, so they enjoy warmer temperatures. Ideally, keep your rattlesnake plant in a room with temperatures ranging between 65°F and 85°F (18°C and 29°C). Avoid placing it in areas with cold drafts or temperature fluctuations.
- High Humidity: Rattlesnake plants thrive in high humidity environments. Aim for a humidity level of around 50% to 60%. If the air in your home is dry, you can increase humidity by using a humidifier, placing a tray of water near the plant, or misting the leaves regularly.
- Away from Drafts: Ensure that your rattlesnake plant is kept away from drafts caused by air conditioning vents, heaters, or open windows. These sudden temperature changes can lead to stress and damage the leaves.
- Ample Space: Give your rattlesnake plant room to grow and spread its beautiful foliage. Avoid overcrowding it with other plants or placing it in a tight corner. This will allow the plant to flourish and maintain good air circulation around its leaves.
By choosing the right location for your rattlesnake plant, you are setting it up for success. Providing the ideal lighting conditions, temperature range, humidity, and ample space will create an optimal environment for the plant to thrive and showcase its unique beauty.
Providing the Ideal Temperature and Humidity
The temperature and humidity conditions in your home play a crucial role in the health and growth of your rattlesnake plant. This tropical beauty thrives in specific environmental conditions. Here’s what you need to know about providing the ideal temperature and humidity for your rattlesnake plant:
- Temperature: Rattlesnake plants prefer warm temperatures similar to their native tropical habitats. Ideally, maintain a temperature range of 65°F to 85°F (18°C to 29°C). Avoid exposing the plant to extreme temperature fluctuations, as it can cause stress and damage to the leaves. Keep it away from cold drafts and drafts caused by air conditioning or heating vents.
- Humidity: Rattlesnake plants thrive in high humidity environments. Aim for a humidity level of around 50% to 60%. Increased humidity can be achieved by using a humidifier, placing a tray of water near the plant, or misting the leaves regularly. It’s important to avoid letting the plant sit in standing water, as this can lead to root rot.
- Misting: Misting the leaves of your rattlesnake plant can help mimic its natural humid environment. Fill a spray bottle with distilled water and lightly mist the leaves once or twice a week. This will not only increase humidity but also keep the leaves clean and free from dust, which can hinder photosynthesis.
- Grouping Plants: Another way to increase humidity around your rattlesnake plant is by grouping it with other plants. As the plants release moisture through transpiration, it creates a microclimate of increased humidity. Just ensure that the plants are not crowded together, as proper air circulation is still important.
- Avoid Dry Air: Dry air can be detrimental to rattlesnake plants. Avoid placing the plant near heaters, air conditioners, or in areas with low humidity, such as near vents or open windows. If you live in a particularly dry climate, using a humidifier can be a great way to provide the necessary moisture for your plant.
By providing the ideal temperature and humidity conditions, you are creating a favorable environment for your rattlesnake plant to thrive. Pay attention to these factors and make the necessary adjustments to ensure your plant remains happy and healthy.
Watering Properly
Proper watering is essential for the health and vitality of your rattlesnake plant. Understanding the watering needs and following the right watering practices will help your plant thrive. Here are some tips for watering your rattlesnake plant:
- Moist, Not Soggy: Rattlesnake plants prefer consistently moist soil, but not soggy. Overwatering can lead to root rot and other moisture-related issues. Allow the top inch of soil to dry out slightly between waterings. Stick your finger into the soil to test its moisture level. If it feels dry, it’s time to water. If it’s still moist, wait a few more days.
- Watering Frequency: The watering frequency will depend on various factors such as room temperature, humidity, and the size of the pot. On average, water your rattlesnake plant once a week. Adjust the frequency if the plant is located in a particularly warm or dry environment or if it’s in a larger pot that retains moisture for longer.
- Watering Method: When watering your rattlesnake plant, use room temperature water to avoid shocking the plant with cold or hot water. Pour water slowly into the pot until it starts to drain from the bottom. Empty any excess water from the saucer to prevent the roots from sitting in standing water. Avoid overhead watering, as it can lead to moisture on the leaves, which can promote fungal growth.
- Humidity Considerations: Since rattlesnake plants prefer high humidity, it’s important to consider the moisture levels in the air when determining the watering needs. If the humidity is low, you may need to water your plant more often to compensate for the lack of moisture in the air.
- Seasonal Adjustments: The watering requirements of your rattlesnake plant can vary with the seasons. During the warmer months when the plant is actively growing, it may require more frequent watering. In contrast, during the winter when growth slows down, water sparingly to prevent overwatering.
By following these watering tips, you can ensure that your rattlesnake plant receives the right amount of moisture it needs to thrive. Remember to monitor the soil moisture level and make adjustments based on the environmental conditions and the plant’s behavior.
Fertilizing the Plant
Fertilizing your rattlesnake plant is an important aspect of its care regimen. While these plants can survive in nutrient-poor environments, providing regular fertilization will promote growth and enhance their overall health. Here are some guidelines for fertilizing your rattlesnake plant:
- Choose a Balanced Fertilizer: Use a balanced, water-soluble fertilizer with equal amounts of nitrogen, phosphorus, and potassium (NPK). Look for a fertilizer specifically formulated for houseplants or tropical plants. This balance of nutrients will support overall plant growth and development.
- Fertilizer Schedule: During the active growing season, which usually falls in spring and summer, fertilize your rattlesnake plant every four to six weeks. Reduce fertilization frequency during the dormant winter period to once every two or three months. Always follow the instructions provided by the fertilizer manufacturer for the best results.
- Dilute the Fertilizer: When using a water-soluble fertilizer, dilute it to half the recommended strength. This will prevent fertilizer burn and minimize the risk of overfeeding, which can be detrimental to the plant’s health. Overfeeding can cause leaf burn, yellowing, or stunted growth.
- Apply Fertilizer to Moist Soil: Before applying fertilizer, ensure that the soil is moist, but not waterlogged. Water the plant thoroughly a few hours before applying the fertilizer. This will prevent the roots from being burned by concentrated fertilizer and help distribute the nutrients evenly throughout the soil.
- Avoid Fertilizing Newly Repotted Plants: If you have recently repotted your rattlesnake plant, wait at least six weeks before applying fertilizer. Newly repotted plants need time to settle and establish their root systems before being exposed to additional nutrients.
- Flush the Soil Occasionally: To prevent the buildup of salt and minerals from the fertilizer, periodically flush the soil with plain water. This will help remove any excess salts and maintain a healthy balance of nutrients in the soil.
By following these fertilization guidelines, you can provide your rattlesnake plant with the necessary nutrients for robust growth and vibrant foliage. Remember to observe the plant’s response to the fertilizer and make adjustments as needed to maintain its overall health and vitality.
Pruning and Propagating the Rattlesnake Plant
Pruning and propagating your rattlesnake plant are essential tasks to maintain its shape, health, and to expand your plant collection. Pruning helps remove dead or damaged foliage, encourages bushier growth, and promotes overall plant vitality. Propagation allows you to create new plants from your existing rattlesnake plant. Here’s how you can properly prune and propagate your rattlesnake plant:
- Pruning Dead or Yellowing Leaves: Regularly inspect your rattlesnake plant for any dead or yellowing leaves. Use clean, sharp scissors or pruners to carefully trim these leaves back to the base of the plant. This will help maintain the plant’s appearance and prevent any potential disease or pest problems.
- Encouraging Bushier Growth: If you desire a more bushy appearance, you can encourage the rattlesnake plant to produce more side shoots. Simply prune back the main stem by cutting above a healthy leaf node. This will stimulate new growth and result in a more compact and fuller plant.
- Propagating through Stem Cuttings: Rattlesnake plants can be easily propagated through stem cuttings. Select a healthy stem that is at least 4-6 inches long and has a few leaves. Cut the stem just below a leaf node and remove the lower leaves. Place the cutting in a jar of water or moist potting medium. Keep it in a warm and bright location, ensuring the soil remains consistently moist. Roots should start to form within a few weeks, after which you can transplant the cutting into a pot with well-draining soil.
- Dividing the Plant: Another method of propagating your rattlesnake plant is by dividing it. When your plant becomes large and overcrowded, carefully remove it from its pot and separate the rootball into smaller sections. Each section should have a portion of the rhizome and healthy roots. Repot the divided sections into new containers with fresh potting soil. Water thoroughly and provide the same care as you would for a mature rattlesnake plant.
- Rejuvenating Leggy Plants: If your rattlesnake plant becomes leggy or loses its compact shape over time, you can rejuvenate it by pruning it back to a desired height. Trim the main stem above a healthy leaf node or cut the entire plant back to a few inches from the soil level. The plant will produce new growth from the remaining stem and result in a more compact appearance.
By regularly pruning your rattlesnake plant and propagating it through stem cuttings or division, you can maintain its desired shape, expand your plant collection, and ensure the overall health and vigor of your plants. Make sure to always use clean and sharp tools when pruning and provide proper care and conditions for successful propagation.
Preventing Pest Infestations
Pests can be a common problem for rattlesnake plants, but taking proactive measures to prevent infestations can keep your plant healthy and thriving. Here are some effective methods to prevent pest infestations:
- Inspect Regularly: Take the time to regularly inspect your rattlesnake plant for any signs of pests. Look for visible pests, such as aphids, spider mites, or mealybugs, as well as any distorted or discolored leaves that may indicate pest damage.
- Keep a Clean Environment: Maintaining a clean environment around your rattlesnake plant can help prevent pest infestations. Remove fallen leaves or debris from the soil surface, as these can provide hiding spots for pests. Also, be sure to keep the area around the plant free of dust and dirt, as pests can be attracted to these conditions.
- Quarantine New Plants: Before introducing a new plant to your collection, quarantine it for a few weeks to ensure that it is free of pests. This will prevent any potential infestations from spreading to your other plants. Keep the new plant isolated during this period and monitor it closely for signs of pests.
- Provide Adequate Air Circulation: Proper air circulation is important for preventing pest infestations. Ensure that your rattlesnake plant is not overcrowded and has enough space around it for air to flow freely. Avoid placing the plant near drafts or in stagnant areas where pests may be more likely to thrive.
- Natural Pest Remedies: Consider using natural remedies to deter pests from your rattlesnake plant. For example, you can use a diluted neem oil solution or a homemade insecticidal soap to spray on the leaves, both of which are effective against many common plant pests. These natural solutions are generally safe for the plant and do not harm beneficial insects.
- Maintain Optimal Plant Health: Keeping your rattlesnake plant in optimal health can make it less susceptible to pest infestations. Provide the plant with appropriate lighting, temperature, humidity, and watering conditions. A healthy plant will have a stronger immune system and be more resistant to pests and diseases.
- Act Swiftly: If you do notice any signs of pest infestation on your rattlesnake plant, it’s crucial to act swiftly. Remove any affected leaves or insects manually and consider using appropriate pest control methods. The earlier you address the issue, the easier it will be to prevent further damage.
By implementing these preventative measures, you can minimize the risk of pest infestations on your rattlesnake plant and ensure its continued health and beauty. Regular monitoring, cleanliness, proper plant care, and natural pest remedies are key in maintaining a pest-free environment for your plant.
Common Issues and Troubleshooting
While rattlesnake plants are generally resilient, they can still encounter a few common issues. Understanding these problems and troubleshooting them promptly can help prevent further damage to your plant. Here are some common issues you may encounter and tips for troubleshooting:
- Yellowing Leaves: Yellowing leaves can be a sign of overwatering, underwatering, or nutrient deficiencies. Evaluate your watering routine and adjust accordingly. Check the soil moisture level and ensure it’s not too wet or too dry. If nutrient deficiency is suspected, consider fertilizing with a balanced fertilizer following the recommended dosage.
- Brown Leaf Tips: Brown leaf tips are often caused by dry air or improper watering. Increase humidity around the plant by misting the leaves or using a humidifier. Ensure that the plant is getting sufficient water without being overwatered. Trim any severely damaged foliage to prevent further spread.
- Wilting or Drooping Leaves: Wilting or drooping leaves can indicate underwatering or overwatering. Check the soil moisture level and adjust your watering routine accordingly. Ensure that the pot has proper drainage to prevent waterlogging. If the issue persists, consider repotting the plant into fresh, well-draining soil.
- Stunted Growth: Stunted growth can be attributed to insufficient light or nutritional deficiencies. Ensure that your rattlesnake plant is placed in a location with adequate indirect light. If indoors, consider using artificial grow lights. Check the soil moisture and ensure the plant is receiving adequate nutrients through proper fertilization.
- Pest Infestations: Pesky pests like aphids, spider mites, or mealybugs can infest rattlesnake plants. Monitor your plant regularly for any signs of pests and take immediate action if detected. Consider using natural remedies like neem oil or insecticidal soap, or manually remove insects using a soft cloth or cotton swab dipped in rubbing alcohol.
- Root Rot: Root rot can occur if the plant is overwatered or if it’s planted in poorly draining soil. To prevent root rot, ensure the plant is in a pot with proper drainage holes. Adjust your watering routine to let the top layer of soil dry out slightly before watering again. If root rot is severe, consider trimming affected roots and repotting the plant in fresh soil.
- Leaf Curling: Leaf curling can be a response to low humidity, extreme temperatures, or pests such as spider mites. Increase humidity by misting the leaves or using a humidifier. Ensure the plant is not exposed to cold drafts or direct sunlight. Inspect for pests and treat accordingly if detected.
By identifying and addressing these common issues promptly, you can help your rattlesnake plant recover and thrive. Regularly monitor the plant, provide proper care, and make the necessary adjustments to create the ideal growing conditions for a healthy and beautiful plant.