
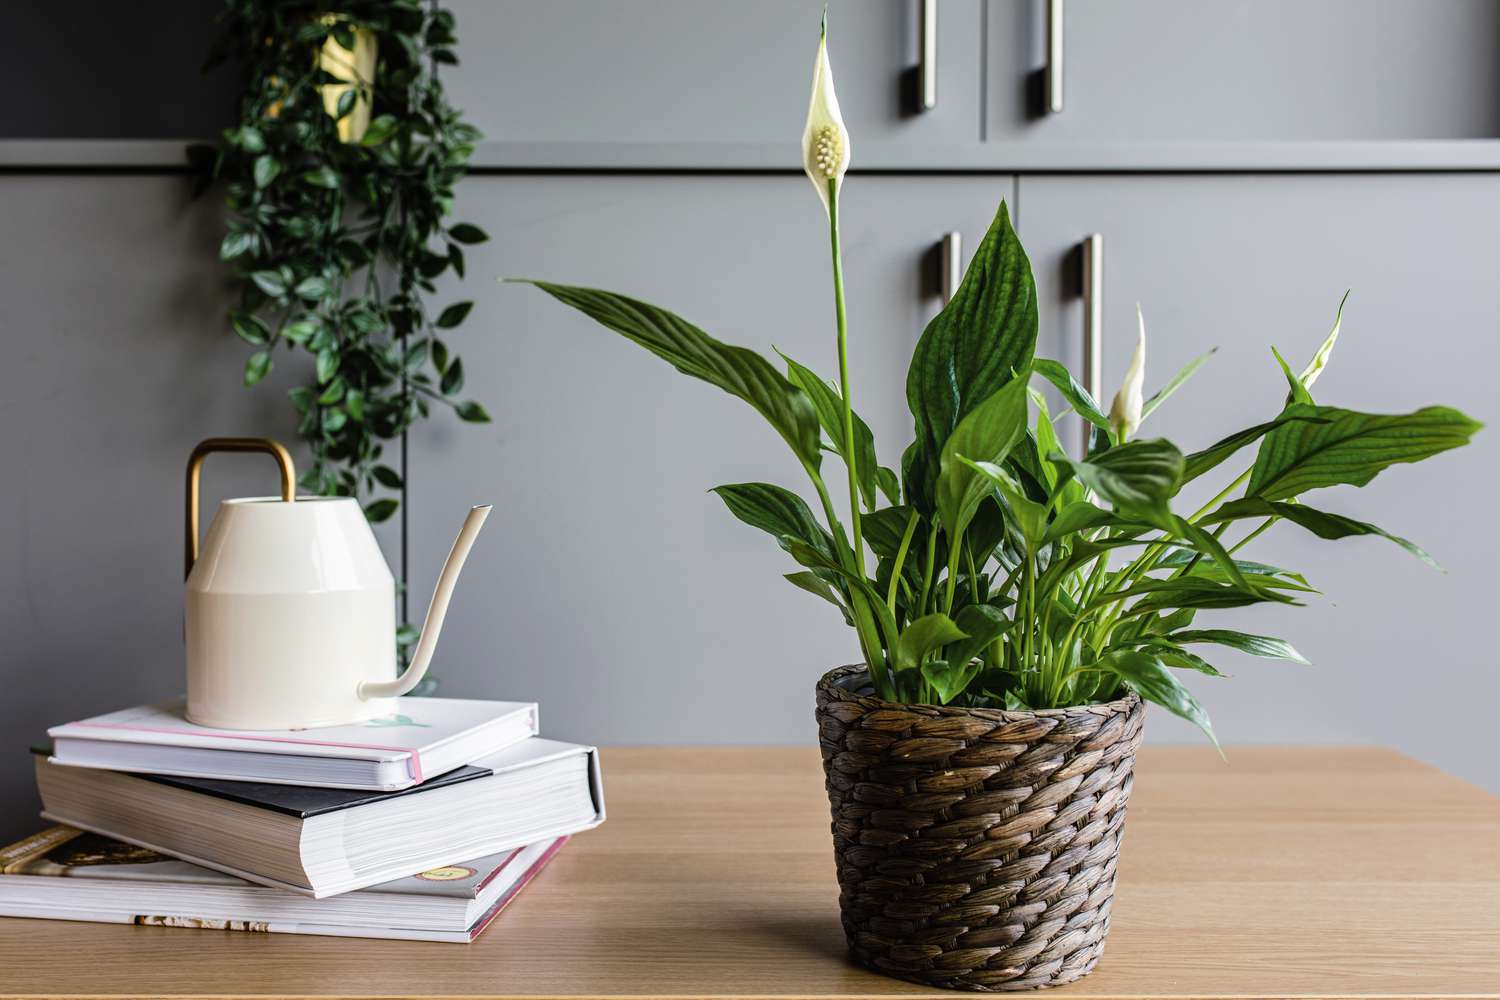
Choosing the right location for your peace lily plant
When it comes to caring for your peace lily plant, one of the most important considerations is selecting the right location for it to thrive. The right location will provide the ideal conditions for your plant to grow and flourish. Here are some key factors to keep in mind when choosing a location for your peace lily:
- Indirect sunlight: Peace lilies prefer bright, indirect light. Avoid placing them in direct sunlight, as this can scorch their leaves. Find a spot in your home that receives bright, filtered light throughout the day.
- Avoid cold drafts: Peace lilies are sensitive to temperature fluctuations, especially cold drafts. Make sure to keep them away from windows, doors, and air conditioning vents that may expose them to chilly drafts.
- Moderate temperatures: Peace lilies thrive in temperatures between 65-80°F (18-27°C). Avoid exposing them to extreme heat or cold, as it can negatively impact their growth and overall health.
- Humidity: Peace lilies prefer higher humidity levels, so it’s beneficial to place them in a room with relatively higher humidity. If the air in your home is dry, consider using a humidifier or placing the plant on a tray filled with pebbles and water to increase the humidity around it.
- Stable environment: Peace lilies are sensitive to changes in their environment, so it’s best to choose a location that offers a stable climate. Avoid placing them near heating or cooling vents, as well as areas with frequent temperature fluctuations.
By carefully considering these factors, you can choose the perfect location for your peace lily plant. Providing it with the right amount of light, temperature, and humidity will contribute to its overall health and longevity.
Providing the right amount of light for your peace lily plant
Light is essential for the well-being of any plant, including the peace lily. Finding the right balance of light is crucial to ensure the optimal growth and health of your peace lily. Here are some important considerations when it comes to providing the right amount of light:
Indirect light: Peace lilies thrive in bright, indirect light. They are not fond of direct sunlight, as it can scorch their leaves. Place your peace lily in a location that receives bright, filtered light throughout the day. This can be near a north-facing window or somewhere with sheer curtains to diffuse the sunlight.
Low light tolerance: While peace lilies prefer bright light, they can tolerate lower light conditions. If your peace lily is in a room with less natural light, consider supplementing with artificial light sources, such as fluorescent bulbs or LED grow lights. Position the lights about a foot above the plant and keep them on for approximately 12-14 hours a day.
Monitor leaf color: The leaves of a peace lily can provide valuable information about their light requirements. If the leaves are dark green and healthy, it indicates that the plant is receiving adequate light. If the leaves turn pale or yellow, it may be an indication of insufficient light. On the other hand, if the leaves are getting scorched or developing brown spots, it may be receiving too much direct sunlight.
Rotate the plant: To ensure even growth and prevent the plant from leaning towards the light source, rotate your peace lily every few weeks. This will help to ensure that all sides of the plant receive equal exposure to light, promoting a balanced and symmetrical growth pattern.
Adjust light as needed: Take into consideration the changing seasons and adjust the light exposure accordingly. During the summer months, the intensity of light increases, so you may need to move your peace lily further away from the window or use sheer curtains for filtering. In the winter, when light may be limited, consider moving the plant closer to a window or using supplemental grow lights.
By providing the right amount of light for your peace lily, you will help it to thrive and display its beautiful foliage and flowers. Remember to observe the plant’s response and make adjustments as needed to ensure optimal growth and health.
Watering your peace lily plant correctly
Proper watering is essential for the health and vitality of your peace lily. While it’s important to keep the soil moist, overwatering can be just as harmful as underwatering. Here are some guidelines to help you water your peace lily correctly:
Check the soil: Before watering your peace lily, check the moisture level of the soil. Stick your finger about an inch into the soil. If it feels dry, it’s time to water; if it’s still moist, wait a little longer. Peace lilies prefer slightly moist soil, but it’s important to avoid waterlogged conditions.
Water thoroughly: When watering your peace lily, ensure thorough soaking of the soil. Use room temperature water and pour it gently onto the soil until it starts to drain out from the bottom of the pot. This ensures that the entire root system gets hydrated.
Drain excess water: Make sure to discard any excess water that accumulates in the pot’s saucer or tray after watering. Leaving the peace lily sitting in standing water can lead to root rot and other issues. Empty the saucer or tray to prevent water from being reabsorbed by the roots.
Watering frequency: The frequency of watering your peace lily depends on various factors, including the size of the pot, the humidity of the environment, and the season. Generally, peace lilies prefer to be slightly on the drier side rather than overwatered. As a rule of thumb, water your peace lily when the top inch of the soil feels dry.
Avoid underwatering and overwatering: Striking the right balance is crucial when it comes to watering your peace lily. Underwatering can cause wilting, yellowing leaves, and stunted growth, while overwatering can lead to root rot and fungal issues. Pay attention to the plant’s needs and adjust your watering accordingly.
Mist the leaves: Peace lilies appreciate higher humidity levels. Misting the leaves occasionally or placing a humidifier nearby can help create a more favorable environment for your peace lily. However, avoid misting excessively, as it can lead to fungal diseases.
By following these watering guidelines, you will provide your peace lily with the right amount of moisture to thrive. Remember to be mindful of the plant’s needs and adjust your watering routine based on its response and environment.
Maintaining the right temperature and humidity for your peace lily plant
Temperature and humidity are important factors in maintaining the health and well-being of your peace lily plant. Creating the right environment for your peace lily will contribute to its overall growth and vitality. Here are some tips to help you maintain the right temperature and humidity:
Temperature: Peace lilies thrive in temperatures between 65-80°F (18-27°C). It’s important to avoid exposing them to extreme temperatures. Keep your peace lily away from cold drafts, such as open windows or air conditioning vents. Additionally, avoid placing them near heat sources like fireplaces or radiators as these can cause the leaves to wilt or burn.
Humidity: Peace lilies prefer higher humidity levels. If the air in your home is dry, particularly during the winter months, you can increase the humidity around your peace lily through a few simple methods. Firstly, grouping your plants together can create a microclimate of increased humidity. Secondly, placing a tray filled with water and pebbles under your peace lily can help to create a humid environment as the water evaporates. Lastly, using a room humidifier can add moisture to the air and benefit your plant.
Misting: Another way to increase humidity around your peace lily is by misting its leaves. Use a fine mist spray bottle and gently mist the leaves, taking care not to saturate them. Misting can help mimic the natural rainforest environment that peace lilies thrive in. However, it’s important not to overdo it, as excessive misting can lead to fungal diseases.
Monitoring and adjusting: Keep an eye on your peace lily’s response to temperature and humidity. If the leaves start to curl, brown at the edges, or the plant looks stressed, it may be an indication of too low humidity. On the other hand, if the leaves begin to yellow or droop excessively, it may be a sign of too high humidity. Adjust the temperature and humidity levels accordingly to ensure your peace lily is in its ideal growing conditions.
Consider the location: The location of your peace lily can also play a role in maintaining temperature and humidity. Placing your peace lily in a bathroom or near a kitchen sink can provide the added benefit of naturally higher humidity from showers or cooking activities. However, ensure that the area still provides adequate light and is away from temperature extremes.
By maintaining the right temperature and humidity levels, you will provide an ideal growing environment for your peace lily. Pay attention to the plant’s response and adjust the conditions as necessary to ensure its optimal health and growth.
Fertilizing your peace lily plant
Fertilizing is an important aspect of caring for your peace lily plant. While peace lilies are generally low-maintenance plants, they still benefit from occasional nourishment to support their growth and overall health. Here are some guidelines for fertilizing your peace lily:
Choosing the right fertilizer: When it comes to fertilizing your peace lily, it’s best to use a balanced, water-soluble fertilizer. Look for a fertilizer with an equal ratio of nitrogen (N), phosphorus (P), and potassium (K), such as a 10-10-10 or 20-20-20 formula. You can also opt for a specifically formulated houseplant fertilizer. Avoid using fertilizers high in nitrogen, as this can lead to excessive foliage growth at the expense of flowers.
Frequency of fertilizing: Peace lilies do not require frequent fertilization, as they are not heavy feeders. Generally, applying fertilizer every two to three months during the growing season (spring and summer) is sufficient. During the dormant period (fall and winter), you can reduce or suspend fertilization altogether.
Diluting the fertilizer: When fertilizing your peace lily, always follow the instructions on the fertilizer packaging for proper dilution. It’s important not to use more fertilizer than recommended, as this can lead to fertilizer burn and damage the roots. A general guideline is to mix the fertilizer at half strength or slightly lower.
Application method: To fertilize your peace lily, first, ensure that the soil is moist. Then, pour the diluted fertilizer evenly onto the soil, being careful not to get it on the leaves or flowers. Alternatively, you can apply the fertilizer while watering, allowing it to mix with the water and distribute through the root zone.
Flush with water: After fertilizing, it’s essential to flush the soil with water to prevent salt buildup. This buildup can occur from using tap water, which contains minerals, or from residual salts in the fertilizer. Every few months, or whenever you notice a white crust forming on the soil surface, water your peace lily thoroughly and allow excess water to drain out of the pot.
Observing plant response: Pay attention to how your peace lily responds to fertilization. If you notice excessive foliage growth but no flowering, it may be a sign of overfertilization. On the other hand, if your peace lily’s leaves are pale and overall growth is slow, it may benefit from a light fertilization. Adjust the frequency and dosage accordingly to ensure balanced growth.
By fertilizing your peace lily appropriately, you can provide it with the necessary nutrients for robust growth and vibrant blooms. Remember to follow the recommended guidelines, observe the plant’s response, and adjust fertilization practices accordingly to maintain a healthy and flourishing peace lily.
Pruning and repotting your peace lily plant
Pruning and repotting are important aspects of caring for your peace lily plant. Pruning helps to maintain its shape and remove any damaged or yellowing leaves, while repotting ensures that the plant has enough room to grow and thrive. Here’s what you need to know about pruning and repotting your peace lily:
Pruning: Regular pruning helps to keep your peace lily looking its best. Use clean, sharp pruning shears or scissors to remove any yellow or brown leaves. Cut the leaf at the base, close to the stem. This not only improves the appearance of the plant but also encourages the growth of new leaves. Additionally, if any stems become leggy or start to wilt, you can prune them back to promote a bushier and more compact plant.
Deadheading: After your peace lily has bloomed, you may notice that the flowers start to wither and fade. Deadheading is the process of removing these spent flowers. Gently pinch or snip off the faded flowers at the base of the stem. This prevents the plant from putting energy into seed production and redirects its energy towards new growth.
Repotting: As your peace lily grows, it will eventually outgrow its current pot. Repotting is necessary to provide it with fresh soil and additional space for its roots to expand. Repotting should typically be done every one to two years, or when you notice the plant becoming root-bound. Choose a new pot that is one or two sizes larger than the current one and ensure it has drainage holes. Carefully remove the plant from its old pot, gently loosen the roots, and place it in the new pot, adding fresh potting soil around the roots. Water thoroughly after repotting.
Timing: The best time to prune and repot your peace lily is during the spring or early summer when it’s actively growing. This allows the plant to recover and adjust quickly to the changes. Avoid pruning or repotting in the winter or during its dormant period.
Cleanup: After pruning or repotting, make sure to clean and sanitize your tools to prevent the spread of diseases or pests. Wipe down the blades with rubbing alcohol or a disinfecting solution before and after use.
Monitor and adjust: After pruning or repotting, observe your peace lily’s response. It may take some time for the plant to adjust to its new conditions. Watch for signs of stress or wilting, and make any necessary adjustments to the care routine, such as providing extra humidity or adjusting watering frequency.
By regularly pruning and repotting your peace lily, you promote its overall health, aesthetics, and growth. Remember to take your time, use clean tools, and observe the plant’s response to ensure successful pruning and repotting practices.
Dealing with common pests and diseases of peace lilies
Like any other houseplant, peace lilies are susceptible to a few common pests and diseases. Being proactive and knowing how to identify and address these issues will help keep your peace lily healthy and thriving. Here are some common pests and diseases of peace lilies:
Spider mites: Spider mites are tiny insects that can infest peace lilies, causing visible webbing and yellowing leaves. To control spider mites, regularly mist the plant to increase humidity and use a gentle spray of water to wash away the pests. If the infestation persists, you can use insecticidal soap or neem oil to eliminate them.
Mealybugs: Mealybugs are small, white insects that gather in clusters on the undersides of leaves and in leaf joints. They can cause stunted growth and wilting. To get rid of mealybugs, dab them with a cotton swab dipped in rubbing alcohol or use an insecticidal soap. Be sure to check and treat all affected areas of the plant.
Fungal diseases: Peace lilies are susceptible to various fungal diseases, including root rot and leaf spot. These diseases are often caused by overwatering, poor drainage, or high humidity. To prevent fungal infections, ensure the plant is not sitting in water and provide good air circulation. If you notice signs of fungal diseases, remove affected leaves and improve the plant’s growing conditions. In severe cases, a fungicide may be necessary.
Yellowing leaves: Yellow leaves on a peace lily can be a sign of overwatering, underwatering, or a nutrient deficiency. Adjust your watering routine and ensure the plant is receiving adequate light and fertilizer. Additionally, check for pests or diseases that may be causing stress to the plant. Trim yellow leaves to encourage new growth.
Leaf browning: Brown tips or edges on peace lily leaves can result from low humidity, overfertilization, or exposure to cold drafts. Increase humidity levels by misting the leaves or placing a tray of water nearby. Ensure proper fertilization and avoid excessive amounts. Move the plant away from cold drafts or temperature extremes.
Prevention is key: Maintaining good plant health is essential in preventing pests and diseases. Avoid overwatering your peace lily, provide proper drainage, and keep a consistent care routine. Regularly inspect your plant for any signs of pests or diseases and take immediate action to address them.
Isolation and treatment: If you notice an infested peace lily or one affected by a disease, it’s crucial to isolate it from other plants to prevent the problem from spreading. Treat the affected plant as soon as possible using specific remedies for the particular pest or disease. Follow the instructions on the treatment product carefully for best results.
By staying vigilant and promptly addressing pests and diseases, you can keep your peace lily healthy and pest-free. Regular care and proper prevention methods will go a long way in ensuring the long-term viability and beauty of your peace lily plant.
Troubleshooting common issues with peace lily plants
While peace lilies are generally hardy and easy to care for, they can sometimes encounter common issues. Understanding these problems and knowing how to troubleshoot them will help ensure the health and vitality of your peace lily. Here are some common issues you may encounter with peace lily plants and how to address them:
Wilting: If your peace lily is wilting, it may be a sign of underwatering. Ensure that you are providing enough water and that the soil is moist but not waterlogged. If the soil is too dry, thoroughly water the plant and monitor its response. If the wilting persists, check for other potential issues such as root rot or pests.
Yellow leaves: Yellowing leaves can indicate several issues. Overwatering, underwatering, exposure to direct sunlight, or nutrient deficiencies can all cause yellow leaves. Adjust your watering routine, avoid direct sunlight, and ensure your peace lily is receiving proper nutrition. If all these factors are in check, trim and remove the yellow leaves to encourage new growth.
Brown tips or edges: Brown tips or edges on peace lily leaves can result from low humidity, overfertilization, or exposure to cold drafts. Increase humidity levels by misting the leaves or placing a tray of water nearby. Ensure proper fertilization, avoiding excessive amounts. Move the plant away from cold drafts or temperature extremes.
Lack of flowers: If your peace lily is not producing flowers, it may be due to insufficient light or inadequate fertilization. Ensure that your peace lily is placed in a well-lit area with bright, indirect light. Additionally, consider fertilizing the plant with a balanced fertilizer during the growing season to encourage flowering. Be patient, as peace lilies may take time to mature and produce blooms.
Leaf discoloration: Leaf discoloration in peace lilies can be caused by various factors. Brown or black spots may indicate fungal diseases such as leaf spot. Remove affected leaves and improve growing conditions. Yellow or pale leaves could indicate nutrient deficiencies. Adjust fertilization or consider using a slow-release fertilizer to provide steady nutrition.
Stunted growth: If your peace lily is not growing as expected, it may be due to inadequate light, lack of nutrients, or overcrowding. Ensure your plant is receiving sufficient indirect light, adjust fertilization, and consider repotting if the roots are becoming root-bound. Providing optimal growing conditions will promote healthy growth.
Pest infestations: Peace lilies can be susceptible to pests such as spider mites, mealybugs, and aphids. Keep an eye out for signs of infestation, such as webbing, cotton-like masses, or visible insects. Use appropriate treatments like insecticidal soap, neem oil, or rubbing alcohol to control and eliminate the pests. Isolate affected plants to prevent the infestation from spreading to other plants.
By troubleshooting common issues promptly and taking appropriate action, you can help your peace lily recover and thrive. Pay attention to your plant’s needs, provide optimal conditions, and adjust care practices as necessary to ensure the continued health and beauty of your peace lily.
Propagating peace lilies from cuttings or division
Propagating peace lilies is a rewarding way to expand your collection or share the beauty of this resilient plant with others. Two common methods of propagating peace lilies are through cuttings or division. Here’s a guide on how to propagate peace lilies using these methods:
Propagation through cuttings: To propagate a peace lily through cuttings, follow these steps:
- Select a healthy and mature peace lily plant with multiple stems.
- Using clean and sharp pruning shears, cut a stem or stalk from the parent plant just below a leaf node.
- Ensure the cutting has at least two to three leaves and a small section of the stem.
- Place the cutting in a small container or glass of water, making sure that the leaf nodes are submerged.
- Keep the container in a warm and bright location, avoiding direct sunlight.
- Change the water every few days to prevent stagnation and promote root development.
- After a few weeks, once the cutting has developed roots that are a few inches long, it is ready to be transferred to a pot with well-draining potting mix.
- Water the newly potted cutting and place it in a location with indirect light.
Propagation through division: To propagate a peace lily through division, follow these steps:
- Remove the peace lily from its pot and gently shake excess soil from the roots.
- Identify natural divisions or clumps in the plant where there are separate sections of stems and roots.
- Using sharp and clean gardening shears or a knife, carefully separate the clumps into individual sections.
- Ensure that each section has a good amount of roots and leaves.
- Prepare the pots with fresh potting mix and place each divided section into its own pot.
- Water the newly potted divisions thoroughly and place them in a location with indirect light.
Both methods of propagation can be successful with peace lilies, and you may find that one method works better for you than the other. It’s important to note that peace lilies may take some time to establish themselves after propagation, so patience and consistent care is key.
Whether you choose to propagate through cuttings or division, propagating peace lilies allows you to expand your plant collection and share the beauty of these resilient and elegant plants with others.
Tips for keeping your peace lily plant healthy and thriving
Keeping your peace lily plant healthy and thriving requires consistent care and attention. By following these tips, you can ensure that your peace lily remains vibrant and beautiful for years to come:
Provide the right amount of light: Place your peace lily in a location with bright, indirect light. Avoid direct sunlight, as it can scorch the leaves. If the light conditions in your home are low, supplement with artificial lights such as fluorescent bulbs or LED grow lights.
Maintain optimal temperature and humidity: Peace lilies prefer temperatures between 65-80°F (18-27°C). Avoid exposing them to extreme cold or heat. Increase humidity levels by misting the leaves occasionally, using a humidifier, or placing the plant on a tray with pebbles and water.
Water consistently: Keep the soil consistently moist, but avoid overwatering. Check the soil moisture regularly and water when the top inch feels dry. Ensure the pot has good drainage to prevent water from sitting in the bottom, which can lead to root rot.
Fertilize periodically: Feed your peace lily with a balanced water-soluble fertilizer every two to three months during the growing season. Follow the instructions on the fertilizer packaging and avoid overfertilization, as it can cause burning and damage to the plant.
Prune and remove spent flowers: Regularly prune your peace lily to remove yellow or brown leaves, which helps maintain its overall appearance. Remove spent flowers to redirect the plant’s energy towards new growth. Use clean and sharp pruning shears to minimize the risk of spreading diseases.
Keep an eye out for pests and diseases: Regularly inspect your peace lily for signs of pests such as spider mites, mealybugs, or aphids. Address any infestations promptly using appropriate treatments. Monitor for signs of diseases like root rot or leaf spot and take necessary measures to control them.
Rotate the plant: To ensure balanced growth, rotate your peace lily periodically. This helps prevent the plant from leaning towards the light source and promotes even growth on all sides.
Observe and adjust care routine: Pay attention to your peace lily’s response to its environment and adjust your care routine accordingly. Consider factors such as seasonal changes, temperature fluctuations, and airflow. Make necessary adjustments in watering, humidity levels, and placement to ensure the plant remains healthy.
Practice good hygiene: Keep your peace lily clean and free from dust by wiping the leaves with a damp cloth. This helps the plant absorb light and reduces the risk of pests. Remember to sanitize your tools before and after pruning or propagating to prevent the spread of diseases.
By following these tips and providing consistent care, you can create the optimal conditions for your peace lily plant to thrive. With a little attention and love, your peace lily will reward you with its lush foliage and elegant flowers.