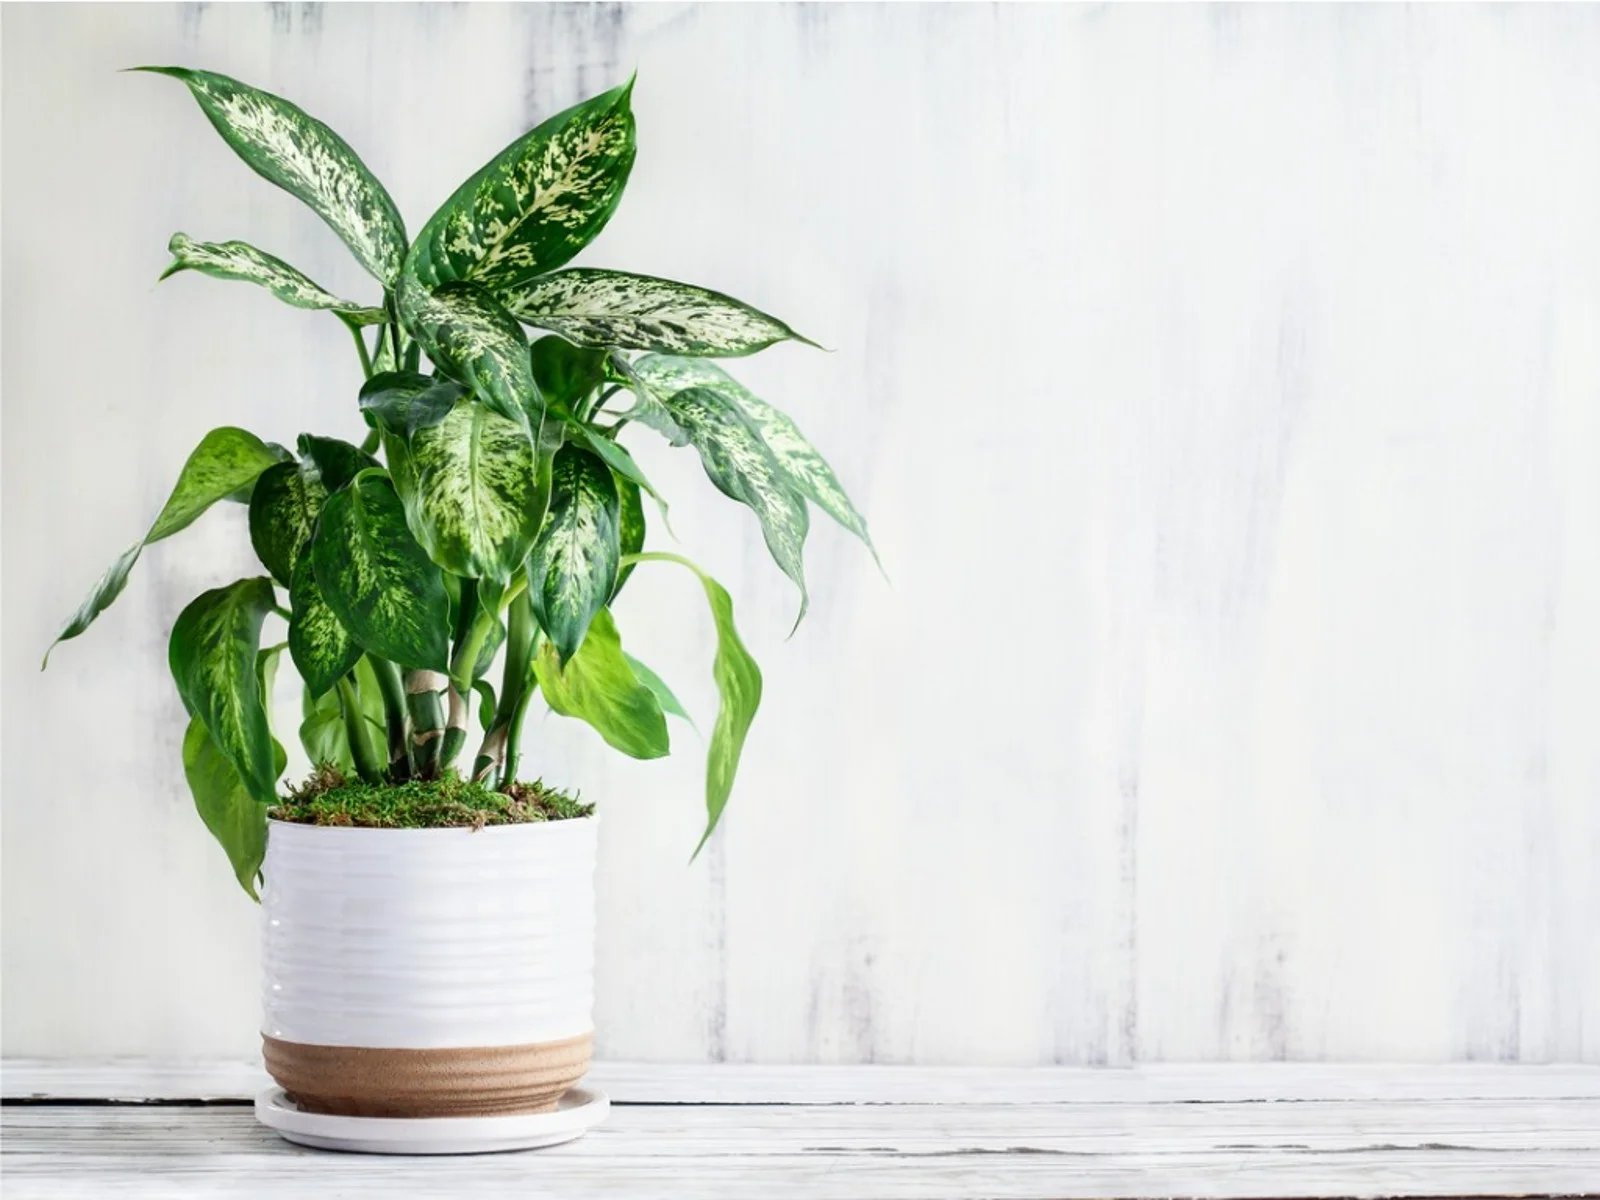
Choosing the Right Location for Your Dieffenbachia Plant
The Dieffenbachia plant, also known as Dumb Cane, is a popular choice for indoor houseplants due to its attractive foliage and easy care requirements. To ensure the health and well-being of your Dieffenbachia, it is crucial to choose the right location for it to thrive. Here are some essential factors to consider when selecting the perfect spot:
- Indirect sunlight: Dieffenbachia plants prefer bright, indirect light. Avoid placing them in direct sunlight as it can scorch the leaves. Instead, opt for a spot near a north or east-facing window that provides gentle, filtered light.
- Avoid drafty areas: Dieffenbachia plants are sensitive to cold drafts and temperature fluctuations. Keep them away from doors, windows, and air conditioning vents to prevent damage to the leaves and promote healthy growth.
- Stable temperature: Dieffenbachia plants thrive in temperatures between 60 to 75 degrees Fahrenheit (15 to 24 degrees Celsius). Avoid placing them near heat sources or areas with extreme temperature variations to maintain a stable and comfortable environment for the plant.
- Adequate space: Dieffenbachia plants can grow up to several feet in height, so it’s important to provide enough space for them to spread out. Ensure that the chosen location allows for proper airflow and doesn’t restrict the plant’s growth.
- Proximity to other plants: While Dieffenbachia plants can be grouped with other houseplants, it’s crucial to consider their growth habits and potential competition for resources. Avoid overcrowding by providing sufficient space between plants to prevent shading and potential nutrient deficiencies.
Remember, finding the right location for your Dieffenbachia plant will play a vital role in its overall growth and well-being. By considering factors such as sunlight, temperature, space, and proximity to other plants, you can create an optimal environment that will help your plant thrive for years to come.
Providing Adequate Lighting for Your Dieffenbachia Plant
Proper lighting is crucial for the health and growth of your Dieffenbachia plant. While it thrives in bright, indirect light, providing too much or too little light can have adverse effects. Here are some tips on providing adequate lighting for your Dieffenbachia:
- Indirect sunlight: Dieffenbachia plants prefer bright, indirect light. Avoid placing them in direct sunlight as it can scorch the leaves. Instead, opt for a spot near a window with a sheer curtain or a few feet away from a brightly lit area.
- Suitable lighting conditions: Ideally, your Dieffenbachia should receive about 12 to 16 hours of bright, indirect light each day. If the plant is placed too far from a window, it may not receive enough light. Supplemental lighting, such as fluorescent or LED grow lights, can be used to ensure adequate lighting.
- Rotate the plant: To promote even growth and prevent the plant from leaning towards the light source, rotate your Dieffenbachia every few weeks. This ensures that all sides of the plant receive an equal amount of light and prevents lopsided growth.
- Monitor for signs of inadequate lighting: If your Dieffenbachia receives insufficient light, it may exhibit signs such as smaller leaves, stretched stems, or a sparse appearance. If you notice these signs, consider moving the plant to a brighter location or providing supplemental lighting.
- Watch for signs of too much light: On the other hand, if your Dieffenbachia receives too much light, its leaves may become scorched or develop brown patches. If this happens, move the plant to a shadier location or provide filtered light through sheer curtains or blinds.
- Adjust lighting during seasons: During the winter months when natural light is limited, you may need to adjust the lighting conditions for your Dieffenbachia. Consider increasing the duration or intensity of artificial lighting to ensure the plant receives adequate light for healthy growth.
By providing the right amount and quality of light, you can ensure the vigorous growth and overall health of your Dieffenbachia plant. Remember to observe the plant regularly and make adjustments as needed to optimize its lighting conditions.
Maintaining the Ideal Temperature and Humidity for Your Dieffenbachia Plant
The Dieffenbachia plant is native to tropical regions, so it thrives in warm and humid conditions. Maintaining the ideal temperature and humidity levels is crucial for the health and well-being of your Dieffenbachia. Here’s what you need to know:
- Temperature: Dieffenbachia plants prefer temperatures between 60 to 75 degrees Fahrenheit (15 to 24 degrees Celsius). Avoid exposing them to sudden temperature fluctuations or cold drafts, as they can lead to stress and damage the leaves. Keep your Dieffenbachia away from windows, doors, and air conditioning vents that can cause temperature variations.
- Humidity: Dieffenbachia plants thrive in high humidity levels. Aim to maintain humidity levels between 50% to 60%, which mimics their natural habitat. To increase humidity, you can use a humidifier, place a tray with water near the plant, or mist the leaves regularly. Avoid placing your Dieffenbachia near sources of dry air, such as heaters or air conditioners.
- Temperature and humidity variations: While Dieffenbachia plants prefer warm and humid environments, they can tolerate slight variations in temperature and humidity levels. However, they may become stressed or show signs of poor growth if exposed to extremes or drastic changes. Avoid placing your Dieffenbachia near drafts or areas with fluctuating temperature and humidity levels.
- Leaf health: Maintaining the ideal temperature and humidity levels is crucial for the overall health of your Dieffenbachia’s leaves. Inadequate humidity can cause the leaves to turn brown or develop crispy edges, while too much humidity can lead to leaf yellowing or fungal issues. Monitor the leaves regularly and adjust the temperature and humidity levels as needed to ensure vibrant and healthy foliage.
- Grouping plants: Grouping your Dieffenbachia with other houseplants can help create a microclimate with higher humidity levels. Plants release moisture through transpiration, creating a more humid environment around them. Ensure that the grouped plants have similar temperature and humidity requirements, and avoid overcrowding to maintain good airflow.
By maintaining the ideal temperature and humidity levels, you can provide a comfortable and nurturing environment for your Dieffenbachia plant. Regularly monitor the temperature and humidity, and make adjustments as needed to ensure the plant’s well-being and promote healthy growth.
Watering Your Dieffenbachia Plant Properly
Proper watering is essential for the health and vitality of your Dieffenbachia plant. While it is important not to overwater or underwater your plant, finding the right balance can be a bit tricky. Here are some guidelines to help you water your Dieffenbachia properly:
- Check the soil: Before watering, always check the moisture level of the soil. Insert your finger about an inch into the soil. If it feels dry, it’s time to water your plant. If the soil feels moist, wait a few more days before watering.
- Water thoroughly: When watering your Dieffenbachia, make sure to provide enough water to thoroughly moisten the soil. Water until it begins to drain out of the bottom of the pot, ensuring that the roots receive an adequate amount of water. Avoid letting the plant sit in standing water, as it can lead to root rot.
- Avoid overwatering: Overwatering is one of the most common mistakes made with Dieffenbachia plants. It’s important to let the top inch or so of soil dry out between waterings. Excess water can lead to root rot, wilting, and other issues. Always err on the side of slightly underwatering rather than overwatering.
- Adjust watering frequency: The watering frequency for your Dieffenbachia will depend on various factors such as temperature, humidity, and the size of the pot. Generally, watering once a week is a good starting point. But remember to assess the moisture level of the soil to determine if your plant needs water.
- Avoid using cold water: Dieffenbachia plants are sensitive to temperature variations. Avoid using cold water when watering, especially during the winter months. Room temperature or slightly tepid water is ideal for maintaining the plant’s health and preventing shock.
- Consider the season: During the winter months when growth is slower, you may need to reduce the frequency of watering. Dieffenbachia plants require less water during their dormant period. Adjust your watering schedule accordingly to prevent overhydration.
- Additional moisture: Dieffenbachia plants appreciate higher humidity levels. You can supplement the moisture by misting the leaves regularly or placing a tray with water near the plant to increase humidity. This can help prevent the edges of the leaves from browning and promote healthy growth.
By following these watering guidelines, you can ensure that your Dieffenbachia plant receives the right amount of water to thrive. Remember to assess the soil moisture level, water thoroughly but avoid overwatering, and make adjustments based on seasonal requirements. With proper watering, your Dieffenbachia will flourish and display its lush, vibrant foliage.
Fertilizing Your Dieffenbachia Plant to Promote Growth
Fertilizing is an essential aspect of caring for your Dieffenbachia plant. Proper fertilization provides the necessary nutrients for growth, enhances the plant’s foliage, and promotes overall health. Here are some tips to effectively fertilize your Dieffenbachia:
- Choose the right fertilizer: Select a balanced, water-soluble fertilizer with equal parts nitrogen (N), phosphorus (P), and potassium (K). Look for a fertilizer specifically formulated for indoor plants or foliage plants. Follow the instructions on the package for the correct dilution ratio.
- Frequency of fertilization: During the growing season, which is typically spring and summer, fertilize your Dieffenbachia every two to four weeks. Reduce the frequency to once every six to eight weeks during the fall and winter months when growth slows down. Follow the instructions on the fertilizer package for specific guidelines.
- Water before fertilizing: It’s important to water your Dieffenbachia thoroughly before applying fertilizer. This prevents the roots from being burned by concentrated fertilizer and allows for proper absorption of nutrients.
- Measure and mix correctly: Dilute the fertilizer according to the instructions on the package. Avoid using more fertilizer than recommended, as it can lead to fertilizer burn. Overfertilization can damage the roots and cause leaf discoloration or wilting.
- Apply fertilizer evenly: Pour the diluted fertilizer evenly over the soil surface of your Dieffenbachia. Avoid getting fertilizer on the leaves or stems, as it may cause burns or brown spots. If any excess fertilizer spills on the leaves, gently wipe it off with a damp cloth.
- Consider slow-release fertilizers: Alternatively, you can use slow-release fertilizers specially formulated for indoor plants. These granules release nutrients gradually, providing a steady supply of nourishment over several weeks. Follow the package instructions for application guidelines.
- Monitor foliage response: Observe the foliage of your Dieffenbachia after fertilization. If the leaves show signs of burning or become excessively dark green, it may indicate that you’re using too much fertilizer. Adjust the dilution ratio or frequency of fertilization accordingly.
- Flush the soil periodically: To prevent fertilizer buildup and salt accumulation in the soil, flush the soil with plain water every few months. This helps to remove excess salts and maintain a healthy root environment for your Dieffenbachia.
- Pause fertilization during dormancy: During the dormant period in fall and winter, when growth slows down, pause fertilization. The plant requires less nutrient uptake during this time. Resume regular fertilization when active growth resumes in spring.
By following these fertilization guidelines, you can provide your Dieffenbachia with the right nutrients for healthy growth and vibrant foliage. Remember to choose the correct fertilizer, dilute and apply it properly, and adjust the frequency based on the plant’s growth stage and seasonal needs. With proper fertilization, your Dieffenbachia will thrive and showcase its beauty in your indoor space.
Pruning and Propagating Your Dieffenbachia Plant
Pruning and propagating your Dieffenbachia plant are important tasks that help maintain its shape, control growth, and create new plants. With proper techniques, you can keep your plant looking lush and propagate new ones to expand your collection. Here’s how to prune and propagate your Dieffenbachia:
- Pruning for shape and size: Prune your Dieffenbachia to control its size and shape. Use clean pruning shears or scissors to remove overgrown or damaged leaves and stems. You can also trim back long stems to encourage bushier growth. Cut just above a leaf node, as new growth will emerge from there.
- Pruning for leggy growth: If your Dieffenbachia becomes leggy with few leaves at the bottom, you can prune it back to promote a fuller appearance. Cut the stem above a node, and new shoots will emerge from there. This rejuvenation pruning helps create a more compact and attractive plant.
- Propagating through stem cuttings: Dieffenbachia can be easily propagated through stem cuttings. Select a healthy stem, about 4-6 inches long, and make a clean cut just below a leaf node. Remove the lower leaves, leaving a few at the top. Place the cutting in a glass of water or a well-draining potting mix, ensuring that the node is submerged or buried. Keep the soil moist and provide indirect light. Roots will develop within a few weeks, and you can then transplant the new plant into a separate pot.
- Propagating through air layering: Another method of propagation is air layering. Select a section of a healthy stem and make a slanting cut. Apply a rooting hormone to the wounded area and wrap it with moist sphagnum moss. Cover the moss with plastic wrap, securing it at both ends. Roots will develop within a few weeks. Once roots are well established, cut the stem below the rooted section and transplant it into a new pot.
- Propagation through division: Dieffenbachia plants can also be propagated through division during repotting. Carefully remove the plant from its pot and gently separate the rootball into multiple sections, ensuring each section has roots and foliage. Plant each division in a separate pot with fresh potting soil, and water thoroughly. This method allows you to create multiple new plants from a single parent plant.
- Maintaining proper hygiene: When pruning or propagating, it’s important to use clean and sterile tools to minimize the risk of disease transmission. Disinfect your pruning tools before and after use, and avoid cross-contamination between plants.
Pruning and propagating your Dieffenbachia plant not only helps maintain its appearance but also allows you to expand your plant collection. Regular pruning promotes healthy growth and rejuvenates the plant, while propagation offers the opportunity to share your plant with others. With the right techniques and care, your Dieffenbachia will thrive and provide you with years of enjoyment.
Preventing and Treating Common Pests and Diseases in Dieffenbachia Plants
While Dieffenbachia plants are relatively resilient, they can still be susceptible to pests and diseases. Being proactive in preventing and treating these issues is crucial to maintaining the health and beauty of your plant. Here are some tips for preventing and treating common pests and diseases in your Dieffenbachia:
- Pest prevention: Regularly inspect your Dieffenbachia for common pests such as aphids, spider mites, mealybugs, and scale insects. These pests can cause damage by sucking sap from the leaves, weakening the plant. To prevent infestations, keep your plant clean and dust-free, and regularly wipe the leaves with a damp cloth. Avoid exposing your Dieffenbachia to other infested plants.
- Monitoring for pests: Carefully examine the undersides of leaves, stems, and new growth for signs of pests. Look for small eggs, clusters of insects, or sticky residue on the foliage. If you spot any signs of infestation, promptly isolate the affected plant from other plants to prevent the spread of pests.
- Natural pest control: For minor pest infestations, you can use natural pest control methods such as manually removing the pests using a cotton swab dipped in rubbing alcohol or a mixture of mild soap and water. Insecticidal soap or neem oil can also be effective in controlling pests. Follow the instructions carefully and test on a small area before applying to the entire plant to avoid any adverse effects.
- Treating common diseases: Dieffenbachia plants can be susceptible to diseases such as root rot, leaf spot, and bacterial or fungal infections. To prevent these diseases, ensure proper drainage by using well-draining soil and pots with drainage holes. Avoid overwatering, as this can lead to root rot. Prune infected leaves or areas and apply a fungicide as directed to treat fungal or bacterial infections.
- Cultural care practices: Maintaining proper cultural care practices can help prevent pests and diseases. Avoid overwatering and allow the soil to dry out slightly between waterings. Ensure good air circulation around the plant by spacing it properly and avoiding overcrowding. Keep the area around the plant clean, removing any fallen leaves or debris that can harbor pests or pathogens.
- Quarantine new plants: When bringing new plants into your home or garden, it’s important to quarantine them for a few weeks before placing them near your Dieffenbachia. This allows you to observe for any signs of pests or diseases and prevent their spread to your existing plants.
- Seek professional advice: If you’re unsure about identifying or treating pests and diseases on your Dieffenbachia, don’t hesitate to seek professional advice from a plant specialist or horticulturist. They can provide guidance on specific issues and recommend appropriate treatments.
By being proactive in preventing and treating common pests and diseases in your Dieffenbachia, you can keep your plant healthy and thriving. Regular inspections, cultural care practices, and prompt action can help you address any issues that arise and ensure the long-term well-being of your plant.
Dealing with Yellowing or Drooping Leaves on Your Dieffenbachia Plant
Yellowing or drooping leaves on your Dieffenbachia plant can indicate a variety of issues, including improper care, environmental stress, or pest and disease infestations. It’s important to identify and address the underlying cause promptly to prevent further damage. Here’s how to deal with yellowing or drooping leaves on your Dieffenbachia:
- Inadequate lighting: Insufficient light can cause the lower leaves of your Dieffenbachia to turn yellow and drop. Ensure that your plant is receiving enough bright, indirect light. Move it to a brighter location or consider using supplemental grow lights if natural light is limited.
- Overwatering or underwatering: Both overwatering and underwatering can lead to yellowing or drooping leaves. Check the moisture level of the soil and adjust your watering routine accordingly. Allow the top inch of soil to dry out slightly between waterings, and avoid leaving the plant sitting in standing water.
- Poor drainage: Insufficient drainage can cause root rot, leading to yellowing and wilting of the leaves. Ensure that your Dieffenbachia is planted in well-draining soil and a pot with drainage holes. Remove excess water from the saucer or tray after watering to prevent water from sitting around the roots.
- Inadequate humidity: Low humidity levels can cause leaves to yellow and droop. Dieffenbachia plants thrive in higher humidity, so consider using a humidifier, placing a tray of water near the plant, or misting the leaves regularly to increase moisture in the air around your plant.
- Pests or diseases: Infestations by pests like spider mites, mealybugs, or scale insects, as well as diseases like root rot or fungal infections, can cause yellowing and drooping of leaves. Inspect your plant for signs of pests or diseases. If detected, take appropriate measures to control and treat the issue, such as using natural pest control methods, removing affected leaves, or applying fungicides as directed.
- Temperature stress: Extreme temperatures or sudden temperature fluctuations can stress your Dieffenbachia, resulting in yellowing or drooping leaves. Protect your plant from drafty areas, keep it away from cold windows or air conditioning vents, and provide a stable temperature between 60 to 75 degrees Fahrenheit (15 to 24 degrees Celsius).
- Nutrient deficiencies: Lack of essential nutrients can cause yellowing leaves. Ensure your Dieffenbachia is receiving balanced fertilization according to its needs. Use a water-soluble fertilizer formulated for indoor foliage plants, following the recommended application instructions. Adjust the fertilization schedule as necessary.
- Transplant shock: If your Dieffenbachia has recently been repotted, it may experience temporary leaf yellowing or drooping as it adjusts to its new environment. Provide proper care, maintain watering and lighting conditions, and the plant should recover over time.
- Pruning and grooming: Prune away yellowing or drooping leaves to promote new growth and improve the overall appearance of your Dieffenbachia. This will redirect energy to healthy foliage and encourage the plant to thrive.
By addressing the underlying cause of yellowing or drooping leaves and taking appropriate steps to improve care, you can revive your Dieffenbachia plant and restore its overall health and beauty. Regularly monitor your plant, provide optimal conditions, and be proactive in addressing any issues that arise to ensure the continued vibrancy of your Dieffenbachia.
Repotting Your Dieffenbachia Plant to Ensure Healthy Growth
Repotting is an important aspect of Dieffenbachia plant care that promotes healthy growth and development. As your plant grows, it will eventually outgrow its current pot and require repotting. This process allows for the replenishment of nutrients, provides the plant with ample space for root growth, and helps prevent root-bound conditions. Here’s how to repot your Dieffenbachia:
- Timing: Spring is generally the best time to repot your Dieffenbachia when it is actively growing. Avoid repotting during the dormant phase in winter as the plant’s root growth is minimal during this period.
- Choosing the right pot: Select a pot that is one size larger than the current one. Make sure the new pot has drainage holes to ensure proper drainage. Using a container with good drainage helps prevent waterlogged soil, which can lead to root rot.
- Preparing the plant: Before repotting, water your Dieffenbachia a day or two in advance. Moist soil makes it easier to remove the plant from its current pot without causing damage to the roots. Gently slide a trowel or your hand along the inside edges of the pot to loosen the soil and ease the plant out.
- Inspecting the roots: Once you have removed the plant from its pot, examine the roots. If you notice any rotting, brown, or mushy roots, trim them off with clean, sterilized shears. Healthy white roots indicate vigorous growth.
- Preparing the new pot: Place a layer of well-draining potting mix at the bottom of the new pot. This provides aeration and prevents water from sitting at the bottom, promoting healthy root development. Use a well-draining, peat-based potting mix suitable for tropical plants.
- Repotting the plant: Position your Dieffenbachia in the center of the new pot and add potting mix around the sides, gently pressing it to secure the plant. Ensure the crown of the plant (where the stems meet the soil) sits at the same level as it was in the previous pot. Avoid burying the crown too deeply.
- Watering and settling the soil: After repotting, thoroughly water the plant, allowing the water to drain through the bottom of the pot. This helps settle the soil and eliminates any air pockets around the roots. Check for proper drainage and adjust if necessary.
- Post-repotting care: Place your newly repotted Dieffenbachia in a location with bright, indirect light. Avoid direct sunlight, as it can scorch the leaves. Maintain regular watering, ensuring the soil stays evenly moist but not waterlogged. Avoid fertilizing immediately after repotting to prevent root burn.
- Monitoring and follow-up care: Keep a close eye on your repotted Dieffenbachia for the next few weeks. Monitor for signs of stress or shock, such as wilting or yellowing leaves. Adjust your care routine as needed, providing proper lighting, watering, and humidity to help the plant recover and thrive.
Repotting your Dieffenbachia at the right time with the proper care ensures its healthy growth and overall well-being. By providing ample space for root development and maintaining the right environmental conditions, you will reward yourself with a beautiful and thriving Dieffenbachia plant.
Tips for Troubleshooting Common Problems with Dieffenbachia Plants
While Dieffenbachia plants are generally low-maintenance and resilient, they can face common problems that affect their health and appearance. By knowing how to identify and troubleshoot these issues, you can ensure the continued well-being of your Dieffenbachia. Here are some tips for troubleshooting common problems:
- Yellow or brown leaf tips: Dry or brown leaf tips can be a result of low humidity or underwatering. Increase humidity levels by misting the leaves or using a humidifier. Ensure consistent watering and never let the soil dry out completely.
- Leaf spots: Leaf spots can be caused by fungal or bacterial infections. Use a fungicide or bactericide according to the product instructions to treat the affected leaves. Ensure good air circulation, avoid overhead watering, and remove any affected leaves to prevent further spread.
- Wilting leaves: Wilting leaves can be an indication of both overwatering and underwatering. Check the soil moisture level and adjust your watering routine accordingly. Remove any waterlogged or dry soil and improve drainage if necessary.
- Leggy growth: Long stems with sparse foliage can be caused by insufficient light. Move the plant to a brighter location or provide supplemental lighting. Prune leggy stems to promote bushier growth and encourage a fuller appearance.
- Root rot: Root rot is caused by overwatering and poor drainage, leading to the decay of the roots. To combat root rot, improve drainage by using well-draining soil and pots with drainage holes. Allow the soil to dry out between waterings, and trim off any rotting roots.
- Leaf drop: Leaf drop can occur due to stress from changes in environment, overwatering, or underwatering. Evaluate the conditions and adjust accordingly. Monitor temperature, humidity, and watering practices to provide a stable environment for your plant.
- Pest infestations: Common pests that can affect Dieffenbachia include aphids, spider mites, mealybugs, and scale insects. Inspect your plant regularly, particularly the undersides of leaves, and treat any infestations promptly with natural pest control methods or appropriate insecticides.
- Pale or thin leaves: Pale or thin leaves can indicate a nutrient deficiency. Ensure that you are providing balanced fertilization according to the plant’s needs. Use a water-soluble fertilizer formulated for foliage plants, following the recommended dilution and frequency.
- Scorched leaves: Direct exposure to intense sunlight can cause scorching and browning of the leaves. Move your Dieffenbachia to a spot with bright, indirect light, or provide shade during the hottest parts of the day to prevent leaf damage.
- Slow growth: Several factors can contribute to slow growth, including insufficient light, improper watering, or inadequate nutrients. Assess the plant’s conditions and make adjustments as needed. Ensure the plant is receiving adequate light, appropriate watering, and regular fertilization.
By closely monitoring your Dieffenbachia plant, providing optimal conditions, and addressing any issues promptly, you can overcome common problems and help your plant thrive. Regular care and attention will ensure the continued health and vibrancy of your Dieffenbachia for years to come.