
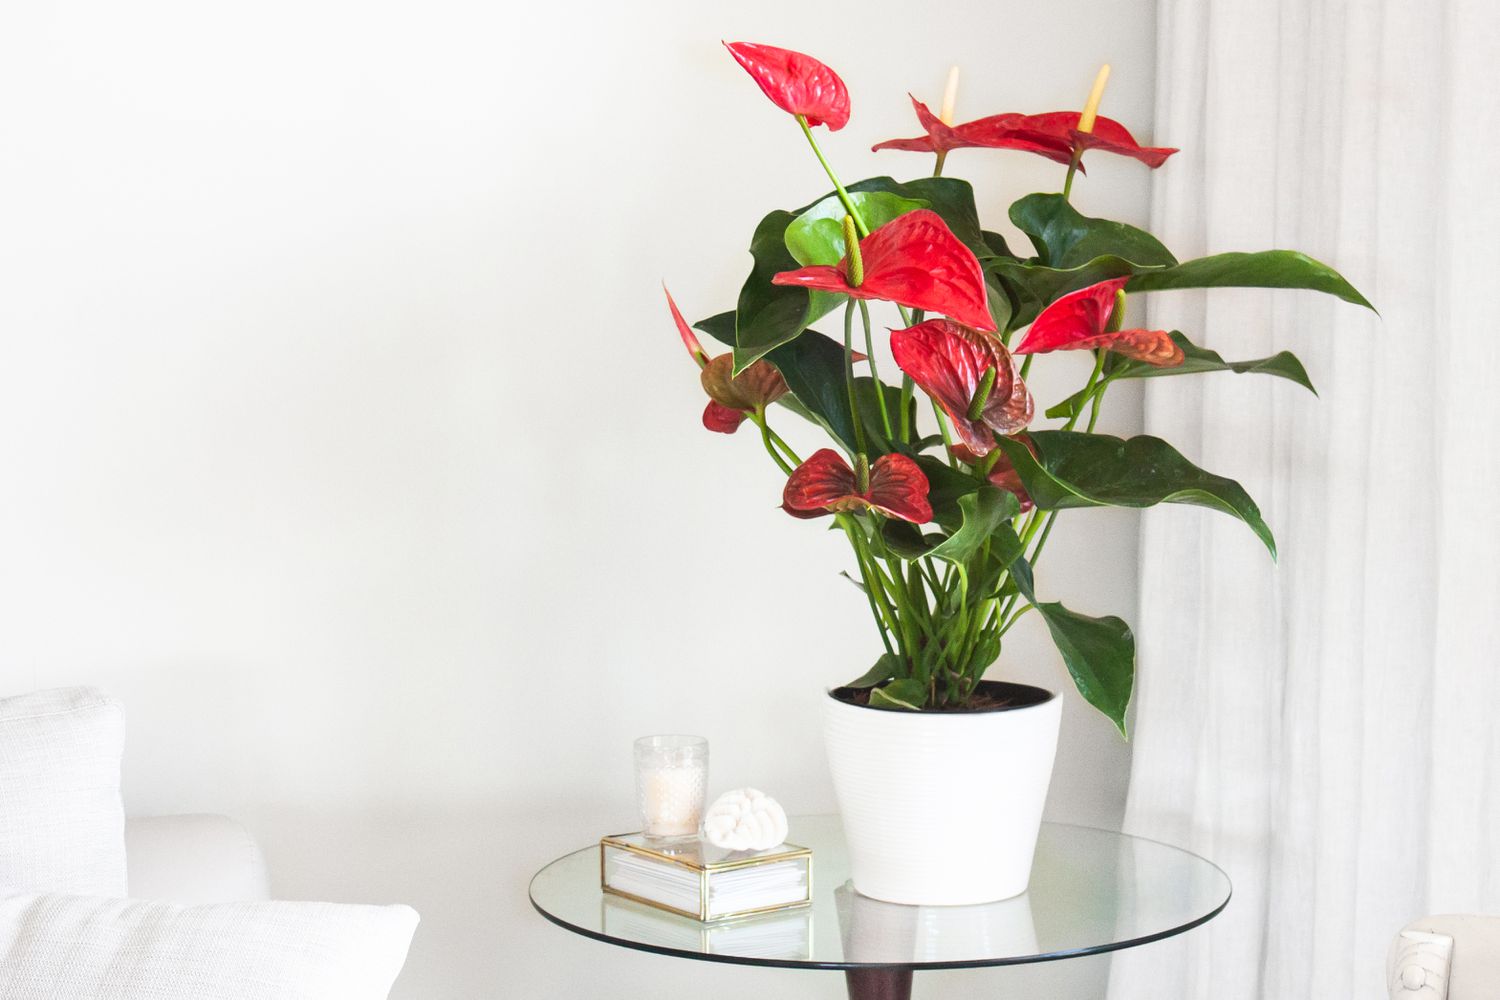
Choosing the Right Anthurium Plant
When it comes to selecting the perfect Anthurium plant for your home or garden, there are a few factors to consider. These beautiful plants come in a variety of species and cultivars, each with its own unique characteristics and care requirements. Here are some tips to help you choose the right Anthurium plant:
1. Consider the size: Anthurium plants can vary in size, from compact varieties ideal for tabletops or shelves to larger specimens that make a statement as a focal point in your space. Assess the available space you have and choose a size that fits well.
2. Look at the foliage: Anthurium plants are known for their stunning foliage, which comes in a range of colors and textures. Some have glossy green leaves, while others boast variegated patterns or even velvety textures. Consider your personal preferences and the overall aesthetic you want to achieve.
3. Check the flowers: While the foliage of Anthurium plants steals the show, their flowers are equally captivating. These plants produce large, vibrant blooms in various shades of red, pink, white, or even orange. Take the time to admire the flowers and choose a color that resonates with you.
4. Assess the care requirements: Different species of Anthurium plants have different care needs, so it’s important to consider your level of experience and commitment to plant care. Some varieties are more forgiving and adaptable, while others require specific conditions to thrive.
5. Consider your local climate: If you plan to grow your Anthurium plant outdoors, make sure to choose a species or cultivar that is suitable for your climate. Some plants are more cold-sensitive, while others are more tolerant of heat or humidity.
By considering these factors, you can choose the right Anthurium plant that fits your space, aesthetic preferences, and care capabilities. Remember to always read about the specific care instructions for the species or cultivar you choose to ensure its long-term success.
Providing Proper Lighting
Proper lighting is crucial for the health and growth of your Anthurium plant. These tropical plants thrive in bright, indirect light, mimicking the conditions of their natural habitat. Here’s what you need to know about providing the right lighting for your Anthurium:
1. Indirect sunlight: Anthurium plants prefer bright but indirect sunlight. Direct sunlight can scorch their leaves, causing damage. Place your plant near a window with filtered light or use sheer curtains to diffuse the sunlight.
2. Avoid low light conditions: While Anthuriums can tolerate lower light conditions, prolonged exposure to low light can result in leggy growth and reduced flowering. It’s best to provide them with bright, indirect light to promote optimal growth and flowering.
3. North or east-facing windows: If you’re unsure where to place your Anthurium plant, north or east-facing windows are usually the best options. These directions provide sufficient light without excessive exposure to direct sunlight, especially during the intense midday hours.
4. Supplemental lighting: If you don’t have access to sufficient natural light, you can supplement it with artificial light sources. Use fluorescent or LED grow lights specifically designed for houseplants. Position the lights about 12-18 inches above the plant and provide 12-14 hours of light per day.
5. Monitor light intensity: While Anthuriums enjoy bright light, avoid exposing them to strong, direct sunlight for prolonged periods. If you notice leaf burn or discoloration, move the plant to a slightly shadier spot or add a sheer curtain to filter the light.
Remember, lighting requirements may vary slightly depending on the species or cultivar of your Anthurium plant. Always check the specific care instructions for your plant and keep an eye on how it responds to its current lighting conditions. With the right balance of light, your Anthurium will thrive and showcase its vibrant foliage and stunning blooms.
Maintaining the Right Temperature
Temperature plays a vital role in the overall health and growth of Anthurium plants. These tropical beauties thrive in warm and humid conditions, similar to their native habitats. To ensure your Anthurium flourishes, it’s important to maintain the right temperature in their environment. Here are some essential tips to help you:
1. Ideal temperature range: Anthurium plants prefer temperatures between 60°F (15°C) and 85°F (29°C). They can tolerate slightly cooler temperatures, but prolonged exposure to temperatures below 50°F (10°C) can damage the plant. Avoid placing them in drafty areas or near air conditioning units.
2. Avoid temperature extremes: Anthuriums are sensitive to temperature extremes, so it’s crucial to protect them from both hot and cold extremes. Avoid placing them near heating vents, radiators, or windows that receive direct sunlight, as these can create hotspots and cause leaf burn.
3. Optimal humidity levels: Anthurium plants thrive in humid conditions. If your home or location is dry, you can increase humidity levels by placing a tray of water near the plant or using a humidifier. Misting the leaves with water can also help create a more humid microclimate around the plant.
4. Seasonal adjustments: Anthuriums may require temperature adjustments depending on the season. During the warmer months, ensure they are shielded from direct sunlight and have proper ventilation to prevent overheating. In cooler months, protect them from cold drafts and consider using a gentle heat source to maintain the ideal temperature range.
5. Understand plant tolerance: Different Anthurium species have varying temperature tolerance levels. Some varieties are more cold-sensitive, while others are more tolerant of heat. Research the specific care requirements for your Anthurium plant to ensure you are providing the right temperature conditions.
By maintaining the right temperature and humidity levels, you will create a favorable environment for your Anthurium to thrive. Keeping a consistent temperature range and avoiding extremes will help promote healthy growth, vibrant foliage, and stunning blooms.
Watering the Anthurium Plant
Proper watering is crucial for the health and well-being of your Anthurium plant. These tropical plants have specific water requirements that need to be met to ensure optimal growth and prevent issues such as root rot. Here are some essential tips for watering your Anthurium:
1. Find the right balance: Anthurium plants prefer to be kept slightly moist but not overly saturated. It’s important to strike a balance between providing enough water to keep the soil moist and preventing water from sitting in the pot’s bottom. Avoid letting the plant sit in standing water, as this can lead to root rot.
2. Water quality: Anthuriums are sensitive to chemicals, so it’s best to use filtered or purified water. If tap water is your only option, let it sit for 24 hours to allow any chlorine or other chemicals to evaporate before using it to water your plant.
3. Observe the soil moisture: Before watering, check the moisture level of the soil. Anthuriums prefer a slightly damp soil, so wait until the top inch of the soil feels dry to the touch before watering again. Insert your finger about an inch into the soil to gauge its moisture level.
4. Watering frequency: The frequency of watering will depend on factors such as temperature, humidity, and the size of your Anthurium plant. As a general rule, water your Anthurium thoroughly when the top inch of soil feels dry, typically every 7-10 days. Adjust the frequency based on the plant’s needs.
5. Proper drainage: Good drainage is essential for Anthuriums to prevent waterlogged soil. Ensure that your pot has drainage holes to allow excess water to escape. Use well-draining soil mix with good aeration to prevent water from sitting around the roots.
6. Pay attention to the leaves: The condition of your Anthurium’s leaves can give you clues about its watering needs. If the leaves appear droopy or wilted, it may be a sign of underwatering. Conversely, yellowing or blackening leaves can indicate overwatering. Adjust your watering routine accordingly.
By following these watering tips, you can provide your Anthurium with the right amount of water, promoting healthy growth and preventing issues associated with overwatering or underwatering. Remember that each plant may have slightly different watering needs, so closely observe your Anthurium’s response to ensure it stays happy and hydrated.
Fertilizing the Anthurium Plant
Fertilizing is an important aspect of Anthurium plant care. These tropical plants benefit from regular nutrient supplementation to support their growth and flowering. Here are some essential tips for fertilizing your Anthurium:
1. Choose the right fertilizer: Anthuriums have specific nutrient requirements, and it’s important to choose a fertilizer specifically formulated for flowering houseplants. Look for a balanced fertilizer with an N-P-K ratio (nitrogen, phosphorus, and potassium) of 10-10-10 or 20-20-20. This will ensure a good supply of essential nutrients.
2. Follow the instructions: Always read and follow the instructions on the fertilizer packaging. Each brand and product may have different recommended application rates and frequencies. Avoid over-fertilizing, as it can lead to salt build-up in the soil, causing root damage and other issues.
3. Fertilize during active growth: Anthuriums typically experience a period of active growth during spring and summer. This is the ideal time to fertilize as the plant can efficiently utilize the nutrients. Reduce or halt fertilization during the fall and winter months, as the plant enters a dormant phase.
4. Dilute the fertilizer: When applying liquid fertilizer, dilute it to half or quarter strength to prevent the possibility of burning the plant’s roots. This is especially important for young or newly potted Anthuriums, which may be more sensitive to strong concentrations of fertilizer.
5. Apply evenly: Apply the fertilizer evenly to the soil surface, avoiding direct contact with the plant’s leaves. Water the plant after fertilizing to ensure the nutrients reach the root zone. Alternatively, you can use slow-release fertilizer granules, following the package instructions for application rates.
6. Supplement with micronutrients: In addition to the balanced fertilizer, it is beneficial to provide some essential micronutrients to your Anthurium. You can use a specialized micronutrient fertilizer or apply compost or organic matter to the soil to enhance the overall nutrient profile.
Regular fertilization will help ensure that your Anthurium plant receives the necessary nutrients for vibrant foliage and abundant blooms. However, it’s important to strike a balance and avoid over-fertilization. Always monitor your plant’s response and adjust the fertilization routine as needed to maintain its health and vitality.
Repotting the Anthurium Plant
Repotting is an essential task in the care of Anthurium plants. As these tropical beauties grow, they may outgrow their current pots or require fresh soil to thrive. Here are some key tips to consider when repotting your Anthurium:
1. Timing: The ideal time to repot your Anthurium is in the spring or early summer when the plant is entering its active growth phase. Avoid repotting during the dormant period, as the plant may have a slower recovery time.
2. Assess the root system: Before repotting, carefully remove the Anthurium from its current pot and examine the root system. If the roots are densely packed and circling the pot, it’s a sign that your plant needs a larger container. Healthy roots should be white or light tan in color.
3. Choose the right pot size: Select a new pot that is one size larger than the current one. Anthuriums prefer to be slightly root-bound, so avoid choosing a pot that is excessively large. Ensure the new pot has drainage holes to prevent waterlogged soil.
4. Use well-draining soil mix: Anthuriums require well-draining soil to prevent waterlogged roots. Use a mix of peat moss, perlite, and orchid bark to enhance drainage. This will help prevent issues such as root rot and allow the plant to access essential oxygen.
5. Gently remove old soil: Carefully remove the old potting soil from the roots, being cautious not to damage them. Gently shake off any excess soil and untangle any tangled roots. Trimming any damaged or dead roots is also advisable during this process.
6. Repot with care: Place the Anthurium in the center of the new pot, ensuring it is at the same depth as it was in the previous pot. Fill in the gaps with the fresh potting soil mix, gently firming it around the roots. Avoid excessive compaction, as it can hinder water drainage and root growth.
7. Allow time to adjust: After repotting, give your Anthurium some time to acclimate to its new environment. Place it in a location with bright, indirect light and provide regular watering to ensure the soil stays lightly moist. Avoid fertilizing for a few weeks to reduce stress on the plant.
Repotting your Anthurium can help promote healthier growth and provide the necessary space for its roots to expand. By following these tips and providing proper care post-repotting, your Anthurium will continue to thrive and bring beauty to your indoor or outdoor space.
Pruning and Trimming
Pruning and trimming are important maintenance tasks to keep your Anthurium plant looking its best and to promote healthy growth. Regular pruning helps remove dead or damaged foliage, encourages new growth, and maintains the plant’s overall shape. Here are some key tips for pruning and trimming your Anthurium:
1. Remove dead or yellowing leaves: As Anthurium plants age, their lower leaves may start to yellow or wilt. Gently remove these leaves by snipping them at the base using clean, sharp pruning shears. This will not only improve the plant’s appearance but also prevent the spread of any diseases.
2. Trim brown or damaged sections: Brown or damaged sections of foliage can be trimmed to improve the plant’s aesthetics. Make clean cuts just above a leaf node or stem junction. Ensure that the pruning shears are sterilized to prevent the spread of any potential infections.
3. Shape the plant: Anthuriums can develop a bushy or leggy growth habit over time. To maintain a desirable shape, selectively prune back long or unruly stems. Trimming the tips of the stems will encourage branching and create a fuller appearance. Trim just above a leaf node to promote new growth.
4. Prune after flowering: Anthuriums produce long-lasting blooms, but once they fade, it’s best to remove the spent flowers. This will divert the plant’s energy towards new growth instead of seed production. Snip off the faded flower stems just above a leaf node or stem junction.
5. Watch for overcrowding: Anthuriums can become crowded with time, with multiple stems competing for space and light. If you notice overcrowding, selectively remove some of the weaker or less desirable stems to allow more room for healthy growth and airflow.
6. Avoid over-pruning: Although pruning is beneficial, it’s important not to overdo it. Removing too much foliage can shock the plant and hinder its ability to photosynthesize. Only prune what is necessary and maintain a balance between allowing the plant to express its natural growth pattern and encouraging proper shape and density.
Regular pruning and trimming sessions will help keep your Anthurium plant looking tidy, healthy, and vibrant. Remember to always use clean and sharp pruning shears to prevent the transfer of diseases. As you prune, take the opportunity to inspect your plant for any signs of pests or diseases, and address them promptly if necessary.
Dealing with Pests and Diseases
Pests and diseases can pose a threat to the health and vitality of your Anthurium plant. Being proactive in identifying and addressing these issues is crucial to ensure the plant’s well-being. Here are some common pests and diseases that may affect Anthuriums and how to deal with them:
1. Mealybugs: Mealybugs are small, white, cottony insects that feed on plant sap. They are commonly found on the undersides of leaves and in leaf axils. To get rid of mealybugs, you can use a cotton swab dipped in rubbing alcohol to wipe them off. Alternatively, neem oil or insecticidal soap can be applied to affected areas following the product instructions.
2. Aphids: Aphids are small, soft-bodied insects that can be green, black, or brown. They usually gather in large groups on new growth and the undersides of leaves. Use a gentle stream of water to dislodge the aphids from the plant. Another option is to introduce natural predators, such as ladybugs or lacewings, to control their population.
3. Scale insects: Scale insects appear as small, round or oval bumps on the stems or leaves of Anthurium plants. They can be white, brown, or black in color. These pests feed on plant sap and excrete a sticky substance called honeydew. Remove small infestations by scraping them off with a cotton swab or a soft brush dipped in rubbing alcohol. For larger scale infestations, use an organic insecticidal oil or soap following the package instructions.
4. Root rot: Root rot is a fungal disease caused by overwatering or poorly drained soil. It causes the roots to decay and turn brown or black. To prevent root rot, ensure the Anthurium is not sitting in water and that the potting soil has good drainage. If root rot occurs, remove the affected roots, treat with a fungicide, and repot the plant in fresh, well-draining soil.
5. Leaf spot: Leaf spot is a fungal disease characterized by black or brown spots on the leaves. It is usually caused by overwatering or high humidity levels. To prevent leaf spot, avoid excessive foliage wetting and improve ventilation around the plant. If leaf spot occurs, remove and destroy the affected leaves, and treat the plant with a fungicide following the instructions on the product label.
Regularly inspect your Anthurium plant for any signs of pests or diseases, especially on the undersides of leaves and in leaf axils. Early detection and prompt action can prevent further damage and spread. Additionally, maintaining good overall plant health through proper watering, adequate lighting, and appropriate fertilization can help prevent many pest and disease issues.
Propagating Anthurium Plants
Propagating Anthurium plants is a rewarding way to expand your collection or share these beautiful plants with others. There are a few methods you can use to propagate Anthuriums, including division, stem cuttings, and seed propagation. Here are some essential tips for propagating Anthurium plants:
1. Division: Anthurium plants naturally form clusters of multiple stems or offshoots. As the plant grows, you can carefully separate these offshoots, ensuring each division has healthy roots attached. Plant each division in its own pot with fresh potting soil and provide appropriate care. Division is typically best done during repotting when plants are already being removed from their pots.
2. Stem cuttings: Propagating Anthuriums from stem cuttings is another effective method. Select a healthy stem with several leaves and use a clean, sharp knife or shears to make a clean cut just below a leaf node. Remove any lower leaves to expose at least one node. Place the cutting in moist potting soil or a mixture of perlite and peat moss. Keep the soil moist and provide indirect light and warmth. With time, the cutting will develop roots and can be potted into its own container.
3. Seed propagation: While seed propagation is possible, it can be a lengthier and more unpredictable process. Collect mature seeds from the spadix (the flower spike) of a mature Anthurium plant. Sow the seeds in a well-draining soil mix and keep them consistently moist in a warm and humid environment. Germination can take several weeks to months, and the resulting plants may exhibit a wide range of traits due to genetic variability.
Regardless of the propagation method you choose, it’s important to provide proper care to the newly propagated Anthuriums. Place them in a warm, well-lit area with indirect light and maintain a consistently moist but not waterlogged soil. Avoid exposing young plants to harsh direct sunlight or extreme temperature fluctuations.
Remember that propagation may not always be successful, and it requires patience and careful attention to provide the best conditions for new plants to establish and thrive. With practice and experience, you can enjoy the satisfaction of propagating Anthurium plants and expanding your green thumb collection.
Troubleshooting Common Problems
While Anthurium plants are generally hardy and resilient, they can occasionally experience issues. Being able to identify and address common problems will help ensure the health and vitality of your Anthurium. Here are some common issues and troubleshooting tips:
1. Yellowing leaves: Yellowing leaves can indicate various issues, such as overwatering, underwatering, or nutrient deficiencies. Check the soil moisture level and adjust your watering accordingly. Ensure the plant is receiving appropriate amounts of light. If nutrient deficiencies are suspected, consider fertilizing with a balanced houseplant fertilizer following the instructions.
2. Leaf curling: Curling leaves can be a sign of low humidity, underwatering, or exposure to high temperatures. Increase humidity levels by placing a tray of water near the plant or using a humidifier. Check the soil moisture and adjust watering if needed. Ensure the plant is not exposed to direct sunlight or excessively warm conditions.
3. Brown leaf tips: Brown leaf tips are often caused by dry air or inconsistent watering. Increase humidity levels by misting the leaves or placing a humidifier nearby. Ensure the plant is receiving sufficient water, and avoid underwatering or allowing the soil to become completely dry between waterings.
4. Lack of blooms: If your Anthurium is not producing blooms, it may be due to insufficient light, improper fertilization, or the plant being too young. Ensure the plant is receiving bright, indirect light for at least a few hours each day. Use a balanced fertilizer formulated for flowering plants to provide essential nutrients. Be patient, as Anthuriums may take several years to reach blooming maturity.
5. Pests: Common pests that can affect Anthuriums include mealybugs, aphids, and scale insects. Regularly inspect your plants and treat any infestations promptly. Use natural remedies such as rubbing alcohol or insecticidal soap, or introduce natural predators like ladybugs or lacewings.
6. Root rot: Root rot can occur due to overwatering or poorly-drained soil. If you suspect root rot, carefully remove the plant from its pot and inspect the roots. Trim off any mushy, dark-colored roots and repot the plant in fresh, well-draining soil. Adjust your watering practices to prevent overwatering in the future.
Addressing these common problems promptly will help maintain the health and appearance of your Anthurium plants. Regularly monitor their condition, provide appropriate care, and make necessary adjustments to ensure their continued growth and beauty.